Off-Grid Battery Monitor Installation Mistakes to Avoid
Oh, the battery monitor! It sounds like such a simple component in your off-grid solar setup, right? Just plug it in, and poof, instant clarity on your power situation. But let me tell you, I've seen countless folks, myself included in the early days, pull their hair out over weird readings or non-functional displays, all because of a few seemingly minor installation slip-ups. This guide is all about shining a light on those common off-grid battery monitor installation mistakes, so you can avoid the headaches, get accurate data, and truly understand what's happening with your precious battery bank.
Misplacing the Shunt: The Root of Many Evils
One of the most frequent and frustrating mistakes people make when installing a battery monitor is incorrect shunt placement. The shunt is the heart of your monitor system, and if it's not positioned just right, your readings will be as useful as a screen door on a submarine. It's not just about hooking up a wire; it's about understanding current flow.
Why Shunt Placement is Critical
Think of your shunt as a highly sensitive gatekeeper that measures all electrons entering and leaving your battery bank. For it to accurately count these electrons, every single bit of current that flows to or from your batteries must pass through it. If even one load or charge source bypasses the shunt, your monitor will be telling you tales, showing incorrect state of charge, inaccurate current draw, and unreliable historical data. This leads to a constant guessing game about your battery's health and remaining capacity, which is precisely what you bought the monitor to avoid!
Many people mistakenly connect a critical load directly to the battery's negative terminal instead of routing it through the shunt. Maybe it's a powerful inverter or a direct solar charge controller connection. When this happens, the monitor only "sees" a portion of the current, making it impossible to give you a true picture of your battery's energy balance. You might think your batteries are fuller than they are, only to find yourself unexpectedly in the dark. It's a classic case of garbage in, garbage out, and it can be incredibly frustrating when you're trying to figure out if you have enough juice to run your well pump.
Correct Shunt Wiring Best Practices
The golden rule for shunt wiring is simple: everything negative goes through the shunt, and nothing bypasses it. This means your battery bank's negative terminal should only connect to one side of the shunt. The other side of the shunt then becomes the common negative busbar for all your loads (inverter, lights, fridge, etc.) and all your charging sources (solar charge controller, DC-DC charger, shore power charger).
For instance, if you have a 48V battery bank, the main negative cable coming from that battery bank should connect directly to the "battery" side of your shunt. Then, all the other negative cables from your inverter, charge controller, DC loads, etc., connect to the "load/system" side of the shunt. This ensures every amp-hour going in or out is accounted for. This setup is crucial for devices like the popular Victron BMV or Renogy's battery monitor series, as they rely on this precise current measurement to calculate your state of charge (SOC) accurately. Double-check your wiring diagrams, sometimes the simplicity can be misleading. Proper installation will prevent you from underestimating your battery's true capacity, which is vital information when you're trying to figure out how many batteries to run an air conditioner, for example.
Overlooking Calibration and Configuration Details
Installing the hardware is only half the battle. Your off-grid battery monitor is a sophisticated piece of equipment that needs to be properly introduced to your unique battery bank. Skipping calibration or misconfiguring settings is like buying a high-end thermometer but never setting it to Fahrenheit or Celsius – you'll get a reading, but it won't make sense.
The Importance of Initial Setup Parameters
Every battery monitor needs to be told exactly what kind of battery bank it's monitoring. This includes the total capacity (in Amp-hours), the charge voltage, the discharge floor (the minimum state of charge you ever want to reach), and often, a Peukert exponent for lead-acid batteries. If these initial parameters are off, your monitor's calculations will be fundamentally flawed. For example, if you tell it you have a 400Ah battery bank when you actually have 200Ah, it will consistently overstate your remaining capacity, leading to premature battery depletion and potential damage.
Ignoring settings like "Charged Voltage" and "Tail Current" can also cause your monitor to lose synchronization with your actual battery state. Your monitor needs to know when your battery is truly full to recalibrate its 100% state of charge. If these thresholds are set too high or too low, the monitor might never recognize a full charge, or it might incorrectly declare itself 100% full when it's not, gradually drifting further and further from reality. This is particularly crucial for lithium iron phosphate (LiFePO4) batteries, which have a very flat discharge curve, making voltage-based SOC estimation difficult without a proper shunt-based monitor. You need to know how many batteries to run a refrigerator, but also accurately track their charge!
Steps for Accurate Calibration
Once your shunt is correctly wired, take the time to go through your battery monitor's manual and configure every setting.
- Total Battery Capacity (Ah): This is perhaps the most critical setting. Add up the Amp-hour ratings of all your batteries in your bank. For example, if you have four 100Ah 12V batteries wired in series for a 48V system, your total effective capacity is still 100Ah at 48V. If they were wired in parallel for a 12V system, it would be 400Ah. Know your battery bank's configuration!
- Charged Voltage: This is the voltage at which your battery monitor considers the battery "full" and will synchronize to 100%. For most lead-acid batteries, this might be around 14.4V (for 12V nominal) or 57.6V (for 48V nominal) after a certain "tail current" has been reached. For LiFePO4 batteries, consult your battery manufacturer's specifications, as their full charge voltage is usually a bit higher, around 14.4-14.6V per 12V block.
- Tail Current: This small current threshold (often 0.5% to 2% of the battery capacity) tells the monitor that charging is essentially complete, even if the voltage hasn't quite hit the "Charged Voltage" threshold. This helps prevent false "100% full" readings when small loads are still active during the absorption phase.
- Peukert Exponent (for Lead-Acid): This factor accounts for the decrease in usable capacity of lead-acid batteries at higher discharge rates. Your battery manufacturer might provide this. If not, a common value for deep cycle lead-acid is 1.25. LiFePO4 batteries typically have a Peukert exponent closer to 1 (meaning their capacity doesn't change much with discharge rate), so this setting might not even apply or should be set to 1.
- Synchronization: After configuring, fully charge your battery bank until it reaches the set "Charged Voltage" and "Tail Current." This will force the monitor to synchronize to 100% and provide accurate readings from that point forward.
You can often find great resources and user experiences on Amazon product pages or directly from manufacturers like Renogy, offering advice on specific settings for their monitors. Taking the time to properly configure your battery monitor is paramount to accurately determining your system's performance, helping you answer questions like, "Is off-grid solar worth the cost?"
Ignoring Cable Sizing and Connections
It's easy to get caught up in the big components—the solar panels, the batteries, the inverter—and overlook the seemingly mundane details of wiring. But when it comes to a battery monitor, inadequate cable sizing or poor connections can render your expensive monitoring system useless and even dangerous. Think of it like trying to run a marathon with shoelaces that are too short and constantly untying; you're just asking for trouble.
The Impact of Incorrect Wire Gauge
The small wires connecting your battery monitor to the shunt and to your battery's positive terminal might seem insignificant, but they carry vital voltage readings. If these wires are too thin or excessively long, they can introduce voltage drop. This means the voltage the monitor "sees" at its terminals could be slightly lower than the actual voltage at your battery posts, especially under load. This discrepancy, while seemingly minor, can skew your state-of-charge readings and make your battery appear less full than it actually is, or trigger low-voltage alarms prematurely. While a shunt-based monitor primarily uses current, the voltage reading is still a crucial data point for overall battery health assessment and triggering alarms.
Moreover, if the power wire to the monitor itself is undersized or poorly connected, the monitor might not receive consistent power, leading to flickering displays, intermittent data, or even complete failure. This can be particularly frustrating if your monitor is hidden away and you're constantly wondering if it's the monitor itself or your battery that's acting up. Proper wire sizing is a fundamental aspect of any robust Off-Grid Solar Wiring Diagram Explained or How to Size Wire and Cables guide.
Ensuring Secure and Correct Connections
Beyond wire gauge, the quality of your connections is paramount. Loose or corroded terminals can lead to intermittent readings, voltage fluctuations, and even resistance heating, which is a fire hazard.
Here's how to ensure rock-solid connections for your battery monitor:
- Use Appropriate Gauge Wires: Refer to your battery monitor's manual for recommended wire gauges. Generally, the small sense wires for voltage don't need to be massive, but using good quality, multi-strand copper wire (like 16 or 18 AWG) is always a safe bet for runs under 10-15 feet. For longer runs, consider going up a gauge.
- Crimped and Heat-Shrunk Lugs: For connecting to the battery terminals or busbars, always use properly crimped ring terminals or lugs. A good crimp ensures maximum conductivity and mechanical strength. For added protection against corrosion and vibration, use marine-grade heat shrink tubing over the crimped connection.
- Clean Terminals: Before making any connections, ensure all battery terminals, busbar connections, and shunt terminals are clean, shiny, and free of corrosion. A wire brush and some terminal cleaner can work wonders.
- Tighten Securely: Hand-tighten connections, then use a wrench or socket to snug them up firmly. Be careful not to overtighten, especially on battery posts, as this can damage the terminals. A good rule of thumb is "snug plus a quarter turn."
- Dedicated Positive Connection: The positive power feed to your battery monitor should come directly from your main battery positive terminal (or a dedicated battery side busbar). It should not be connected after an inverter or load disconnect switch, as this could cause the monitor to lose power when those devices are turned off. Many monitors require constant power to track historical data and maintain accuracy. Adding a small fuse (often 1A or 2A) in this positive line is also a smart safety precaution, as detailed in guides on How to Size Fuses and Breakers.
- Secure Mounting: Make sure your battery monitor and its shunt are securely mounted. Vibration from an RV on the road or even just moving things around in a cabin can loosen wires over time. Use appropriate screws or bolts and consider rubber grommets if mounting to a vibrating surface.
By meticulously handling these wiring and connection details, you'll dramatically increase the reliability and accuracy of your off-grid battery monitor, preventing it from becoming just another frustrating gadget on your homestead.
Neglecting Environmental and Physical Protection
We invest in robust solar panels that can withstand hail, heavy batteries in protective boxes, and durable inverters. Yet, sometimes, the battery monitor, a crucial tool for understanding our system, gets installed almost as an afterthought. Ignoring its environment is a surefire way to shorten its lifespan and compromise its performance.
Exposing Components to Harsh Conditions
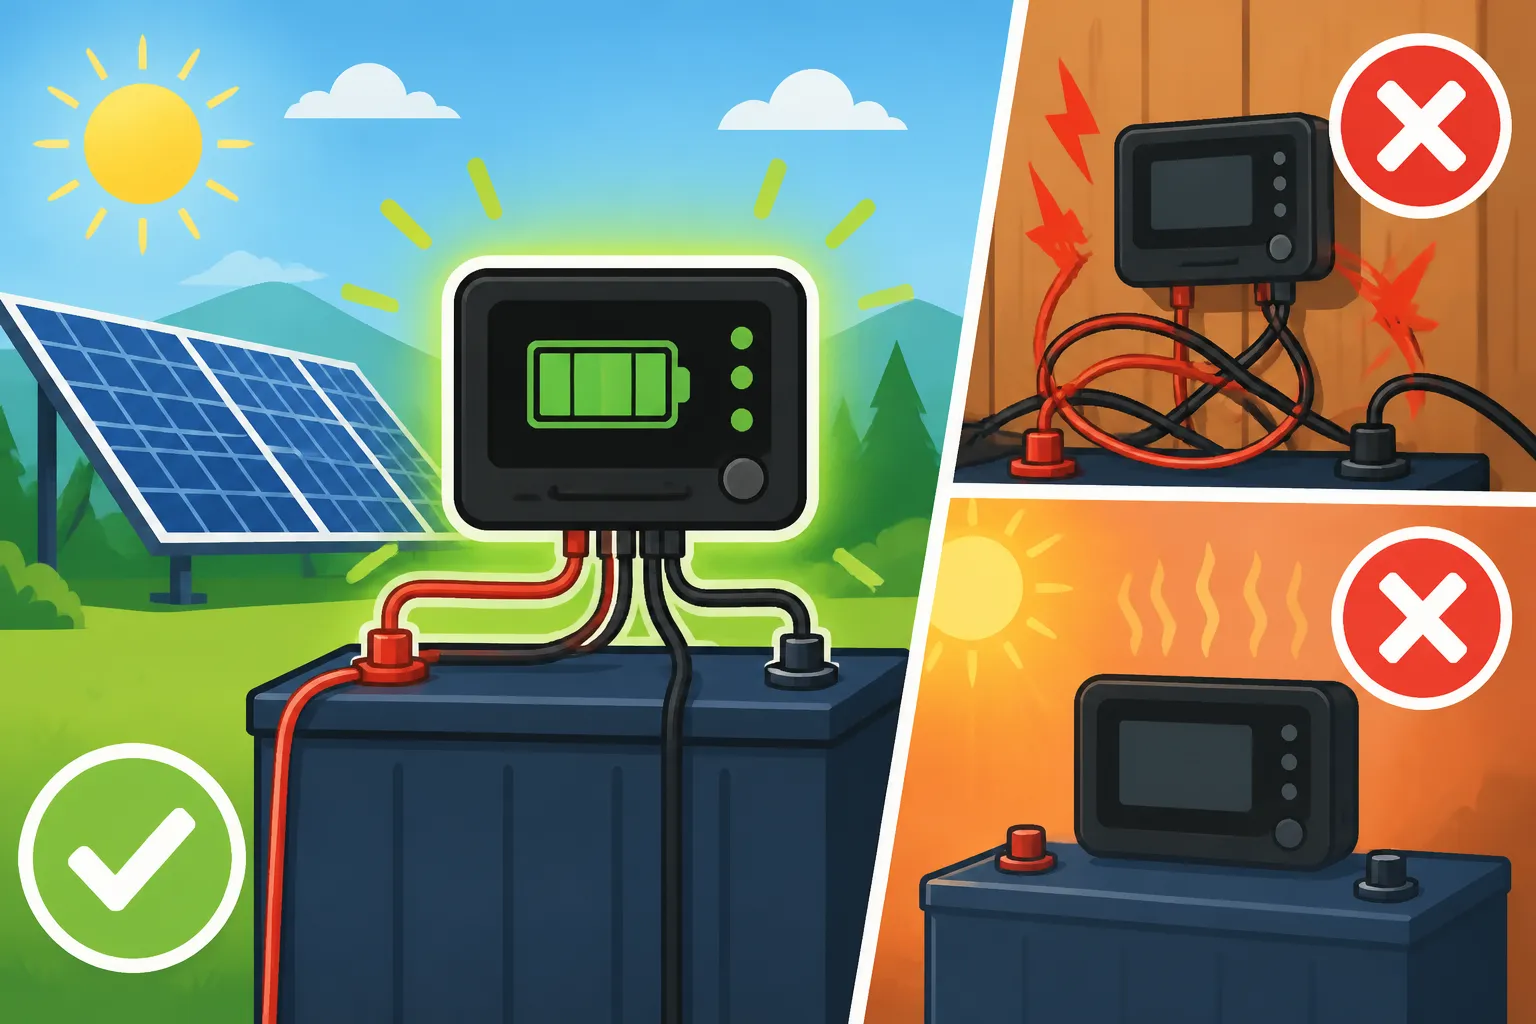
Your off-grid life often means your components face the elements, or at least some pretty demanding conditions. A common mistake is installing the battery monitor's display unit or, more critically, the shunt, in an area prone to excessive heat, cold, dust, or moisture.
Imagine installing the shunt in a battery box that isn't adequately ventilated. Lead-acid batteries, in particular, can off-gas hydrogen during charging, which is flammable. Moisture can lead to corrosion on the shunt terminals, increasing resistance and throwing off readings, or even causing shorts. Extreme heat, especially if the shunt is carrying significant current, can damage the internal components of the shunt or cause connections to loosen due to thermal expansion and contraction. I’ve personally seen shunts corrode in damp environments, leading to unreliable readings and a constant state of anxiety about battery levels.
Similarly, the display unit, while often more robust than a phone screen, isn't designed for direct exposure to pouring rain, intense UV radiation from constant sunlight, or heavy dust. Over time, these conditions can degrade the display, cause buttons to fail, or lead to internal circuit damage. If you're building out an off-grid system for a workshop or a food truck, chances are the environment can be pretty tough on electronics.
Providing Adequate Protection and Ventilation
To ensure your battery monitor and shunt have a long, happy, and accurate life, you need to be intentional about their placement and protection.
- Ventilation for Shunts: If your shunt is in a battery box with lead-acid batteries, ensure the box is properly ventilated. This allows any hydrogen gas to escape and helps dissipate heat. Even with LiFePO4 batteries, which don't off-gas, ventilation helps with temperature regulation. Some battery monitors, like higher-end Victron Energy models, even have optional temperature sensors that can be connected directly to the battery, providing another layer of crucial data. This data is critical, especially when considering Off-Grid Solar Cost in Cold Climates or very hot ones.
- Protection from Moisture and Dust:
- Shunt: Enclose the shunt in a moisture-resistant and dust-resistant enclosure if it’s in a damp or dusty area. This doesn't mean hermetically sealed—remember ventilation is key—but protected from direct splashes or heavy dust accumulation. Some shunts are rated for outdoor use, but most are not.
- Display: Mount the display in a sheltered location inside your cabin, RV, or tiny home. If it must be exposed, consider a dedicated marine-grade or outdoor-rated enclosure to shield it. Many displays are designed for flush mounting into a panel, which provides a degree of protection.
- Temperature Extremes: Avoid direct sunlight on the shunt or display, as this can lead to excessive heat buildup. Conversely, in very cold climates, consider if the display's LCD screen will operate reliably below freezing temperatures. Some LCDs can become very sluggish or even stop functioning in extreme cold. If your entire power center is in an unheated space, you might need to add a small heat source to keep your batteries and sensitive electronics within their optimal operating range, a consideration detailed in guides like How to Protect Batteries from Cold.
- Physical Security: Mount the shunt and display securely where they won't be accidentally bumped, kicked, or have heavy objects placed on them. The small terminals on the shunt can be surprisingly delicate if put under undue stress.
By proactively protecting your battery monitor, you're not just ensuring its longevity; you're safeguarding the accuracy of the vital information it provides. After all, what's the point of going to all the trouble of setting up a reliable off-grid system if you can't even trust the data telling you how much power you have left?
Ignoring System Expansion and Future Needs
When setting up an off-grid solar system, it's natural to focus on what you need right now. But the truth is, most off-grid systems evolve. You might start with a small setup for a weekend cabin and then decide you want to upgrade to full-time living, adding more panels, more batteries, or larger appliances. One common oversight is not considering how your battery monitor fits into this future growth, leading to expensive replacements or frustrating limitations down the road.
Buying an Undersized or Incompatible Monitor
It's tempting to grab the cheapest battery monitor you see on Amazon, especially if you're on a tight budget for your initial build, maybe for a simple Cost of a 400W Off-Grid Solar System. However, many entry-level monitors come with shunts that have current limitations. A common size is a 500A shunt. This might seem like a lot, but if you eventually upgrade to a larger inverter (say, a 5000W model) running a well pump or an air conditioner, your instantaneous current draw can easily exceed 400-500 amps, especially if you're running a 12V or 24V system. When this happens, your monitor will either max out, give inaccurate readings, or even be damaged.
Similarly, some monitors are designed for specific battery chemistries or voltage ranges. A monitor perfectly suited for a 12V lead-acid system might not perform optimally, or even be compatible, with a 48V LiFePO4 bank. If you anticipate moving from lead-acid to lithium, or increasing your system voltage, ensuring your monitor can handle the change is crucial. I've known people who had to completely replace their monitor system just a year or two after installation because they didn't foresee their power needs growing, essentially paying twice for the same functionality. This kind of "hidden cost" can significantly impact the Off-Grid Solar Return on Investment.
Planning for Scalability and Future-Proofing
To avoid these pitfalls, think ahead about your potential off-grid journey and choose a battery monitor that can grow with you.
- Oversize Your Shunt: When in doubt, go bigger. If you think you might one day run a 3000W inverter (around 250A peak at 12V, or 60A at 48V), a 500A or even 1000A shunt might be a wiser investment from the start, especially for a 12V or 24V system. While a larger shunt might cost a bit more upfront, it saves you the hassle and expense of replacing it later. Products from brands like Victron often come with shunts rated for higher amperages, offering excellent headroom for expansion.
- Voltage and Chemistry Compatibility: If you're starting with a 12V system but might move to 24V or 48V, choose a monitor that supports a wide voltage range. Most quality battery monitors today are pretty versatile in terms of voltage (e.g., 9-90V), but always double-check. Also, ensure it has configurable settings for different battery chemistries, especially if you're considering the jump from lead-acid to lithium, as discussed in LiFePO4 vs Lead-Acid Battery Cost.
- Data Logging and Connectivity: Consider monitors with advanced features like Bluetooth connectivity (like some Renogy options or Victron's SmartShunt) or the ability to integrate with a larger system monitor. This allows you to monitor your system from afar, view historical data trends, and easily update firmware. This kind of detailed data is invaluable for understanding your power consumption and generation, which directly ties into How to Calculate Off-Grid Solar Needs and How to Design an Expandable System.
- Modularity: Some systems are designed to be modular, allowing you to add components seamlessly. While the battery monitor itself isn't typically modular, its compatibility with other system components (charge controllers, inverters) can be. Choosing a monitor from a brand that offers a comprehensive ecosystem of products can make future upgrades and system integration much smoother.
By thinking about your long-term vision, even if it's just a vague idea of "more power someday," you can make a smarter initial investment in a battery monitor that won't become a bottleneck as your off-grid system evolves.
Here's a quick reference table to help visualize common mistakes and their fixes:
| Mistake Category | Specific Mistake | Consequence | How to Avoid/Fix |
|---|---|---|---|
| Shunt Placement | Critical load/charge bypasses shunt | Inaccurate SOC, current, and historical data; unexpected power loss | Route all negative cables (battery, loads, charge sources) through the shunt's "load" side. Only one cable from battery negative to "battery" side. |
| Configuration | Incorrect battery capacity or chemistry settings | Over/underestimated runtime, false 100% SOC, premature battery wear | Accurately enter total Ah, charged voltage, tail current, and Peukert exponent (if applicable) based on battery specs. Fully charge and synchronize after setup. |
| Wiring & Connections | Undersized sense wires or loose terminals | Inaccurate voltage readings; flickering display; potential fire hazard | Use recommended wire gauge for sense wires. Ensure all terminals are clean, properly crimped, and securely tightened. Add inline fuse on positive power lead. |
| Environmental Protection | Exposure to heat, cold, moisture, dust | Premature component failure, corrosion, intermittent readings | Mount shunt in ventilated, protected space. Enclose display from direct elements. Consider temperature extremes. |
| Future Needs | Undersized shunt or incompatible monitor | Maxed-out monitor, future replacement costs, inaccurate readings with expansion | Choose a shunt with sufficient current rating headroom (e.g., 500A-1000A). Select a monitor compatible with various voltages/chemistries for future upgrades. |
Conclusion
Navigating the world of off-grid solar can feel like a labyrinth, and it's easy to get sidetracked by seemingly small details. But as we've explored, those "small details" in battery monitor installation can make a huge difference in the reliability and accuracy of your entire power system. From the critical placement of your shunt to the often-overlooked environmental protection, each step plays a vital role. Taking the time upfront to meticulously install and configure your battery monitor, understanding its needs, and even planning for future system expansion, will save you countless headaches, frustrating troubleshooting sessions, and potentially expensive battery replacements down the line. A properly installed battery monitor isn't just a gadget; it's your trusted co-pilot in the journey to off-grid independence, giving you the real-time insights you need to make informed decisions about your power.
Disclaimer
The information provided in this guide is for general informational purposes only and does not constitute professional electrical or solar installation advice. Always consult with a qualified electrician or solar professional for specific design and installation guidance, and ensure all work complies with local electrical codes and safety standards. Working with electricity can be dangerous.