Cost of a 400W Off-Grid Solar System
It’s easy to get excited about the idea of a 400-watt off-grid solar system. You might be envisioning a cozy cabin in the woods, a reliable power source for your RV adventures, or just a robust backup for emergencies at home. But then reality hits: what does "400 watts" actually mean in terms of dollars and cents? Many folks feel a pang of frustration when they realize the initial sticker price for panels is just the tip of a much larger financial iceberg, leaving them wondering if their off-grid dream is truly within reach. This guide is here to demystify the true cost of setting up a 400W off-grid solar system, breaking down every component and hidden expense so you can budget with confidence.
Understanding the Core Components and Their Costs
When you’re looking at a 400W off-grid solar system, it’s not just about the panels themselves. You’re building a miniature power plant designed to capture sunlight, convert it, store it, and then deliver it as usable electricity. Each piece of this puzzle comes with its own price tag, and understanding these individual costs is absolutely essential to grasping the total investment.
Solar Panels
The solar panels are the most visible part of your system, the workhorses soaking up the sun’s rays. For a 400W system, you could opt for a single 400-watt panel, or more commonly, multiple smaller panels wired together, like four 100-watt panels or two 200-watt panels. The choice often depends on your available space and how you want to mount them. Monocrystalline panels are generally preferred for off-grid setups due to their higher efficiency, especially in limited spaces like an RV roof or a small cabin.
The cost for 400 watts of solar panels can range significantly. On the lower end, you might find a basic 100W flexible panel for around $80-120, meaning four of them would cost $320-$480. More robust, rigid panels can cost $150-250 per 100W, pushing your panel total to $600-$1000. These prices can fluctuate based on brand reputation, efficiency ratings, and where you purchase them. While tempting to go for the cheapest option, remember that higher quality panels often come with better warranties and more consistent output, which is crucial when you’re relying entirely on them for power. You can often find good deals on reliable panels from online retailers like Amazon, especially during sales events. If you're wondering about the overall investment, our guide on how much does an off-grid solar system cost delves into the broader financial picture.
Charge Controller
Once your panels generate electricity, it needs to be managed before it reaches your batteries. That’s where the charge controller comes in. Its job is to regulate the voltage and current coming from the solar panels to your battery bank, preventing overcharging and extending battery life. There are two main types: PWM (Pulse Width Modulation) and MPPT (Maximum Power Point Tracking).
For a 400W system, an MPPT charge controller is almost always the better choice, despite being more expensive. MPPT controllers are significantly more efficient, especially in varying light conditions or when your panel voltage is much higher than your battery bank voltage. This means you'll squeeze more usable power out of your 400 watts of panels. A good MPPT controller for a 400W system might cost anywhere from $100 to $300, depending on the brand and features. PWM controllers are cheaper, typically $30-80, but their inefficiency can often mean you're not getting the full benefit of your 400 watts, essentially leaving power on the table. Investing in a quality MPPT controller ensures that your solar power generation is optimized, which is key for reliable off-grid living. For more details on this essential component, check out our article on the cost of a charge controller.
Battery Bank
The battery bank is arguably the most critical and often the most expensive part of any off-grid solar system, and a 400W system is no exception. This is where your precious solar energy is stored for use when the sun isn’t shining. Without a robust battery bank, your 400W system is essentially useless after dark or on cloudy days. The size and type of batteries you choose will heavily influence both your upfront costs and the longevity of your system.
You'll generally choose between lead-acid (flooded or AGM) and lithium iron phosphate (LiFePO4) batteries. Lead-acid batteries are cheaper upfront, with a 100Ah 12V AGM battery costing around $200-300. To support a 400W array with some days of autonomy, you might need two to four such batteries, totaling $400-$1200. However, they have a shorter lifespan and require more maintenance. LiFePO4 batteries, while a larger initial investment (a 100Ah 12V LiFePO4 battery can cost $300-600), offer significantly longer cycle life, deeper discharge capabilities, and are virtually maintenance-free. For a 400W system, you might spend $600-$2400 or more on LiFePO4 batteries, but their long-term value often outweighs the initial cost. For example, Battle Born Batteries are a popular choice for their reliability and long lifespan, though they come at a higher price point. Understanding the differences is crucial, and our deep dive into LiFePO4 vs Lead-Acid Battery Cost can help you make an informed decision. This component is where most of the money goes, and its capacity determines how many batteries to run a refrigerator or other essential appliances you can power.
Inverter
The inverter is the piece of equipment that converts the DC (direct current) power stored in your batteries into AC (alternating current) power, which is what most of your household appliances use. Without an inverter, you’d be limited to only powering 12V or 24V DC devices directly from your battery bank, which isn’t practical for many modern conveniences.
For a 400W system, you'll want an inverter that can handle the combined wattage of your AC loads, plus a little extra for surge capacity. Many small off-grid users with a 400W array might opt for a 1000W to 2000W pure sine wave inverter. Pure sine wave inverters are crucial for sensitive electronics, as they produce a clean, consistent waveform similar to grid power. A good quality 1000W pure sine wave inverter might cost $150-$400, while a 2000W model could range from $300-$800. If you plan to run items with high starting loads, like a microwave, you'll need to ensure your inverter has a sufficient surge rating. For example, if you need to know what size inverter to run a microwave, you'll find that microwaves often have surge ratings far exceeding their running wattage, and your inverter needs to be able to handle that momentary spike. Investing in a reliable inverter, like those from Victron Energy or Renogy, is paramount for the health of your electronics and the overall efficiency of your system. To explore this further, consult our guide on the Cost of an Off-Grid Solar Inverter.
Beyond the Basics: Hidden Costs and Variables
It’s easy to focus on the four main components: panels, charge controller, batteries, and inverter. But anyone who has actually built an off-grid system will tell you that the devil is in the details – and those details often come with unexpected costs. Ignoring these “hidden” expenses can quickly derail your budget and leave you frustrated with unforeseen setbacks.
Mounting Hardware
Your shiny new solar panels won’t just float in the air. They need a secure, durable mounting system that can withstand the elements and keep them optimally angled towards the sun. The cost and complexity of this hardware depend heavily on your installation location and type.
For a fixed installation on a cabin roof or shed, you might need roof mounting brackets, rails, and tilt kits. These can add $100-$300 to your total, depending on the material and brand. If you're setting up a ground mount, which often provides better adjustability for seasonal tilt, you'll need a more robust frame, potentially involving concrete footings or heavy-duty anchors, pushing costs into the $200-$500 range. For an RV or van, specific Z-brackets or aerodynamic mounts are required, usually costing $50-$150. Don't forget the small but essential items like fasteners, sealing caulk, and cable entry glands to keep everything watertight. While it might seem like a minor expense, skimping on mounting hardware can lead to panels blowing off in a storm or sub-optimal power production due to poor positioning.
Wiring, Fuses, and Connectors
This is one area where cutting corners is not an option. Proper wiring, fuses, and connectors are crucial for both the efficiency and safety of your off-grid solar system. You’ll need appropriate gauge wire for your solar array (PV wire), battery cables, and AC wiring from your inverter to your loads. Undersized wire can lead to significant power loss and, more dangerously, fire hazards.
Expect to budget $100-$300 for high-quality, UV-resistant solar cables, heavy-gauge battery cables, MC4 connectors for your panels, and various fuses and circuit breakers to protect each circuit. This includes things like an inline fuse for your solar panels, a main battery fuse, and AC breakers for your inverter output. Don't forget conduit to protect outdoor wiring from physical damage and critters. These components aren't glamorous, but they are absolutely non-negotiable for a safe and reliable system. Trying to save a few bucks here could cost you much more in repairs, or even lead to catastrophic failure.
Installation Labor and Permits
One of the biggest variables in the total cost of a 400W off-grid system is whether you plan to install it yourself or hire professionals. Many people opt for DIY to save money, especially for smaller systems like 400W. If you have electrical knowledge and are comfortable with the hands-on work, this can save you thousands. However, if you’re not experienced, the learning curve can be steep, and mistakes can be costly or dangerous.
If you decide to go the professional route, installation labor can add anywhere from $500 to $1500 or more, depending on the complexity of your setup and local labor rates. Even for a 400W system, professionals will ensure everything is up to code, wired safely, and operating efficiently. Beyond labor, you might encounter permitting and inspection fees. Many jurisdictions, even for off-grid systems, require permits to ensure safety and compliance with local electrical codes. These fees can range from a few dozen dollars to several hundred, depending on your county or municipality. It’s always best to check with your local authority before starting any installation. For a deeper dive into the financial implications of installation, our article on DIY vs Professional Off-Grid Solar Cost offers valuable insights. Also, understanding Off-Grid Solar Permits and Codes is crucial to avoid legal headaches.
Real-World Cost Estimates and Scenarios
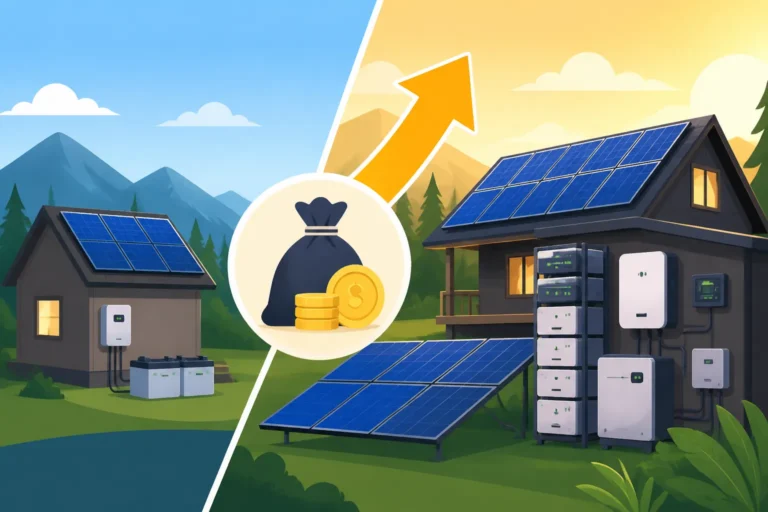
So, what does a 400W off-grid solar system actually cost in practice? The truth is, there’s no single answer, because it depends entirely on your specific needs, your chosen components, and your approach to installation. Let’s break down some common scenarios, from a bare-bones budget setup to a more robust and reliable system.
Budget-Friendly 400W Setup for Basic Needs
This scenario is for someone looking to get the absolute minimum to power very basic essentials, perhaps for a small shed, a weekend camping setup, or an emergency backup. The focus here is on affordability and simplicity, often sacrificing long-term durability or extensive power capabilities.
For a budget-friendly 400W system, you might purchase four inexpensive 100W rigid solar panels from a general online retailer like Amazon, costing around $400-$500 total. You'd likely choose a PWM charge controller, which is cheaper but less efficient, perhaps $50-$70. For batteries, you might opt for one or two 100Ah deep cycle AGM batteries, totaling $400-$600. The inverter would likely be a basic 1000W modified sine wave inverter, costing $70-$120. Add in another $100-$200 for basic wiring, fuses, and mounting hardware for a DIY installation. This kind of setup, often found in a basic off-grid solar kit, could range from approximately $1,020 to $1,490. It's a great starting point for someone wondering what a 400W off-grid system can power and cost for minimal usage, like charging phones, running a few LED lights, and maybe a small fan for a few hours. A portable power station like a Jackery Explorer 500 or 1000, often paired with a 100W or 200W portable solar panel, offers a simple, compact version of this concept, though it's typically an all-in-one unit rather than a component-based system.
Mid-Range 400W System for RV or Small Cabin
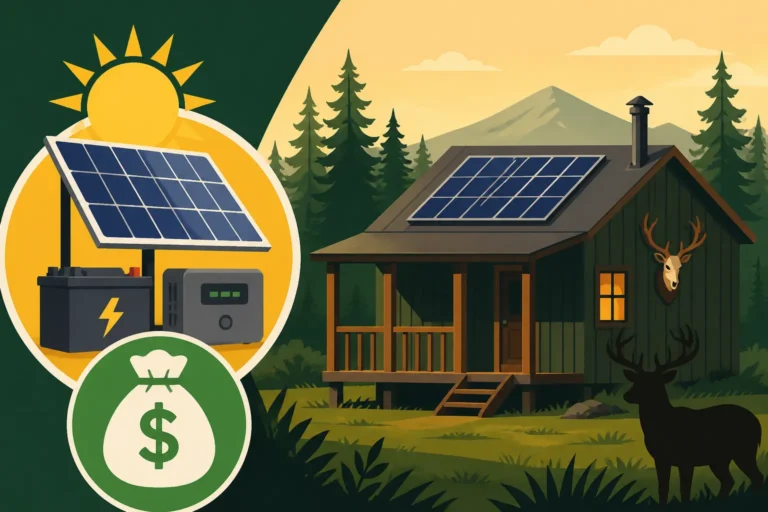
This scenario is for individuals or couples who need more reliable power for consistent use in an RV, a small hunting cabin, or a tiny home. The goal is a balance between cost and performance, investing in better components for increased efficiency and longevity.
For a mid-range 400W system, you'd likely invest in higher quality monocrystalline panels, possibly two 200W panels or four 100W panels, for about $600-$800. An efficient MPPT charge controller is a must here, adding $150-$250. The biggest upgrade would be in the battery bank. You might choose two 100Ah LiFePO4 batteries, which offer better performance and lifespan, at a cost of $800-$1200. For the inverter, a reliable 1500W-2000W pure sine wave inverter would be appropriate, ensuring compatibility with most appliances, costing $300-$500. Add in $200-$400 for higher quality wiring, safety components, and more robust mounting hardware. If you're doing a DIY installation, your total cost would likely fall in the range of $2,050 to $3,150. This kind of system is perfect if you're planning to run things like a small refrigerator, a few lights, charge laptops, and maybe a small TV. Learning how to size an off-grid solar system effectively is crucial for this type of setup to ensure it meets your specific demands.
Premium 400W System for Extended Reliability
This setup is for those who prioritize maximum reliability, efficiency, and longevity from their 400W system, even if it means a higher upfront investment. This is often seen in full-time RVers, remote homesteaders, or those building a system that needs to be virtually hands-off for many years.
In a premium 400W system, you would select top-tier 400W panels, perhaps from a reputable brand, costing $800-$1000. An advanced MPPT charge controller, possibly with smart monitoring features from a brand like Victron, would run $250-$400. The battery bank would consist of top-of-the-line LiFePO4 batteries, possibly two 100Ah units or a single 200Ah unit for a 12V system, with a robust Battery Management System (BMS), totaling $1,000-$1,600. A high-performance 2000W pure sine wave inverter-charger combo, capable of handling complex loads and potentially integrating a generator, would be a smart choice, priced at $500-$1,000. Essential wiring, heavy-duty breakers, a battery monitor shunt, and premium mounting hardware could easily add $400-$700. If you also factor in potential professional consultation or partial installation for critical components, your total could be in the range of $2,950 to $4,700+. This system offers superior performance and peace of mind, allowing you to easily run things like a refrigerator, lights, a well pump, and even an air conditioner for limited periods. When you want the best off-grid solar panels, and components that will last, this is the route to go.
| Component | Budget 400W System (Estimate) | Mid-Range 400W System (Estimate) | Premium 400W System (Estimate) |
|---|---|---|---|
| Solar Panels (400W) | $400 – $500 | $600 – $800 | $800 – $1,000 |
| Charge Controller | $50 – $70 (PWM) | $150 – $250 (MPPT) | $250 – $400 (Advanced MPPT) |
| Battery Bank | $400 – $600 (AGM) | $800 – $1,200 (LiFePO4) | $1,000 – $1,600 (Premium LiFePO4) |
| Inverter | $70 – $120 (Modified Sine) | $300 – $500 (Pure Sine) | $500 – $1,000 (Inverter-Charger) |
| Wiring, Fuses, Mounts | $100 – $200 | $200 – $400 | $400 – $700 |
| Total Estimated Cost (DIY) | $1,020 – $1,490 | $2,050 – $3,150 | $2,950 – $4,700 |
Maximizing Value and Saving Money
Embarking on an off-grid solar journey is a significant investment, but there are definitely ways to stretch your dollar further without completely compromising on performance. It’s all about making smart choices, being strategic, and understanding where you can genuinely save versus where it’s better to spend a little more.
DIY vs. Turnkey Solutions
One of the most impactful decisions you’ll make regarding cost is whether to build your 400W system yourself or purchase a complete turnkey solution. A DIY approach, while requiring time and effort, almost always offers substantial savings on labor costs. If you’re mechanically inclined and willing to learn basic electrical principles, buying individual components and assembling them can cut your total cost by 20-50% compared to having a professional installation. This is especially true for smaller systems like a 400W setup, where the complexity is more manageable. You can meticulously research and choose the best value components, perhaps finding deals on individual items from different suppliers.
However, DIY isn't for everyone. If you're uncomfortable with electrical wiring or the intricacies of system design, a turnkey solution from a reputable provider, or even a pre-assembled kit, might offer peace of mind. These kits come with all the necessary components matched and often include clear instructions or even pre-wired elements. While the initial cost may be higher, you save time and reduce the risk of costly mistakes. Our article on How much cheaper is DIY off-grid solar dives into this topic in much greater detail, helping you weigh the pros and cons for your situation.
Phased Approaches to Building Your System
You don’t have to install your entire 400W system all at once, especially if budget is a concern. A phased approach allows you to spread the cost over time, making the investment more manageable. You could start with a smaller array and battery bank, perhaps just 200W with enough battery capacity for essential lights and charging, and then add more panels and batteries as funds become available.
For example, you might initially purchase two 100W panels, a charge controller, one battery, and a smaller inverter to cover your most critical loads. Later, you could add two more 100W panels and another battery, eventually building out your full 400W system. This strategy works particularly well with modular components like LiFePO4 batteries, which are easier to expand upon. It also gives you valuable experience with your system before making a larger investment. Consider starting with just the panels and a charge controller to maintain a smaller battery bank, then expand your inverter as your AC needs grow. This flexible strategy also provides valuable real-world data on your actual power consumption before you commit to the full system. The cost of expanding an off-grid system later is often less intimidating than the initial lump sum, and helps you budget effectively.
Smart Component Choices
Making informed decisions about each component can significantly impact your overall cost and system performance. It’s not always about buying the cheapest item, but rather the best value for your specific needs. For instance, while LiFePO4 batteries have a higher upfront cost, their longer lifespan (often 10-15 years vs. 3-7 for lead-acid) and deeper discharge capabilities mean a much lower lifetime cost. If you’re planning for long-term use, they are often the smarter investment despite the initial sticker shock.
Similarly, an MPPT charge controller, while pricier than a PWM, can extract up to 20-30% more power from your panels, meaning your 400W system effectively performs like a larger system in terms of energy harvest. This efficiency can translate into needing fewer batteries or having more reserve power. Researching specific brands and reading reviews for reliability and customer support is also crucial. Sometimes, spending a little more on a component from a well-regarded brand like Victron, Renogy, or Jackery (for portable solutions) can save you headaches and replacement costs down the line. To put it simply, for a truly effective system, our guide on how to budget for an off-grid solar system emphasizes making informed decisions about each and every component.
Maintenance and Longevity
The long-term cost of your 400W off-grid solar system isn’t just about the initial purchase; it also includes maintenance and potential replacement costs over its lifespan. By investing in quality components and performing regular maintenance, you can significantly reduce these ongoing expenses. For example, keeping your solar panels clean will ensure they operate at peak efficiency, maximizing their power output and delaying the need for expansion.
Proper battery care is paramount. If you choose lead-acid batteries, regular watering and equalizing charges are essential. With LiFePO4 batteries, while less maintenance is required, avoiding extreme temperatures and ensuring proper charging parameters will extend their life considerably. While there will always be some off-grid solar maintenance costs, proactive care, such as periodically checking all connections for corrosion and ensuring proper ventilation for your components, can prevent expensive repairs or premature component failures. This foresight ensures your initial investment continues to pay dividends for many years to come, truly making your off-grid lifestyle sustainable and enjoyable.
Disclaimer
Please note that the cost estimates provided in this article are generalized and based on current market trends. Actual costs can vary significantly depending on your specific location, chosen brands, supplier pricing, market fluctuations, and the complexity of your unique off-grid solar installation. It is always recommended to obtain multiple quotes and conduct thorough research tailored to your individual project before making purchasing decisions.