How to Install Tilt Mounts for Panels
One of the biggest headaches for off-grid solar users, especially those living in places with distinct seasons, is trying to get the most power out of their solar panels year-round. You set them up at a decent angle in spring, but come winter, you’re suddenly not generating enough juice. This guide is all about tackling that common frustration by walking you through exactly how to install tilt mounts for your solar panels, ensuring you can optimize your power harvest no matter the season.
Understanding Tilt Mounts for Solar Panels
When you commit to off-grid living, every watt counts. Fixed solar panel installations can be a real drag on your system's efficiency because the sun's path across the sky changes dramatically throughout the year. That's where tilt mounts come in, offering a flexible solution to keep your panels working at their peak.
Why Panel Tilt Angle Matters for Off-Grid Performance
Imagine the sun as a giant flashlight. To get the brightest spot, you want that flashlight shining directly at your surface. Solar panels are no different. They generate the most electricity when the sun's rays hit their surface at a 90-degree angle. The challenge is, the sun isn't always at the same height or in the same spot at noon every day.
In the summer, the sun is high in the sky, so you'd want your panels at a shallower, more horizontal angle to catch those direct rays. But in winter, the sun dips much lower on the horizon. If your panels are still at that summer angle, the sun's rays will be hitting them at a very oblique angle, scattering much of the energy and dramatically reducing your power output. For those relying entirely on solar, this seasonal dip can mean running out of battery sooner or needing to fire up a generator more often. Properly adjusting your panels can significantly increase your efficiency, sometimes by as much as 30% or more during crucial winter months, making a huge difference in your daily energy budget. It’s not just about getting some power; it’s about getting the most power when you need it.
Types of Tilt Mounting Systems
Just like there's more than one way to skin a cat, there are several kinds of tilt mounting systems available, each with its own advantages depending on your setup. Understanding these can help you choose the best option for your specific off-grid needs, whether you’re mounting on a cabin roof, an RV, or a ground array.
One common type is the simple adjustable foot system. These often come as part of a kit, like those offered by Renogy. They consist of L-shaped brackets that secure to your mounting surface and extendable legs that attach to the solar panel frame or a rail system. You typically adjust these by loosening a bolt, changing the leg length, and then tightening it back up. They are very popular for smaller installations, such as on RVs or sheds, because they are relatively lightweight and straightforward to install. You'll often find these types of kits readily available on platforms like Amazon, offering a convenient way to get started with adjustable tilt.
For larger, more permanent ground-mount systems, you might see more robust telescoping arm setups or even complex tracking systems that automatically follow the sun. Telescoping arms provide a greater range of motion and stability for heavier panels, often allowing for fine-tuning of angles. While automatic trackers offer the ultimate efficiency by constantly adjusting, they also come with a higher cost and more complex installation and maintenance. For most DIY off-gridders, manually adjustable tilt mounts strike a good balance between cost, effort, and performance gain.
Essential Tools and Materials for Tilt Mount Installation
Before you dive into the installation process, taking stock of what you'll need is crucial. There's nothing worse than getting halfway through a project only to realize you're missing a critical bolt or the right size wrench. A little preparation here will save you a lot of frustration later.
Gathering Your Mounting Hardware and Fasteners
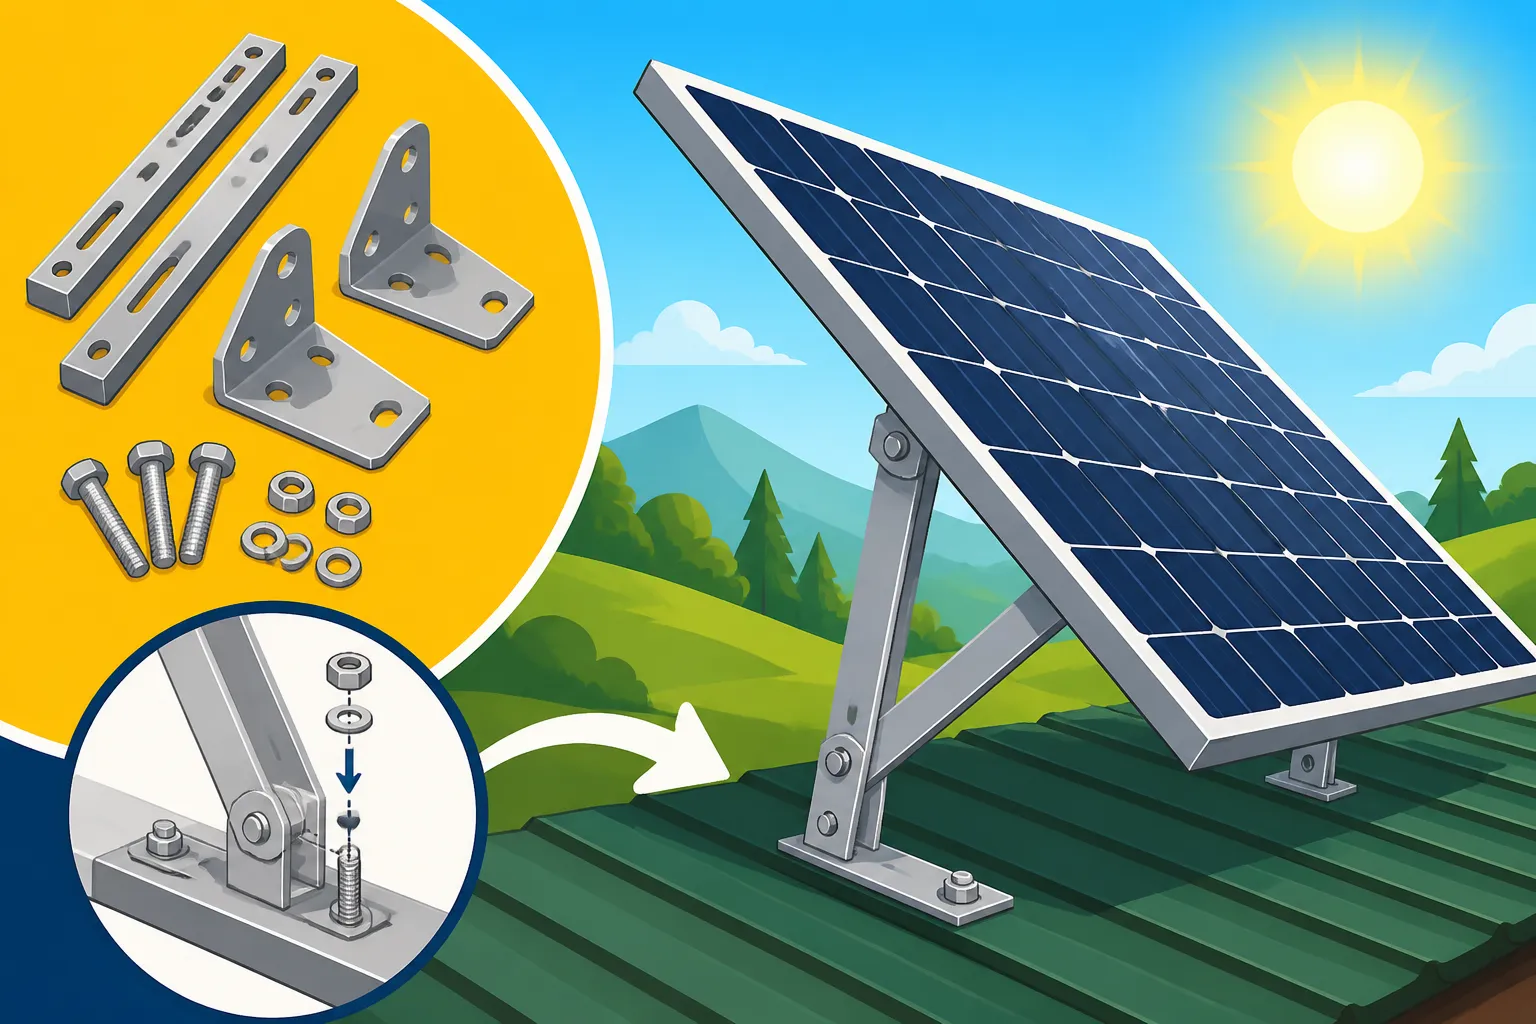
First and foremost, you'll need the tilt mount kit itself. These kits usually include the L-feet or base mounts that attach to your surface, the adjustable tilt brackets or legs, and the hardware to connect them to your solar panels and rails. Look for kits made from corrosion-resistant materials like aluminum or stainless steel, especially if you're in a humid or coastal environment. The durability of these components directly impacts the longevity and safety of your solar array.
Beyond the main tilt components, you'll need a variety of fasteners. This includes stainless steel bolts, nuts, and washers to secure everything. The specific sizes and types will depend on your chosen tilt kit and your solar panel frames, so always double-check the manufacturer's recommendations. If you're attaching to a wooden structure, you might need lag screws designed for exterior use. For metal surfaces, self-tapping screws might be appropriate. Don't skimp on quality here; weak fasteners can lead to disaster in high winds. Many high-quality solar panel kits, even those found on Amazon, will often specify the necessary hardware.
Tools for a Smooth Installation
Having the right tools makes the job not only easier but safer too. You'll definitely need a drill with appropriate bits for pilot holes and driving fasteners. An impact driver can be incredibly helpful for speeding up the process, especially when dealing with numerous screws. A set of wrenches or a socket set will be indispensable for tightening bolts securely. Always ensure your wrenches match the sizes of your chosen hardware; adjustable wrenches can work, but dedicated sizes offer better grip and torque.
Measuring tools are also key: a tape measure for precise spacing, a level to ensure your panels are aligned correctly, and a protractor or angle finder to accurately set your tilt angle. For roof installations, a caulk gun with a high-quality, UV-resistant sealant is essential to prevent leaks where you penetrate the roof. Safety gear like work gloves, safety glasses, and sturdy footwear should always be on your list. If you're working at height, a reliable ladder and potentially a safety harness are non-negotiable.
Step-by-Step Guide to Installing Tilt Mounts
Alright, now that you've got your gear, it's time to get down to business. Installing tilt mounts might seem daunting at first, but if you break it down into manageable steps, you'll find it's a very achievable DIY project. We'll start with the crucial planning phase and work our way through to securing your panels.
Planning and Positioning Your Panels
Before you even think about drilling holes, you need a solid plan. The first step is determining the optimal orientation for your panels. In the Northern Hemisphere, this almost always means facing true south, and in the Southern Hemisphere, true north. This ensures your panels capture the maximum amount of sunlight throughout the day. Don't just follow magnetic north; use a compass and adjust for magnetic declination in your area or simply use a solar pathfinder app on your phone.
Next, calculate your ideal tilt angle. This is perhaps the most critical part of the planning. A general rule of thumb for year-round production is to set your tilt angle roughly equal to your latitude. For example, if you live at 40 degrees North latitude, you'd set your panels at a 40-degree tilt. However, for maximum winter production, you'll want to increase this angle by about 10-15 degrees (so 50-55 degrees in our example), and for summer, decrease it by 10-15 degrees (25-30 degrees). Consider your specific energy needs and the season you want to prioritize. For a more detailed look into this, check out our guide on Best Tilt Angle for Off-Grid Panels. Planning for these seasonal adjustments right from the start will make your life much easier.
It's also essential to consider potential shading. Walk around your property at different times of day and different seasons if possible. Trees, buildings, or even other panels can cast shadows that drastically reduce your solar output. Even a small shadow on one cell of a panel can diminish the entire panel's performance, or even the whole array if wired in series. Position your panels to avoid any shadows, especially during peak sun hours (usually 9 AM to 3 PM). Think about how much solar you need to run your appliances, and design your system accordingly. You can learn more about how to account for your energy demands by reading our article on How to Calculate Daily Energy Usage.
Securing the Base Mounts to Your Surface
Once your planning is done and you know where and how your panels will sit, it’s time to install the base mounts. These are the foundation of your tilt system, so they need to be rock solid. For roof installations, this usually means attaching L-feet or standoffs directly to the roof rafters or purlins, not just the sheeting. You'll need to locate these structural members using a stud finder. Mark your drilling spots carefully, ensuring they are evenly spaced to support the rails and panels.
Drill pilot holes, then apply a generous amount of high-quality, UV-resistant sealant around and into the holes before driving in your lag screws or bolts. This step is absolutely critical to prevent water intrusion and costly leaks down the road. If you’re installing on an RV, you might use similar L-feet or specialized RV mounts that adhere with a strong adhesive in addition to screws, making sure to seal every penetration. For ground mounts, your base mounts might attach to a wooden frame, concrete piers, or directly into the ground with specialized anchors. Always ensure your chosen fasteners are appropriate for your specific mounting surface and can withstand local wind loads. Remember, securing your base mounts correctly is paramount for safety and system longevity. Need more details on various mounting options? Check out our guides on How to Install Roof-Mounted Solar Panels and How to Install Ground-Mounted Solar Panels.
Assembling and Adjusting the Tilt Mechanism
With the base mounts firmly in place, it’s time to assemble the tilt components. This typically involves attaching the solar panel mounting rails to the L-feet or standoffs, and then integrating the adjustable tilt legs or arms. Many kits, like those from Renogy or others found on Amazon, come with clear instructions for this assembly. The rails provide the framework that your solar panels will ultimately clamp onto. Ensure they are perfectly parallel and level across the width of your array. Use your level and tape measure to verify.
Once the rails are in place, attach the adjustable tilt legs to the rails and to the lower L-feet or a separate anchor point. These legs are what will allow you to change the angle. Most systems use bolts and wing nuts or quick-release pins for easy adjustment. For example, a common system might have multiple holes in the tilt legs, allowing you to choose the desired angle by inserting a bolt through a specific hole. Use your angle finder to precisely set the tilt to your calculated optimal angle for the current season. Double-check all bolts and connections to ensure they are snug but not overtightened, which could strip threads.
Mounting and Wiring Your Solar Panels
Finally, it’s time to introduce your solar panels to their new home! Carefully lift each panel onto the installed rails. Work with a partner if the panels are large or heavy. Once positioned, use the included mid-clamps and end-clamps to secure the panels to the rails. Mid-clamps sit between two panels, holding them both down, while end-clamps secure the panels at the edges of your array. Make sure these clamps are tightened firmly according to the manufacturer's specifications to prevent the panels from shifting or lifting in high winds. You should feel a definite resistance when tightening, but avoid crushing the panel frame.
After all panels are securely clamped, you can begin the initial wiring. This usually involves connecting the MC4 connectors between panels, either in series, parallel, or a combination of both, depending on your system voltage requirements and your charge controller specifications. It's often a good idea to lay out your wiring plan beforehand, knowing exactly where your strings will run and where your combiner box (if you're using one) will be located. Always ensure you connect positive to positive and negative to negative, or positive to negative for series connections, as per your system design. For more in-depth wiring advice, check out our guides on How to Wire Solar Panels in Series and How to Wire Solar Panels in Parallel.
Seasonal Adjustments and Maintenance for Tilt Mounts
Having tilt mounts is only half the battle; actually using and maintaining them effectively is what truly maximizes your off-grid solar system's potential. Regular adjustments and routine checks will ensure your investment pays off for years to come.
Optimizing Tilt for Different Seasons
The real beauty of tilt mounts lies in their ability to adapt to the sun's seasonal journey. As discussed earlier, the optimal angle shifts throughout the year. In the summer months, when the sun is highest in the sky, you'll want to set your panels at a shallower angle. This means they'll be closer to horizontal, allowing them to capture the overhead sun more effectively. Think of it as lounging back on a beach chair to catch those strong midday rays. A common summer adjustment is your latitude minus 10 to 15 degrees. This can significantly increase power production during your longest daylight hours, helping to quickly charge your Off-Grid Solar Battery Bank after heavy usage.
Conversely, when winter rolls around and the sun hangs low on the horizon, you'll need to tilt your panels much steeper, closer to vertical. This allows them to face the weaker, lower-angle winter sun more directly. It’s like standing upright to catch a low-flying frisbee. A good winter angle is often your latitude plus 10 to 15 degrees. In some extreme northern or southern latitudes, people even opt for a full vertical tilt during the darkest winter days. Making these seasonal adjustments, typically two to four times a year (spring, summer, fall, winter), can make a monumental difference in your power generation, especially when daylight hours are shorter and you're likely drawing more power for heating or lighting. For those designing an entire system with winter in mind, our guide on How to Design Off-Grid Solar for Winter offers further insights.
Inspecting and Maintaining Your Tilt Mounts
Like any outdoor equipment, your tilt mounts and solar panels require periodic inspection and maintenance to ensure their continued performance and safety. Every time you adjust the tilt angle, take a moment to do a quick visual check. Look for any loose bolts, nuts, or clamps. Vibrations from wind or even thermal expansion and contraction can sometimes loosen fasteners over time. A quick tighten with a wrench can prevent bigger problems later.
Inspect the structural integrity of the mounts. Are there any signs of rust, corrosion, or bending, especially on the adjustable components? If you notice any issues, address them promptly. Rust can weaken metal, and bent components can compromise the entire array's stability. Check the condition of any sealant used for roof penetrations; extreme weather can cause it to crack or degrade. Reapply sealant as needed to prevent leaks. Beyond the mounts, also give your panels a once-over for debris, dirt, or bird droppings that can block sunlight. A regular cleaning regimen, particularly after a dust storm or heavy pollen season, will also boost efficiency. Our article on How to Clean Off-Grid Solar Panels has some great tips for this.
Consider creating a simple maintenance log, noting when you adjusted the tilt, what angle you set, and any observations during your inspection. This helps you track performance and anticipate future needs. By staying on top of these tasks, you'll extend the lifespan of your system and ensure it continues to provide reliable power for your off-grid lifestyle.
Recommended Seasonal Tilt Angles by Latitude
This table provides a general guideline for adjusting your solar panel tilt angle based on your latitude and the season. Remember that these are approximations; local sun path variations and specific energy needs might require slight adjustments. Always aim for the sun's rays to hit the panels as perpendicularly as possible.
| Latitude Zone | Spring/Autumn (Equinox) | Summer (Solstice) | Winter (Solstice) |
|---|---|---|---|
| Low Latitudes | (0° to 15°) | (0° to 15°) | (15° to 30°) |
| e.g., Miami, Hawaii | Latitude + 5° | Latitude – 10° | Latitude + 20° |
| Mid Latitudes | (15° to 45°) | (0° to Latitude – 15°) | (Latitude + 15° to 60°) |
| e.g., Denver, NYC | Equal to Latitude | Latitude – 15° | Latitude + 15° |
| High Latitudes | (45° to 60°) | (30° to 45°) | (Latitude + 15° to 90°+) |
| e.g., Seattle, Alaska | Latitude – 10° | Latitude – 20° | Latitude + 25° (or even vertical) |
- Equal to Latitude: A good baseline for year-round average.
- Latitude – 10° to 20°: Flatter angle to capture high summer sun.
- Latitude + 15° to 30°: Steeper angle to capture low winter sun. In extreme high latitudes, panels might even be near vertical or slightly past 90 degrees from horizontal to best catch the lowest winter sun.
Remember, the goal is to maximize the amount of direct sunlight hitting your panels. Regular adjustments will help you get the most out of your Off-Grid Solar System Sizing Guide.
Disclaimer
The information provided in this guide is for general informational purposes only and is not intended as professional advice. Off-grid solar installations involve electrical components and can be dangerous if not handled properly. Always consult with a qualified electrician or solar professional before undertaking any installation. Ensure all local codes and regulations are followed. The author and publisher are not liable for any loss, damage, or injury incurred as a result of using this information.