How to Size an MPPT Charge Controller
One of the most intimidating parts of building an off-grid solar system, especially for folks new to the game, is figuring out how all the different components fit together and, more importantly, how to size them correctly. You’ve got your panels, your batteries, your inverter, and then there's the charge controller – a crucial piece that often gets overlooked or misunderstood. Choosing the wrong size can lead to inefficient charging, damaged batteries, or even system failure, leaving you scratching your head and wondering why your carefully planned setup isn't delivering the power you need. This guide is here to demystify the process, walking you through exactly how to size an MPPT charge controller so you can build a reliable and efficient off-grid solar power system.
Understanding the Role of an MPPT Charge Controller
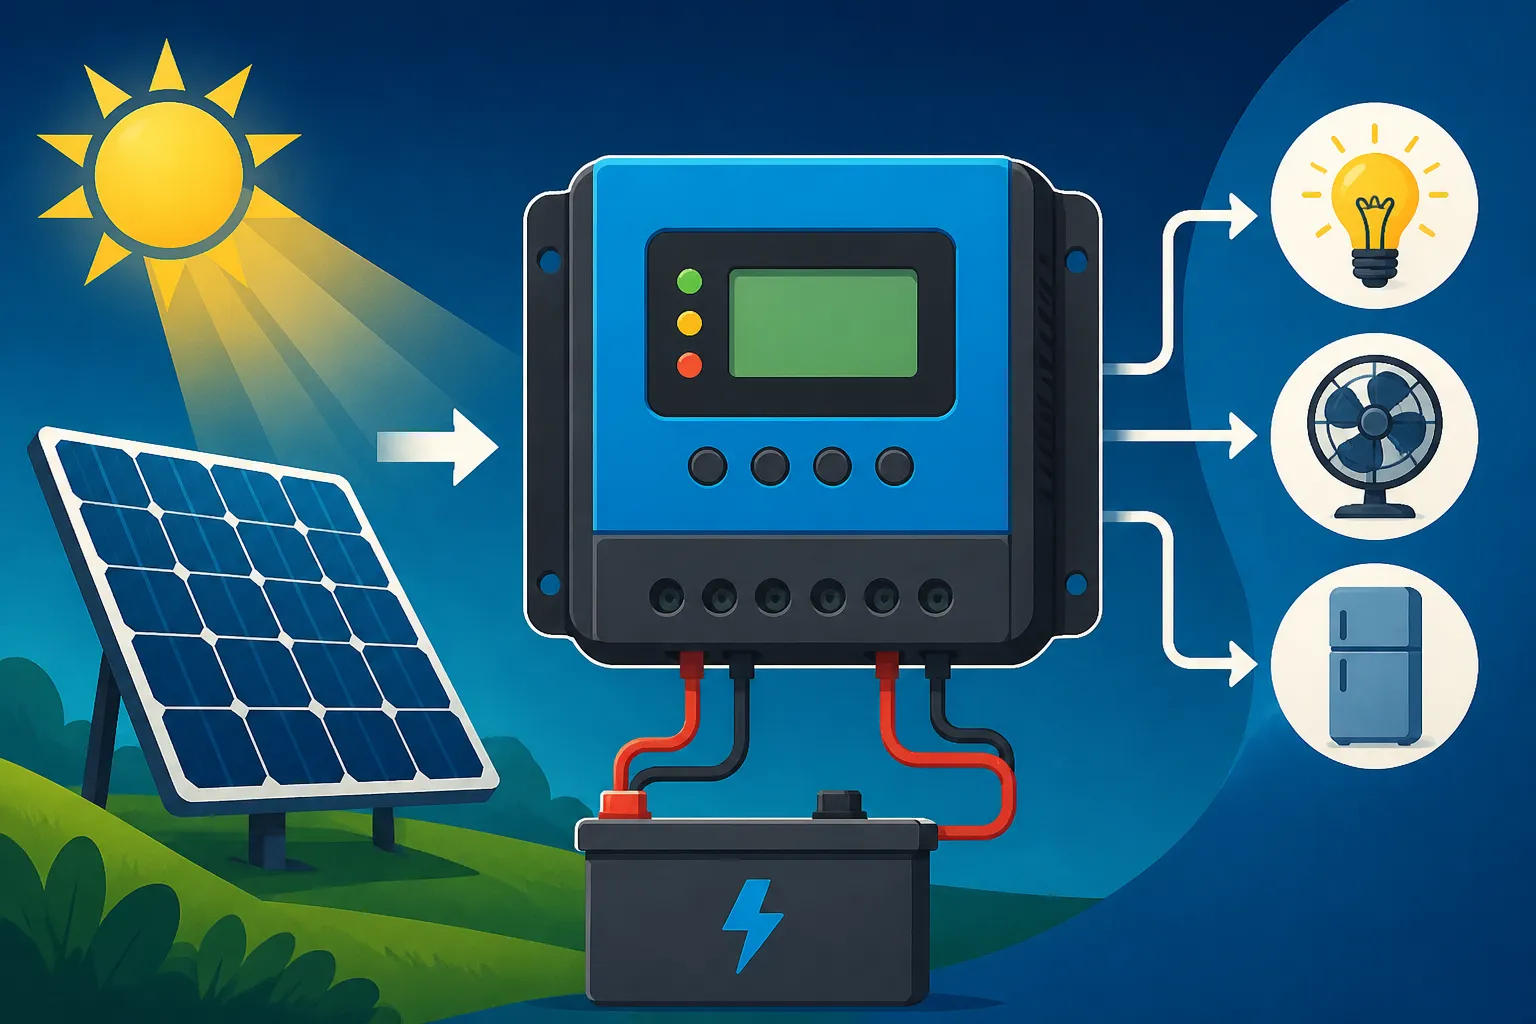
Before we dive into the nitty-gritty calculations, let’s talk about what an MPPT charge controller actually does. Think of it as the brain between your solar panels and your battery bank. Its primary job is to take the power generated by your solar panels and convert it into a usable form to charge your batteries, all while optimizing that power harvest.
Why MPPT is Superior for Off-Grid Systems
MPPT stands for Maximum Power Point Tracking, and it's a game-changer compared to its simpler cousin, the PWM (Pulse Width Modulation) charge controller. A PWM controller essentially chops up the power from your panels to match the battery voltage, which means any excess voltage from the panels is just wasted as heat. It’s like trying to fit a square peg in a round hole by just shaving off the edges.
An MPPT controller, on the other hand, is much smarter. It constantly monitors the voltage and current output of your solar panels and actively adjusts its internal circuitry to find the "sweet spot" – the maximum power point – where your panels are producing the most electricity. If your panels are generating, say, 18V, and your 12V battery needs charging, the MPPT controller won't just drop the voltage and discard the extra; it will convert that excess voltage into more current at the battery's voltage. This conversion process can yield anywhere from 10% to 30% more power (and sometimes even more in cold weather or when battery voltage is low) compared to a PWM controller, making it an indispensable part of any efficient off-grid system. For anyone serious about maximizing their energy harvest, especially when space for panels is limited or in less-than-ideal weather conditions, the investment in an MPPT controller is absolutely worth it. You can learn more about how different components work together in our article on Off-Grid Solar System Components Explained.
Key Specs to Look For
When you're shopping for an MPPT charge controller, you'll encounter a few key specifications that are crucial for proper sizing:
- Maximum PV Input Voltage (Voc/Vmp): This tells you the highest voltage your solar array can produce that the controller can safely handle. Voc (Open Circuit Voltage) is the voltage your panel produces with no load, while Vmp (Maximum Power Voltage) is the voltage at which the panel produces its maximum power. You'll primarily use Voc for safety sizing.
- Maximum Charge Current (Amps): This indicates the maximum current (amps) the controller can deliver to your battery bank. This is the rating you’ll match to your array’s current output.
- Nominal Battery Voltage (12V, 24V, 48V): This specifies the voltage of the battery bank the controller is designed to charge. Some controllers are auto-sensing, meaning they can detect and work with multiple voltages.
- Maximum PV Input Power (Watts): Often, controllers will list a maximum wattage they can handle for a given battery voltage. This is a helpful quick reference but should always be backed up by the voltage and current calculations.
Understanding these specs is the first step to ensuring your MPPT controller is a perfect match for your solar array and battery bank.
The Two Critical Sizing Calculations
Sizing an MPPT charge controller comes down to two main calculations: making sure it can handle the maximum voltage your solar panels will produce, and making sure it can handle the maximum current they'll put out. Get these two right, and you’re golden.
Sizing for Maximum Solar Panel Array Voltage (Voc)
This is perhaps the most critical calculation for safety. If your solar array's voltage exceeds the controller's maximum input voltage, you risk permanently damaging the controller, and potentially creating a fire hazard. The important voltage here is the Open Circuit Voltage (Voc) of your solar panels, not the Vmp (Voltage at Maximum Power). Why Voc? Because on a cold, sunny morning, before your batteries start drawing significant power, your panels can reach their absolute highest voltage. Cold temperatures actually increase the voltage output of solar panels.
Here's how to calculate it:
- Find the Voc of a single panel: This is usually listed on the back of your solar panel or in its datasheet. Let's say it's 45V for one panel.
- Determine your series string configuration: If you wire panels in series, their voltages add up. If you connect three 45V Voc panels in series, your total Voc for that string will be 3 x 45V = 135V.
- Apply a cold weather multiplier: Solar panel voltage increases as temperature drops. The National Electrical Code (NEC) often recommends a multiplier. A common safety factor for cold weather can range from 1.15 to 1.25, depending on your climate zone. For example, if you live in an area where temperatures can drop significantly, a 1.25 multiplier is a safe bet.
- So, 135V (array Voc) x 1.25 (cold weather factor) = 168.75V.
- Compare to controller's max input voltage: Your chosen MPPT charge controller must have a maximum PV input voltage rating higher than this calculated value (168.75V in our example). If your controller has a maximum input of 150V, it's not big enough for this series string! You'd need a controller rated for at least 170V or more.
Ignoring this step is a common off-grid sizing mistake that can lead to costly equipment failure.
Sizing for Maximum Solar Panel Array Current (Isc)
Once you’ve ensured the voltage is safe, you need to make sure the controller can handle the current your array will generate. This calculation determines the amperage rating of your charge controller. For this, we use the Short Circuit Current (Isc) of your solar panels. This is the maximum current a panel can produce under ideal conditions if its terminals were shorted.
Here's the process:
- Find the Isc of a single panel: Again, check your panel's datasheet. Let’s say it's 9A for one panel.
- Determine your parallel string configuration: If you wire panels in parallel, their currents add up. If you have two strings, each with panels in series (as calculated above), and you connect these two strings in parallel, their currents will add. For instance, if each string has an Isc of 9A, two parallel strings would give you 2 x 9A = 18A.
- Apply a safety factor: The NEC requires a 1.25 (125%) safety factor for solar array current to account for potential variations and irradiance spikes.
- So, 18A (array Isc) x 1.25 (safety factor) = 22.5A.
- Compare to controller's max charge current: Your MPPT charge controller must have a maximum charge current rating higher than this calculated value (22.5A). So, you'd be looking for a controller rated for at least 25A or more. Many popular brands like Renogy offer a range of controllers, and checking their specifications carefully is crucial. Remember, this is the current the controller outputs to the batteries, so it must be able to handle the input current from the panels after the conversion.
These two calculations are paramount. Always round up when in doubt to provide a buffer for safety and optimal performance.
Step-by-Step Guide to Sizing Your MPPT Charge Controller
Now that we understand the core principles, let's walk through the actual steps. This isn't rocket science, but it does require attention to detail.
Step 1: Determine Your Battery Bank Voltage
Your off-grid solar system's battery voltage is the foundation of your entire electrical design. Common system voltages are 12V, 24V, and 48V.
- 12V Systems: These are typical for smaller setups like RVs, vans, or tiny cabins, especially if you're only powering a few lights, a laptop, and maybe a small fridge. They are simpler to wire, but for larger loads, you'll need very thick, expensive cables to avoid voltage drop, and higher currents can lead to more heat.
- 24V Systems: A good middle ground, often used for medium-sized cabins or workshops. They offer better efficiency than 12V systems for similar power output, allowing for thinner wiring and less current loss.
- 48V Systems: These are the go-to for larger off-grid homes or extensive setups because they are the most efficient. Higher voltage means lower current for the same amount of power (Watts = Volts x Amps), which significantly reduces wire thickness requirements and overall energy loss. This is especially important when you start thinking about how many watts of solar you need for a full home.
Your choice of battery bank voltage will directly influence the specifications of your charge controller and inverter. We have a detailed guide on 12V vs 24V vs 48V: Which to Choose that can help you make this decision. For this guide, let’s assume you've decided on a 24V battery bank.
Step 2: Calculate Your Total Solar Panel Array Power and Electrical Characteristics
This is where you tally up your solar panels to get your total Voc, Vmp, Isc, and Imp. This step depends on how you plan to wire your panels – in series, parallel, or a combination (series-parallel).
Let’s use an example with four 100W solar panels.
Each panel's specs (from its datasheet):
- Rated Power (Pmax): 100W
- Open Circuit Voltage (Voc): 21.6V
- Voltage at Max Power (Vmp): 18.0V
- Short Circuit Current (Isc): 6.1A
- Current at Max Power (Imp): 5.56A
Scenario 1: All Four Panels in Parallel
- Total Pmax: 4 x 100W = 400W
- Total Voc: 21.6V (Voltage remains the same in parallel)
- Total Vmp: 18.0V
- Total Isc: 4 x 6.1A = 24.4A
- Total Imp: 4 x 5.56A = 22.24A
Scenario 2: Two Strings of Two Panels in Series, then Strings in Parallel
- For one series string (2 panels):
- Voc (string): 2 x 21.6V = 43.2V
- Vmp (string): 2 x 18.0V = 36.0V
- Isc (string): 6.1A (Current remains the same in series)
- Imp (string): 5.56A
- For two parallel strings:
- Total Pmax: 4 x 100W = 400W
- Total Voc: 43.2V (Voltage of one string)
- Total Vmp: 36.0V
- Total Isc: 2 x 6.1A = 12.2A (Current of two strings)
- Total Imp: 2 x 5.56A = 11.12A
As you can see, wiring makes a huge difference! For a 24V battery bank, the second scenario (43.2V Voc) is much more suitable than the first (21.6V Voc) as the MPPT controller will work more efficiently with a higher input voltage relative to the battery voltage. We have articles like How to Wire Solar Panels in Series and How to Wire Solar Panels in Parallel for more detailed wiring diagrams.
Step 3: Apply Safety Factors
This is a critical step that many DIYers might overlook, but it’s essential for system longevity and safety.
- Cold Weather Voltage Factor: As mentioned, cold temperatures can significantly increase panel voltage. A common factor is 1.25.
- Using our Scenario 2 (two series strings in parallel) with a Voc of 43.2V:
- Factored Voc = 43.2V x 1.25 = 54V
- Using our Scenario 2 (two series strings in parallel) with a Voc of 43.2V:
- Current Safety Factor: The NEC (National Electrical Code) typically requires a 125% overcurrent protection factor for solar circuits.
- Using our Scenario 2 with an Isc of 12.2A:
- Factored Isc = 12.2A x 1.25 = 15.25A
- Using our Scenario 2 with an Isc of 12.2A:
So, for our example, your MPPT charge controller needs to handle at least 54V input voltage and deliver at least 15.25A to the batteries.
Step 4: Select an MPPT Charge Controller
With your calculated (and factored) values, you're ready to pick out a controller. You'll need to find one that meets or exceeds these critical numbers for your 24V battery bank.
Based on our example:
- System Voltage: 24V
- Minimum Max PV Input Voltage: 54V
- Minimum Max Charge Current: 15.25A
When you search for controllers, you’ll typically find options like a 20A, 30A, 40A, 60A, or 80A MPPT controller, with varying maximum input voltages (e.g., 100V, 150V, 250V).
For our example, a charge controller with a 24V nominal battery voltage, a maximum input voltage of 100V, and a maximum charge current of 20A would be a perfect fit. The 100V input can easily handle our 54V, and the 20A output is well above our 15.25A requirement. Brands like Victron Energy are known for their high-quality MPPT controllers, offering excellent efficiency and robust features. You can often find suitable options on marketplaces like Amazon or through specialized solar retailers.
Remember, the maximum PV input power spec on the controller datasheet should also be considered. For a 24V system, a 20A charge controller can handle approximately 480W (20A x 24V = 480W). Since our array is 400W, this controller is well within its limits. This gives you a bit of headroom if you decide to add another panel or two later without needing to upgrade the charge controller immediately. This concept is part of How to Plan for Future Expansion.
Here's a quick summary table of our example calculations:
| Component / Calculation | Value for One Panel (Example) | Configuration: Two 2-Panel Series Strings in Parallel | Factored Value for Controller Selection |
|---|---|---|---|
| Panel Rated Power (Pmax) | 100W | 400W | N/A |
| Panel Open Circuit Voltage (Voc) | 21.6V | 43.2V | 54V (43.2V x 1.25) |
| Panel Short Circuit Current (Isc) | 6.1A | 12.2A | 15.25A (12.2A x 1.25) |
| Desired Battery Voltage | N/A | 24V | 24V |
| Minimum Controller Specs | N/A | N/A | Input Voltage > 54V, Charge Current > 15.25A |
This table provides a clear, concise overview to help you keep track of your calculations and make an informed decision when choosing your MPPT charge controller.
Common Pitfalls and Advanced Considerations
Even with the right calculations, there are a few nuances and considerations that can make a big difference in your off-grid system's performance and longevity.
Over-paneling and Controller Limits
You might hear the term "over-paneling" or "oversizing the array." This is when you install more solar panel wattage than your charge controller's rated maximum input power. For example, if your 24V, 60A MPPT controller has a maximum input of 1450W, but you install a 1600W solar array.
The good news is that most quality MPPT charge controllers are smart enough to "clip" or limit their output to their maximum rated current. So, in our example, a 60A controller will never send more than 60A to your batteries, regardless of how much your 1600W array could produce. The excess power from the panels is simply not utilized.
Why do people do this?
- Maximizing Morning/Evening Production: In the early morning, late afternoon, or on cloudy days, your panels won't produce their peak wattage. Over-paneling helps ensure the controller can hit its maximum output (e.g., 60A) earlier in the day and maintain it longer, even with less-than-ideal sun.
- Cost-Effectiveness: Sometimes, adding a few extra panels is cheaper than buying a larger, more expensive charge controller that you might only fully utilize for a few hours a day.
However, be mindful that consistently over-paneling significantly can lead to the controller operating at its thermal limits more often, potentially reducing its lifespan. Always prioritize the voltage and current safety factors, as the controller must be able to handle these without exceeding its ratings.
System Expandability and Future-Proofing
When designing any off-grid system, it's wise to think about the future. Will you add more appliances? Will your family's power needs grow? Buying a charge controller that has a bit more capacity than your immediate needs can save you money and hassle down the road.
For instance, if your current calculations suggest you need a 20A charge controller, opting for a 30A or even a 40A model might be a smart move. This extra headroom allows you to add more solar panels later without having to replace the entire charge controller. This is an excellent strategy for anyone looking to build a system that can grow with their needs, whether it's powering a larger Off-Grid Solar Cost for a Cabin or expanding an RV setup. When you calculate How to Calculate Daily Energy Usage, consider future loads as well.
Monitoring and Data Logging
A well-sized MPPT charge controller is only as good as its performance, and that's where monitoring comes in. Many modern MPPT controllers, especially those from brands like Victron or some Renogy models, come with Bluetooth connectivity or ports for external displays. These features allow you to monitor critical data like:
- Panel Voltage and Current: See what your array is actually producing.
- Battery Voltage and Current: Understand how much power is going into your batteries.
- Daily Energy Harvest: Track your system's performance over time.
- Historical Data: Identify trends, pinpoint issues, and optimize your setup.
Monitoring helps you verify that your charge controller is operating at peak efficiency and that your system is meeting your power demands. It also provides invaluable insights for troubleshooting. If you see your charge current consistently falling short of expectations, it could indicate a shading issue on your panels, a wiring problem, or that your array isn't producing as much as you thought. Regularly checking your system's vital signs helps ensure long-term reliability for your Best Off-Grid Solar Batteries.
Choosing the right MPPT charge controller is a pivotal step in building a robust and efficient off-grid solar system. By diligently following these sizing calculations and considering future needs, you'll be well on your way to reliable, self-sufficient power.
Disclaimer
The information provided in this guide is for educational purposes only and should not be considered professional electrical advice. Always consult with a qualified electrician or solar professional before installing or modifying any electrical system. Working with electricity can be dangerous, and improper installation can lead to property damage, injury, or death. Ensure all installations comply with local electrical codes and regulations.