Best Off-Grid Solar Kit for an RV
The open road, the freedom to explore, and the ability to wake up to a new vista every day – that's the dream of RV living. But a common frustration for many adventurers is the constant hunt for shore power hookups, limiting where you can truly go and how long you can stay. This comprehensive guide is designed to cut through the confusion, helping you understand, choose, and implement the best off-grid solar kit for your RV, empowering you to live that truly independent, unplugged lifestyle you’ve been craving.
Why an Off-Grid Solar Kit is a Game Changer for RVers
For many, RVing is synonymous with independence and exploration, yet the reality often involves a continuous dance around generator noise, campground electrical pedestals, and the nagging worry of a dead battery. An off-grid solar kit isn't just an accessory; it's a fundamental shift, transforming your RV into a truly self-sufficient mobile oasis.
The Freedom of Unplugged Adventures
Imagine pulling into a breathtaking boondocking spot deep in the national forest or parking by a serene desert landscape, knowing you have all the power you need. That's the core promise of an off-grid RV solar system. No more jockeying for crowded campground spots with electrical hookups, no more cutting your stay short because your batteries are drained, and certainly no more noisy, fuel-guzzling generators disturbing the peace of nature (or your neighbors!). This newfound freedom allows you to truly embrace remote camping, explore lesser-known areas, and extend your stays in pristine environments. It’s about being able to run your lights, charge your devices, keep your food cold, and even enjoy a movie without a second thought about where your next charge will come from. This self-reliance fosters a deeper connection to your surroundings and a more authentic RV experience.
Cost Savings and Environmental Benefits
While the initial investment in an off-grid solar kit can seem significant, it quickly starts to pay dividends. Think about the cumulative cost of campground fees for electrical hookups – those can really add up over a season or two. Then there's the ongoing expense of running a generator, not just for the fuel, but for maintenance and eventual replacement. With solar, your "fuel" is free and abundant sunshine. Over time, these savings can offset a substantial portion of your system's cost, making Is Off-Grid Solar Worth the Cost a resounding yes for many RVers. Beyond your wallet, there's the undeniable environmental advantage. By harnessing clean, renewable energy, you significantly reduce your carbon footprint. You're not burning fossil fuels for power, and you're contributing to a quieter, cleaner camping experience for everyone. It's a win-win: more money in your pocket and a healthier planet.
Understanding the Core Components of an RV Off-Grid Solar Kit
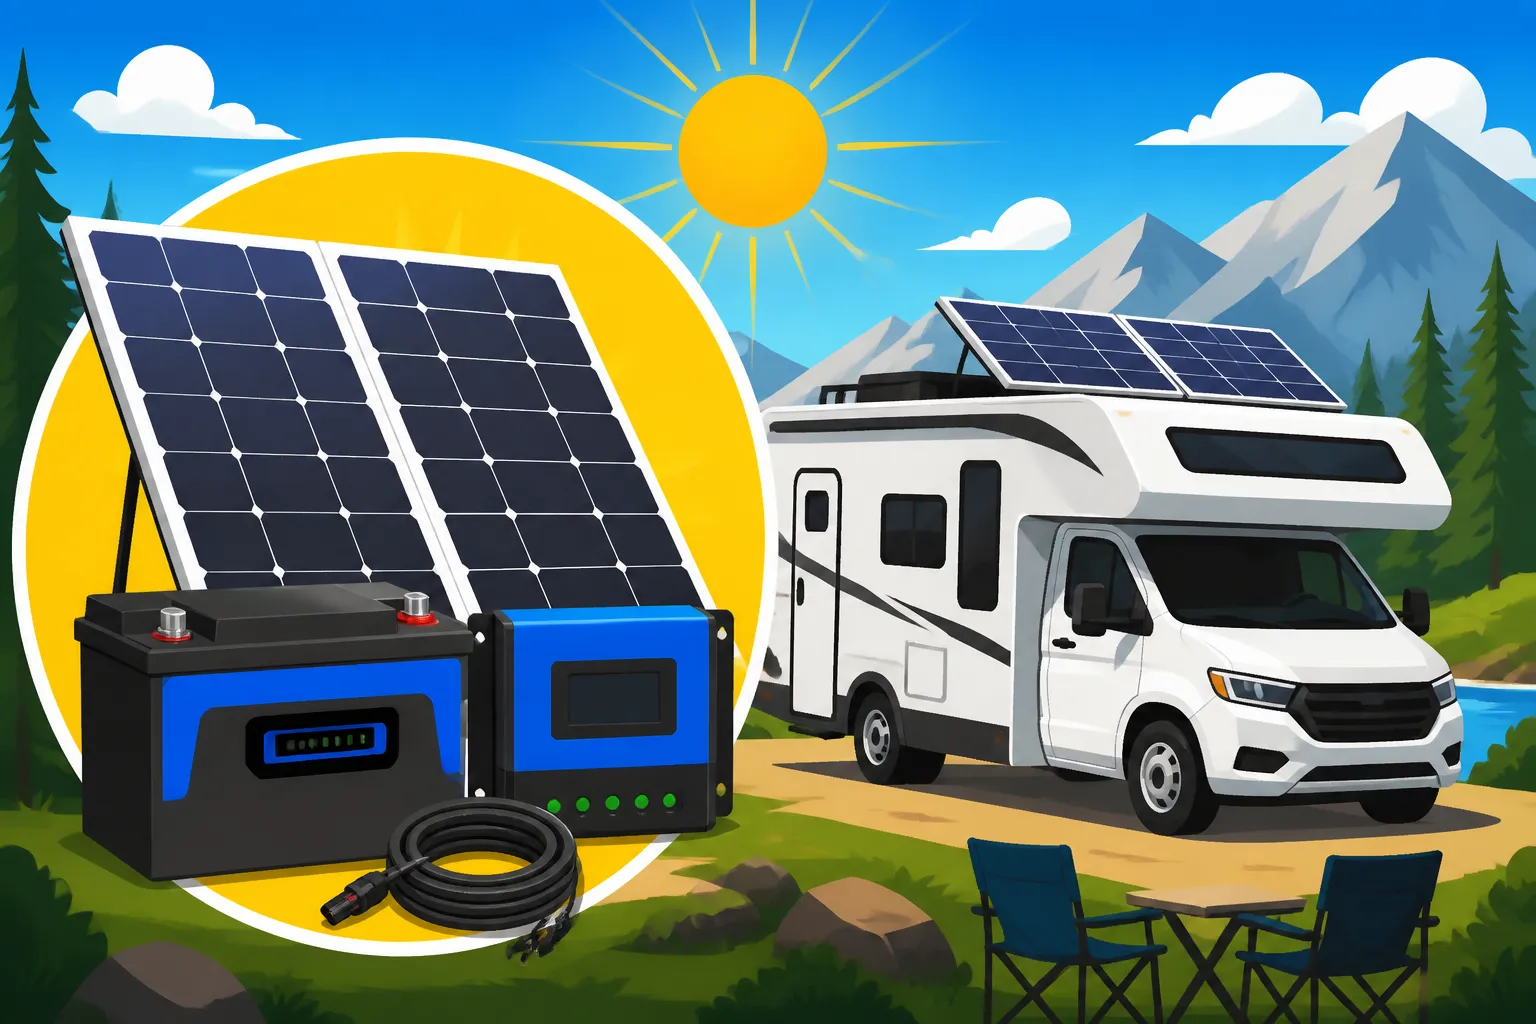
To truly appreciate the "best" off-grid solar kit for your RV, you first need to understand the fundamental building blocks that make these systems tick. Each component plays a crucial role in converting sunlight into usable electricity for your adventures.
Solar Panels: Your Energy Harvesters
Solar panels are the unsung heroes, silently working to capture the sun's energy. For RVs, you'll primarily encounter a few types, each with its own advantages. Rigid panels are the most common, offering the best efficiency and durability. They're typically mounted permanently on your RV roof, though some setups use tilt mounts to optimize sun angle. They’re robust, designed to withstand the elements and highway speeds, and come in various wattages, commonly from 100W to 400W per panel.
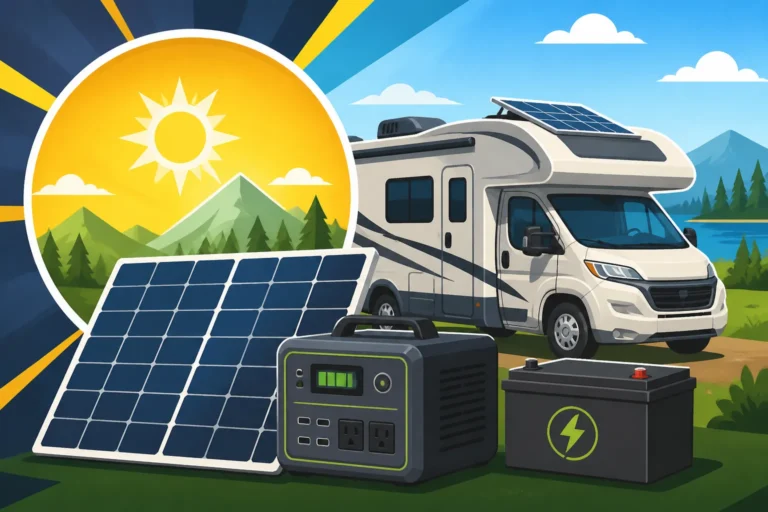
Then there are flexible panels, which are lightweight and can conform to curved surfaces, making them ideal for RVs with limited flat roof space or for those who prefer a less intrusive look. However, they generally have lower efficiency and can be more prone to overheating if not properly ventilated. Lastly, portable solar panels are fantastic for supplementing your main system or for smaller power needs. Brands like Jackery offer excellent portable panels that fold up for easy storage and can be set out in the sun when parked, allowing you to chase the sun even if your RV is parked in the shade. These are great for topping off a power station or small battery bank. The choice largely depends on your available roof space, aesthetic preferences, and how much power you need to generate.
Batteries: The Heart of Your System
If solar panels are the lungs of your system, breathing in energy, then batteries are definitely the heart, pumping that energy to your appliances. They store the electricity generated by your panels, so you have power even when the sun isn't shining. For RV applications, the debate often boils down to two main chemistries: LiFePO4 (Lithium Iron Phosphate) and Lead-Acid (AGM or Gel).
LiFePO4 batteries have become the darling of the RV community, and for good reason. They offer superior cycle life (thousands of cycles vs. hundreds for lead-acid), can be discharged much deeper without damage (typically 80-100% vs. 50% for lead-acid), are lighter, and often have a smaller footprint for the same usable capacity. This means you need fewer batteries, saving space and weight – crucial considerations in an RV. While their upfront cost is higher, their longevity and performance often make them more cost-effective in the long run. If you're comparing options, take a deep dive into LiFePO4 vs Lead-Acid Battery Cost to see why many RVers are making the switch. Lead-acid batteries, particularly AGM (Absorbed Glass Mat), are still a viable, more budget-friendly option, especially for smaller systems or occasional use. They are robust but require more careful management of their depth of discharge and have a shorter lifespan. The capacity, usually measured in Amp-hours (Ah) or Kilowatt-hours (kWh), dictates how long you can run your appliances without solar input. This is a critical factor in determining your "days of autonomy" – how long your system can sustain your power needs without any new solar input.
Charge Controllers: The Brains of the Operation
Think of the charge controller as the system's intelligent manager. Its job is to regulate the voltage and current coming from your solar panels to your battery bank. Without it, your panels could overcharge your batteries, severely damaging them and potentially creating a safety hazard. There are two primary types of charge controllers:
PWM (Pulse Width Modulation) controllers are simpler and more affordable. They essentially "throttle" the voltage from the panels to match the battery voltage, which means they can lose some of the potential power, especially when the panel voltage is significantly higher than the battery voltage. They're a decent option for smaller, less complex systems where budget is a primary concern.
MPPT (Maximum Power Point Tracking) controllers, on the other hand, are much more sophisticated. They actively track the maximum power point of the solar array, converting excess voltage into additional current. This results in significantly higher efficiency, often capturing 10-30% more power from your panels compared to a PWM controller, especially in cooler weather or when the battery is low. For RVers looking to maximize their energy harvest, an MPPT controller is almost always the better choice. They are also essential for larger systems or when you have high-voltage panels. If you're serious about getting the most out of your solar setup, exploring options like those highlighted in Best MPPT Charge Controllers will be invaluable for a robust and efficient system.
Inverters: Turning DC to AC Power
Most of the power generated by your solar panels and stored in your batteries is DC (Direct Current) power – typically 12V, 24V, or 48V. However, many of your common RV appliances, like microwaves, coffee makers, hair dryers, and even some laptops, run on AC (Alternating Current) household power (120V). This is where the inverter comes in. It's a critical component that takes the DC power from your batteries and converts it into usable AC power.
You'll primarily encounter two types of inverters: Modified Sine Wave and Pure Sine Wave. Modified sine wave inverters are less expensive and can power most basic AC loads like lights or simple electronics. However, they produce a "stepped" waveform that can be harmful to sensitive electronics, motors, and appliances with timers or variable speeds. Using a modified sine wave inverter with certain appliances can cause them to run inefficiently, overheat, or even fail prematurely.
Pure sine wave inverters, by contrast, produce a clean, smooth waveform that perfectly mimics the power from the grid. This makes them safe for all types of electronics and appliances, from your refrigerator to your laptop to your microwave. For any modern RV with sensitive electronics or motor-driven appliances, a pure sine wave inverter is absolutely essential. Sizing your inverter correctly is also vital; you need to ensure its continuous wattage rating can handle the combined running watts of all AC appliances you might use simultaneously, plus a surge rating to handle the brief power spike when motors (like in a microwave or AC unit) first start up. Don't underestimate the importance of this component, and if you need help figuring out the right size, check out How to Size an Off-Grid Inverter for detailed guidance.
Sizing Your Off-Grid RV Solar System: No More Guesswork
One of the biggest hurdles for RVers diving into off-grid solar is figuring out how much power they actually need. It’s not about guessing; it’s about calculating your specific energy demands to ensure your system can reliably keep up with your lifestyle on the road.
Calculating Your Daily Energy Needs
This is the absolute first step, and honestly, the most crucial. Many people get excited about panels and batteries, but without understanding their actual consumption, they risk building an undersized or oversized (and thus unnecessarily expensive) system. To calculate your daily energy needs, you need to perform a "load analysis." This involves listing every electrical appliance you use in your RV, how many watts it consumes, and for how long you use it each day.
Let's take a common RV setup as an example:
- Lights (LED): 5W per bulb, 4 bulbs for 4 hours = 80 Wh
- Water Pump: 60W, 10 minutes (0.17 hours) = 10 Wh
- Refrigerator (12V compressor type): 50W, runs 12 hours/day (cycling on/off) = 600 Wh
- Laptop Charging: 60W, 2 hours = 120 Wh
- Phone Charging: 10W, 2 hours = 20 Wh
- Fan (small, 12V): 15W, 6 hours = 90 Wh
- TV (LED): 50W, 3 hours = 150 Wh
- Coffee Maker (AC): 1000W, 10 minutes (0.17 hours) = 170 Wh
Summing these up gives you an estimated daily watt-hour (Wh) consumption. In this example, it's roughly 1240 Wh, or 1.24 kWh per day. Remember to differentiate between continuous loads (like a refrigerator cycling) and intermittent loads (like a microwave or hair dryer, which have high wattage but run for short periods). Being meticulous here pays off immensely. To truly master this step, refer to How to Calculate Daily Energy Usage for a detailed walkthrough and a worksheet that can help you track everything.
Determining Solar Panel Wattage Required
Once you have your daily energy consumption in watt-hours, you can start to figure out how many solar panels you’ll need. This isn't just about matching watts to watt-hours, because solar panels don't produce their rated wattage all day long. Their output depends on factors like sunlight intensity, angle, temperature, and shading. The key metric here is "peak sun hours" (PSH) – the equivalent number of hours per day when the sun's intensity averages 1000 watts per square meter. PSH varies significantly by your location and the time of year. For instance, in sunny Arizona, you might get 6 PSH in the summer, but only 3 PSH in the winter.
Let's assume our RV is traveling in a region averaging 4 PSH. If our daily energy need is 1240 Wh, then we need enough panel wattage to generate 1240 Wh in 4 hours of peak sun.
Calculation: 1240 Wh / 4 PSH = 310 Watts of solar panel capacity.
However, you should always add a buffer for efficiency losses (wires, charge controller, temperature) and less-than-perfect sun days. A good rule of thumb is to add 20-30% to your calculated panel wattage. So, 310W * 1.25 = 387.5 Watts. This means you’d likely want at least two 200W panels (400W total) or three 100W panels (300W total, but less than ideal for this scenario). For consistent off-grid living, especially in varying climates, many RVers slightly oversize their array. If you're wondering How Many Solar Panels for Off-Grid Living for your specific setup, a bit of careful calculation and padding your numbers will ensure you're never caught short.
Sizing Your Battery Bank for Days of Autonomy
Your battery bank is your energy reservoir, providing power when the sun isn't available. Sizing it correctly ensures you have enough stored energy to cover your needs during cloudy days, nights, or when you're parked in the shade. The concept of "days of autonomy" refers to how many days your battery bank can sustain your RV's power needs without any input from your solar panels or other charging sources. For most RVers, 2-3 days of autonomy is a comfortable target, providing peace of mind during extended bad weather.
Using our previous example of 1240 Wh (1.24 kWh) daily consumption:
For 2 days of autonomy, you'd need 1240 Wh/day * 2 days = 2480 Wh (2.48 kWh) of usable battery capacity.
This is where battery chemistry really matters.
- Lead-Acid (AGM): If you opt for AGM batteries, you typically shouldn't discharge them below 50% to maximize their lifespan. So, you'd need a total bank capacity of 2480 Wh / 0.50 = 4960 Wh (4.96 kWh). At 12V, that's roughly 413 Ah (4960Wh / 12V = 413Ah). You might get four 100Ah 12V AGM batteries.
- LiFePO4: With LiFePO4 batteries, you can safely discharge them to 80-100% without significant degradation. So, for 2480 Wh usable capacity, you'd need approximately 2480 Wh / 0.80 = 3100 Wh (3.1 kWh) of total capacity. At 12V, that's roughly 258 Ah (3100Wh / 12V = 258Ah). This could mean two 100Ah 12V LiFePO4 batteries and one 50Ah battery, or perhaps two 150Ah units.
As you can see, LiFePO4 batteries allow for a smaller, lighter battery bank for the same usable power. Always calculate your usable capacity based on your chosen battery chemistry. Don't forget that larger appliances, like a rooftop air conditioner, will dramatically increase your daily energy needs and require a much larger battery bank and solar array. For a deeper understanding and precise calculations, check out How Many Batteries for an Off-Grid System to ensure your power storage is robust enough for your RV adventures.
Different Types of Off-Grid Solar Kits for RVs
The beauty of off-grid solar for RVs is the sheer variety of solutions available, catering to different budgets, power needs, and travel styles. What works for a weekend warrior might not cut it for a full-time RVer, and vice versa.
Entry-Level Portable Kits
For those just dipping their toes into the off-grid lifestyle, or who only need to power basic essentials on shorter trips, entry-level portable kits are an excellent starting point. These kits are often centered around a portable power station (sometimes called a solar generator) combined with one or two foldable solar panels. They are incredibly user-friendly – just unfold the panels, plug them into the power station, and you're charging.
Brands like Jackery are particularly well-known for their portable power stations, such as the Jackery Explorer series, which can be easily paired with their SolarSaga panels. These systems are fantastic for charging phones, laptops, drones, running a small fan, or powering LED lights. Their main advantage is their portability and simplicity; you can move them around to chase the sun, or even take them away from your RV for other uses. They don't require any complex installation, wiring, or permanent modifications to your RV. However, their limitations become apparent with higher-draw appliances like microwaves, air conditioners, or extensive daily usage. They are best suited for supplemental power, car camping, weekend getaways, or as a reliable backup power source for emergencies.
Mid-Range Expandable Kits
As your off-grid ambitions grow, or if you plan on extended trips with moderate power needs, mid-range expandable kits offer a much more robust solution. These systems typically involve permanently mounted rigid solar panels on your RV roof, a dedicated battery bank (often starting with 100-200Ah of LiFePO4 or 200-400Ah of AGM), a charge controller, and a pure sine wave inverter. Many popular manufacturers offer these types of kits, often designed for easy DIY installation, though professional help is always an option.
The key benefit here is expandability. You can start with a basic setup and then add more panels, increase your battery capacity, or upgrade your inverter as your power demands evolve. This makes them a cost-effective long-term solution, allowing you to gradually build your ideal system without a massive upfront investment. These kits are capable of handling more significant loads like running a small 12V compressor fridge 24/7, powering a robust laptop workstation, or enjoying several hours of TV. They are perfect for RVers who want more freedom than a portable solution but don't necessarily need to power a full-sized household appliance. You'll find many options in the Best Off-Grid Solar Kit with Battery and Inverter category that fit this description, providing a solid foundation for extended boondocking.
High-Capacity Whole RV Systems
For the full-time RVer, digital nomad, or anyone who wants to bring all the comforts of home on the road, a high-capacity whole RV system is the ultimate goal. These systems are designed to power almost everything you would in a conventional home, including energy-intensive appliances like rooftop air conditioners, electric water heaters, washing machines, and large microwaves. They typically feature a large array of solar panels (often 800W to 2000W or more), substantial LiFePO4 battery banks (300Ah to 600Ah or even larger), and powerful inverters (3000W to 5000W).
These comprehensive systems often operate at higher voltages, such as 24V or 48V, which allows for smaller wire gauges and reduced power loss over longer runs, making them more efficient for heavy loads. Such setups often incorporate sophisticated monitoring systems, sometimes with integrated inverter-chargers that can seamlessly switch between solar, shore power, and even generator input. While these systems require a significant investment and often professional installation or a very experienced DIYer, they deliver unparalleled energy independence. They are custom-built to the RVer's specific lifestyle and usage patterns, ensuring consistent, reliable power no matter where the road takes them.
Key Features to Look for in the Best RV Solar Kit
Choosing the right off-grid solar kit for your RV isn't just about the biggest numbers; it’s about finding a system that aligns with your travel style, technical comfort, and future aspirations. Several key features can make or break your off-grid experience.
System Expandability and Scalability
One of the most valuable aspects of any RV solar kit is its ability to grow with your needs. Many RVers start with a smaller system and, as they spend more time off-grid or acquire new appliances, realize they need more power. A good kit should be designed with expandability in mind. This means the charge controller should have room to accommodate additional solar panels, and the battery management system (BMS) in your lithium batteries should support adding more batteries in parallel.
For instance, if you initially install a 400W solar array and later decide you want to add another 200W panel, your charge controller needs to have sufficient input capacity to handle the increased amperage and wattage. Similarly, if your inverter has a pass-through current rating, ensuring it's ample for future additions can save you headaches. Investing in modular components from reliable brands like Victron or Renogy, even if you don't use their full capabilities immediately, can future-proof your investment and prevent you from having to completely overhaul your system down the line. It's often cheaper to incrementally upgrade than to start from scratch.
Durability and Weather Resistance
Your RV solar kit will face the elements head-on: scorching sun, driving rain, freezing temperatures, and constant vibration from road travel. Therefore, durability and weather resistance are paramount. Look for solar panels with robust aluminum frames, tempered glass, and high IP ratings (Ingress Protection) that indicate their resistance to dust and water. Marine-grade components are often a good sign, as they are built to withstand harsh, corrosive environments.
Batteries, especially LiFePO4, should have good internal temperature management or external heating pads if you plan to camp in cold climates. All wiring and connectors (like MC4 connectors for solar panels) should be UV-resistant and waterproof. The inverter and charge controller should be rated for RV use, meaning they can handle vibrations and temperature fluctuations common in mobile environments. A kit might look good on paper, but if its components aren't designed for the rigors of RV life, you'll be dealing with premature failures and frustrating repairs.
Ease of Installation and User-Friendliness
For many RVers, a DIY installation is a big draw, both for the satisfaction of building it yourself and for the significant cost savings. If you're considering the DIY route, look for kits that come with clear, comprehensive instructions, pre-wired components where possible, and all necessary mounting hardware and cables. Some kits are specifically marketed as "plug-and-play," simplifying the wiring process.
However, even with the best DIY kits, a basic understanding of electrical principles and safety is crucial. If you're not comfortable with electrical work, it might be worth considering a kit that's known for professional installation support or budgeting for an experienced RV electrician to handle the trickier parts. The cost difference between DIY vs Professional Off-Grid Solar Cost can be substantial, so it's a decision that requires honest self-assessment of your skills. Post-installation, user-friendliness extends to daily operation. Can you easily monitor your battery state of charge, solar input, and inverter output? Simple, intuitive displays or smartphone apps make managing your power much less stressful on the road.
Monitoring and Management Systems
Understanding your power system is critical for optimizing its performance and ensuring you don't run out of juice unexpectedly. Modern RV solar kits often come with sophisticated monitoring and management capabilities, which are invaluable. A good battery monitor, often an external shunt-based device, provides an accurate "fuel gauge" for your battery bank, showing state of charge (SOC), current flow (amps in/out), and voltage. This is far more reliable than just reading battery voltage.
Many advanced charge controllers and inverters now integrate with smartphone apps (e.g., Victron Connect for Victron Energy products) or dedicated displays, allowing you to see real-time data on solar harvest, consumption, and battery status from the comfort of your RV couch. This not only helps you adjust your energy habits (e.g., waiting for peak sun to run the microwave) but also aids in troubleshooting if something isn't performing as expected. The ability to remotely monitor and even control aspects of your system can give you immense peace of mind, especially when you’re relying solely on solar in remote locations.
Top Contenders for Best RV Off-Grid Solar Kits
When it comes to outfitting your RV for off-grid living, several brands and types of systems consistently rise to the top, offering solutions for various needs and technical proficiencies.
Renogy RV Solar Kits
Renogy has carved out a significant niche in the RV solar market, particularly for DIY enthusiasts. They offer a wide range of comprehensive RV solar kits, from small 100W setups perfect for trickle charging or minimal electronics, all the way up to powerful 1600W+ systems designed for more extensive power needs. Their popularity stems from their accessibility, relatively affordable pricing, and the fact that their kits typically include all the major components: solar panels (rigid or flexible), MPPT charge controllers (like the Rover series), LiFePO4 or AGM batteries, pure sine wave inverters, and often all the necessary wiring, connectors, and mounting hardware.
Renogy systems are known for being fairly straightforward to install for those with basic electrical knowledge, and their customer support often provides helpful resources. For many, a Renogy Off-Grid Inverter Review or similar component-specific research will often point to their balance of cost and performance. A common choice for mid-range RVers is their 400W or 600W Premium Kits, which provide enough power for moderate daily use and the flexibility to expand later. They make it easy to get started with off-grid power without having to source every component individually, which can be a huge time-saver.
Victron Energy Components for Custom Builds
While Victron Energy doesn't typically sell "kits" in the all-inclusive sense, they are the gold standard for high-end, custom-built RV solar systems. If you're looking for ultimate reliability, efficiency, and advanced monitoring capabilities, Victron components are unmatched. Their product lineup includes robust MultiPlus inverter-chargers, highly efficient SmartSolar MPPT charge controllers, precise battery monitors like the SmartShunt, and comprehensive system monitoring via their Cerbo GX device and VRM portal.
The strength of Victron lies in its integrated ecosystem. All components "talk" to each other seamlessly via their VE.Bus and VE.Direct communication protocols, giving you a holistic view and control over your entire power system. This level of sophistication makes them a favorite for full-time RVers or those running demanding loads like multiple air conditioners. While the initial investment is higher and requires more in-depth knowledge for design and installation, the performance, longevity, and peace of mind are often worth it. If you're serious about building a robust, fault-tolerant system and want to understand why experts prefer these components, a comparison like Victron vs Renogy Equipment can illuminate the differences in quality and capability.
All-in-One Portable Solutions like Jackery Power Stations
For RVers who prioritize simplicity, portability, and ease of use, all-in-one solar generators or power stations from brands like Jackery are excellent choices. These devices combine a LiFePO4 battery, an inverter, and a charge controller into a single, compact unit. They are designed to be incredibly user-friendly – simply plug in your devices or appliances, and plug in a solar panel (like Jackery's SolarSaga series) to recharge the unit.
The Jackery Explorer series, for example, offers a range of capacities suitable for various needs, from small units perfect for charging phones and running a fan, to larger ones like the Jackery 2000 Plus for Off-Grid: Specs and Review that can power mini-fridges, microwaves, and even small air conditioners for short bursts. Their main appeal is their "grab-and-go" nature; no installation is required, and they can be used inside or outside your RV, or even taken on a hike. They’re fantastic for weekend trips, as a supplemental power source for an existing system, or as reliable emergency backup. While they might not provide the continuous, high-capacity power of a permanently installed system, their convenience factor is hard to beat for many RVers.
EcoFlow and Bluetti Integrated Systems
Emerging as strong contenders in the RV and van life market are integrated power solutions from companies like EcoFlow and Bluetti. These brands offer comprehensive, modular systems that bridge the gap between simple portable power stations and complex custom builds. EcoFlow's Power Kits, for instance, provide all the core components (battery, inverter-charger, DC distribution) in a cohesive, easy-to-install package designed specifically for vehicles. They emphasize modularity, allowing users to easily select battery capacity (from 2kWh to 15kWh) and integrate solar panels.
Similarly, Bluetti offers powerful solutions like the Bluetti EP500 or the AC300 series, which are larger, more permanent power stations that can be integrated into an RV's electrical system and accept significant solar input. These systems often feature intelligent apps for monitoring and control, high-efficiency inverters, and long-lasting LiFePO4 batteries. They are ideal for RVers seeking a streamlined, high-capacity solution without the headache of individually selecting and wiring every component from scratch. If you're looking for robust, integrated power, diving into reviews like EcoFlow Delta Pro for Off-Grid: Specs and Review can give you a clear picture of what these modern all-in-one systems offer.
Installation Considerations for Your RV Solar Kit
Installing an off-grid solar kit on an RV comes with its own unique set of challenges and considerations compared to a stationary home system. Space, weight, vibration, and safety are all heightened concerns that need careful attention.
Roof Space, Panel Placement, and Shading
Your RV roof is prime real estate, often shared with air conditioners, vents, skylights, and antennas. Maximizing your solar harvest means smart panel placement. You’ll want to arrange panels to minimize shading from other rooftop obstacles. Even partial shading on one part of a panel or array can drastically reduce the output of the entire system. Consider your usual parking habits: do you often park under trees? If so, flexible or portable panels might be a better supplement to your fixed array, allowing you to move them into the sun.
The orientation of your panels is also important. While a fixed roof mount will generally be flat or slightly angled, optimizing for southern exposure (in the Northern Hemisphere) is key. For those seeking maximum output, tilt mounts allow you to manually adjust the panel angle seasonally or when parked, significantly boosting power generation, especially in winter or when the sun is low in the sky. However, tilt mounts add complexity and potential wind resistance when traveling. Always plan your layout carefully, measuring all available space and considering the path of the sun.
Wiring and Safety Best Practices
Proper wiring is paramount for both performance and safety. In an RV, wires are subjected to constant vibration and movement, so robust connections are crucial. Use the correct gauge wire for each circuit, accounting for current load and wire length to prevent voltage drop and overheating. DC wiring, from panels to charge controller and charge controller to batteries, is often thick gauge, and AC wiring from the inverter to your breaker panel needs to adhere to standard electrical codes. All connections should be secure, preferably crimped and heat-shrinked, and wires should be properly routed and protected in conduit or wire loom to prevent chafing or damage.
Fuses and breakers are non-negotiable safety devices. You need overcurrent protection for your solar array, between the charge controller and battery, and for the inverter’s DC input, as well as AC breakers for your inverter output. A master battery disconnect switch is also highly recommended, allowing you to safely shut down the entire DC system for maintenance or emergencies. Overlooking safety can have serious consequences in a confined space like an RV. For a comprehensive overview, understanding How to Wire an Off-Grid Solar System is essential for a safe and effective setup.
Permitting and RV-Specific Regulations
While permanent residential solar installations almost always require permits and inspections, the situation for RVs can be a bit murkier and often less stringent. Generally, if you're installing solar panels on your RV that are not permanently affixed to a building, you might not need a municipal building permit in the same way a home installation would. However, it's crucial to check local regulations if you plan to tie your RV's solar system into a permanent structure or if your RV serves as a primary residence on a fixed property for an extended period.
More importantly, if your RV is manufactured, any modifications to the electrical system could impact your RVIA (RV Industry Association) certification or warranty. While most DIY solar installations don't fall under strict governmental permitting, adhering to best practices and safety standards (like those in the National Electric Code, even if not legally required) is always advisable. If you ever plan to connect your RV's AC system to shore power, ensuring your inverter's output is properly isolated and protected is critical to prevent dangerous back-feeding. When in doubt, consulting with a qualified RV electrician or familiarizing yourself with Do You Need a Permit for Off-Grid Solar related to mobile installations can save you headaches.
Maximizing Your RV Solar Kit's Performance and Longevity
Installing your off-grid RV solar kit is a huge step, but the journey doesn't end there. To truly enjoy years of reliable, free power, you need to commit to smart usage habits and a bit of routine care. These practices will not only maximize your energy harvest but also extend the lifespan of your valuable components.
Regular Maintenance and Cleaning
Just like your RV itself, your solar system benefits from a little TLC. The most common maintenance task is keeping your solar panels clean. Dust, dirt, pollen, bird droppings, and even sap can accumulate on the panel surface, significantly reducing their efficiency. A simple wash with mild soap and water, using a soft brush or sponge, can often restore them to peak performance. Avoid abrasive cleaners or harsh scrubbing, which can scratch the glass.
Beyond cleaning, periodically inspect all connections – from your MC4 connectors on the roof to the battery terminals. Vibrations from travel can sometimes loosen connections, leading to increased resistance, voltage drop, and potential arcing. Check wire insulation for any signs of chafing or damage, and ensure all fuses and breakers are in good condition. For batteries, especially lead-acid, monitor water levels (if applicable) and keep terminals clean and corrosion-free. LiFePO4 batteries are generally lower maintenance, but ensuring they're operating within their recommended temperature range is important. Keeping up with Off-Grid Solar Maintenance Costs typically involves just a bit of time and effort rather than expensive repairs if you catch issues early.
Smart Energy Habits on the Road
Even with a robust solar system, adopting smart energy habits can make a huge difference in your off-grid experience. Think of your battery bank as a finite resource, especially when you're facing several cloudy days. This means being mindful of your power consumption.
- Prioritize efficient appliances: Whenever possible, use 12V DC appliances directly (e.g., 12V fans, refrigerators, LED lights) instead of running them through an inverter, which incurs efficiency losses.
- Time heavy loads: If you need to run high-wattage AC appliances like a microwave, coffee maker, or hair dryer, try to do so during peak sun hours. This allows your solar panels to directly supply most of the power, minimizing draw from your batteries.
- Unplug phantom loads: Many electronics draw a small amount of power even when turned off or in standby mode (e.g., TVs, chargers). Unplug them when not in use.
- Monitor your consumption: Use your system's monitoring tools (battery monitor, app) to understand what appliances draw the most power and how quickly your battery bank depletes. This knowledge empowers you to make informed decisions about your usage.
These small changes can significantly extend your battery autonomy and reduce reliance on backup charging methods, allowing you to stay off-grid longer.
Planning for Seasonal Variations
The amount of sunlight your solar panels receive varies dramatically throughout the year and depending on your geographical location. In winter months, daylight hours are shorter, and the sun's angle is lower, reducing solar input. Furthermore, snow cover on panels can completely block production. Conversely, extreme summer heat can slightly reduce panel efficiency.
To counteract these variations:
- Adjust panel tilt: If your RV panels are on tilt mounts, adjust them for optimal winter sun angle (steeper) and summer angle (flatter).
- Embrace flexibility: During periods of low sun, be prepared to conserve energy more diligently, reduce your electrical consumption, or utilize supplemental charging options like a portable solar generator (e.g., a Jackery unit) or a quiet conventional generator.
- Plan your travel: If year-round off-grid living is your goal, consider following the sun. Heading south for the winter can dramatically improve your solar harvest and overall comfort.
Understanding these seasonal impacts and planning accordingly is key to ensuring your off-grid solar system remains a reliable power source, no matter the season or where your RV adventures take you.
RV Off-Grid Solar Kit Comparison
To help you visualize the differences and choose the best fit for your RV lifestyle, here's a comparison of common off-grid solar kit types.
| Feature / Kit Type | Entry-Level Portable Kit (e.g., Jackery Explorer + SolarSaga) | Mid-Range Expandable Kit (e.g., Renogy 400W Kit) | High-Capacity Whole RV System (e.g., Custom Victron/EcoFlow) |
|---|---|---|---|
| Primary Use | Weekend camping, light use, backup, supplemental power | Extended trips, moderate daily use, small appliances | Full-time living, heavy appliance use (AC, microwave, water heater) |
| Solar Panels | 100-200W foldable/portable | 200-800W rigid, roof-mounted | 800W – 2000W+ rigid, roof or ground-mounted |
| Battery Type | Integrated LiFePO4 | LiFePO4 (100-300Ah) or AGM (200-600Ah) | LiFePO4 (300-600Ah+), often 24V/48V configurations |
| Inverter | Integrated pure sine wave (500W-2000W) | Standalone pure sine wave (1000W-3000W) | Powerful standalone or inverter-charger (3000W-5000W+) |
| Charge Controller | Integrated MPPT | Standalone MPPT (20A-60A) | High-capacity standalone MPPT (60A-100A+) |
| Installation | None (plug-and-play) | DIY-friendly to moderate complexity | Complex, often professional or very experienced DIY |
| Cost Range | $500 – $2,500 | $1,500 – $6,000 | $6,000 – $20,000+ |
| Key Advantage | Portability, simplicity, quick setup | Balance of performance, expandability, good value | Ultimate energy independence, comfort, reliability |
| Limitations | Limited power, no permanent integration | Can be challenging to expand beyond initial framework | High upfront cost, complex installation, weight |
Disclaimer
The information provided in this guide is intended for educational and informational purposes only and does not constitute professional advice. Off-grid solar systems involve high voltages and specialized knowledge. Improper installation or handling can result in serious injury, fire, or damage to property. Always consult with a qualified electrician or solar professional before installing or modifying any electrical system. Local codes and regulations may apply to your specific situation. We are not responsible for any actions taken based on the information provided herein.