How to Adjust Panel Tilt Seasonally
It can be incredibly frustrating to watch your off-grid solar production plummet as the seasons change, especially when winter days are short and cloudy. You might be wondering if there’s a way to squeeze more power out of your panels without adding more of them. The good news is, there is! Adjusting your solar panel tilt seasonally is one of the most effective and often overlooked strategies for maximizing your energy harvest year-round, ensuring your batteries stay charged and your lifestyle remains powered up. This comprehensive guide will walk you through why and how to make these vital adjustments.
Why Seasonal Solar Panel Tilt Adjustments Are Crucial for Off-Grid Living
When you’re living off-grid, every watt-hour counts. Unlike grid-tied systems where fluctuating production might just mean a slightly higher utility bill, for off-gridders, it can mean running out of power, relying heavily on a generator, or even going without essential appliances. Understanding the sun’s journey across the sky throughout the year is key to unlocking consistent power.
Understanding the Sun’s Path Throughout the Year
Imagine the sun as a spotlight moving across a stage. In summer, that spotlight is high in the sky, casting a direct, intense beam for many hours. As autumn approaches, it dips lower, and by winter, it’s barely skimming the horizon for much shorter periods, especially in northern latitudes. This change in the sun’s apparent height and daily arc is due to the Earth’s axial tilt relative to its orbit around the sun.
During the summer solstice, typically around June 21st in the Northern Hemisphere, the sun reaches its highest point in the sky. It delivers maximum direct sunlight for the longest duration. Conversely, during the winter solstice, around December 21st, the sun is at its lowest angle and day length is shortest. In between, during the spring and fall equinoxes (around March 20th and September 22nd, respectively), the sun's path is somewhere in the middle.
For your solar panels, this means that a fixed tilt angle that works perfectly in July will be far from optimal in January. If your panels are angled too steeply in summer, they're missing out on those high, direct rays. If they're too flat in winter, the low sun angle means much of the light is glancing off rather than being absorbed directly. This inefficiency directly translates to less power generation, which can be a real headache when you're trying to keep your lights on and your refrigerator running without grid backup.
Maximizing Energy Harvest in Different Seasons
Adjusting your solar panels to match the sun’s changing angles allows you to capture the most direct sunlight possible, significantly boosting your daily energy production. Think of it like a baseball catcher adjusting their glove – they move it to meet the ball head-on for the most effective catch. Your panels need to “catch” the sunlight head-on.
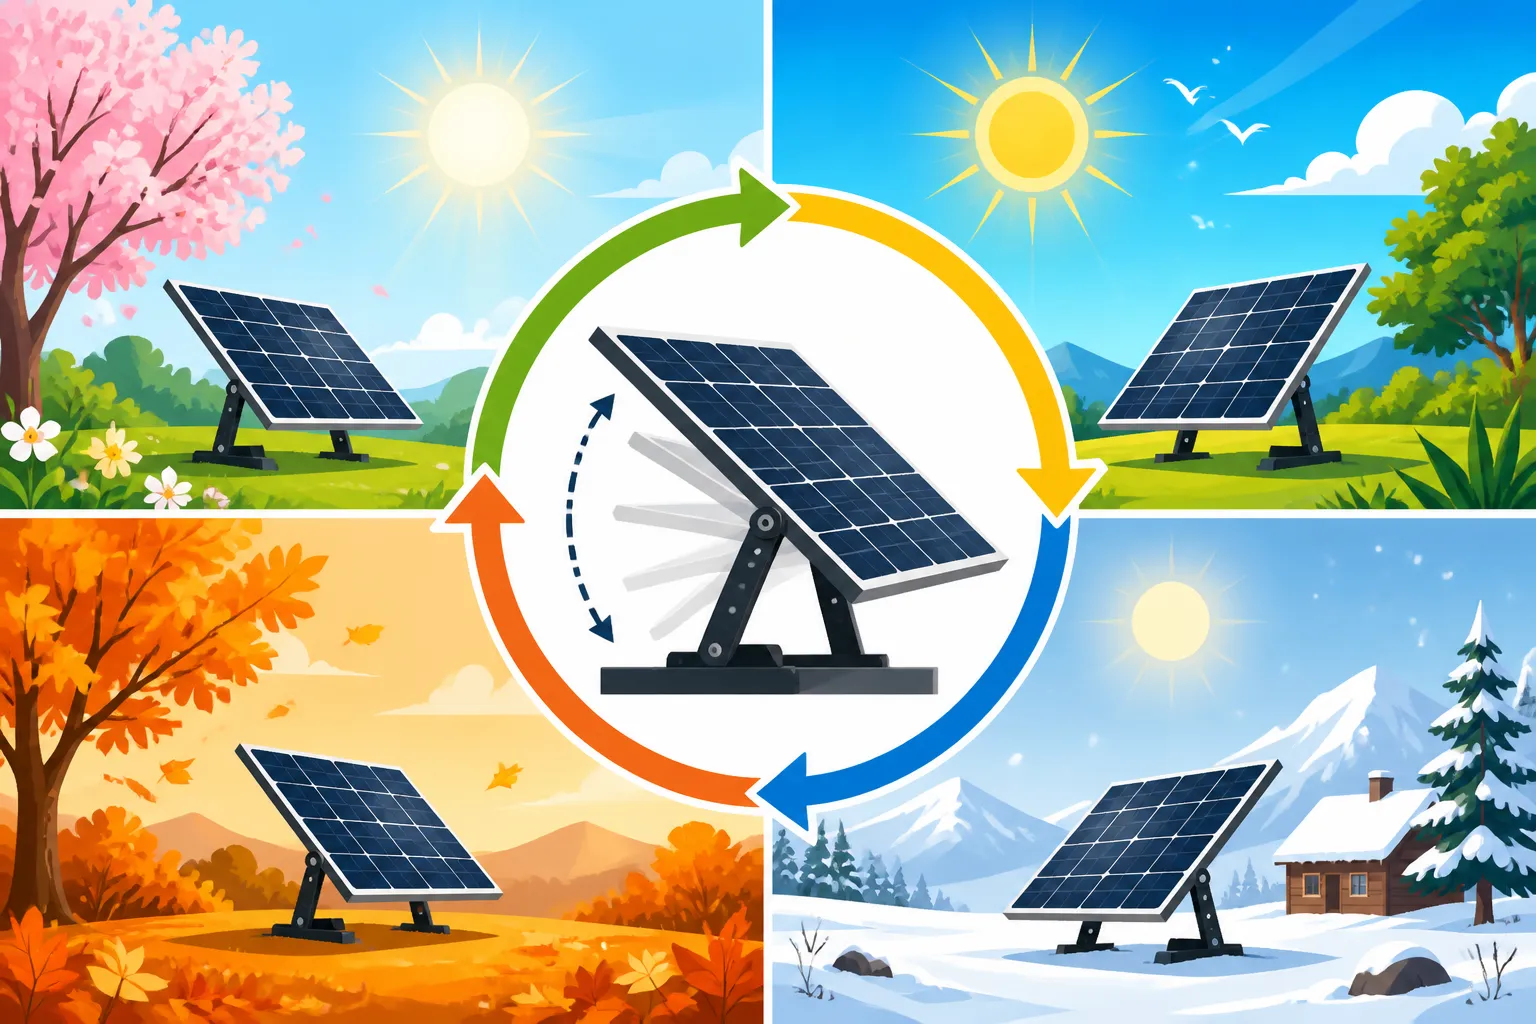
In the height of summer, when the sun is high and daylight hours are long, you want your panels to be flatter, aiming almost directly overhead. This helps them soak up the abundant midday sun and maintain production through the extended daylight. Neglecting this means your system might not be fully charging your batteries, leaving you with less stored energy for evening use or unexpected cloudy days.
When winter rolls around, and the sun hangs low, you need to tilt your panels much more steeply. This allows them to face the low winter sun more directly. It also has the added benefit of helping snow and ice slide off, which is a major concern for anyone living off-grid in colder climates. Without this steep tilt, a fixed-angle panel can become completely covered in snow, effectively shutting down your power generation until you manually clear it. This is a common frustration for many off-gridders, leading to excessive generator use and higher fuel costs. By adjusting your tilt, you ensure you're getting every possible photon from the winter sun, reducing the need for costly generator run-time and preserving the lifespan of your battery bank by keeping it within optimal charge cycles. Understanding how to manage your system for all seasons is critical for reliable power, and you can learn more about this in our guide on How to Design for Year-Round Off-Grid Power.
Calculating Your Optimal Seasonal Tilt Angles
Don’t worry, you don’t need a degree in astrophysics to figure out the best tilt for your panels. There are some simple, widely accepted formulas and tools that can guide you to the sweet spot for your specific location.
Simple Formulas for Tilt Angle Calculation
The most common and easy-to-remember rule of thumb involves using your geographical latitude. Your latitude essentially tells you how far north or south you are from the equator, and it’s a fundamental starting point for determining optimal tilt angles.
Here are the basic formulas for the Northern Hemisphere (adjust inversely for the Southern Hemisphere):
- Summer Tilt: To maximize summer production when the sun is highest, a good starting point is your latitude minus 15 degrees. For example, if you live at 40 degrees North latitude, your summer tilt would be roughly 25 degrees from horizontal (40 – 15 = 25). This flatter angle allows the panels to catch more of the high-angle sun.
- Winter Tilt: For those low winter sun angles, you want a steeper tilt. A common guideline is your latitude plus 15 degrees. So, at 40 degrees North, your winter tilt would be around 55 degrees from horizontal (40 + 15 = 55). This steeper angle helps capture the low-slung sun and promotes snow shedding.
- Spring/Fall (Equinox) Tilt: During the transitional seasons, when the sun's path is more balanced, simply setting your panel tilt to match your latitude is often optimal. At 40 degrees North, this would mean a 40-degree tilt.
These formulas are excellent general guidelines that provide a significant improvement over a fixed, non-adjusted system. They're based on the sun's average position and are designed to maximize overall energy production during those specific periods. Keep in mind that these are approximations; local weather patterns, horizon obstructions, and specific energy demands might lead you to slightly tweak these angles.
Using Online Calculators and Tools
While the basic formulas are fantastic for a quick estimate, if you want to get more precise, the internet is brimming with helpful resources. Many online solar calculators can give you highly specific recommendations for your exact location. These tools often take into account more variables, such as average cloud cover, local weather data, and even your specific panel type.
For example, the National Renewable Energy Laboratory (NREL) offers its PVWatts Calculator, which is a powerful tool for estimating solar production based on detailed location data, panel array size, and tilt/azimuth angles. While it's typically used for system sizing, you can experiment with different tilt angles to see their impact on monthly or annual energy output. Simpler online solar tilt calculators are also available – just input your latitude and they'll often suggest optimal seasonal angles.
These tools can be particularly useful if you're trying to fine-tune your system or if you have specific energy needs during certain months. They can show you how even a few degrees of adjustment can impact your daily kilowatt-hour production, helping you make informed decisions about your adjustment schedule. When planning your system, understanding how much battery capacity you need is just as important as panel tilt, and you can delve into that topic further in our guide on How Many Batteries for an Off-Grid System.
Practical Steps for Adjusting Your Off-Grid Solar Panels
Now that you understand the “why” and “what” of seasonal tilt adjustments, let’s get down to the “how.” The actual process isn’t overly complicated, but it does require some safety precautions and the right approach.
Types of Mounting Systems and Their Adjustability
The ease of adjusting your solar panels largely depends on the type of mounting system you have installed.
- Ground Mounts: These are often the easiest to adjust. Many ground mount systems, especially those designed for off-grid applications, come with built-in adjustability features. They might have a series of pre-drilled holes for different tilt angles or a simple bolt-and-pivot mechanism. Brands like Renogy and other solar component manufacturers offer adjustable ground mount frames, often available through retailers like Amazon, that make seasonal changes straightforward. You'll typically loosen a few bolts, slide the support arms to the desired angle, and re-tighten.
- Pole Mounts: Similar to ground mounts, pole mounts generally offer good adjustability. These systems elevate your panels on a single or multiple poles, making them less susceptible to shading and often easier to access for adjustments. They usually feature robust hardware designed to handle regular changes in tilt.
- Roof Mounts: This is where things can get a bit trickier.
- Fixed Roof Mounts: Many standard residential roof-mounted systems are designed for a fixed tilt, optimized for year-round production in a grid-tied scenario where minor fluctuations are less critical. Adjusting these can be difficult, sometimes requiring specialized hardware or even a partial reinstallation. If you have a fixed roof mount, you might need to consider if the effort and potential cost of modifying it for adjustability are worth the gains, or if oversizing your array to compensate for winter is a better strategy.
- Adjustable Roof Mounts: Some RV or cabin roof mounts, especially those designed for off-grid use, do offer adjustability. These often involve telescoping legs or pivot points that allow you to manually change the angle. However, safety is paramount when working on a roof, and careful planning is essential.
Before you begin, always inspect your mounting hardware. Ensure all bolts, clamps, and supports are in good condition and free from corrosion. Having a clear understanding of your specific mount's mechanics will make the adjustment process smoother and safer.
Step-by-Step Adjustment Process
Once you’ve identified your optimal tilt angle and confirmed your mounting system’s adjustability, follow these steps for a safe and effective adjustment:
- Safety First: Power Down! This is non-negotiable. Before you touch anything, always disconnect your solar array from your charge controller and inverter. You're working with electricity, even if it's DC from the panels. Locate your PV disconnect switch or breaker and turn it OFF. This prevents any live current from flowing through the system while you're working.
- Gather Your Tools: You'll typically need:
- A wrench or socket set (to loosen and tighten bolts on your mounting system).
- A reliable angle finder or protractor (many smartphone apps can also do this, or you can use a simple construction protractor).
- A tape measure (to ensure consistent height or spacing if adjusting multiple supports).
- Safety gear: gloves, sturdy shoes, and if working on a roof, a safety harness and fall protection.
- Loosen Mounting Hardware: Carefully loosen the bolts or clamps that secure your panels at their current tilt angle. Do not remove them completely, just enough so the panel can move freely. If you have multiple panels, it's often easiest to adjust them one by one or in small sections, depending on how they are grouped on your mount.
- Set the New Angle: Using your angle finder, adjust the panel(s) to the calculated optimal tilt angle for the season. For many adjustable ground and pole mounts, there are marked settings or a simple way to measure. For custom setups, you'll need to measure the angle from the horizontal surface to the face of your solar panel. Ensure the angle is consistent across all panels in your array to maximize uniformity in production.
- Re-tighten Everything Securely: Once the desired angle is achieved, firmly tighten all the bolts and clamps. Double-check every fastening point to ensure the panels are stable and won't shift in wind or adverse weather. You don't want your precious energy producers flying off in a storm!
- Reconnect and Monitor: After all adjustments are complete and everything is secure, reconnect your solar array to your charge controller and inverter. Turn your PV disconnect or breaker back ON. Now, take some time to monitor your system's performance. Check your battery monitor or inverter display to see the immediate impact on power generation. You should notice an improvement in current or wattage, especially during peak sun hours.
Seasonal Adjustment Schedule and Considerations
How often you adjust your panels is a personal choice, balancing the effort involved against the gains in power.
- Twice a Year (Minimum): Many off-gridders find a twice-yearly adjustment to be a good compromise. Once for summer (flatter angle) and once for winter (steeper angle). These adjustments would typically coincide with the spring and fall equinoxes, or a few weeks before the solstices, to prepare for the peak of each season.
- Four Times a Year (Optimal): For those seeking maximum optimization, adjusting four times a year – corresponding to the solstices and equinoxes – will yield the best results. This allows your panels to be perfectly aligned for each major seasonal shift:
- Late March (for spring angle, matching latitude)
- Late June (for summer angle, latitude – 15)
- Late September (for fall angle, matching latitude)
- Late December (for winter angle, latitude + 15)
Considerations:
- Local Weather Patterns: If you live in a region with extremely variable weather, like long periods of cloudiness in spring, you might slightly delay or advance an adjustment to align with clearer sky forecasts.
- Shading: Always re-evaluate potential shading after an adjustment. A new angle might expose your panels to more shade from trees or buildings that weren't an issue at the previous angle.
- Maintenance: Use the adjustment opportunity as a chance to perform other vital maintenance, such as cleaning your panels. Dirty panels can significantly reduce efficiency, negating some of the benefits of proper tilt. Check out our guide on How to Clean Off-Grid Solar Panels for best practices.
Benefits and Potential Drawbacks of Seasonal Adjustments
While the idea of maximizing power sounds universally good, it’s worth weighing the pros and cons of committing to seasonal tilt adjustments for your off-grid solar setup.
The Upsides: More Power, Longer Battery Life, Reduced Generator Use
The benefits of regularly adjusting your solar panel tilt are substantial for an off-grid system, translating directly into more reliable power and long-term savings.
- Increased Energy Production: This is the most immediate and obvious benefit. By positioning your panels to directly face the sun's path, you're ensuring they capture as much solar radiation as possible. This means more kilowatt-hours generated per day, which is absolutely critical for off-grid living where every watt matters. During short, low-sun winter days, a properly tilted array can make the difference between just enough power and constantly feeling like you're running on empty.
- Healthier Battery Bank and Extended Lifespan: A well-sized and optimally performing solar array means your battery bank will receive more consistent and complete charging cycles. Constantly undercharging batteries, especially lead-acid types, can significantly reduce their lifespan. Even with resilient LiFePO4 batteries, maintaining a healthy state of charge reduces stress. By consistently charging your batteries to their full capacity, you're promoting their longevity and ensuring they remain reliable for years to come. For those interested in the economics, this can directly impact your Off-Grid Solar Payback Period Explained.
- Reduced Reliance on Backup Generators: For most off-gridders, a backup generator is a necessary evil. It’s loud, it consumes fuel, and it requires maintenance. By optimizing your solar production through seasonal tilt adjustments, you'll naturally reduce the number of times you need to fire up that generator. This translates into significant savings on fuel costs, less wear and tear on your generator, and a quieter, more peaceful off-grid experience. Think of how much you'll save on gas when you're not running it for hours every winter evening!
- Better Snow and Debris Shedding: In snowy climates, a steeper winter tilt isn't just about catching more sun; it's about shedding snow. Panels set at a fixed, shallow angle can quickly accumulate a thick layer of snow, completely halting production until it's manually cleared. A steeper angle allows snow to slide off more easily, especially if the sun hits the panel and warms it slightly, saving you the labor of frequent roof climbs or snow removal.
The Downsides: Time, Effort, and Safety Concerns
While the benefits are clear, it’s also important to be realistic about the drawbacks of manually adjusting your solar panels.
- Time and Effort Investment: Each adjustment takes time. Depending on the size of your array and the ease of access, this could range from 15 minutes to an hour or more, several times a year. For a busy homesteader or someone living in a remote location, finding this time can be a challenge. It's a commitment that you need to be willing to make consistently for the best results.
- Physical Labor and Accessibility: Adjusting panels often involves working outdoors, sometimes in less-than-ideal weather conditions. If your panels are on a roof, it means climbing up, often with tools, and working at height. This inherently carries safety risks. Ground mounts or pole mounts are generally much safer and easier to adjust, but roof mounts require careful planning and appropriate safety gear to prevent falls or accidents.
- Cost of Adjustable Mounts: If your current system is on a fixed mount, converting it to an adjustable system can incur additional costs for new hardware or even professional installation. While the long-term gains in energy and battery life might justify this, it's an upfront investment to consider. Some off-gridders opt for a slightly oversized fixed array in regions with consistent sun to avoid the hassle of adjustments, but this often leads to higher initial costs. You can explore a detailed breakdown of Off-Grid Solar Cost: Complete Breakdown for various components.
- Potential for Error: Incorrectly adjusting panels, or not tightening hardware sufficiently, could lead to suboptimal performance or, worse, damage to your panels in high winds. Always double-check your angles and ensure all components are secure.
Ultimately, the decision to implement seasonal tilt adjustments comes down to your individual circumstances, system size, and willingness to invest the time and effort. For many off-gridders, the tangible benefits of increased energy independence and reduced operational costs make it a worthwhile endeavor.
Optimizing Further: Advanced Tips for Off-Grid Solar Performance
Adjusting your panel tilt is a fantastic step, but it’s just one piece of the puzzle for a truly optimized off-grid solar system. There are other elements you can focus on to squeeze every last drop of power out of your setup.
Beyond Tilt: Panel Cleaning and Maintenance
Even the most perfectly tilted solar panels won’t perform optimally if they’re covered in grime. Dust, pollen, bird droppings, leaves, and especially snow can drastically reduce a panel’s efficiency. Think about it: if even 10% of your panel is shaded by dirt, you’re losing at least 10% of its potential output.
Regular cleaning, especially after a period of high winds or during dusty seasons, is crucial. A simple rinse with a hose can often dislodge loose debris. For more stubborn dirt, a soft brush and mild soap with water, followed by a thorough rinse, usually does the trick. Always clean panels when they are cool, ideally in the morning or late afternoon, to avoid thermal shock and water spotting.
During your seasonal tilt adjustments, take the opportunity to visually inspect your panels. Look for any signs of physical damage, such as cracks in the glass or frame, or delamination. Check the wiring for any frayed cables or loose connections, and ensure that all mounting hardware remains secure. Proactive maintenance can prevent small issues from becoming costly problems down the line, ensuring your system's longevity and peak performance. You can delve deeper into this with our guide on Off-Grid Solar Maintenance Costs.
Monitoring Your System’s Performance
You can’t manage what you don’t measure. For off-grid solar, diligent monitoring is your best friend. It allows you to see the real-time impact of your tilt adjustments, identify any dips in production, and understand your overall energy consumption patterns.
Modern charge controllers and inverters often come with built-in displays that show current voltage, amperage, and kilowatt-hour production. Many also have Bluetooth or Wi-Fi capabilities that connect to smartphone apps, providing detailed historical data and real-time performance metrics. For instance, high-quality brands like Victron Energy offer powerful monitoring solutions, such as their SmartShunt battery monitor or Venus OS devices, which give you a comprehensive overview of your battery's state of charge, incoming solar power, and outgoing loads. This data is invaluable for understanding how your adjustments are affecting your daily energy harvest.
By regularly checking your system's output, especially during and after a tilt adjustment, you can confirm that your changes are having the desired effect. If you adjust your panels for winter but still notice unusually low production on clear days, it might indicate another issue, such as shading, a dirty panel, or a component malfunction. Monitoring helps you troubleshoot and fine-tune your off-grid power system for maximum efficiency and reliability, helping you understand how to budget for off-grid batteries. For detailed insights, check out our article on How to Install an Off-Grid Battery Monitor.
| Season | Optimal Tilt Angle (Approx.) | Rationale | Key Benefit |
|---|---|---|---|
| Winter | Latitude + 15 degrees (or more) | Sun is lowest in the sky; maximizes direct hit angle. | Maximize production during short, weak days; aids snow shedding. |
| Spring/Fall | Equal to Latitude | Sun's path is balanced; good all-around angle. | Balanced production during transitional seasons. |
| Summer | Latitude – 15 degrees | Sun is highest in the sky; flatter angle catches high-angle rays. | Maximize production during long daylight hours. |
| Example: 40° N | Winter: 55° | Spring/Fall: 40° | Summer: 25° |
Disclaimer
Please remember that this guide provides general information for educational purposes only. Working with solar electrical systems can be dangerous. Always prioritize safety, disconnect power before making physical adjustments, and consult with a qualified electrician or solar professional if you are unsure about any steps or require assistance with your specific setup. Local regulations and permitting requirements may also apply to your off-grid solar installation.