How to Install a Battery Disconnect
If you're diving into the world of off-grid solar, you know that managing power is a big part of the adventure. But what happens when you need to work on your system, say, swap out a battery or troubleshoot an inverter, and you're dealing with a powerful, live battery bank? The thought can be intimidating, even downright dangerous, and that's precisely why understanding how to install a battery disconnect is not just good practice – it's absolutely crucial for safety and ease of maintenance. This guide is going to walk you through everything you need to know to safely and effectively add this vital component to your setup.
Why a Battery Disconnect is Non-Negotiable for Off-Grid Systems
When you're dealing with electrical systems, especially high-capacity battery banks found in off-grid solar setups, safety should always be your number one priority. A battery disconnect isn't just an extra component; it's a fundamental safety device that protects both you and your valuable equipment from potential hazards.
Safety First: Protecting Yourself and Your Equipment
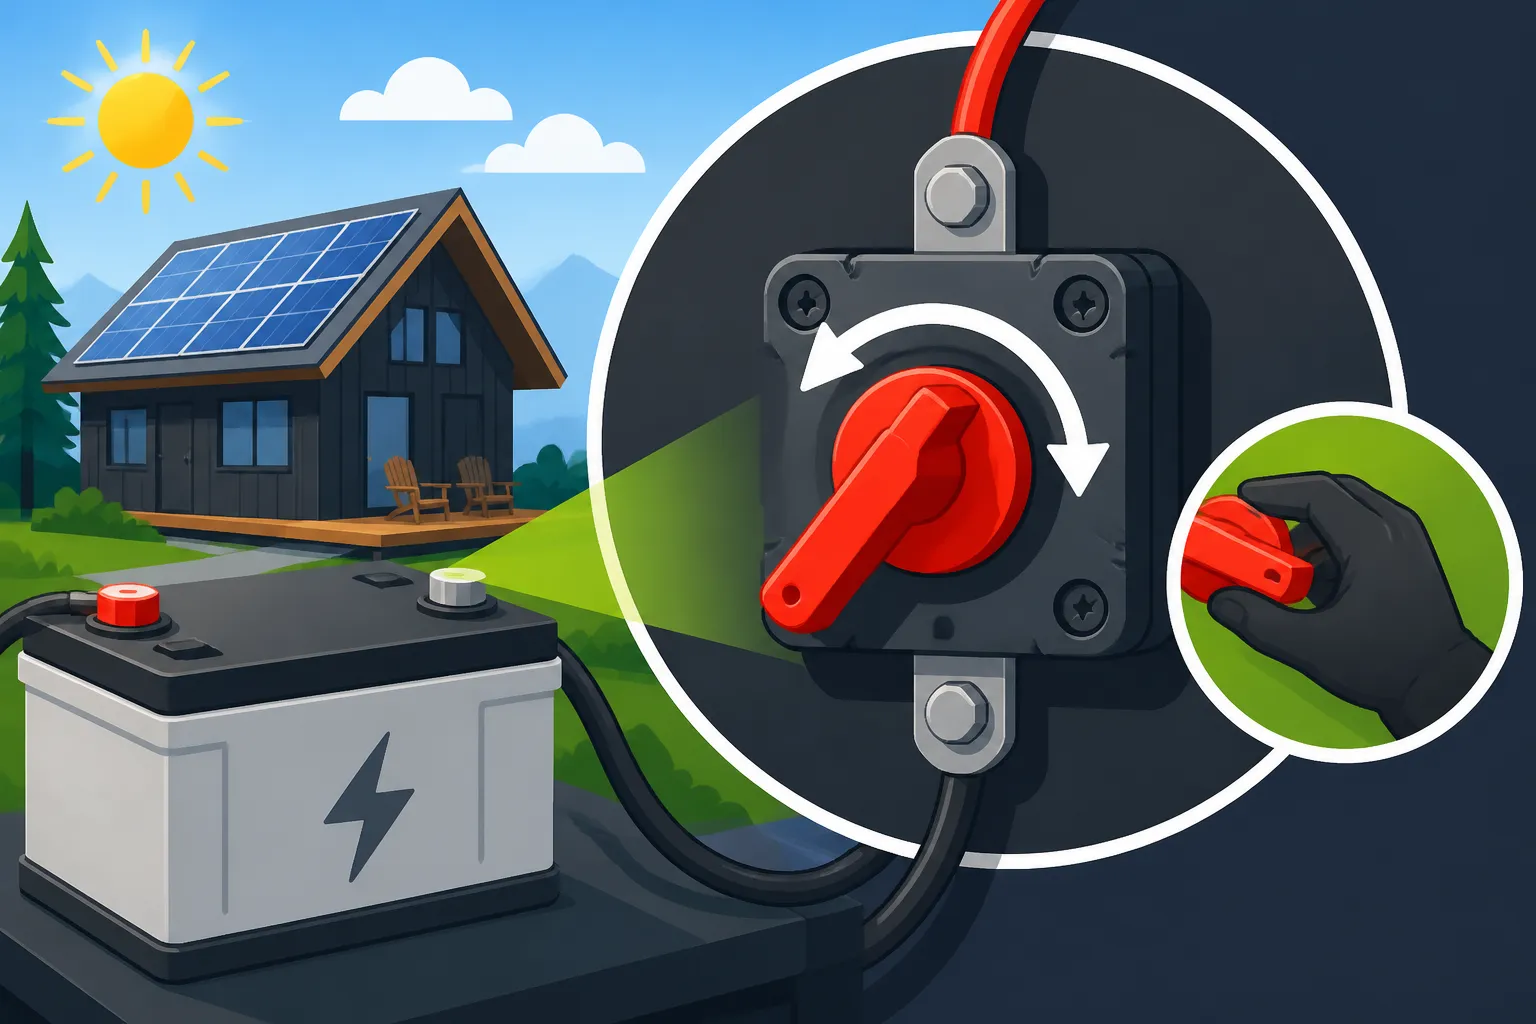
Imagine for a moment trying to change a flat tire while the car is still in drive – sounds pretty reckless, right? That's a bit like trying to work on your off-grid electrical system with live power flowing from your batteries. Direct Current (DC) electricity, especially from a large battery bank, carries significant punch. We're talking about high amperage that, in a short circuit, can lead to immediate and severe consequences like electrical fires, melted wires, or even explosions. These aren't scare tactics; they're real risks that off-gridders have to contend with. A battery disconnect provides a critical break in this electrical path, essentially hitting the "off" switch for your entire battery bank.
This simple act of isolation is your first line of defense. Without it, even a small mistake, like accidentally dropping a wrench across terminals or connecting a wire incorrectly, can turn into a catastrophic event. It protects you from accidental electrocution or burns, and it safeguards your expensive components like your inverter, charge controller, and even the batteries themselves from damage caused by sudden surges or short circuits during installation, maintenance, or troubleshooting. Think of it as a circuit breaker dedicated solely to your battery power, providing immediate peace of mind and protection.
Essential for Maintenance and Troubleshooting
Beyond immediate safety, a battery disconnect dramatically simplifies the ongoing care and problem-solving for your off-grid system. Anyone who's spent time with a complex setup knows that things sometimes need adjusting, cleaning, or even replacing. Trying to perform these tasks with the system fully energized is not only dangerous but often impractical.
Let's say you need to replace a faulty battery in your bank, or maybe you're upgrading your system to include a larger inverter. Instead of having to meticulously unhook every single wire, creating sparks and anxiety, a quick flip of the disconnect switch isolates the entire battery bank. This allows you to work confidently and methodically on the downstream components or the battery bank itself without worrying about live current. It’s like being able to pause the electricity flow to a specific area of your house while you fix an outlet, rather than having to shut down power to the whole neighborhood. For troubleshooting, a disconnect is invaluable. If you're chasing an unexpected drain or a component malfunction, being able to cleanly isolate the battery power allows you to systematically test different parts of your system without the constant threat of power flowing through. It's an indispensable tool for anyone serious about managing their off-grid power effectively and safely.
Types of Battery Disconnects and How to Choose
Choosing the right battery disconnect isn't just about picking the biggest switch you can find. It involves understanding the demands of your system and selecting a device that can handle that power reliably. There are primarily two types to consider: manual switches and automatic breakers.
Manual Disconnect Switches
Manual disconnect switches are exactly what they sound like: physical switches that you manually turn on or off to break the circuit. These are often heavy-duty rotary switches or knife-blade style switches.
Pros:
- Simplicity: They are straightforward devices with a clear "on" and "off" state, making them easy to understand and operate.
- Cost-effectiveness: Generally, manual switches are less expensive than automatic breakers for similar current ratings. You can find solid, high-amperage options on platforms like Amazon without breaking the bank.
- Reliability: With fewer moving parts and electronic components, they tend to be extremely robust and reliable. They won't trip unexpectedly due to minor fluctuations, which can be both a blessing and a curse.
Cons:
- Requires manual operation: If you're not there to flip the switch, it won't operate. This means no automatic protection against overcurrent situations.
- No overcurrent protection: A manual disconnect is purely for isolation; it won't prevent damage if an appliance draws too much power or if there's a short circuit elsewhere in the system. For that, you'll still need fuses or circuit breakers.
Considerations: When selecting a manual switch, pay close attention to its amperage rating and voltage rating. The switch must be rated for at least the maximum continuous current your battery bank can output and the nominal voltage of your system (12V, 24V, or 48V). It's always wise to oversize slightly for safety and longevity. Look for switches with robust, marine-grade construction if possible, especially if your setup might be exposed to moisture or extreme temperatures. A good quality switch will have large, solid terminals for secure cable connections.
Automatic Disconnects and Breakers
Automatic disconnects, typically in the form of DC circuit breakers, offer both isolation and overcurrent protection. These devices will "trip" and open the circuit automatically if the current flowing through them exceeds a certain threshold.
Pros:
- Overcurrent protection: This is their biggest advantage. If something goes wrong—like a short circuit in your inverter or an appliance drawing excessive current—the breaker will trip, preventing damage to your batteries and other components.
- Convenience: Many automatic breakers have a push-button reset, making it easy to restore power once the fault has been cleared.
- Dual functionality: They serve as both a safety disconnect and an overcurrent protection device, potentially simplifying your wiring slightly by combining roles.
Cons:
- Potentially higher cost: High-quality DC circuit breakers, especially for larger systems, can be more expensive than simple manual switches.
- May reset prematurely: If not sized correctly or if you have high surge loads, a breaker might trip when it shouldn't, leading to nuisance power interruptions.
- Complexity: Some larger breakers can be a bit more complex to install and understand their tripping characteristics.
Examples: Companies like Renogy and others offer a range of DC circuit breakers suitable for off-grid systems. These often come in panel-mount or surface-mount configurations with various amperage ratings.
Considerations:
- Interrupting Capacity (AIC): This is crucial. It refers to the maximum fault current a breaker can safely interrupt. Your breaker's AIC must be higher than the maximum fault current your battery bank can produce. This is especially important for large lithium battery banks, which can deliver massive amounts of current in a short circuit.
- Trip Curve: Different breakers have different trip curves (how quickly they trip at a given overcurrent). For battery disconnects, you generally want a "slow" or "thermal" trip curve that tolerates short-duration surges (like an inverter starting up) but trips on sustained overcurrents.
- Reset vs. Non-Reset: Most are resettable, but some very high-amperage industrial breakers might be single-use. Ensure you get a resettable type for practical off-grid use.
- Coordination with Fuses: While a DC breaker offers overcurrent protection, it often works in conjunction with fuses. Fuses are typically faster and cheaper for catastrophic short circuits, while breakers provide more convenient protection for common overloads. It's often recommended to have a fuse as the ultimate protection right at the battery terminal, followed by a battery disconnect (which could be a breaker) downstream.
Sizing Your Disconnect Properly
This step is absolutely critical. An undersized disconnect is a dangerous disconnect.
1. Calculate Maximum Continuous Current:
You need to know the maximum continuous current that will flow through this disconnect. This is usually determined by your inverter's maximum continuous draw.
- Formula:
Amps = Watts / Volts - Let's say you have a 3000-watt (W) inverter operating on a 24-volt (V) battery bank.
3000 W / 24 V = 125 Amps.
- Now, inverters aren't 100% efficient. You'll typically lose 10-15% of power in the conversion process. So, to be safe, you might add 15% to that.
125 Amps * 1.15 = 143.75 Amps.
- This means your disconnect should be rated for at least 144 amps. But don't stop there.
2. Account for Surge Loads:
Inverters can have significant surge capacities, often double their continuous rating, for short periods to start motors (like a well pump or refrigerator compressor). While this surge doesn't last long, your wiring and disconnect must be able to handle it without melting or tripping instantly. If you choose a breaker, ensure its trip curve can accommodate these brief surges. For a manual switch, it's about not exceeding its instantaneous rating (which is often much higher than its continuous rating, but verify).
3. Oversize for Safety and Longevity:
A general rule of thumb is to size your disconnect at 125% to 150% of your maximum anticipated continuous current.
- Using our 143.75 Amp example:
143.75 Amps * 1.25 = 179.68 Amps143.75 Amps * 1.50 = 215.62 Amps
- In this case, a 200 Amp or 250 Amp disconnect would be appropriate. If you're using a DC breaker, choosing one that's slightly oversized helps prevent nuisance tripping from momentary surges.
- Always match the voltage rating to your system (e.g., a 48V system needs a 48V or higher rated disconnect).
Choosing the correct size is a safety measure. An undersized disconnect will overheat, potentially fail, or if it's a breaker, constantly trip, which is incredibly frustrating for day-to-day living.
| Feature | Manual Disconnect Switch | DC Circuit Breaker |
|---|---|---|
| Primary Function | System Isolation (on/off) | System Isolation & Overcurrent Protection |
| Safety Feature | Prevents accidental discharge/shocks during work | Prevents overcurrents, short circuits, and fires |
| Cost | Generally lower | Generally higher for equivalent amperage |
| Complexity | Simple "flip the switch" operation | May have trip curves, interrupting capacity ratings |
| Resetability | Always manually resettable (no trip mechanism) | Manually resettable after a trip |
| Response to Fault | None (requires separate fuse/breaker) | Automatic trip on overcurrent/short circuit |
| Typical Use | Main battery disconnect where fuses are also present | Main battery disconnect, individual circuit protection |
This table provides a quick overview, but remember that for comprehensive safety, a well-designed off-grid system often incorporates both fuses (for ultimate short-circuit protection right at the battery terminals) and a battery disconnect, which might be a manual switch or a high-amperage DC breaker acting as both.
Step-by-Step Installation Guide for a Battery Disconnect
Alright, let's get down to the nitty-gritty of installing this essential piece of equipment. Taking your time and following these steps meticulously will ensure a safe and successful installation.
Preparatory Steps and Safety Precautions
Before you even think about cutting wires, it's vital to get everything in order and ensure your safety. This isn't just a suggestion; it’s a non-negotiable part of working with high-voltage DC systems.
-
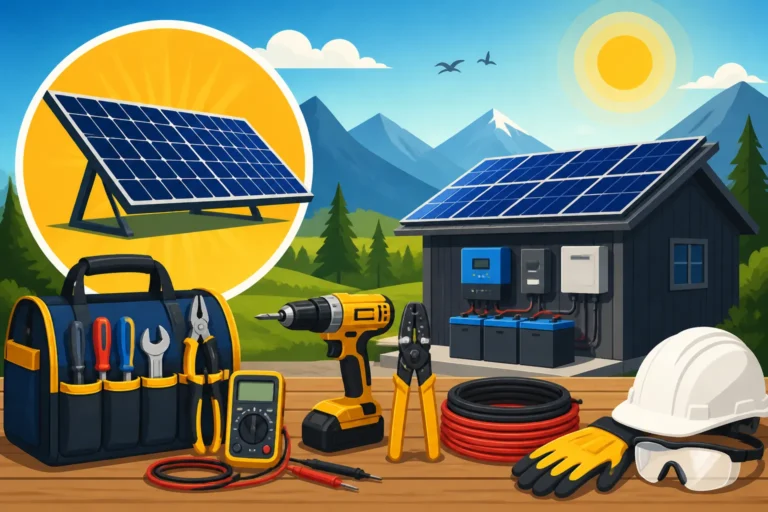
Gather Your Tools: You'll need:
- Safety Gear: Insulated gloves, safety glasses, and ideally, non-conductive shoes. Seriously, don't skip this.
- Wire Strippers/Cutters: Heavy-duty ones capable of handling large gauge cables (00 AWG, 4/0 AWG, etc., depending on your system).
- Crimpers: A heavy-duty hydraulic or hammer crimper for securely attaching lugs to your battery cables. Standard hand crimpers often aren't enough for large gauges.
- Multimeter: Essential for checking voltage and continuity.
- Torque Wrench: To ensure all terminals are tightened to manufacturer specifications, preventing loose connections and heat buildup.
- Heat Gun: For shrinking heat-shrink tubing over crimped connections.
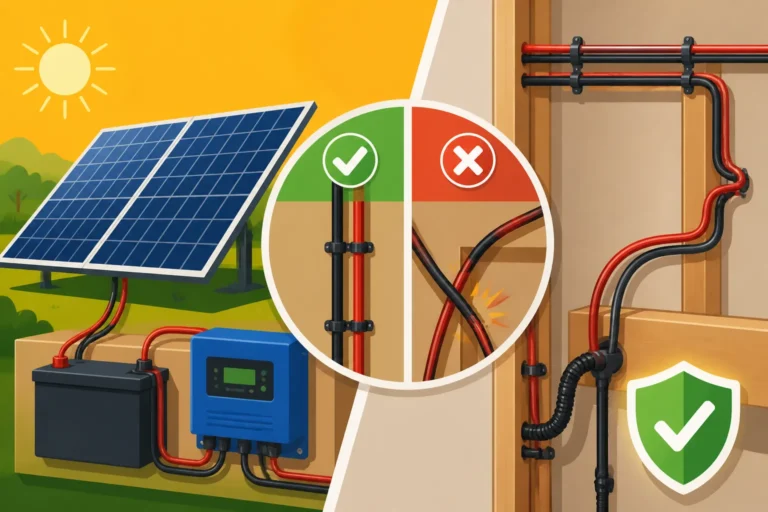
- Cable Ties/Management: To keep your wiring neat and secure.
- Fire Extinguisher: A Class C (electrical) fire extinguisher should always be within reach when working on live electrical systems.
- Insulating Tape: Just in case you need to temporarily cover an exposed terminal.
-
Disconnect All Loads: Before touching your battery bank, turn off your inverter, charge controller, and any other loads connected to your system. This minimizes the chance of an unexpected power draw or surge while you're working. Ideally, turn off your solar array by covering panels or using a PV disconnect switch as well, so no power is being generated. If you are learning how to install an off-grid solar system from scratch, this will be one of the earlier steps.
-
Double-Check Wire Sizes and Connections: Ensure that the existing wires are correctly sized for your system's current and that all current connections are secure. If you're unsure about proper wire sizing, refer to resources like "How to Size Wire and Cables" or consult a professional. Loose connections are a primary cause of resistance, heat, and potential fires.
-
Location, Location, Location: Choose an appropriate location for your battery disconnect. It should be:
- Close to the Battery Bank: The closer, the better. This minimizes the length of unprotected cable between the battery (the power source) and the disconnect. The National Electrical Code (NEC) typically recommends overcurrent protection (like a fuse, which should precede the disconnect) within a few inches of the battery terminal.
- Accessible: You need to be able to easily reach and operate the switch.
- Dry and Ventilated: Protect it from moisture and ensure adequate airflow if it's enclosed. If you're installing a battery bank, you might also be considering how to build a battery box that can house your disconnect safely.
-
Read the Manuals: Seriously, read the installation instructions for your specific battery disconnect switch or breaker. Manufacturers often have specific recommendations or requirements you need to follow.
Wiring the Disconnect Switch or Breaker
This is where we connect the disconnect into your system's main positive battery cable.
-
Identify the Positive Line: Your battery bank will have a main positive (+) and a main negative (-) cable running to your charge controller, inverter, or busbar. The battery disconnect must be installed on the main positive cable.
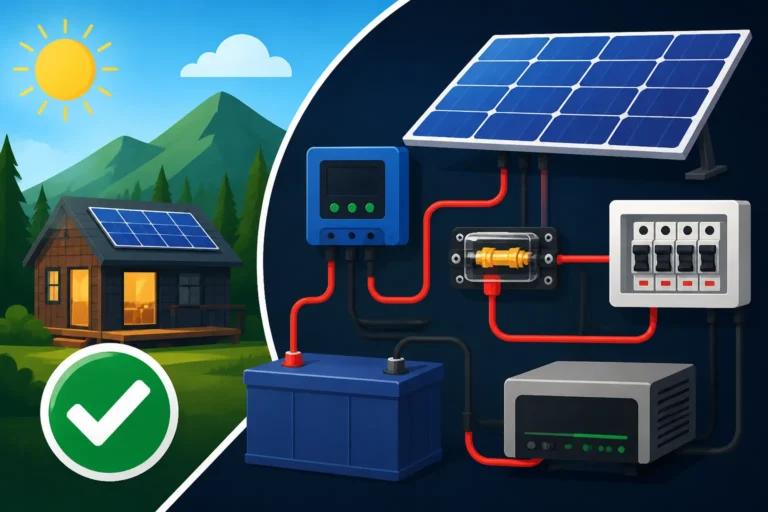
- Crucial Point: If you have fuses (and you really should, check out our guide on how to install fuses and breakers), the battery disconnect is typically placed after the main battery fuse (which is right at the battery terminal) and before your inverter or charge controller. This ensures the fuse provides ultimate protection against a short before the disconnect, and the disconnect provides isolation for the rest of the system.
-
Disconnect the Main Positive Battery Cable: With all loads off and safety gear on, carefully disconnect the main positive cable from either your battery bank's positive terminal or the input to your inverter/charge controller. Be extremely careful not to let this cable touch any metal surfaces or the negative terminal. It's still live on one end! Secure the disconnected end so it cannot accidentally make contact.
-
Cut and Strip the Cable: Determine the exact length of cable needed to run from the battery fuse (or battery terminal if no fuse yet) to one terminal of the disconnect, and then from the other terminal of the disconnect to your inverter/charge controller. You'll likely be cutting the existing main positive cable to insert the disconnect.
- Use your heavy-duty cable cutters.
- Carefully strip the insulation from the ends of the cables, exposing enough copper to fit securely into your chosen lug or disconnect terminal. Be precise; don't nick the copper strands.
-
Crimp Lugs (if applicable): If your disconnect uses stud terminals, you'll need to crimp appropriate-sized lugs onto the stripped cable ends.
- Insert the stripped wire fully into the lug barrel.
- Use your hydraulic or hammer crimper to make a secure crimp. A good crimp is essential for low resistance and efficient power transfer.
- After crimping, slide heat-shrink tubing over the connection and shrink it with a heat gun. This insulates and protects the connection from corrosion.
-
Connect to the Disconnect:
- Connect one end of your prepared cable (from the battery side, ideally via a fuse) to one terminal of the disconnect.
- Connect the other prepared cable (leading to your inverter/charge controller) to the other terminal of the disconnect.
- Pay attention to direction if your disconnect or breaker has an input/output designation. While most manual disconnects are bidirectional, some DC breakers are designed for current to flow in a specific direction.
- Use your torque wrench to tighten all connections to the manufacturer's specified torque settings. Over-tightening can damage terminals; under-tightening creates resistance and heat.
-
Secure the Disconnect: Mount the disconnect switch or breaker firmly in its chosen location using appropriate hardware. Ensure it's not rattling or susceptible to vibration.
-
Reconnect the Main Positive Battery Cable: Once all connections are secure, insulated, and mounted, carefully reconnect the main positive battery cable (now with the disconnect in line) to its original destination (inverter/charge controller input).
Remember, you might be dealing with system voltages like 12V, 24V, or a powerful 48V system. The principles are the same, but the power levels and potential for danger increase with voltage and amperage. This installation is a critical part of your overall Off-Grid Solar Wiring Diagram Explained and overall system reliability.
Testing and Finalizing Your Installation
You've done the hard work, now let's make sure it's working as expected and button things up.
-
Initial Continuity Check:
- With the disconnect in the "off" position, use your multimeter to check for continuity across the disconnect's terminals. There should be no continuity (an open circuit).
- Flip the disconnect to the "on" position. Now, there should be continuity (a closed circuit).
- Then, with the disconnect still "on", check the voltage at the output side of the disconnect. It should match your battery bank's voltage. This confirms the power is flowing through.
-
Gradual Reintroduction of Loads:
- Before powering everything up at once, start by reconnecting your charge controller (if it was disconnected from the battery). Let it establish connection with the battery bank.
- Next, turn on your inverter. Listen for any unusual sounds or smells.
- Finally, gradually reintroduce your household loads one by one. Check for normal operation of each appliance. This phased approach helps you identify any issues if something isn't quite right.
-
Monitoring System Performance: Keep an eye on your system for the first few hours or days after installation.
- Check for any signs of overheating at the disconnect switch or the cable connections (hot spots, burnt smell). This indicates a poor connection or an undersized component.
- Use a battery monitor (if you have one) to confirm proper charging and discharging.
- Ensure your battery disconnect operates smoothly and reliably whenever you need to use it.
-
Labeling: Once everything is working, clearly label your battery disconnect. Indicate "ON" and "OFF" positions, and what it controls (e.g., "Main Battery Disconnect"). This simple step is invaluable for future maintenance and for anyone else who might need to interact with your system. A well-labeled, organized system is a safe system.
Common Mistakes to Avoid and Best Practices
Even experienced off-gridders can make mistakes. Being aware of common pitfalls can save you a lot of headache, and potentially danger, down the road.
Undersizing and Incorrect Placement
One of the most dangerous mistakes you can make is installing an undersized battery disconnect. We covered sizing in detail earlier, but it bears repeating: if your disconnect can't handle the maximum current your battery bank and inverter can deliver, it will overheat, melt, or fail. This isn't just an inconvenience; it's a fire hazard. Always err on the side of caution and choose a disconnect with an amperage rating significantly higher than your calculated maximum continuous current.
Equally critical is correct placement. The battery disconnect must be on the positive line of your main battery bank. Placing it on the negative line technically breaks the circuit, but it's not standard practice and can complicate troubleshooting and grounding schemes. More importantly, it needs to be as close to the battery bank as safely possible, specifically after any main battery fuses. The idea is to protect the longest, highest-current carrying cables immediately after they leave the battery, which is the source of all that raw power. Not placing it correctly, or trying to put it mid-circuit between, say, your charge controller and your solar panels, misses its fundamental purpose of isolating the high-energy battery source. For larger systems, a common mistake is not fully understanding the implications of different system voltages; a 12V system has vastly different current requirements than a 48V system. If you're pondering 12V vs 24V vs 48V: Which to Choose, remember that higher voltages mean lower currents for the same power, often allowing for smaller cable gauges and disconnects, but the safety principles remain.
Neglecting Proper Wiring and Connections
A battery disconnect is only as good as its connections. Loose terminals are a silent killer in off-grid solar systems. They create resistance, which generates heat. Over time, this heat can melt insulation, damage terminals, and lead to total component failure or, worst-case scenario, an electrical fire. This is why a torque wrench is essential. Every connection, especially those carrying high current, needs to be tightened to the manufacturer's specifications.
Using undersized or improperly insulated cables is another major error. Just like the disconnect itself, your cables must be rated for the maximum current of your system. Using automotive-grade wire for a high-amperage off-grid system is a recipe for disaster. Always use appropriately sized, flexible, fine-stranded copper cable (like welding cable) and ensure all exposed connections are properly insulated with heat-shrink tubing. Frayed wire strands or poor crimps on battery lugs also contribute to resistance and heat. Invest in a quality crimping tool; a cheap, ill-fitting crimp can compromise the entire connection. Proper wiring is fundamental to Off-Grid Solar Wiring Best Practices.
Integrating with Other Safety Devices
A battery disconnect doesn't work in isolation; it's one piece of a larger safety puzzle. A common mistake is to think that installing a disconnect means you don't need fuses or other breakers. This couldn't be further from the truth.
- Fuses: Fuses are critical for ultimate short-circuit protection. A main fuse should be installed as close as possible to the positive terminal of your battery bank (within 6-18 inches, depending on code requirements). This fuse protects the main battery cable and the rest of your system from catastrophic short circuits that a breaker might not trip fast enough for, or that a manual disconnect wouldn't react to at all. If you're learning how to install an off-grid battery bank, integrating these components from the start is paramount.
- DC Circuit Breakers: While your battery disconnect might be a breaker itself, you'll likely need additional DC circuit breakers for individual circuits or components, such as between your solar charge controller and your solar array (a PV disconnect) or for specific DC loads. These breakers protect against overcurrents specific to those parts of the system.
- Grounding: Proper grounding of your entire off-grid solar system is vital. This protects against fault currents and lightning strikes. The battery disconnect, like all other components, should be part of a properly grounded system. You can read more about this in our guide on Off-Grid Solar Safety and Grounding.
Think of your off-grid system's electrical safety as a layered approach: fuses at the source (batteries), followed by a main battery disconnect for isolation, and then additional breakers for specific components and circuits. This comprehensive approach ensures that multiple safety measures are in place to protect against various electrical faults and allow for safe maintenance.
Disclaimer
The information provided in this article is for educational and informational purposes only and does not constitute professional electrical advice. Working with electrical systems, especially off-grid solar, can be dangerous. Always consult with a qualified and licensed electrician or solar professional before undertaking any electrical work to ensure compliance with local codes and safety standards. Improper installation can lead to property damage, serious injury, or death.