How to Wire an MPPT Charge Controller
Wiring an MPPT charge controller can feel like stepping into a tangled web of wires and confusing diagrams, especially if you're new to the world of off-grid solar. It's totally understandable to feel a bit overwhelmed and worried about making a mistake that could damage expensive equipment or, worse, create a safety hazard. This comprehensive guide is here to walk you through the entire process, demystifying each connection so you can confidently wire your MPPT charge controller and get your off-grid system humming.
Understanding the MPPT Charge Controller's Role
Before we grab any tools, let's chat about what an MPPT charge controller actually does and why it's such a crucial piece of your off-grid puzzle. Think of it as the brain between your solar panels and your battery bank. Its job is to optimize the power flow, ensuring your batteries get charged efficiently and safely without overcharging or being damaged by fluctuating solar input.
Why MPPT is Superior for Off-Grid Systems
MPPT stands for Maximum Power Point Tracking, and it's a game-changer compared to older PWM (Pulse Width Modulation) controllers. While a PWM controller essentially just reduces the solar panel voltage to match your battery voltage, often wasting excess power as heat, an MPPT controller is much smarter. It constantly scans the voltage and current output from your solar panels to find the sweet spot – the maximum power point – where your panels are generating the most power. It then converts this excess voltage into additional current at the battery's voltage, delivering significantly more energy to your battery bank, especially in cooler weather or when light conditions are less than ideal. This means you get more usable power from your solar array, which is a huge benefit when every watt counts in an off-grid setup. If you're curious about the technical differences, we have a detailed guide on MPPT vs PWM Charge Controllers.
For example, imagine your 12-volt battery bank is at 12.5 volts, and your solar panels are producing 18 volts at their maximum power point. A PWM controller would simply drop that 18 volts down to 12.5 volts, effectively losing the difference. An MPPT controller, however, takes that 18 volts, converts it into 12.5 volts, but then increases the amperage delivered to your battery. It's like having a special gear that allows your solar panels to work at their optimal performance regardless of the battery's state of charge, leading to faster charging and better overall system performance. This efficiency is why most serious off-grid systems opt for MPPT technology, making it easier to meet your energy needs day in and day out.
Key Components of an MPPT Controller
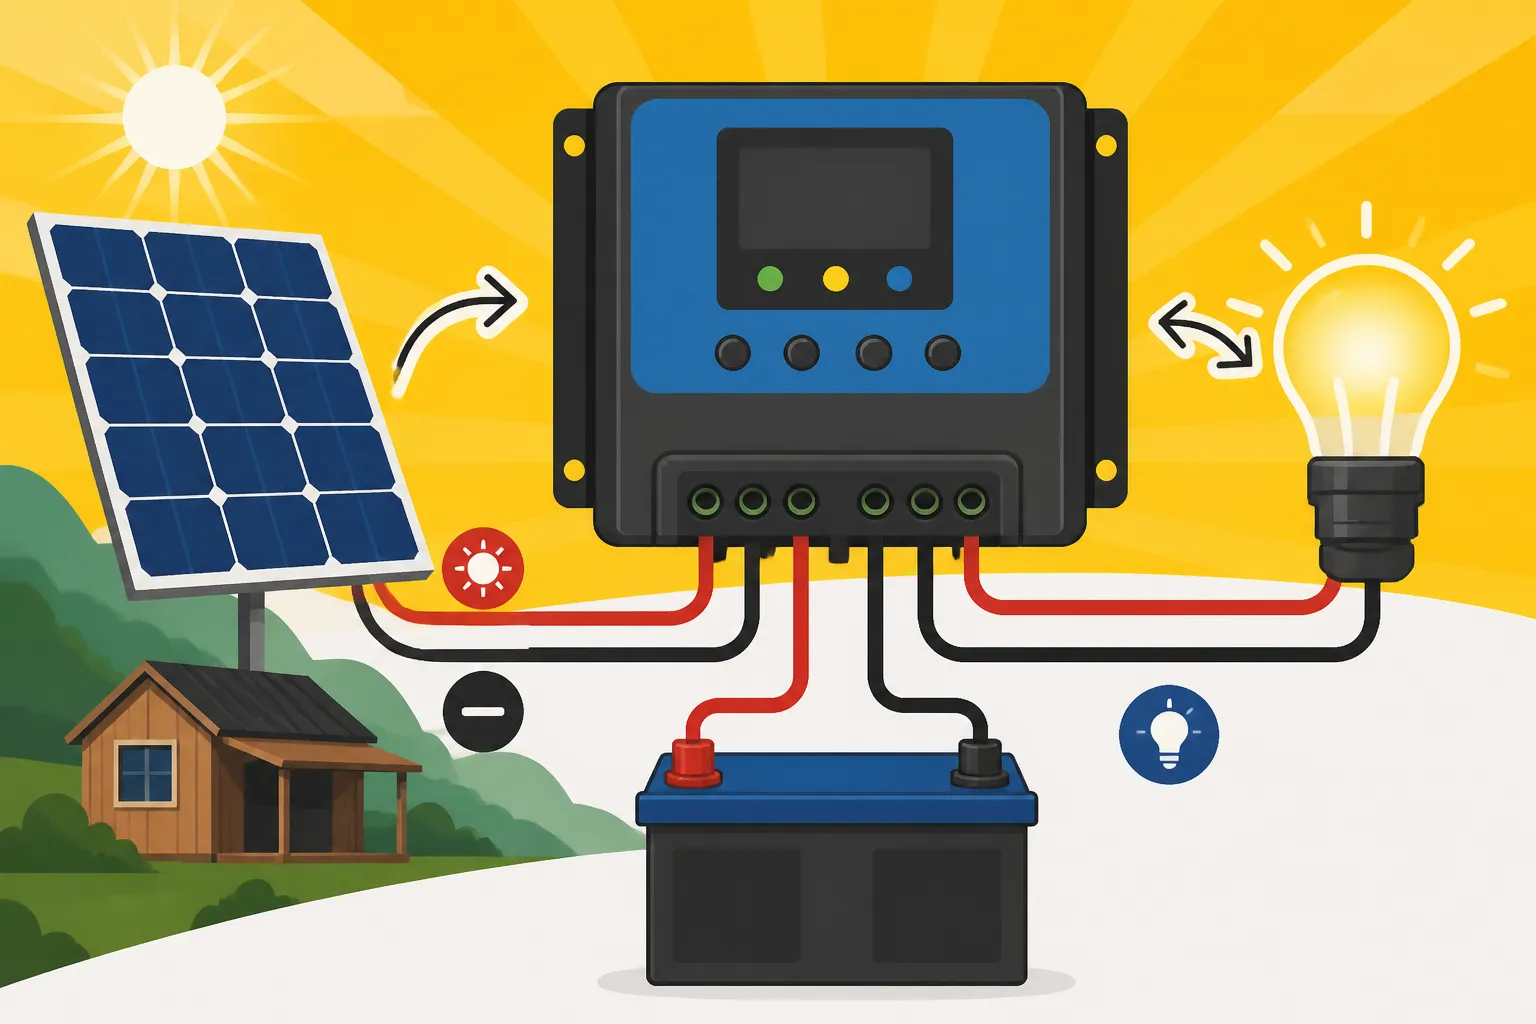
When you unbox your MPPT charge controller, you'll notice a few key terminals and interfaces. While specific models vary, the core components remain the same across brands like Renogy or Victron Energy. You'll typically find:
- Battery Terminals: These are marked with a '+' and '-' and are where your battery bank connects. This connection is paramount as the controller needs to sense the battery voltage to begin operation.
- Solar Input Terminals: Also marked with '+' and '-', these are for connecting your solar panel array. It's vital to ensure correct polarity here to avoid damage.
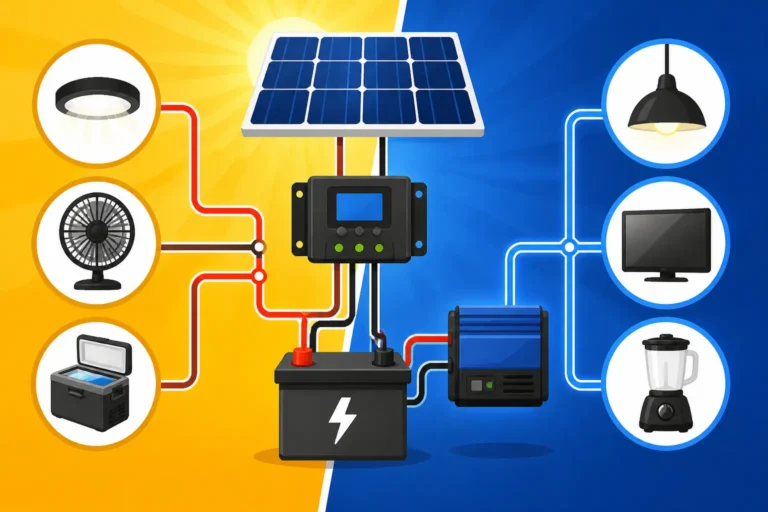
- Load Output Terminals (Optional): Some smaller MPPT controllers include a dedicated DC load output, usually for low-power devices. This output is often programmable and provides protection against over-discharge of your batteries. However, for larger loads, it's generally better to wire them directly to a separate DC distribution panel.
- Display Screen/LEDs: Provides real-time information such as battery voltage, charging current, solar panel voltage, and error codes.
- Communication Ports: Many modern MPPT controllers come with ports (like RS485, CAN bus, or Bluetooth) for connecting to external displays, battery monitors, or smart apps, allowing you to monitor and adjust settings. This connectivity can be incredibly helpful for optimizing your system and diagnosing issues.
Understanding these parts is your first step to a successful installation. Knowing where each wire goes and why is half the battle won, preventing those forehead-slapping "oops" moments down the line.
Essential Tools and Safety Precautions
Before you start twisting wires, it’s crucial to have the right tools on hand and, more importantly, to understand and implement proper safety measures. Electricity, especially in a solar setup with significant amperage and voltage, is not something to take lightly. A little preparation goes a long way in preventing accidents and ensuring your system functions correctly for years to come.
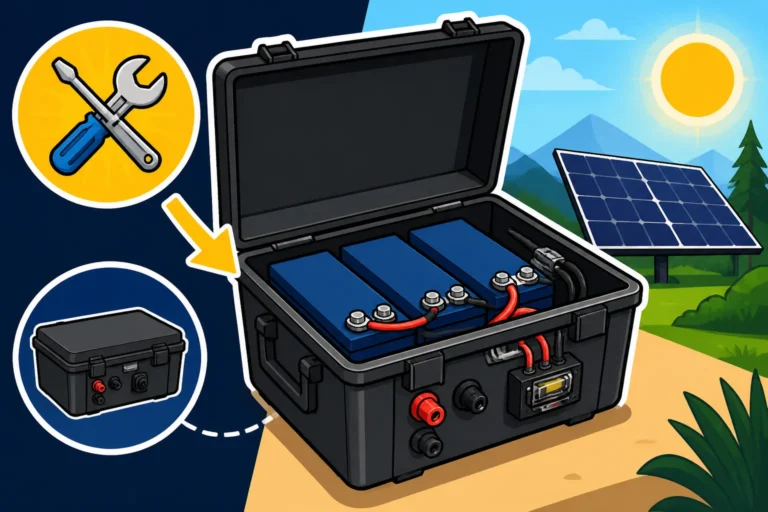
Gathering Your Wiring Arsenal
You don't need a professional electrician's toolkit, but having the right specialized tools makes the job much safer and easier. Skimping here can lead to frustrating delays or, worse, poor connections that cause inefficiencies or hazards.
Here’s a checklist of what you’ll likely need:
- Wire Strippers: Get a good quality pair that can handle various wire gauges, especially the larger gauges used for battery and solar connections.
- Crimpers: These are essential for creating secure, low-resistance connections with lug terminals. Do not just twist wires together; crimping ensures durability and safety.
- Multimeter: Absolutely critical! This tool allows you to check voltage, current, and continuity. You’ll use it to verify polarities, check panel output, and troubleshoot.
- Safety Glasses and Gloves: Non-negotiable. Protect your eyes from sparks and your hands from cuts or accidental electrical contact.
- Screwdrivers and Wrenches: For tightening terminal screws and mounting hardware. Ensure they are insulated if possible.
- Cable Cutters: For cleanly cutting thick solar and battery cables.
- Heat Gun (for heat shrink tubing): If you're using heat shrink to seal your connections, a heat gun provides a professional and durable finish.
- Zip Ties or Cable Management: For keeping your wiring neat and organized, which is crucial for both safety and troubleshooting.
- Fuses and Fuse Holders / Circuit Breakers: These are non-negotiable safety devices. You'll need appropriate DC-rated fuses or breakers for your solar array, battery bank, and any load outputs. We talk more about How to Install Fuses and Breakers in another guide.
Having these tools readily available, perhaps sourced from a reliable vendor on Amazon, will make your wiring process smooth and professional.
Prioritizing Safety First
This cannot be stressed enough: safety must be your top priority. Working with electricity, especially high-voltage solar arrays and powerful battery banks, carries inherent risks. Ignoring safety steps can lead to severe injury, fire, or costly equipment damage.
Always follow these golden rules:
- Read the Manual: Seriously, read the manufacturer’s instructions for your specific MPPT charge controller, like those provided by Renogy or Victron. Every model has nuances, and the manual is your authoritative guide for installation and safety.
- Disconnect All Power: Before making any connections, ensure all power sources are disconnected. This means covering your solar panels (with an opaque tarp or blanket) to prevent them from producing electricity, and disconnecting your battery bank at the source. This is a critical step, especially before you connect to the charge controller itself.
- Wear Personal Protective Equipment (PPE): Always wear safety glasses and insulated gloves.
- Check Polarity (and Double-Check): Incorrect polarity is one of the most common and damaging mistakes. Always use your multimeter to verify positive and negative terminals before making a connection. Connecting a battery or solar panel in reverse polarity can instantly destroy your charge controller, inverter, or even the battery itself.
- Use Proper Wire Gauge: Undersized wires can overheat, causing fire hazards and efficiency losses. Consult your controller's manual and use appropriate wire gauge calculators for the current and distance of your runs. Our guide on How to Wire an Off-Grid Solar System has more detail on this.
- Secure Connections: Loose connections are a recipe for resistance, heat buildup, and failure. Ensure all crimps are solid and all terminal screws are tightened to the manufacturer’s specifications.
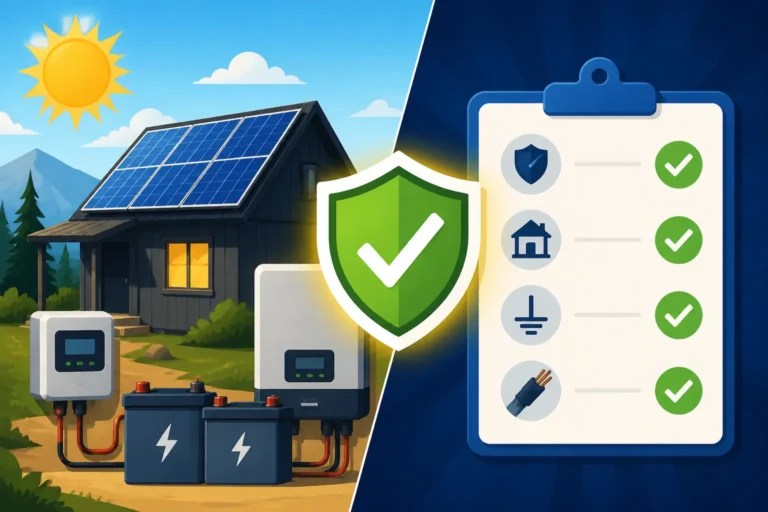
- Grounding: Properly ground your solar array, charge controller, and inverter to protect against lightning strikes and electrical faults. This is a vital safety feature that many DIYers overlook. We have a dedicated guide on How to Ground an Off-Grid Solar System.
By taking these precautions seriously, you create a safer working environment and ensure the longevity and reliability of your off-grid solar power system.
Step-by-Step Wiring Guide for Your MPPT Charge Controller
Alright, with our tools ready and safety hats on, let’s get down to the actual wiring! The sequence of connections is incredibly important here. You always connect the batteries first, then the solar panels. This ensures the charge controller properly senses the system voltage and avoids potential damage from high solar input before it knows what battery bank it's charging.
Connecting to the Battery Bank
This is the first and most crucial connection. Your MPPT charge controller needs to see the battery's voltage to properly initialize and function.
- Prepare Your Battery Cables: Measure the distance from your battery bank to your charge controller. Keep this run as short as possible to minimize voltage drop and resistance. Cut your positive (red) and negative (black) cables to length. Strip about ½ to ¾ inch of insulation from each end, then crimp on appropriately sized lug terminals. Use heat shrink tubing over the crimped areas for added insulation and strain relief.
- Install Battery Fuses/Breakers: Before making any connections to the battery, you must install a DC-rated fuse or circuit breaker on the positive battery cable, as close to the battery's positive terminal as possible. This protects your system from short circuits originating from the battery. The fuse/breaker size should be rated to protect the cable and the charge controller's battery circuit.
- Connect to the Battery Bank:
- Step 1: Connect the negative cable from the charge controller's battery negative terminal to the negative terminal of your battery bank. If you have multiple batteries, refer to our guide on How to Wire a Battery Bank for proper series/parallel connections.
- Step 2: Connect the positive cable from the charge controller's battery positive terminal, through your fuse or circuit breaker, to the positive terminal of your battery bank.
- Verify Voltage: Once connected, and only now, you can remove any battery disconnects or turn on the battery breaker. Your MPPT charge controller should power on and display the battery voltage. Use your multimeter to confirm the voltage reading on the controller matches your battery bank's voltage. This confirms the controller is properly sensing your system.
Important Note: If you have a 12V system, ensure your controller is set for 12V (or auto-detects it). The same goes for 24V or 48V systems. Most larger systems run at higher voltages, and understanding How to Choose System Voltage is critical for your overall design.
Here's a quick reference table for common battery cable sizing based on a short run (under 5 feet) to give you a rough idea, but always consult your controller's manual and a voltage drop calculator:
| System Voltage | Max Current (A) | Recommended Cable Gauge (AWG) |
|---|---|---|
| 12V | 40A | 8 AWG |
| 12V | 60A | 6 AWG |
| 24V | 40A | 10 AWG |
| 24V | 60A | 8 AWG |
| 48V | 40A | 12 AWG |
| 48V | 60A | 10 AWG |
Note: These are general recommendations. Always check your specific controller's maximum input/output current and use a voltage drop calculator for your actual cable lengths.
Wiring the Solar Panel Array
With your battery connected and the MPPT controller powered up, it's time to introduce it to your solar panels! This connection requires careful attention to voltage and polarity.
- Prepare Solar Cables: Run your positive (red) and negative (black) solar cables from your solar array location to the charge controller. Again, keep these runs as efficient as possible. Strip and crimp lug terminals onto the ends connecting to the controller.
- Install Solar Array Disconnect/Breaker: Just like with your batteries, you need a DC-rated fuse or circuit breaker on the positive line from your solar array before it reaches the charge controller. This allows you to safely disconnect the panels for maintenance or in an emergency. The sizing of this breaker depends on your total panel short-circuit current (Isc).
- Ensure Panels are Disconnected/Covered: Before making the final connections, ensure your solar panels are either completely disconnected from each other or fully covered with an opaque material (like a tarp or blanket) to prevent them from producing power. You do not want live voltage running through your cables while connecting them.
- Connect to the MPPT Controller's Solar Input:
- Step 1: Connect the negative cable from your solar array to the negative solar input terminal on your charge controller.
- Step 2: Connect the positive cable from your solar array, through your solar array disconnect/breaker, to the positive solar input terminal on your charge controller.
- Configure Your Solar Array: Depending on your system voltage and panel specifications, you'll need to decide on a series or parallel wiring configuration for your panels.
- Series Wiring: Increases voltage, keeps current the same. This is often preferred for MPPT controllers as it allows for higher input voltage (e.g., 48V system with 2 x 24V panels in series), which can reduce wire gauge requirements and improve MPPT efficiency in some cases. Our guide on How to Wire Solar Panels in Series explains this in detail.
- Parallel Wiring: Increases current, keeps voltage the same. This is useful for charging 12V batteries directly or when you need to combine the output of multiple panels. You can learn more about How to Wire Solar Panels in Parallel in our dedicated post.
- Always ensure your total array's Open Circuit Voltage (Voc) does not exceed the maximum input voltage rating of your MPPT controller, and your total Short Circuit Current (Isc) does not exceed the controller's maximum input current.
- Uncover Panels and Monitor: Once all connections are secure and double-checked, remove the covers from your solar panels (or switch on your solar array disconnect). Your MPPT controller should now start displaying solar input voltage and current, and you'll see a charging indication as power flows into your battery bank.
Integrating a DC Load (If Applicable)
Some smaller MPPT charge controllers have a dedicated DC load output. This is typically for low-power DC appliances or lighting, as the current capacity of these outputs is often limited.
- Assess Your Load: Check the maximum current rating of your controller's load output. Do not exceed this rating. For anything significant (e.g., a refrigerator, well pump), it’s almost always better to wire directly to a separate fused DC distribution panel connected to your main battery bank.
- Wire the Load:
- Step 1: Install a fuse or breaker for your DC load on its positive line, as close to the load output terminal of the controller as possible.
- Step 2: Connect the negative wire from your DC appliance to the negative load output terminal.
- Step 3: Connect the positive wire from your DC appliance, through its fuse/breaker, to the positive load output terminal.
- Configure Load Settings: Many controllers allow you to program the load output, setting low-voltage disconnect thresholds (to protect batteries from over-discharge) or even timers for lighting. Refer to your controller's manual for specific instructions.
Remember, the main purpose of your off-grid system is to power your essentials, so understanding How to Calculate Daily Energy Usage is crucial when planning your loads.
Grounding and Final Checks
Proper grounding is a non-negotiable safety feature, protecting your equipment from lightning strikes and preventing electrical shock hazards.
- Ground the System: Most MPPT charge controllers will have a dedicated grounding terminal, often marked with a ground symbol (three horizontal lines decreasing in length). Connect this terminal to a common grounding point in your system, which should then be connected to an earth ground rod. Your solar panel frames should also be grounded.
- Cable Management: Use zip ties or cable clamps to secure all your wiring runs. This prevents chafing, improves aesthetics, and makes future troubleshooting much easier. Neat wiring also looks more professional and reduces potential hazards.
- Perform Final Visual Inspection: Take a few moments to visually inspect every connection you've made.
- Are all wires properly seated in their terminals?
- Are all screws tightened (but not overtightened)?
- Are all positive and negative polarities correct?
- Are all fuses/breakers in place and correctly rated?
- Are there any exposed wires?
- Is all equipment mounted securely?
Once you’ve completed these checks, you can breathe a sigh of relief. You've just successfully wired your MPPT charge controller!
Common Pitfalls and Troubleshooting Tips
Even with the best intentions and careful planning, sometimes things don't go exactly as expected. Wiring an off-grid solar system involves multiple components, and minor missteps can lead to big headaches. Let's talk about some common issues and how to tackle them.
Avoiding Wiring Mistakes
Many problems arise from simple errors that can be avoided with diligence. Being aware of these common pitfalls can save you hours of troubleshooting.
- Reverse Polarity: This is probably the most common and damaging mistake. Accidentally connecting positive to negative can instantly fry your charge controller, or in some cases, even damage your batteries. Always, always, always use your multimeter to check polarity before making any final connections. If you accidentally connect a solar panel with reversed polarity to an MPPT controller, some higher-end units might have protection, but it's not guaranteed. Prevention is key here.
- Undersized Wiring: Using wires that are too thin for the current they carry creates resistance, leads to voltage drop, generates heat, and wastes energy. This not only reduces efficiency but can also be a fire hazard. Always consult wire gauge charts based on your system's current draw and the length of your wire runs. Our article on Off-Grid Solar Wiring Best Practices dives deeper into this.
- Loose Connections: Over time, vibrations or temperature changes can loosen connections. Loose connections increase resistance, which leads to heat buildup and poor performance. Ensure all terminal screws are tightened according to the manufacturer's torque specifications, and crimps are solid. A good tug test on each crimped lug can help confirm its integrity.
- Incorrect System Voltage Configuration: If your battery bank is 24V but your MPPT controller thinks it's 12V (or vice versa), it won't charge correctly. While many MPPT controllers auto-detect voltage, always verify this setting, especially during initial setup.
- Missing or Incorrect Fuses/Breakers: Forgetting to install fuses/breakers, or using ones with the wrong amperage rating, leaves your system vulnerable to short circuits and overcurrents, risking equipment damage and fire. Remember, fuses protect the wire, not necessarily the component, so they must be sized correctly for the cable.
Basic Troubleshooting for MPPT Issues
If your system isn't charging or behaving as expected, don't panic! Most issues can be diagnosed with a multimeter and a methodical approach.
- No Display or Power on Controller:
- Check Battery Connections: Is the battery connected? Is the fuse/breaker to the battery bank intact and switched on?
- Battery Voltage: Is the battery voltage within the operating range for the controller? If the battery is completely flat, some controllers won't turn on.
- Polarity: Double-check that the battery is connected with the correct positive and negative polarity.
- Controller is On, But Not Charging:
- Solar Panel Connection: Are the solar panels connected to the correct input terminals?
- Solar Panel Voltage: Use your multimeter to check the voltage coming from your solar array before it enters the charge controller. Is it higher than your battery voltage? Is it within the MPPT controller's input voltage range? If you have, say, Renogy 100W panels, are they producing their expected voltage?
- Solar Disconnect/Breaker: Is the solar array disconnect or circuit breaker switched on?
- Shading: Are your panels partially or fully shaded? Even a small amount of shading can drastically reduce output for an entire string of panels.
- Fuse/Breaker on Solar Line: Check if the fuse or breaker protecting the solar input is blown or tripped.
- Controller Settings: Has the controller been programmed correctly for your battery type (e.g., LiFePO4, AGM, Flooded Lead-Acid)? Incorrect settings can prevent proper charging.
- Low Charging Current:
- Peak Sun Hours: Are you getting adequate sunlight (peak sun hours) for your location and time of day?
- Panel Cleanliness: Are your solar panels dirty? Dust, pollen, and debris can significantly reduce their output.
- Array Sizing: Is your solar array adequately sized for your daily energy consumption and desired charging rate? Our guide on How to Size an Off-Grid Solar System can help you determine if your array is too small.
- Battery State of Charge: If your battery is nearly full, the controller will naturally reduce the charging current to prevent overcharging.
- Temperature Compensation: For lead-acid batteries, extreme temperatures can affect charging. MPPT controllers often have temperature compensation features.
Remember, a multimeter is your best friend when troubleshooting. You can find reliable, affordable options on Amazon if you don't already have one. By systematically checking each connection and voltage point, you can usually pinpoint the problem quickly and get your off-grid power flowing smoothly again.
Disclaimer
The information provided in this guide is for general informational and educational purposes only. While we strive to offer accurate and helpful advice, off-grid solar installation involves electrical work that can be dangerous if not performed correctly. Always consult your specific equipment manuals, adhere to all local electrical codes and regulations, and consider hiring a qualified electrician or solar professional for installation and critical wiring tasks, especially for larger or more complex systems. Working with electricity carries inherent risks, and improper installation can lead to property damage, injury, or death.