How to Size an Off-Grid System for a Greenhouse
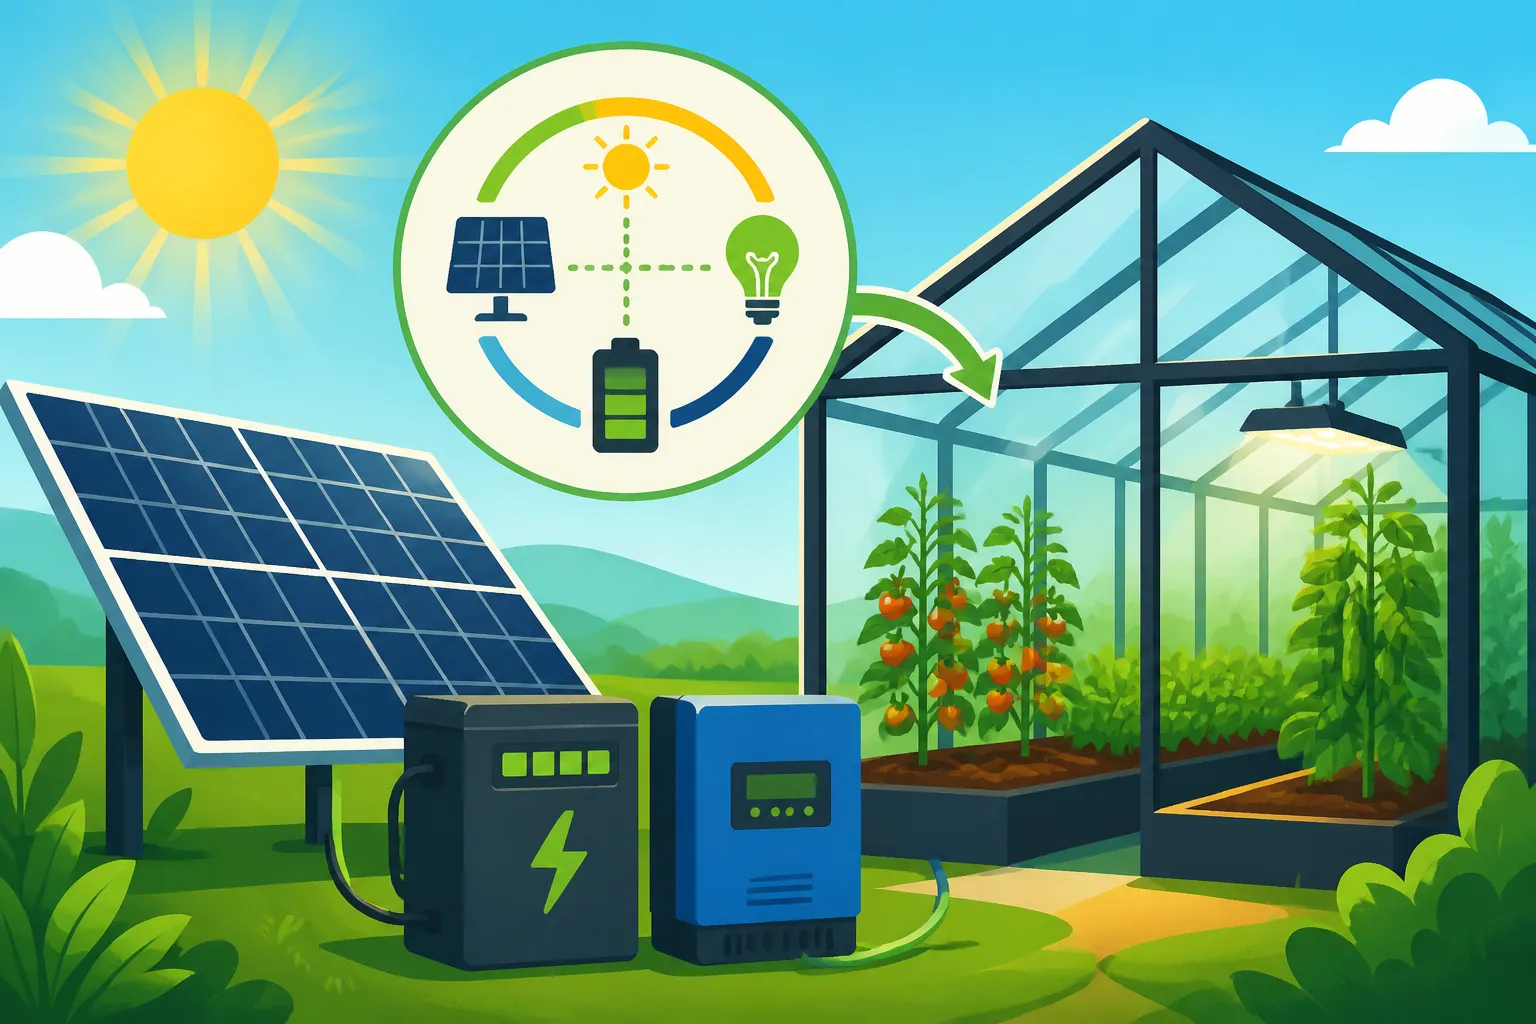
Dreaming of a lush, thriving greenhouse, brimming with your favorite plants, all powered by the sun? It's an incredibly appealing vision, but the reality of figuring out how to adequately power your setup without draining your wallet or leaving your precious plants in the dark can feel utterly overwhelming. You're not alone in wondering where to even begin with solar sizing. This comprehensive guide will walk you through every critical step to accurately size an off-grid solar system specifically for your greenhouse, ensuring your green sanctuary stays perfectly powered.
Understanding Your Greenhouse Energy Needs
Before you even start thinking about solar panels or batteries, the very first, most crucial step is to get a handle on exactly how much power your greenhouse demands. This isn't just about listing your appliances; it's about understanding their wattage and how long they run each day. Skipping this part is like trying to bake a cake without knowing how much flour you need – it’s just not going to turn out right!
Identifying Your Essential Greenhouse Loads
Think of your greenhouse as a miniature ecosystem, each component playing a vital role. From keeping things toasty on a cold night to ensuring proper air circulation on a sweltering afternoon, everything needs power. Your "loads" are simply all the electrical items you plan to run.
Let's break down some common greenhouse loads and why understanding them is key:
- Heating Systems: This is often the biggest power hog, especially in colder climates or during winter. Whether it's an electric heater, heat mats for germination, or even circulation fans that distribute warm air, heaters can draw significant wattage and might run for many hours. Knowing their exact wattage is critical.
- Grow Lights: For extending daylight hours or supplementing natural light, grow lights are indispensable. They come in various types (LED, HID, fluorescent), each with different power consumption. Crucially, they operate on a strict schedule, so you'll need to know exactly how many hours per day they'll be on.
- Ventilation Fans: Essential for temperature and humidity control, these can be thermostatically controlled or run on timers. A small exhaust fan for a hobby greenhouse might draw 20-50 watts, while larger commercial operations could have multiple fans drawing hundreds of watts each. Their run time can vary wildly depending on the weather.
- Irrigation Pumps: If you have an automated watering system, the pump will draw power. These are typically intermittent loads, meaning they run for short bursts rather than continuously. However, a powerful pump pushing water to many plants can have a high starting (surge) wattage.
- Environmental Controls: This includes thermostats, hygrometers, and automated ventilation or shading systems. While individual sensors draw very little power, the motors and relays they control can add up. These are often "always-on" background loads.
- Other Electronics: Don't forget smaller items like propagation mats, small humidifiers, dehumidifiers, tool chargers, or even a radio you listen to while you work. Every little bit adds to the total.
It’s easy to underestimate these, especially the ones that only kick on occasionally. Imagine waking up to find your prize-winning orchids have frozen because your heater only worked for half the night – that's a nightmare scenario we want to avoid!
Calculating Daily Watt-Hours for Each Appliance
Now that you've identified your loads, it's time to quantify their hunger for electricity. We're looking to calculate "watt-hours per day" for each item. This metric tells you how much energy each appliance consumes in a 24-hour period.
Here's how to do it:
-
Find the Wattage (W): Most appliances will have a label that lists their wattage. For things like refrigerators or pumps, you might see both "running watts" and "starting watts" (or surge watts). For this step, focus on the running watts for daily consumption. If an item only lists amps and voltage (e.g., "10 Amps at 120V AC"), you can calculate wattage:
Watts = Amps x Volts. -
Estimate Daily Usage (Hours): How many hours per day will this appliance realistically run? Be honest and consider your specific needs.
- Continuous Loads: A small circulation fan might run 24/7 in certain conditions.
- Timed Loads: Grow lights might run 12-16 hours a day.
- Intermittent Loads: An irrigation pump might run for 15 minutes, three times a day.
- Thermostatically Controlled Loads: Heaters or exhaust fans might turn on and off. For these, estimate the average daily run time during the season they're most active. For example, a heater might run 6 hours on a cold winter day, but 0 hours in summer.
-
Calculate Daily Watt-Hours (Wh/day): Multiply the wattage by the estimated daily usage hours.
Watt-hours (Wh) = Watts (W) x Hours per Day (h)
Example Calculation:
Let's say you have:
- Two 150-watt LED grow lights, running 12 hours a day.
2 lights * 150 W/light = 300 W300 W * 12 hours/day = 3600 Wh/day
- A 60-watt exhaust fan, running 8 hours a day (thermostatically controlled, average estimate).
60 W * 8 hours/day = 480 Wh/day
- A 300-watt electric heater, running 4 hours a day on average during cold snaps.
300 W * 4 hours/day = 1200 Wh/day
- A 50-watt irrigation pump, running for 30 minutes total (0.5 hours) per day.
50 W * 0.5 hours/day = 25 Wh/day
Total Daily Watt-Hours: 3600 + 480 + 1200 + 25 = 5105 Wh/day
This 5105 Wh/day (or 5.1 kWh/day) is your target. This number represents the absolute minimum your solar system needs to generate and store. When you are trying to understand How Many Watt-Hours You Use Per Day, it's important to be meticulous and even track actual usage with a watt-meter for a week if possible.
Sizing Your Solar Panel Array
Once you have your total daily watt-hour requirement, you can start looking at solar panels. This is where your geographic location and the amount of sunlight you get truly matter. After all, the sun is your fuel tank!
Determining Peak Sun Hours for Your Location
Solar panels are rated in "watts" (e.g., 400W), but that rating is under ideal test conditions. In the real world, you don't always get perfect, direct sunlight for 12 hours a day. This is where "peak sun hours" come in.
Peak sun hours (PSH) represent the equivalent number of hours per day when solar irradiance averages 1,000 watts per square meter. It's a way to standardize the amount of usable sunlight your panels will receive. For instance, a day with 8 hours of moderate sunlight might equate to 5 peak sun hours.
- Why it Matters for Greenhouses: For a greenhouse, it's crucial to consider the lowest average peak sun hours for your location, which usually occurs in winter. This is often when your heating and lighting loads are highest, and under-sizing for this period will lead to power shortages. If you size for summer, you'll be significantly short in winter.
- Finding Your PSH: You can find reliable peak sun hour data through online resources like the National Renewable Energy Laboratory's (NREL) PVWatts Calculator or various solar radiation maps. Just input your location, and it will provide average monthly or annual data. Aim for the winter average for the most conservative and reliable sizing. For example, a location in the Midwest might get 4-5 PSH in summer but only 2-3 PSH in winter.
Calculating Required Panel Wattage
With your total daily watt-hours and your worst-case peak sun hours, you can now calculate the total wattage your solar panel array needs to produce.
Here's the basic formula:
Required Panel Watts = (Total Daily Watt-Hours Needed) / (Average Daily Peak Sun Hours)
However, we need to add a buffer for system inefficiencies. Solar panels aren't 100% efficient, and neither are charge controllers, inverters, or the wiring itself. Dust, shading, and temperature can also reduce output. A common recommendation is to add an efficiency factor, typically by dividing by 0.7 to 0.8 (representing 70-80% overall system efficiency).
Revised Formula:
Required Panel Watts = (Total Daily Watt-Hours Needed) / (Average Daily Peak Sun Hours * System Efficiency Factor)
Let's use our previous example of 5105 Wh/day and assume a conservative 2.5 peak sun hours (winter average) and a system efficiency factor of 0.75:
Required Panel Watts = 5105 Wh / (2.5 PSH * 0.75)Required Panel Watts = 5105 Wh / 1.875Required Panel Watts ≈ 2722 Watts
So, you would need roughly 2725 watts of solar panels. This means you might get seven 400-watt panels (7 x 400W = 2800W), which is a good starting point. This also gives you some wiggle room for cloudy days. You might find excellent quality panels from brands like Renogy or through retailers on Amazon. For more on this, check out our guide on How Many Solar Panels for Off-Grid Living.
Designing Your Battery Bank
Solar panels generate power during the day, but your greenhouse needs power 24/7. That's where your battery bank comes in – it's the heart of your off-grid system, storing energy for use when the sun isn't shining. This is often the most expensive component, but it's vital for reliability.
How Many Days of Autonomy Do You Need
"Days of autonomy" refers to how many days your battery bank can power your greenhouse without any additional charge from your solar panels (e.g., during prolonged cloudy weather or snow cover). This is a critical decision and will heavily influence the cost and size of your battery bank.
For a greenhouse, especially one with living plants, a consistent power supply is non-negotiable. You can't just let your plants go without heat or light for days on end. Therefore, aiming for 2 to 3 days of autonomy is a wise and common practice.
- Low-Risk Scenarios: If your greenhouse is mainly for storage or occasional use, and you can tolerate some downtime, you might get away with 1 day of autonomy.
- High-Risk Scenarios: If you're growing high-value crops, living in an area prone to extended cloudy periods, or depend on critical systems like automatic watering, you might even consider 4-5 days.
Keep in mind that more days of autonomy means a significantly larger and more expensive battery bank. However, the peace of mind knowing your plants are safe is often worth the investment. For more detailed information, consider reading our post on How Many Batteries for an Off-Grid System.
Calculating Battery Capacity (Amp-Hours)
To calculate the necessary battery capacity, we need to know your total daily watt-hours, your desired days of autonomy, and your system's voltage. We also need to factor in the Depth of Discharge (DoD), which is the percentage of a battery's total capacity that can be safely used without damaging it or shortening its lifespan.
- Lead-Acid Batteries (Flooded, AGM, Gel): Generally, you should only discharge these to about 50% DoD to maximize their lifespan. This means if you need 100 Ah of usable power, you'd need a 200 Ah battery.
- Lithium Iron Phosphate (LiFePO4) Batteries: These are fantastic for off-grid systems because they can typically be discharged to 80-100% DoD without significant harm, offering much more usable capacity from a smaller battery. They also have a much longer cycle life.
Here's the formula for Amp-Hours (Ah):
Required Battery Ah = (Total Daily Watt-Hours * Days of Autonomy) / (System Voltage * Maximum Depth of Discharge)
Let's continue with our 5105 Wh/day example, aiming for 3 days of autonomy. For system voltage, 12V, 24V, and 48V are common. Higher voltages are generally more efficient for larger systems as they reduce current, allowing for smaller wiring. Let's assume a 24V system, and we'll opt for LiFePO4 batteries with an 80% (0.8) DoD.
Required Battery Ah = (5105 Wh/day * 3 days) / (24V * 0.8)Required Battery Ah = 15315 Wh / 19.2VRequired Battery Ah ≈ 797.6 Ah
So, you would need a battery bank capable of providing roughly 800 Amp-hours at 24 volts. This might translate to four 200 Ah 12V LiFePO4 batteries wired in series-parallel, or perhaps two 400 Ah 12V batteries in series. This calculation is crucial for budgeting, as the Cost of an Off-Grid Solar Battery Bank is a major consideration.
Selecting Your Inverter and Charge Controller
With your panels and batteries sized, it's time to choose the brains of the operation: your inverter and charge controller. These components manage the flow of electricity, making sure your system runs smoothly and safely.
Sizing Your Inverter for Peak Loads
The inverter is what converts the DC (direct current) power from your batteries into usable AC (alternating current) power for most of your greenhouse appliances. Sizing it correctly is about more than just your average daily consumption; it's about handling the instantaneous power demands.
You need to identify the highest simultaneous power draw your greenhouse might have. This includes all appliances that could potentially be running at the exact same moment.
- Running Watts vs. Starting Watts (Surge): Many appliances, especially those with motors (like irrigation pumps, large fans, or even some heaters), require a momentary burst of power to start up. This "starting wattage" or "surge power" can be 2-3 times higher than their continuous "running wattage." Your inverter must be able to handle this surge.
- Pure Sine Wave is Key: For sensitive electronics like grow lights, environmental controls, and most modern appliances, you absolutely need a pure sine wave inverter. Modified sine wave inverters are cheaper but can damage or reduce the efficiency of these devices, creating humming noises or causing them to run hotter. Don't skimp here; your plants' well-being depends on it.
To size your inverter:
- List all appliances that could run simultaneously.
- Determine the running watts of each.
- Determine the starting watts (surge) of the appliance with the highest surge requirement. Add this to the running watts of all other simultaneously running appliances. This is your peak surge demand.
- Choose an inverter with a continuous wattage rating that exceeds the sum of all running watts.
- Ensure the inverter's surge rating (usually for a few seconds) can handle your highest calculated peak surge demand.
Example Inverter Sizing:
Let's say your highest simultaneous running load is:
- Two 150W grow lights (300W)
- 60W exhaust fan
- 300W heater
- Total running load = 660 Watts
Now, let's say your irrigation pump is 50W running, but has a 200W starting surge. If the pump can start while everything else is running, your peak surge demand would be:
- (660W – 50W) (all other running loads) + 200W (pump surge) = 810 Watts.
- Alternatively, simply sum all running loads and the largest surge: 660W (total running) + (200W – 50W) (additional surge from pump) = 810 Watts.
You would want an inverter with a continuous rating of at least 800-1000 watts, and a surge rating of at least 1500-2000 watts. A 1000W continuous / 2000W surge inverter would be a safe bet. Brands like Victron Energy or AIMS Power offer robust pure sine wave inverters suitable for such applications. Our guide on What Size Inverter to Run A Refrigerator delves into surge considerations that are relevant to many greenhouse motors too.
Choosing the Right Charge Controller
The charge controller is the unsung hero that manages the power flowing from your solar panels to your battery bank. It protects your batteries from overcharging and ensures they get the right amount of juice.
For any serious off-grid greenhouse system, you'll almost certainly want an MPPT (Maximum Power Point Tracking) charge controller.
-
MPPT vs. PWM:
- PWM (Pulse Width Modulation) controllers are simpler and cheaper, essentially acting like a switch. They're fine for very small, basic systems but are less efficient, especially when panel voltage doesn't closely match battery voltage or in varying light conditions.
- MPPT controllers are more sophisticated. They can "track" the optimal voltage and current from your solar panels to maximize power harvest, converting excess voltage into additional current. This means they are significantly more efficient, often yielding 15-30% more power than PWM controllers, especially in cold weather or during partial shading. For a greenhouse where every watt counts, MPPT is the clear winner.
-
Sizing Your Charge Controller:
Your charge controller needs to be sized based on two key factors:- Battery Bank Voltage: It must match your battery bank's voltage (e.g., 12V, 24V, 48V).
- Maximum Solar Array Current: The controller needs to handle the maximum output current from your solar panel array.
To calculate the maximum charge current:
Max Charge Current (Amps) = Total Panel Wattage / Battery Bank VoltageUsing our 2725W panel array and 24V battery bank:
Max Charge Current = 2725 W / 24 V ≈ 113.5 AmpsYou should always add a safety factor (typically 25%) to this calculation to account for ideal conditions where panels might overproduce slightly:
113.5 Amps * 1.25 = 141.875 AmpsSo, you would need an MPPT charge controller rated for at least 142 Amps at 24V. Since charge controllers often come in standard sizes (e.g., 60A, 80A, 100A), you might need to use two smaller controllers in parallel, or find a single large one. You'll find great options from brands like Victron Energy, Outback Power, or Renogy. This will help you know How to Choose an Off-Grid Charge Controller.
Bringing It All Together: A Summary Table
To help visualize all these components and calculations, here’s a summary table with our example greenhouse system:
| Component | Calculation Basis | Example Values | Example Result/Choice |
|---|---|---|---|
| Energy Needs | Total daily appliance consumption | 5105 Wh/day (5.1 kWh/day) | Target for generation and storage |
| Solar Panels | (Total Wh/day) / (PSH * System Efficiency) | 5105 Wh / (2.5 PSH * 0.75) | ~2725 Watts |
| Battery Bank | (Total Wh/day * Days of Autonomy) / (V * DoD) | (5105 Wh * 3 days) / (24V * 0.8) | ~800 Ah @ 24V (LiFePO4) |
| Inverter | Sum of highest simultaneous running loads + largest surge | 660W running + 150W surge | 1000W continuous / 2000W surge pure sine wave |
| Charge Controller | (Total Panel W / Battery V) * 1.25 safety factor | (2725W / 24V) * 1.25 | ~142 Amps @ 24V MPPT |
This table provides a snapshot of the critical numbers you'll need to purchase your components. Remember, these are estimates based on a hypothetical greenhouse. Your specific needs and local conditions will dictate your final system size. Researching How Off-Grid Solar Saves Money Long-Term can help solidify your investment decision.
Always make sure to properly install your system and adhere to safety guidelines. Consulting a qualified electrician or solar professional, especially for larger setups, is always a good idea. You might also want to explore options for How to Budget for an Off-Grid Solar System to ensure your dream greenhouse is not only green but also financially sustainable.
Disclaimer
The information provided in this article is for general informational purposes only and does not constitute professional advice. Off-grid solar system design and installation can be complex and involve electrical hazards. Always consult with qualified professionals and adhere to all local codes, regulations, and safety guidelines when designing, purchasing, and installing any solar power system.