How to Size an Off-Grid System for a Cabin
Dreaming of powering your secluded cabin with the sun, far from the hum of the grid? It’s a truly liberating thought, but the reality of figuring out exactly how much solar power you need can feel like trying to solve a complex puzzle with missing pieces. Many folks jump straight into buying panels or batteries, only to find their system falls short on cloudy days or can't handle their favorite appliances. This guide is here to demystify the process, walking you through a step-by-step approach to accurately size an off-grid solar system for your cabin, ensuring you have reliable power when you need it most.
Understanding Your Cabin's Energy Needs
Before you even think about panels or batteries, the absolute first step in sizing an off-grid solar system for your cabin is to deeply understand your specific energy consumption. This isn't just about what you want to power, but what you will power, how often, and for how long. Skipping this crucial phase is like building a house without a blueprint – you might end up with something, but it's unlikely to meet your needs efficiently or reliably.
Listing Your Appliances and Their Wattage
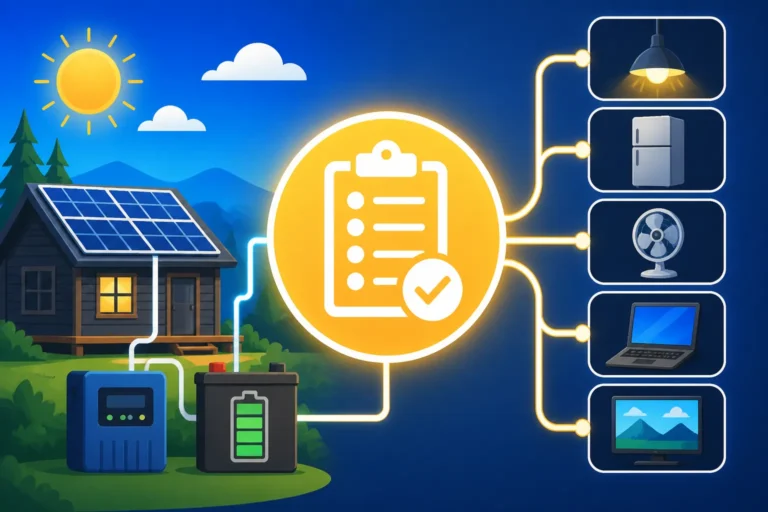
Think of every single electrical item you plan to use in your cabin, from the obvious lights and refrigerator to the seemingly insignificant phone chargers and power tools. No item is too small to list! The goal here is to create a comprehensive inventory. Once you have your list, you need to find the wattage (W) or amperage (A) for each device.
Many appliances have a label on the back or bottom that states their wattage. For larger items like refrigerators, microwaves, or well pumps, you'll often find both a running wattage and a higher "surge" or "starting" wattage. This surge wattage is critical because your inverter needs to be able to handle this temporary spike in demand. If you can't find a label, a quick online search for the make and model usually provides the information. For items where wattage isn't clear, like a laptop charger or a specific drill, you can use a simple power meter (often available on Amazon) to measure its actual draw.
Let's imagine a typical cabin scenario. You might have:
- LED lights: 10W each (you might have 5-10 of these)
- Energy-efficient refrigerator: 100W running, 500W surge
- Water pump: 500W running, 1500W surge (if it's a deep well pump)
- Laptop: 60W
- Phone charger: 10W
- Small microwave: 800W running, 1600W surge (used intermittently)
- Ceiling fan: 40W
- Small TV: 50W
It's tempting to underestimate, but being realistic here will save you headaches and expense down the road. For a more detailed approach, consider reading our guide on How to Estimate Appliance Power Draw.
Calculating Daily Watt-Hours
Once you have your appliance list and their individual wattages, the next step is to calculate how much energy each item consumes per day, measured in Watt-hours (Wh). This is where many people get tripped up, confusing watts with watt-hours. Watts (W) are a measure of instantaneous power draw, like how much power an appliance uses at any given moment. Watt-hours (Wh), on the other hand, measure energy consumption over time. Think of it like speed versus distance: speed is instantaneous, while distance is over a period.
To calculate the daily Watt-hours for each appliance, you simply multiply its wattage by the number of hours you expect to use it in a 24-hour period.
Formula: Appliance Wattage (W) x Hours Used Per Day (h) = Daily Watt-Hours (Wh)
Let's continue with our hypothetical cabin:
- 5 LED lights: (10W/light * 5 lights) * 4 hours = 200 Wh/day
- Refrigerator: While it runs continuously, it cycles on and off. An energy-efficient fridge might run for 8-12 hours total in a day. Let's estimate 10 hours: 100W * 10 hours = 1000 Wh/day
- Water pump: Used for 1 hour total throughout the day for washing and drinking: 500W * 1 hour = 500 Wh/day
- Laptop: Used for 3 hours: 60W * 3 hours = 180 Wh/day
- Phone charger: Plugged in for 5 hours: 10W * 5 hours = 50 Wh/day
- Microwave: Used for 10 minutes total (0.17 hours): 800W * 0.17 hours = 136 Wh/day
- Ceiling fan: Used for 6 hours: 40W * 6 hours = 240 Wh/day
- Small TV: Used for 2 hours: 50W * 2 hours = 100 Wh/day
Now, sum up all these daily Watt-hours to get your Total Daily Watt-Hours.
200 + 1000 + 500 + 180 + 50 + 136 + 240 + 100 = 2406 Wh/day
This 2406 Wh represents the total energy your cabin needs daily. It’s also wise to consider "vampire" loads – devices that draw a small amount of power even when turned off but still plugged in. For a comprehensive overview of this process, check out our article on How to Calculate Daily Energy Usage or How Many Watt-Hours You Use Per Day.
Here’s a useful table summarizing typical power draws for common cabin appliances:
| Appliance | Average Wattage (W) | Avg. Daily Use (hours) | Est. Daily Watt-Hours (Wh) | Surge Wattage (W) |
|---|---|---|---|---|
| LED Light Bulb (x5) | 50 (10W each) | 4 | 200 | 0 |
| Energy Star Refrigerator | 100 | 10 | 1000 | 500-1000 |
| Water Pump (small) | 500 | 0.5 | 250 | 1000-2000 |
| Laptop | 60 | 3 | 180 | 0 |
| Phone Charger | 10 | 5 | 50 | 0 |
| Microwave (small) | 800 | 0.17 (10 min) | 136 | 1500-2000 |
| Ceiling Fan | 40 | 6 | 240 | 0 |
| Small TV | 50 | 2 | 100 | 0 |
| Daily Subtotal | 2156 Wh | |||
| Add 15-20% for inefficiencies/future growth | ~2500 Wh |
Note: These are average figures; always check your specific appliance labels.
Sizing Your Solar Panel Array
With your daily energy consumption pinpointed, you can now move on to determining the size of your solar panel array. This step involves more than just picking a panel off the shelf; it requires understanding how much sunshine your cabin actually gets and accounting for real-world inefficiencies.
Determining Peak Sun Hours for Your Location
Solar panels don't produce their rated wattage all day long. Their output varies significantly with the angle of the sun, cloud cover, and time of year. To standardize this, we use "peak sun hours." This isn't the number of hours the sun is visible, but rather the equivalent number of hours per day when sunlight intensity averages 1,000 watts per square meter (W/m²). For example, if your location gets 6 hours of actual sunlight, but only 4 of those hours are truly intense, your peak sun hours might be 4.
The number of peak sun hours varies dramatically depending on your geographical location and the season. A cabin in sunny Arizona will have vastly different peak sun hours than one in a heavily forested area of the Pacific Northwest, especially in winter. For off-grid reliability, it’s crucial to use the lowest average peak sun hours for the time of year when you'll be using the most power or when sun exposure is at its worst (typically winter).
You can find this data from various sources:
- National Renewable Energy Laboratory (NREL): Their PVWatts Calculator is an excellent tool that allows you to input your specific location and get average solar resource data.
- Online Solar Calculators: Many solar equipment retailers offer calculators that use regional data.
- Local Weather Data: While not as precise for peak sun hours, historical weather data can give you an idea of average sunny days.
Let's assume our cabin is in a region that gets, on average, 3.5 peak sun hours in winter, which is when we plan to use it most. This conservative estimate is vital for ensuring your system can handle less-than-ideal conditions, preventing you from running out of power when you need it most. Our article on How to Account for Cloudy Days and How Winter Affects Off-Grid Sizing delves deeper into these seasonal considerations.
Calculating Required Panel Wattage
Now we can calculate the total wattage your solar panel array needs to generate. We'll use your total daily Watt-hours and the peak sun hours, but we also need to factor in system inefficiencies. No solar system is 100% efficient due to factors like wiring losses, temperature effects on panels, dust/dirt on panels, and inverter conversion losses. A common efficiency loss factor to apply is 1.2 to 1.3 (representing a 20-30% loss).
Formula: (Total Daily Watt-Hours / Peak Sun Hours) x Loss Factor = Total Solar Panel Watts Needed
Using our cabin example of 2406 Wh/day and 3.5 peak sun hours, let's use a conservative loss factor of 1.25 (25% loss):
(2406 Wh / 3.5 hours) * 1.25 = 687.43 * 1.25 = ~859 Watts
This means you would need approximately 860 watts of solar panels to meet your daily energy demand during the worst-case sun conditions.
Now, you need to choose individual panels that add up to this total. Solar panels come in various wattages, commonly 100W, 200W, 300W, 400W, and even higher. For instance, if you choose 200W panels (a popular option from brands like Renogy), you would need:
860 Watts / 200 Watts/panel = 4.3 panels.
Since you can't buy half a panel, you'd round up to 5 panels, giving you a total of 1000 watts (5 x 200W). This slight oversizing is actually a good thing, providing a buffer for less sunny days or future minor load additions. This is why understanding How Many Watts of Solar You Need is so important for building a robust system.
Designing Your Battery Bank
The battery bank is the heart of any off-grid system, storing the energy generated by your solar panels for use when the sun isn't shining. Sizing it correctly is paramount to ensure you don't run out of power overnight or during extended cloudy periods.
Days of Autonomy and Depth of Discharge
Two critical concepts for battery sizing are "days of autonomy" and "depth of discharge" (DoD).
- Days of Autonomy: This refers to how many days your battery bank can power your cabin without any new input from your solar panels (i.e., during prolonged cloudy weather or storms). For a cabin, especially one used year-round or in remote locations, 2-3 days of autonomy is a good starting point. If you live in an area prone to long stretches of bad weather, you might consider 4-5 days.
- Depth of Discharge (DoD): This is the percentage of a battery's total capacity that you can safely use. Pushing batteries beyond their recommended DoD significantly shortens their lifespan.
- Lead-Acid Batteries (Flooded, AGM, Gel): Generally, lead-acid batteries should not be discharged below 50% DoD to maximize their lifespan. This means if you have a 100 Ah lead-acid battery, you can only realistically use 50 Ah before recharging.
- Lithium Iron Phosphate (LiFePO4) Batteries: These are game-changers for off-grid. They can typically be discharged to 80-100% DoD without significant impact on their cycle life, making them much more efficient in terms of usable capacity. This is a major reason why many off-gridders are choosing LiFePO4, despite the higher upfront cost.
It's also crucial to consider temperature. Batteries, especially lead-acid, lose capacity in cold weather. If your cabin experiences freezing temperatures, you'll either need to house your batteries in a heated space or invest in self-heating LiFePO4 batteries designed for cold climates. This directly impacts the usable capacity you can expect. This is a key factor to consider when reading about How Battery Choice Affects Off-Grid Cost.
Calculating Battery Bank Capacity
Now, let's calculate the required Amp-hour (Ah) capacity for your battery bank. You'll need your total daily Watt-hours, your desired days of autonomy, and your battery's DoD. You'll also need to decide on your system voltage (e.g., 12V, 24V, or 48V). Higher voltages are generally more efficient for larger systems as they reduce current, allowing for thinner wiring and less voltage drop. For a system needing 2406 Wh/day, a 24V or 48V system is usually recommended. Let's aim for a 48V system for our cabin example.
First, convert your daily Watt-hours to Amp-hours at your chosen system voltage:
Daily Amp-hours = Total Daily Watt-Hours / System Voltage
2406 Wh / 48V = 50.125 Ah (daily consumption at 48V)
Now, factor in days of autonomy and DoD:
Formula: (Daily Amp-hours x Days of Autonomy) / Depth of Discharge = Required Battery Bank Ah Capacity
Let's assume we want 3 days of autonomy and are using LiFePO4 batteries with an 80% DoD:
(50.125 Ah * 3 days) / 0.80 = 150.375 Ah / 0.80 = 187.97 Ah
So, you would need a 48V battery bank with approximately 190 Ah of capacity. If you were using 100 Ah, 48V LiFePO4 batteries (like those from a reputable brand such as EG4 or Battle Born), you would need two of them wired in parallel to achieve 200 Ah (100 Ah + 100 Ah). For a detailed breakdown on this, see How Many Batteries for an Off-Grid System and How to Size an Off-Grid Battery Bank.
Selecting Your Inverter and Charge Controller
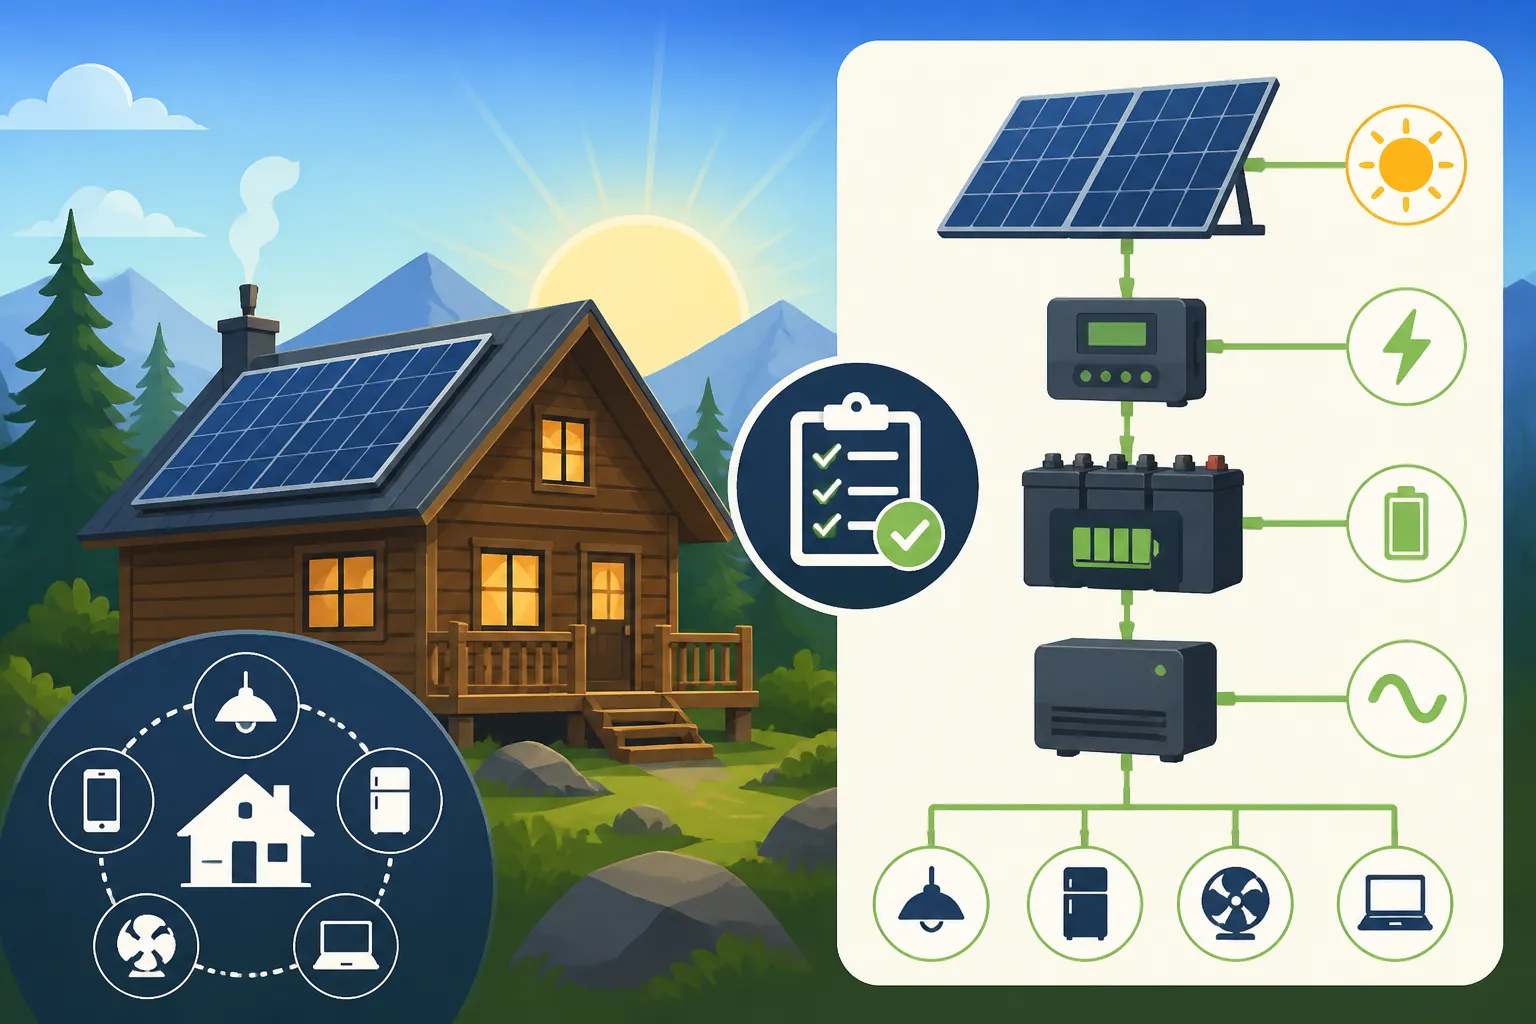
These two components are the unsung heroes of your off-grid system, acting as the brain and brawn, respectively. They ensure that the power generated by your panels is properly converted and delivered to your appliances.
Sizing the Inverter
The inverter's job is to convert the direct current (DC) power stored in your batteries into alternating current (AC) power, which is what most standard household appliances use. When sizing an inverter, you need to consider two main ratings:
- Continuous Wattage: This is the total wattage of all AC appliances you might run simultaneously on a regular basis. Look back at your appliance list and identify the maximum continuous load. For our example, if you're running the fridge (100W), laptop (60W), 3 lights (30W), TV (50W), and a fan (40W) all at once, your continuous load is 280W.
- Surge Wattage: Many appliances, especially those with motors (refrigerators, pumps, microwaves, power tools), require a much higher burst of power for a few seconds when they first start up. This is their surge wattage. Your inverter must be able to handle the highest single surge load in your cabin. In our example, the microwave (1600W surge) or potentially a well pump (1500W surge) would be the deciding factor.
You need an inverter that can comfortably handle both your highest continuous load and the highest single surge load. If your highest continuous load is 280W and your highest surge is 1600W (for the microwave), you'd want an inverter rated for at least 1600-2000W continuous output. Many inverters are rated to handle surge loads that are 2-3 times their continuous rating for a short period. For safety and longevity, it's always better to slightly oversize your inverter than to undersize it. A 2000W pure sine wave inverter would be a robust choice for our example cabin, giving us plenty of headroom.
Pure Sine Wave vs. Modified Sine Wave: For sensitive electronics like laptops, modern refrigerators, and medical equipment, a pure sine wave inverter is essential. Modified sine wave inverters are cheaper but can damage or run inefficiently with many modern appliances. For a cabin, pure sine wave is almost always the way to go. You can learn more about this in What Size Inverter to Run Lights And Electronics or How to Size an Off-Grid Inverter.
Sizing the Charge Controller
The charge controller regulates the voltage and current coming from your solar panels to your battery bank, preventing overcharging and optimizing battery life. There are two main types:
- PWM (Pulse Width Modulation): These are simpler and less expensive, best suited for smaller, simpler systems where the panel voltage closely matches the battery bank voltage.
- MPPT (Maximum Power Point Tracking): These are more advanced and efficient, especially beneficial for larger systems and in situations where panel voltage is significantly higher than battery voltage (e.g., 60V panels charging a 48V battery bank). MPPT controllers can convert excess panel voltage into additional current, harvesting up to 10-30% more power, particularly in cold weather or during partial shading. For a cabin system aiming for reliability, an MPPT controller is highly recommended.
To size your MPPT charge controller, you'll need the total wattage of your solar array and your battery bank voltage. We'll add a safety factor of 1.25 (25% buffer) to account for optimal sun conditions and potential overcurrent.
Formula: (Total Solar Panel Watts / Battery Bank Voltage) x 1.25 (Safety Factor) = Minimum Charge Controller Amperage
Using our example:
(1000W solar array / 48V battery bank) * 1.25 = 20.83 Amps * 1.25 = 26.04 Amps
So, you would need an MPPT charge controller rated for at least 30 Amps (rounding up). Many popular brands offer robust MPPT controllers suitable for cabin systems, such as Victron Energy or MidNite Solar. Understanding How to Size a Charge Controller is a critical step in building a balanced system.
Putting It All Together: A Holistic Approach
Sizing individual components is only part of the puzzle. The real art of off-grid solar design comes from understanding how these pieces interact and building a cohesive system that meets your current and future needs.
System Voltage Considerations
We touched on this briefly with battery sizing, but the system voltage (12V, 24V, or 48V) you choose has profound implications for your entire setup.
- 12V Systems: These are common for small RVs, vans, or very small cabins with minimal power needs. They are simpler to set up and have a wider range of readily available DC appliances. However, for higher power loads, a 12V system requires much thicker (and more expensive) wiring to avoid significant voltage drop, and larger loads can draw dangerously high currents.
- 24V Systems: A good middle-ground for medium-sized cabins. They reduce current by half compared to a 12V system for the same power, allowing for thinner wires and more efficient operation. Many residential-style inverters and appliances are available for 24V.
- 48V Systems: This is the gold standard for most full-sized off-grid homes and larger cabins. At 48V, the current is quartered compared to 12V, leading to significantly less voltage drop, thinner wire gauges, and overall higher efficiency, especially for long wire runs between components. Most high-power inverters and charge controllers are designed to operate efficiently at 48V. For our example cabin with a 2406 Wh/day load, a 48V system is indeed the most appropriate choice for long-term reliability and efficiency. This topic is explored in depth in our guide, How to Choose System Voltage.
Planning for Future Expansion and Redundancy
One of the biggest mistakes off-grid cabin owners make is designing a system that can barely meet their current needs. Life changes, and so do energy demands. You might decide to add a new appliance, a hot tub, or simply spend more time at the cabin. Building an expandable system from the outset will save you significant cost and effort down the line.
When selecting components like charge controllers and inverters, consider models that have some headroom for adding more panels or batteries in the future. For example, if your calculations show you need a 30A charge controller, opting for a 40A or 60A model might only be slightly more expensive but gives you the flexibility to easily add a few more solar panels later without replacing a major component. Similarly, choosing an inverter with a slightly higher continuous rating than your immediate needs can accommodate future appliance upgrades.
Furthermore, thinking about redundancy is crucial for off-grid living. While solar is fantastic, there will be times when the sun just doesn't cooperate. Integrating a backup generator into your system design, especially an automatic start generator, can provide peace of mind during extended cloudy periods or unexpected high loads. The inverter you choose can often be an "inverter charger" that seamlessly integrates a generator, using its power to both run loads and recharge your batteries. Exploring How to Design an Expandable System can provide even more insights into this forward-thinking approach.
Disclaimer
Please remember that this guide provides general information and estimates. Local regulations, specific equipment specifications, and unique environmental factors can significantly impact your final system design and costs. Always consult with a qualified solar professional or electrician when designing and installing your off-grid solar system to ensure safety and compliance with all applicable codes.