Off-Grid Solar Cost for a Sailboat
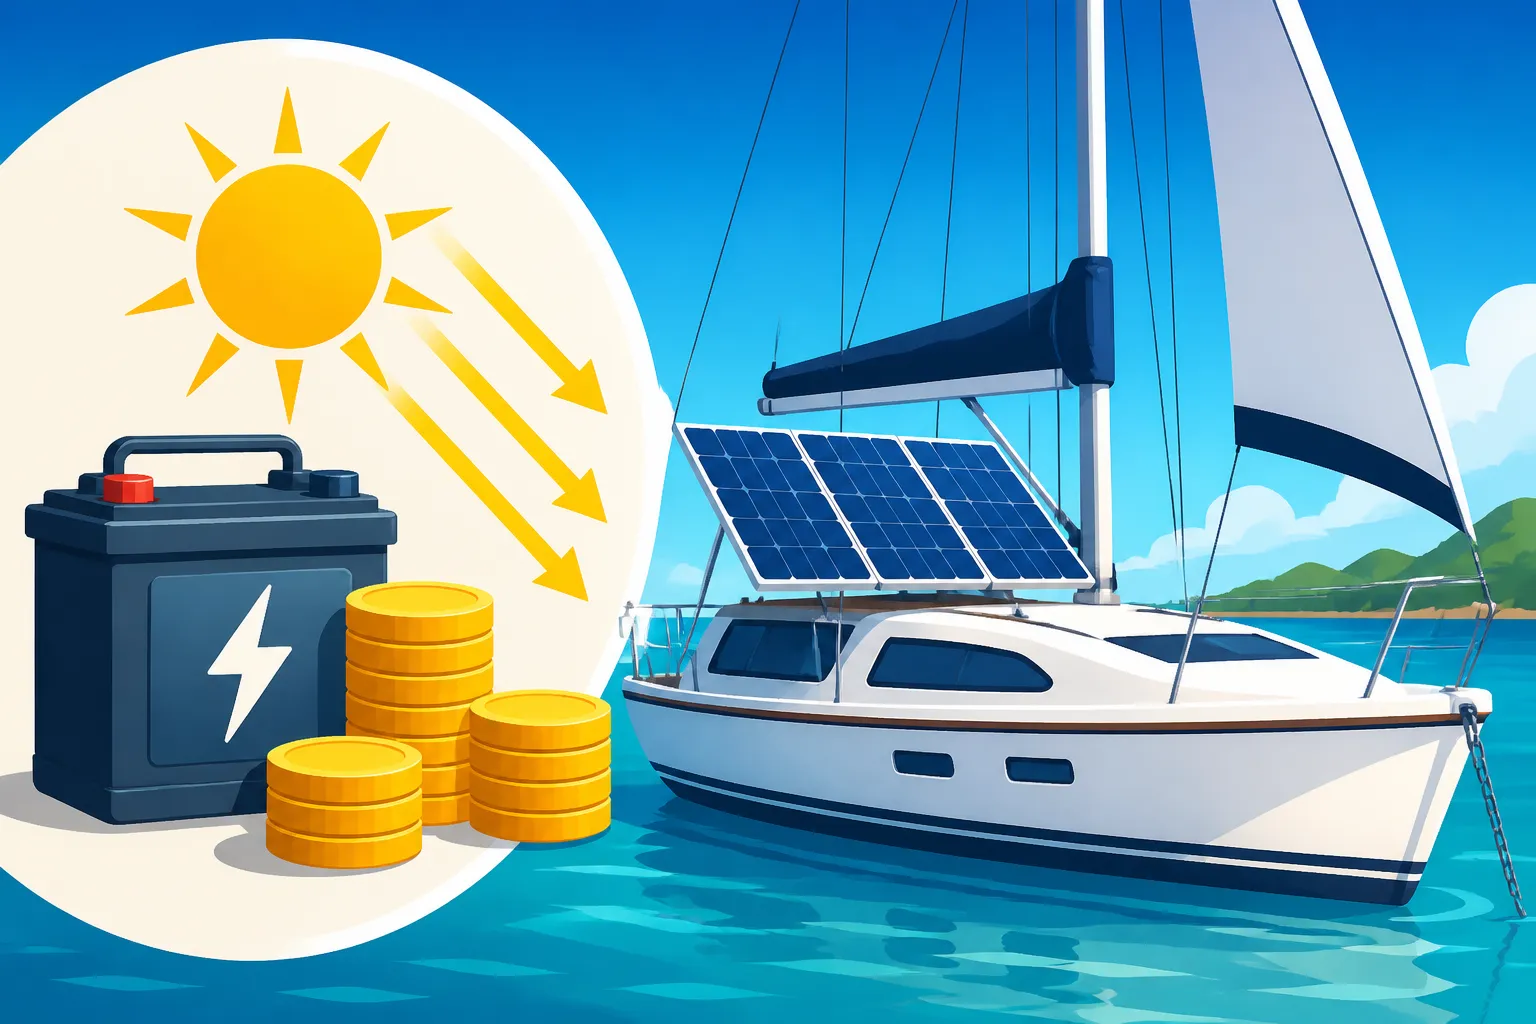
There's nothing quite like the freedom of sailing, the wind in your sails, the endless horizon before you. But let's be real, even when chasing that pure, unadulterated freedom, most of us still want to charge our phones, keep the fridge running, maybe fire up the autopilot, or even enjoy a movie night. The dream often clashes with the reality of power needs, and figuring out the financial commitment for an off-grid solar setup on your beloved sailboat can feel like navigating a storm without a chart. This guide is here to help you demystify the costs involved, from the smallest dinghy setup to a full-time liveaboard system, so you can plan your budget with confidence.
The Unique World of Sailboat Solar: Why It's Different
Putting solar on a boat isn't quite the same as slapping panels on a cabin roof. The marine environment, limited space, and specific power demands create a whole new set of considerations that directly impact your budget. It’s not just about buying panels; it’s about buying the right panels and components that can withstand the rigors of life at sea.
Limited Space and Mounting Options
Sailboats, by their very nature, are designed for efficiency on the water, not necessarily for sprawling solar arrays. Deck space is often at a premium, cluttered with winches, lines, hatches, and the boom. This means you’re often dealing with irregular shapes, shaded areas, and the constant movement of the boat.
You might be looking at flexible panels that can be walked on or bent to fit curved surfaces, arch-mounted rigid panels that are installed over the stern, or even bimini-mounted options. Each of these solutions comes with its own price tag and installation complexities. For instance, a robust stainless steel arch to hold rigid panels can be a significant investment, often costing as much as the panels themselves, but it provides excellent durability and placement above potential shading. On the flip side, flexible panels, while seemingly cheaper per watt, might have a shorter lifespan in the harsh marine sun and can be less efficient if not properly ventilated. This challenge often means you can't just buy the cheapest or largest panels; you need ones that fit your specific vessel and lifestyle, adding a layer to the financial puzzle.
Marine Environment Considerations
Saltwater, relentless UV rays, constant vibration, and the occasional dousing make boats a truly hostile environment for electronics. Standard solar components designed for land-based installations often won't last long when exposed to these elements.
This means investing in marine-grade equipment. Panels need to be sealed against moisture, wiring needs to be corrosion-resistant and properly tinned, and charge controllers and inverters should ideally be IP-rated for ingress protection. These specialized components, like a top-tier Victron Energy charge controller or an inverter-charger designed for marine use, often carry a higher price tag than their land-based counterparts, but they offer the durability and reliability essential for safety and consistent power generation at sea. Skimping here can lead to premature failure, more frequent replacements, and ultimately, higher long-term costs. You really don't want your critical power system failing when you're days from shore.
Energy Needs on the Water
Your power consumption on a sailboat can be surprisingly high, even if you’re trying to be frugal. Beyond basic lighting and charging devices, most cruisers rely on refrigeration, navigation electronics (GPS, chartplotter, radar, autopilot), communication systems (VHF, SSB, Starlink), and sometimes even watermakers or electric winches.
Each of these appliances contributes to your daily energy draw, which directly dictates the size of your solar array and battery bank. A small weekend cruiser might get by with a couple of hundred watts and a modest battery, while a liveaboard bluewater vessel could easily require 1,000 watts or more of solar and several hundred amp-hours of battery capacity. Understanding How to Calculate Daily Energy Usage is crucial here, as it's the first step in accurately budgeting for your system. Many sailors underestimate their actual power needs, leading to undersized systems that leave them constantly struggling for power or running their engine to charge batteries, which defeats the purpose of going solar.
Core Components and Their Costs for Sailboat Solar
Breaking down the cost of an off-grid solar system for your sailboat means looking at each critical piece of the puzzle. Each component plays a vital role, and its quality and capacity will directly influence the overall price and performance of your system.
Solar Panels: Types, Efficiency, and Marine-Specific Options
The panels are what turn sunlight into usable electricity, and their cost will vary widely based on type, efficiency, and how robustly they're built for marine conditions.
- Monocrystalline Panels: These are the most common and generally the most efficient. They offer excellent power output per square foot, which is a huge advantage on a space-limited sailboat. However, rigid monocrystalline panels require sturdy mounting. A 100-watt rigid panel can range from $100-$250, but remember, you'll need multiple panels to meet your daily needs. Brands like Renogy and Rich Solar offer decent options that are often found on sites like Amazon.
- Flexible Panels: Often appealing for their ability to conform to curved deck surfaces or be walked on, flexible panels can be glued directly to the deck or bimini. They tend to be less efficient and can degrade faster if not properly ventilated, as heat reduces their performance and lifespan. Costs typically range from $150-$400 for a 100-watt flexible panel, with varying degrees of marine readiness.
- Bifacial Panels: While less common on smaller boats due to mounting requirements, these panels generate power from both sides, capturing reflected light. They are more efficient but also more expensive and usually require specific mounting that allows light to hit the underside.
- Semi-Flexible Walkable Panels: Some manufacturers offer more robust flexible panels designed to withstand foot traffic, a common necessity on a sailboat. These often come with a textured, anti-slip surface. They are typically more expensive than standard flexible panels but offer better durability.
For a mid-sized cruising sailboat needing around 400-600 watts of solar, you might look at 2-4 rigid panels with a custom arch or 4-6 flexible panels on the bimini and deck. The total cost for panels could easily be in the range of $800 to $2,500, depending on the type and brand chosen.
Batteries: Lithium vs. Lead-Acid, Capacity Needs
The battery bank is where all that lovely solar power gets stored for when the sun isn't shining. This is often the single most expensive component in an off-grid solar system for a sailboat. The choice between battery technologies significantly impacts both initial cost and long-term value. Diving into LiFePO4 vs Lead-Acid Batteries for Off-Grid can help clarify this critical decision.
- Lead-Acid Batteries (AGM/Gel): These are traditionally the most common and cheapest upfront. A 100Ah deep cycle AGM battery might cost $200-$400. However, they have a shorter lifespan (3-5 years typically), can only be discharged to about 50% without damaging them, are heavy, and require more space. For a decent system, you might need 200-400Ah of usable capacity, meaning 400-800Ah of lead-acid batteries, totaling $800-$3,200. They also suffer from voltage sag under load, which can impact appliance performance.
- Lithium Iron Phosphate (LiFePO4) Batteries: These are a game-changer for marine solar, offering incredible advantages. While the initial cost is higher—a 100Ah LiFePO4 battery can cost $600-$1,200—they offer a much longer lifespan (10+ years), can be discharged to 80-100% of their capacity, are significantly lighter, and have a higher energy density. This means you need fewer batteries for the same usable capacity. For that same 200-400Ah usable capacity, you might only need 200-400Ah of LiFePO4 batteries, costing $1,200-$4,800. The higher upfront cost is often offset by their longevity, efficiency, and reduced weight. Brands like Battle Born and EG4 are popular in the marine community for their robust battery management systems (BMS) and reliability.
Many sailors find that investing more in LiFePO4 batteries upfront actually saves money and headaches in the long run, especially when you consider lifespan and the weight savings on a sailboat.
Charge Controllers and Inverters: Marine-Grade Requirements
These are the brains of your system, managing power flow and converting it to usable AC electricity for your appliances.
- Charge Controller: This device regulates the voltage and current coming from your solar panels to your batteries, preventing overcharging. MPPT (Maximum Power Point Tracking) controllers are highly recommended for sailboats because they are more efficient, especially in variable sunlight conditions or when panels are partially shaded, which is common on a rocking boat. A good MPPT controller for a medium-sized system (e.g., 40-60A) can cost $200-$600. Brands like Victron Energy are highly regarded for their marine-specific features and Bluetooth monitoring capabilities, allowing you to check your system from your phone.
- Inverter: If you plan to run any AC appliances (like a microwave, coffee maker, laptop charger, or a small air conditioner), you'll need an inverter to convert the DC power from your batteries into AC power. For marine use, a pure sine wave inverter is essential to protect sensitive electronics and run motors efficiently. The size (wattage) of your inverter depends on your largest AC load. A 1000W inverter might cost $200-$500, while a larger 3000W inverter for a full liveaboard setup could be $500-$1,500 or more. Some advanced units, often referred to as inverter-chargers, combine an inverter with a battery charger that can take shore power or generator input, providing a comprehensive power management solution.
Wiring, Mounting Hardware, and Safety Equipment
These often-overlooked components are critical for safety, efficiency, and longevity, and they add to the overall cost of a system.
- Wiring and Cables: Marine-grade, tinned copper wiring is a must to prevent corrosion. The gauge of the wire needs to be correctly sized for the current and length of the run to prevent voltage drop and overheating. This can be surprisingly expensive, especially for longer runs or high-current battery cables. A few hundred dollars is easily spent on proper wiring. Learning How to Size Wire and Cables is essential for a safe and efficient system.
- Mounting Hardware: For rigid panels, you'll need robust brackets, sometimes an arch, and corrosion-resistant fasteners. If opting for a custom arch, professional fabrication can run into thousands of dollars. Simple deck mounts for smaller flexible panels might only be $50-$200.
- Fuses, Breakers, and Disconnects: Safety is paramount on a boat. All circuits, from the solar array to the battery bank and inverter, need proper fusing and circuit breakers to protect against overcurrents and short circuits. Battery disconnect switches are also vital for maintenance and emergencies. A comprehensive set of marine-grade safety components can easily add $100-$300 to your bill.
- Monitoring System: A good battery monitor (like a Victron BMV-712) provides crucial information about your battery's state of charge, current draw, and historical data, helping you manage your power consumption effectively. These typically cost $150-$300.
Estimating Your Sailboat's Power Needs Accurately
The biggest factor influencing your total off-grid solar cost for a sailboat is your specific power consumption. This isn't just a number; it's a reflection of your lifestyle on the water. Overestimate, and you spend too much; underestimate, and you're constantly running out of juice.
Auditing Your Appliances
Before you even think about buying components, you need to conduct a thorough energy audit of everything electrical on your boat. Grab a notepad, or even better, a spreadsheet, and walk through every appliance. This isn't just about what's plugged in constantly; it's about everything you might want to use.
Think about your lights: are they LED or older incandescent bulbs? What about your navigation equipment – GPS, chart plotter, radar, autopilot – how many hours a day do they run? The refrigeration unit is often the biggest power hog on a boat, so understanding its duty cycle and power draw is critical. Don't forget your comms gear like VHF, SSB, or a Starlink setup, which can be surprisingly thirsty. Even small items like phone chargers, fans, a water pump for your galley, or a stereo system add up over time. Make a list of everything and its wattage or amperage, and then estimate how many hours per day you actually use it. This exercise is directly related to Off-Grid Solar Load Calculation Explained and will prevent many headaches down the line.
Calculating Daily Watt-Hours and Peak Loads
Once you have your appliance list and estimated usage, it's time to crunch some numbers to figure out your total daily watt-hours (Wh). For each item, multiply its wattage by the hours of daily use. If an appliance only lists amps, multiply amps by your system voltage (e.g., 12V) to get watts, then multiply by hours. Sum all these individual watt-hour figures to get your total daily energy consumption.
For example:
- LED cabin lights: 10W x 4 hours = 40 Wh
- Refrigerator: 60W x 12 hours (on-cycle) = 720 Wh
- Autopilot: 30W x 6 hours = 180 Wh
- Laptop charging: 50W x 2 hours = 100 Wh
- VHF radio (standby/receive): 5W x 24 hours = 120 Wh
- Water pump: 30W x 0.5 hours = 15 Wh
Total estimated daily consumption: ~1175 Wh.
Beyond daily consumption, you also need to consider your peak load. This is the maximum wattage your inverter might need to supply at any given moment if multiple high-draw appliances are running simultaneously (e.g., microwave, coffee maker, and water heater). This peak load determines the minimum size of your inverter. For instance, if your microwave draws 1000W and your coffee maker draws 800W, and you might use both at once, you'd need an inverter capable of handling at least 1800W continuously, possibly more for surge capacity if motors are involved. This step is critical in avoiding an undersized inverter that trips circuit breakers.
Planning for Days of Autonomy
Sailboats spend a lot of time under clouds, in rainy conditions, or anchored in shaded coves. Your solar system needs to be able to carry you through these periods without sunshine, or you’ll be firing up your engine to charge batteries, which defeats the purpose. This is where "days of autonomy" comes in.
This refers to how many days your battery bank can sustain your power needs without any input from solar panels. For a sailboat, especially if you plan extended cruising, 2-3 days of autonomy is a good starting point, with some bluewater cruisers aiming for 5 days. To calculate this, take your total daily watt-hours and multiply it by your desired days of autonomy. This number, after accounting for inverter efficiency losses (typically 10-15%), will tell you the minimum usable capacity your battery bank needs. How Much Battery Capacity You Need is directly related to this calculation. For example, if you need 1175 Wh per day and want 3 days of autonomy, you need roughly 3525 Wh of usable battery capacity. This translates to a significantly larger battery bank compared to just covering a single sunny day, and this capacity dramatically impacts overall system cost.
Cost Breakdown: DIY vs. Professional Installation
Once you have your design and component list, the next big decision affecting your budget is whether you'll tackle the installation yourself or hire a professional. Both paths have distinct financial implications and trade-offs.
The "Sweat Equity" Savings of DIY
For many boat owners, the idea of a DIY solar installation is highly appealing. It offers a significant opportunity to save money on labor costs, which can easily represent 20-40% of a professional installation's total price. If you have a solid understanding of marine electrical systems, are comfortable with tools, and willing to invest the time in research and meticulous work, then installing your own off-grid solar system for a sailboat can be very rewarding.
You'll save on hourly rates for electricians and technicians, which can range from $75-$150 per hour or more, depending on your location. Furthermore, a DIY approach allows you to learn every inch of your system, making future troubleshooting and maintenance much easier. Many successful sailboat solar systems, especially on smaller vessels or those with simpler needs, are built by their owners. Online forums, YouTube tutorials, and resources like How to Install Off-Grid Solar on a Boat provide ample guidance. However, it’s crucial to be honest about your skill level. Mistakes in marine electrical systems can be dangerous, leading to fires, equipment damage, or even electrocution. If you go this route, consider doing a significant portion yourself and then hiring an experienced marine electrician for a final inspection or to handle complex wiring connections to ensure safety and compliance with standards.
When Professional Installation is Worth the Investment
There are many scenarios where hiring a professional for your sailboat solar installation is not just advisable, but essential. If your knowledge of DC and AC electrical systems is limited, or if your system is complex—involving high-wattage inverters, multiple battery banks, or integration with existing vessel systems—a professional can ensure safety, efficiency, and compliance.
Professional installers, especially those specializing in marine electrical systems, bring expertise in proper wire sizing, fusing, grounding, and selecting marine-grade components that will stand up to the harsh environment. They can often source equipment at better prices or offer warranties on their work. For a large liveaboard system or a bluewater cruising vessel where reliability is paramount, a professional installation provides peace of mind. The cost can add several thousand dollars to your project, but it minimizes the risk of costly mistakes, ensures optimal performance, and often includes proper documentation and support. For intricate integrations, such as an inverter-charger seamlessly switching between shore power, generator, and battery, an expert can configure the system for maximum efficiency and automation. This is especially important for systems designed for bluewater cruising where every watt counts.
Hidden Costs and Unexpected Expenses
Regardless of whether you go DIY or professional, there are always those little "gotchas" that pop up. Budgeting an extra 10-20% for unexpected expenses is always a good idea. These can include:
- Tools: If you don't already have specialized marine crimpers, wire strippers, multimeter, or a specific drill bit, those costs add up.
- Permits and Inspections: While less common for smaller sailboat systems, some jurisdictions or marinas might have rules. For larger, more integrated systems that tie into the boat's main AC panel, you might need an inspection.
- Shipping and Freight: Larger items like panels and batteries can incur significant shipping costs, especially to remote locations or island marinas.
- Custom Fabrication: If you need a custom arch or mounting solution, the cost for welding and materials can be substantial.
- Component Upgrades: You might initially plan for one type of component but realize a more robust, slightly more expensive option is better for marine use, leading to an unplanned upgrade.
- Corrosion Mitigation: Extra expenses for corrosion-resistant sprays, heat shrink tubing, and marine-grade sealants are always a good idea.
Being aware of these potential hidden costs will help you create a more realistic budget for your sailboat solar project.
Real-World Cost Ranges for Sailboat Solar Systems
Let's talk numbers. The cost of an off-grid solar system for a sailboat can vary wildly, reflecting the enormous diversity in boat sizes, owner needs, and cruising aspirations. Here's a general breakdown to give you a clearer picture.
Small Weekend Cruiser Setups
For a small sailboat (say, 20-30 feet) used for weekend trips or occasional day sails, the power needs are typically minimal. You're mostly looking to charge phones, run navigation lights, a VHF radio, and maybe a small portable cooler or fan.
- System Size: Often in the 100-300 watt range for solar panels, with 100-200Ah of battery capacity.
- Components: You might use one or two smaller rigid panels on a rail mount, or flexible panels secured to the deck/bimini. A basic MPPT charge controller and a small pure sine wave inverter (300-600W) for charging laptops or running small AC appliances. A simple battery monitor and basic safety fusing. A portable solar generator from brands like Jackery or Bluetti can also serve as an all-in-one solution for these lighter needs, costing $300-$1,000 for a unit with panels.
- DIY Cost Estimate: $800 – $2,000. This assumes you're doing all the work yourself and sourcing components carefully, perhaps finding deals on Amazon.
- Professional Installation Cost Estimate: $1,500 – $3,500. This includes labor and markup on components.
This type of setup might look like a single 200W panel, two 100Ah AGM batteries, a 20A MPPT controller, and a 500W inverter, perfect for keeping critical systems running and enjoying basic comforts.
Mid-Size Liveaboard Systems
Moving up to a mid-sized cruising sailboat (30-45 feet) that's home for extended periods or even full-time, your power demands grow considerably. You'll likely want refrigeration, a robust autopilot, more extensive navigation electronics, a water pump, a robust communication system, and comfortable lighting.
- System Size: Typically 400-800 watts of solar, paired with 300-600Ah of usable LiFePO4 battery capacity.
- Components: Multiple rigid panels on a sturdy arch or davits are common for efficiency and durability. A larger MPPT charge controller (40-60A) and a robust pure sine wave inverter (1500-3000W), possibly an inverter-charger for shore power integration. A comprehensive battery monitor and more extensive marine-grade wiring and safety components.
- DIY Cost Estimate: $4,000 – $10,000. This range reflects the investment in high-quality LiFePO4 batteries and larger, more efficient solar panels and inverter.
- Professional Installation Cost Estimate: $7,000 – $18,000. The labor for fabricating an arch and integrating a more complex system significantly increases the cost.
For a 38-foot liveaboard, you might have four 200W monocrystalline panels on an arch, 400Ah of LiFePO4 batteries, a Victron MPPT 100/50 charge controller, and a 2000W pure sine wave inverter-charger. This provides ample power for all essential systems and many creature comforts.
Large Bluewater Cruising Systems
For large sailboats (45+ feet) engaged in serious bluewater cruising or full-time liveaboard life with all the amenities of a small home, the solar system becomes a critical, high-capacity utility. This means running items like watermakers, washing machines, microwaves, air conditioning (mini-splits), and extensive electronics.
- System Size: 800-1500+ watts of solar, often with 600-1200+ Ah of LiFePO4 battery capacity.
- Components: A large array of high-efficiency rigid panels on custom-fabricated arches or extensive bimini coverage. Multiple MPPT charge controllers or a single, very large unit. A powerful pure sine wave inverter-charger (3000-5000W or even dual units), potentially integrated with a generator for backup. Advanced battery monitoring and distribution systems. These systems are often designed for bluewater cruising to ensure continuous reliable power even in challenging conditions.
- DIY Cost Estimate: $10,000 – $30,000+. The cost of components alone is substantial.
- Professional Installation Cost Estimate: $18,000 – $50,000+. At this level, professional design and installation are almost always recommended for safety, efficiency, and system reliability.
A 50-foot catamaran undertaking an circumnavigation might feature 1200W of solar, 800Ah of server-rack style LiFePO4 batteries, a large Sol-Ark or Victron MultiPlus inverter-charger, and a sophisticated energy management system. Such systems are complex and require meticulous planning and execution.
How System Voltage Affects Cost
The choice of system voltage (12V, 24V, or 48V) significantly impacts the cost and efficiency of your sailboat solar setup.
- 12V Systems: Most common on smaller boats due to existing DC systems. Easy to integrate. However, for higher power demands, 12V systems require thicker, more expensive wiring to handle higher currents and avoid voltage drop. This can increase the cost considerably.
- 24V Systems: A good compromise for mid-sized boats. Reduces current by half compared to 12V for the same wattage, allowing for thinner wiring and less voltage drop. Components might be slightly more expensive or harder to find than 12V, but overall system cost often benefits from reduced wire size.
- 48V Systems: Best for large systems with high power demands (over 2000W inverter). Current is reduced even further, allowing for very thin wiring, minimal voltage drop, and highly efficient inverter operation. Components are often industrial grade and more expensive, but the overall efficiency and long-term benefits for a large system often outweigh the initial cost. Many large systems benefit greatly from 48V.
It's a balance between existing infrastructure, future expansion plans, and the overall power needs of your vessel.
| Sailboat Size / Use | Solar Array (Watts) | Battery Bank (Usable Ah LiFePO4) | Inverter (Watts) | Estimated DIY Cost Range | Estimated Professional Cost Range |
|---|---|---|---|---|---|
| Weekend Cruiser | 100 – 300 | 100 – 200 | 300 – 600 | $800 – $2,000 | $1,500 – $3,500 |
| Mid-Size Liveaboard | 400 – 800 | 300 – 600 | 1500 – 3000 | $4,000 – $10,000 | $7,000 – $18,000 |
| Bluewater Cruiser | 800 – 1500+ | 600 – 1200+ | 3000 – 5000+ | $10,000 – $30,000+ | $18,000 – $50,000+ |
Note: These are general estimates and can vary based on brand, component quality, location, and specific marine challenges.
Smart Strategies for Off-Grid Solar Savings on Your Sailboat
Navigating the costs of off-grid solar for your sailboat doesn't have to mean breaking the bank. With some strategic planning and smart choices, you can build a reliable system without unnecessary financial strain.
Prioritizing Essential Loads and Energy Efficiency
The absolute best way to save money on your off-grid solar system is to reduce your power consumption in the first place. Every watt-hour you save means you need fewer solar panels, smaller batteries, and potentially a less powerful inverter, all of which translate directly into cost savings.
Start by conducting a meticulous energy audit, as discussed earlier. Identify your non-negotiable loads (navigation, safety equipment, essential refrigeration) versus your "nice-to-haves" (entertainment, high-draw galley appliances). Look for opportunities to upgrade to energy-efficient alternatives. Switching from incandescent to LED lighting is a classic example, often reducing lighting power consumption by 80-90%. Consider high-efficiency marine refrigerators, which can significantly cut down on your largest power draw. For smaller loads, using 12V direct current appliances where possible, rather than converting to AC with an inverter, minimizes conversion losses and overall power use. For instance, charging phones and tablets directly from USB ports can be far more efficient than using an AC charger plugged into an inverter. Every little bit truly helps, and this meticulous approach to power management can substantially impact your battery bank and system cost over the long run.
Phased Upgrades and Expandable Systems
You don't have to install your dream system all at once, especially if you're on a tight budget or just starting your off-grid journey. A phased approach allows you to spread the cost over time and upgrade as your needs or funds grow.
Start with a basic, essential system that covers your critical loads. Perhaps a couple of small solar panels, a basic charge controller, and enough battery capacity for overnight needs. Over time, you can add more panels, expand your battery bank, or upgrade your inverter as you gain experience and identify your real-world power demands. When planning, design your system with future expansion in mind. For example, choose a charge controller that can handle more solar input than you initially install, or wire your battery bank with terminals that make it easy to add more batteries later. Resources like How to Plan for Future Expansion can guide you on how to set up your system for future additions. This strategy makes the initial investment much more manageable and helps avoid the financial shock of a massive upfront cost, allowing you to gradually work towards your ideal off-grid setup.
Shopping for Deals and Used Equipment (with Caution)
While reliability is paramount on a boat, you can still find ways to save money without compromising safety. Keep an eye out for sales from reputable marine electrical suppliers or general solar equipment retailers. Black Friday, end-of-season sales, or holiday promotions can offer significant discounts on panels, batteries, or inverters. You might find great deals on brands like Renogy or BougeRV panels through major online retailers.
For larger components, sometimes purchasing from a dedicated solar distributor can offer better pricing than a general marine chandlery. Just be sure to compare warranties and shipping costs. When it comes to used equipment, proceed with extreme caution, especially for critical components like batteries and inverters. While you might find a bargain on used solar panels, verifying their condition and output can be challenging. Used batteries, especially lead-acid, often have a significantly reduced lifespan, making them a false economy. Used lithium batteries are even riskier unless they come from a known, trusted source with verifiable history. If you do consider used components, always have them inspected by a knowledgeable professional before purchase to avoid inheriting someone else's problems, which could end up costing you more in repairs or replacements down the line.
Disclaimer
The information provided in this article is for general informational purposes only and does not constitute professional advice. Off-grid solar system design and installation, especially in a marine environment, can be complex and potentially dangerous. Always consult with qualified marine electricians or solar professionals and adhere to all local codes and safety guidelines before undertaking any electrical work on your vessel.