How to Set Up Victron Components
If you've ever stared at a pile of sleek, blue Victron Energy components on your workbench, a mixture of excitement and sheer intimidation probably washed over you. Setting up a robust off-grid solar system is a significant undertaking, and when you choose top-tier equipment like Victron, you're embracing a world of sophisticated integration and powerful control. This guide aims to demystify the process of configuring these components, providing clear, actionable steps to get your system up and running smoothly.
Understanding the Victron Ecosystem
Victron Energy has carved out a name for itself in the off-grid and marine power world as a premium brand known for reliability, deep integration, and comprehensive monitoring. But what exactly makes their ecosystem so compelling, and what are the main players you'll be working with?
Why Choose Victron Energy
For many off-grid enthusiasts, choosing Victron isn't just about buying individual components; it's about investing in a cohesive, intelligent power system. Unlike some plug-and-play kits, Victron allows for incredible flexibility and scalability, meaning you can start small and expand as your needs grow. This modularity means you're building a system that can truly evolve with your homestead, RV, or boat. The build quality is exceptional, designed for longevity and demanding environments, which gives you peace of mind whether you're deep in the wilderness or cruising remote waters. Beyond the hardware, Victron’s commitment to integration through its VE.Bus, VE.Direct, and VE.Can communication protocols ensures all your components talk to each other seamlessly. This creates a unified system that can be monitored and controlled from virtually anywhere via their Victron Remote Management (VRM) portal. The community support and extensive documentation, while sometimes technical, are also massive advantages.
Key Components You'll Encounter
When you dive into the Victron world, you'll quickly become familiar with a few star players that form the backbone of most off-grid setups:
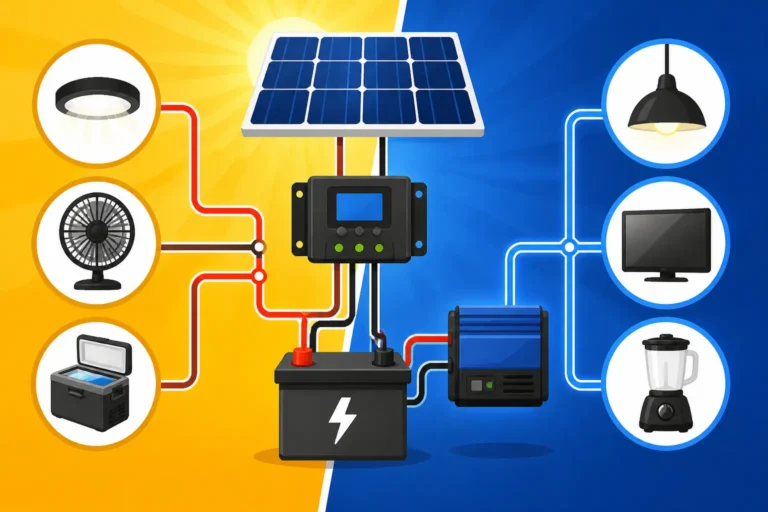
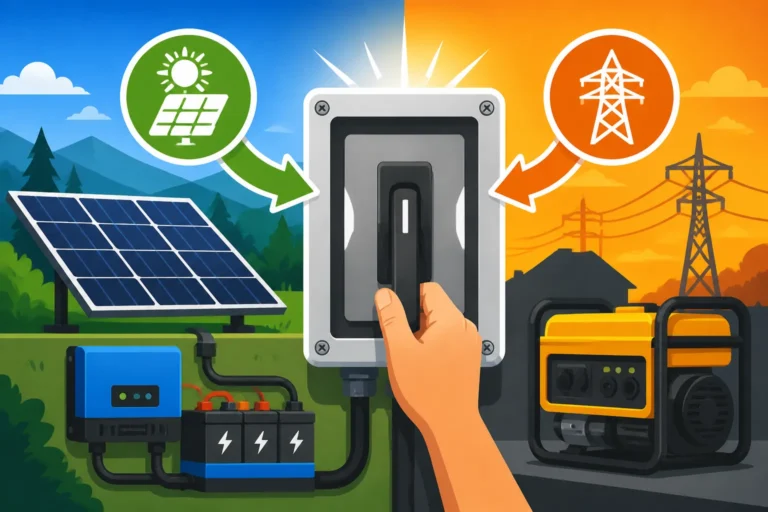
- MultiPlus/Quattro Inverter/Chargers: These are often the heart of the system. A MultiPlus combines a powerful pure sine wave inverter, a sophisticated battery charger, and a high-speed AC transfer switch all in one unit. The Quattro takes it a step further by adding a second AC input, perfect for integrating both a generator and shore power. These devices are renowned for their ability to handle surge loads and provide clean, reliable AC power.
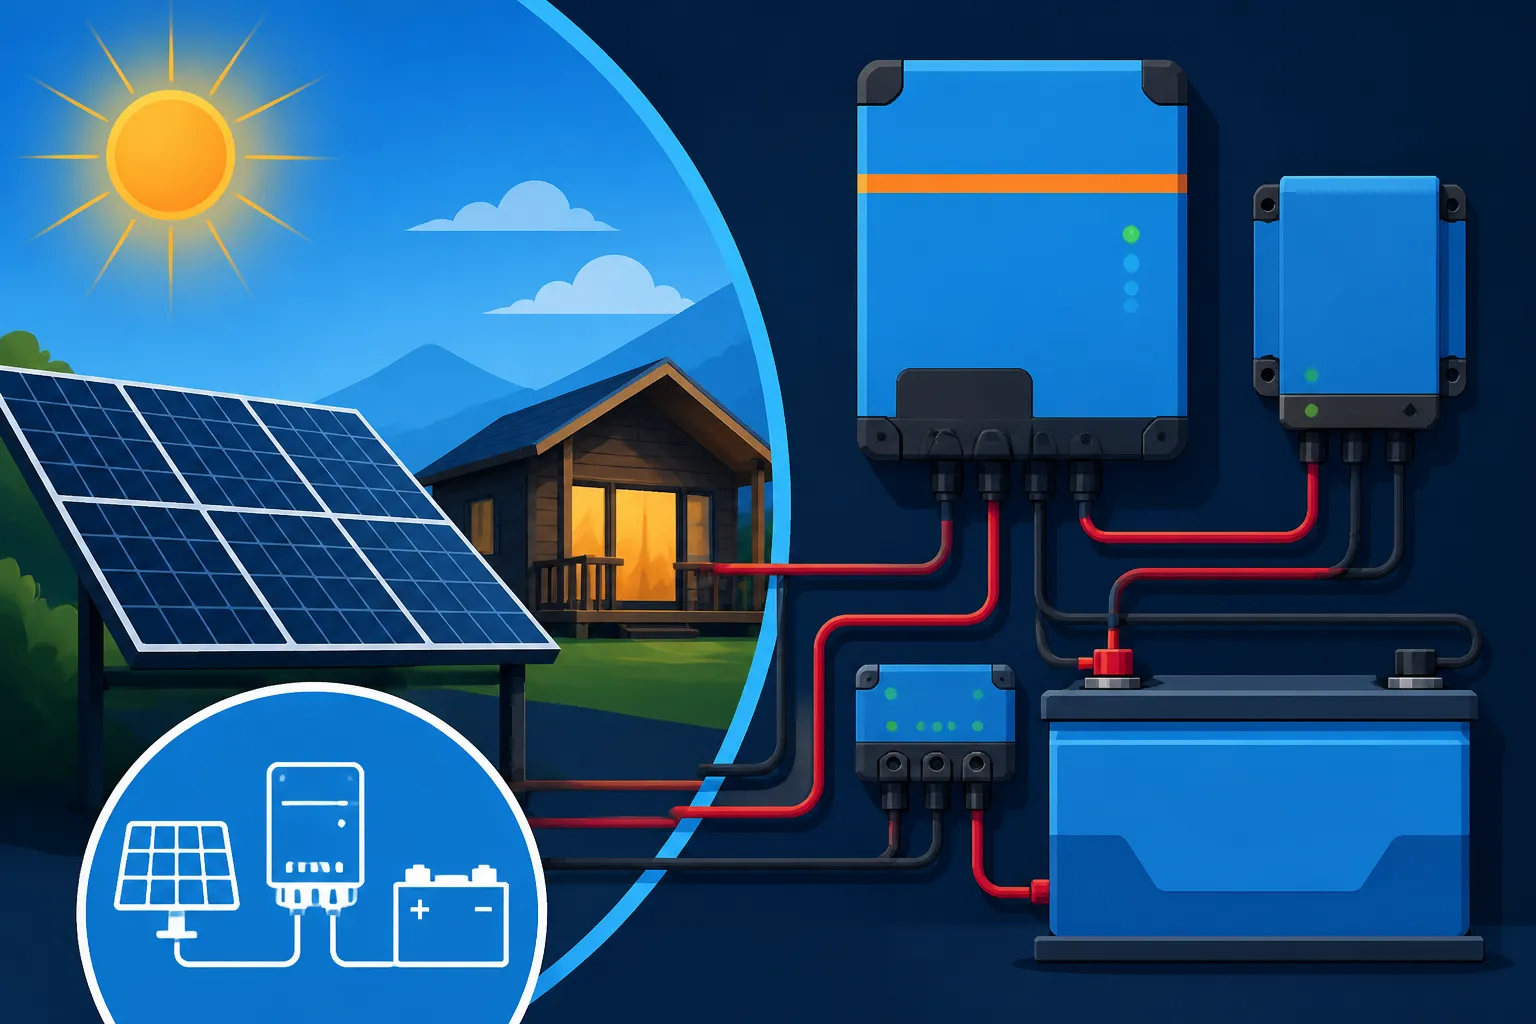
- SmartSolar MPPT Charge Controllers: These are your solar panel's best friends. An MPPT (Maximum Power Point Tracking) charge controller efficiently harvests energy from your solar panels and converts it to the correct voltage and current to charge your battery bank. Victron's SmartSolar range includes built-in Bluetooth, allowing for easy monitoring and configuration right from your phone or tablet using the VictronConnect app.
- Cerbo GX Communication Hub: Think of the Cerbo GX as the brain of your Victron system. It collects data from all connected Victron devices, relays it to the VRM portal for remote monitoring, and allows for local control via a touch display (GX Touch) or web browser. It's what turns a collection of powerful components into a truly smart system.
- SmartShunt/BMV Battery Monitors: You can't manage what you don't measure, and these devices are critical for accurate battery monitoring. They track your battery's state of charge, voltage, current in and out, and more, giving you crucial insights into your power consumption and battery health. The SmartShunt, like the SmartSolar, offers Bluetooth connectivity.
- Lynx Distributor/Smart BMS: For larger systems, these manage high-current DC distribution, providing a neat and safe way to connect multiple battery strings and DC loads while also housing fuses. The Lynx Smart BMS is specifically designed for Victron's LiFePO4 batteries, offering advanced protection and communication.
Each of these components plays a vital role in ensuring your off-grid power system is efficient, reliable, and easy to manage.
Essential Pre-Installation Steps for Victron Gear
Before you even think about unwrapping those shiny blue boxes, a solid foundation of planning, preparation, and safety is absolutely critical. Skipping these steps can lead to inefficiencies, frustrations, or, worse, dangerous situations.
System Design and Sizing
The most common mistake people make when venturing into off-grid solar is failing to properly size their system. You wouldn't build a house without blueprints, and your power system is no different. You need to know exactly what you plan to power, how much energy each appliance consumes, and for how long. This process is called a load analysis. For example, will you be running a powerful air conditioner, or just a few LED lights and charging your phone? The difference in power draw is immense.
Start by listing every electrical device you intend to use. For each item, note its wattage (W) and how many hours per day you expect to use it. Multiply these to get daily Watt-hours (Wh). Don't forget those high-surge items like well pumps or microwaves, which dictate your inverter's peak power capability. Once you have your total daily Watt-hour consumption, you can begin to size your solar array and battery bank. Remember, it's often wise to plan for a few days of autonomy, meaning your batteries can sustain your loads even without sun. This is especially true if you live in an area prone to cloudy weather or want to design for year-round off-grid power. We have a detailed guide on how to size an off-grid solar system that can walk you through this process step-by-step. Without this crucial planning, you risk buying components that are either undersized (leaving you without power) or oversized (wasting money).
Gathering Your Tools and Materials
A successful installation requires the right tools. You're dealing with high-current DC and AC electricity, so precision and quality matter. Here’s a general list, though your specific setup might require more:
- Crimpers: High-quality hydraulic or heavy-duty manual crimpers for battery cables. Do not skimp here; poor crimps are fire hazards.
- Wire Strippers: For various gauges of wire, especially your thick battery cables.
- Multimeter: Essential for checking voltage, continuity, and diagnosing issues.
- Drill and Bits: For mounting components and running conduit.
- Screwdrivers and Wrenches: Various sizes for terminals and mounting hardware.
- Safety Gear: Insulated gloves, safety glasses, fire extinguisher (ABC rated).
- Cable Ties and Management: To keep your wiring neat, organized, and safe.
- Victron Specifics: An MK3-USB adapter if you're configuring a MultiPlus directly from a computer, or a VE.Direct USB cable for older SmartSolar controllers that lack Bluetooth.
In terms of materials, you’ll need appropriate gauge copper wire for all your DC and AC runs. This includes thick battery cables (often 2/0, 4/0, or even larger), PV wire, and AC household wiring. Don't forget properly rated fuses or breakers for all major circuits – this includes battery disconnects and circuit protection for your solar array, battery bank, and AC output. You can often find high-quality wiring and terminals on platforms like Amazon, but always ensure they meet appropriate safety standards for electrical systems.
Safety First: Disconnecting Power and Proper Grounding
This cannot be stressed enough: electricity is dangerous. Before touching any wires, ensure all power sources are disconnected. This means:
- Disconnecting Solar Panels: Cover them with opaque tarps or use a PV disconnect switch to stop power generation.
- Disconnecting Batteries: Use a heavy-duty battery disconnect switch. If you don't have one installed yet, disconnect the negative terminal first, then the positive, wearing insulated gloves.
- Disconnecting AC Input: If you have shore power or a generator connected, unplug it or flip its breaker.
Proper grounding is paramount for safety, protecting both your equipment and yourself from electrical faults. Consult your local electrical codes (like the NEC in the US) for specific requirements. Generally, all metal enclosures of electrical equipment should be bonded together and connected to a common earth ground. This might involve driving a grounding rod into the earth or connecting to a vehicle chassis in an RV or van. Victron inverters often have a specific grounding lug that must be connected. Understanding how to ground an off-grid solar system correctly is vital for preventing shocks and fires.
Step-by-Step Installation and Wiring of Core Victron Components
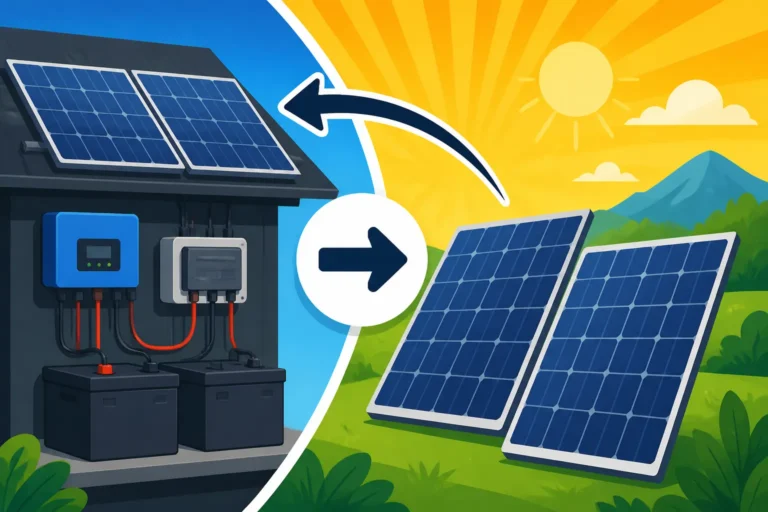
Now that you've done your homework and gathered your gear, it's time to bring your Victron system to life. We'll go through the installation in a logical flow, starting with physical placement and then moving to electrical connections.
Mounting the Hardware
Thoughtful placement of your components isn't just about aesthetics; it's about performance, safety, and longevity.
- Inverter/Charger (MultiPlus/Quattro): These units can be heavy, especially the larger ones, and they dissipate a lot of heat. Mount them to a sturdy, vertical surface like a wall stud or a robust piece of plywood. Ensure there's adequate airflow around the unit, following the manufacturer's recommendations for clearance. Avoid enclosed spaces where heat can build up, and keep them away from anything flammable. A well-ventilated garage, utility room, or dedicated equipment cabinet is ideal. When considering how to size an off-grid inverter, remember that physical space and ventilation are just as crucial as electrical capacity.
- Charge Controllers (SmartSolar MPPT): Like inverters, MPPTs generate heat during operation. Mount them in a cool, dry, and well-ventilated area, out of direct sunlight. A vertical mounting orientation is usually best for natural convection cooling. Make sure they are easily accessible for wiring and future maintenance.
- Cerbo GX and Battery Monitor (SmartShunt/BMV): These don't generate much heat and can be mounted in a convenient location where their displays (if applicable) are easily visible or where they can connect to your network. For battery monitors, place them as close to the battery bank as possible to ensure accurate readings, typically on the negative cable path.
- Lynx Distributor: Mount this securely near your battery bank as it serves as a central hub for your DC connections. Its robust design is meant to handle high currents and large cables.
Always use appropriate mounting hardware and ensure everything is firmly secured. Vibrations, especially in mobile applications like an RV, can loosen connections over time.
Wiring the Battery Bank to the Inverter/Charger
This is where the serious current flows, so absolute attention to detail is paramount. You can dive deeper into the specifics of how to wire a battery bank, but here’s the overview for Victron:
- Battery Disconnect: Install a high-current DC disconnect switch (e.g., a Blue Sea Systems switch or a heavy-duty breaker) between your battery bank and the inverter. This is your primary safety cut-off.
- Fuse Protection: Install appropriate inline DC fuse holders (like a Class T fuse block for large systems) as close to the battery positive terminal as possible, before the disconnect switch and before the inverter. The fuse size must be rated to protect the inverter's input wiring and the inverter itself. Refer to your MultiPlus/Quattro manual for the recommended fuse size based on your model.
- Cable Sizing: Use properly sized cables for your expected current draw and cable length. Undersized cables lead to voltage drop, heat, and fire hazards. For example, a 3000W 12V inverter can draw over 250 amps, requiring very thick cables (e.g., 4/0 AWG). Consult a wire gauge chart to ensure you select the correct size.
- Connecting to MultiPlus/Quattro: Carefully connect the negative battery cable to the negative terminal on the inverter, and the positive battery cable to the positive terminal, ensuring correct polarity. Double-check all connections, ensuring they are tight and secure. Loose connections cause resistance, heat, and arcing. For more insights, refer to our guide on how to connect an inverter to batteries.
Connecting Solar Panels to the MPPT Charge Controller
Your solar panels are the fuel for your off-grid system. How you connect them to your Victron SmartSolar MPPT is crucial for efficiency. You'll find more information in our article on how to install an off-grid MPPT controller.
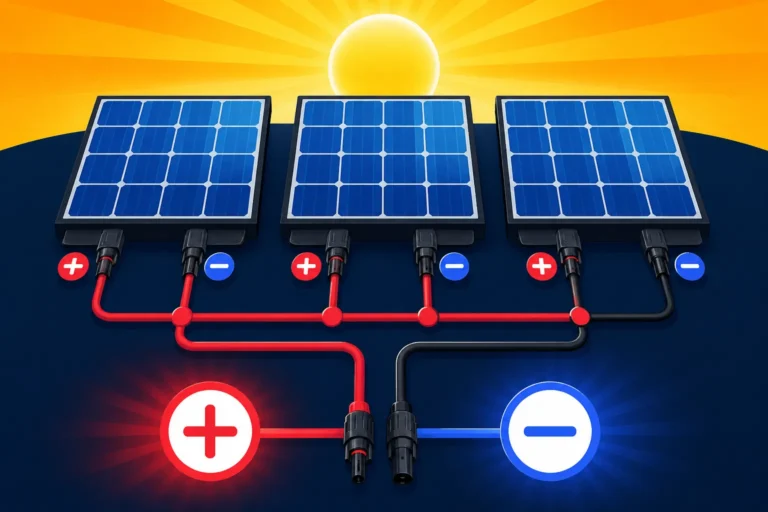
- Panel Wiring (Series/Parallel): Determine your solar array configuration. Wiring panels in series increases voltage, which is generally more efficient for longer cable runs and larger systems, especially when paired with an MPPT controller. Wiring in parallel increases current. Always stay within the MPPT controller's maximum input voltage (Voc) and current (Isc) ratings. Victron MPPTs come in various voltage ratings (e.g., 75V, 100V, 150V, 250V), so match your panel configuration to the controller.
- PV Disconnect and Fusing: Install a DC PV disconnect switch between your solar array and the MPPT charge controller. This allows you to safely shut off power from the panels. Also, consider inline fuses or a PV combiner box with breakers for individual panel strings, protecting against overcurrent and allowing for array isolation.
- Cable Sizing: Use appropriately sized PV wire for the current and length of your solar panel runs. For example, 10 AWG or 12 AWG is common for individual panels or strings.
- Connecting to SmartSolar MPPT:
- First, connect the battery cables from your battery bank to the "Battery" terminals on the MPPT controller. It is critical that the MPPT sees the battery voltage before connecting the solar panels. This prevents potential damage to the controller.
- Once the battery is connected, connect the positive and negative leads from your solar array to the "PV" terminals on the MPPT controller, observing polarity.
Integrating the Cerbo GX and SmartShunt
These components bring intelligence and monitoring to your Victron system, allowing everything to communicate.
- SmartShunt/BMV Installation:
- The SmartShunt or BMV shunt is typically installed on the negative main cable coming directly off your battery bank, before any loads or charging sources connect to the battery bank. This ensures that all current flowing in and out of your batteries passes through the shunt, providing accurate monitoring.
- Connect the thin negative cable from your battery bank to one side of the shunt, and the negative cable going to your inverter, charge controllers, and DC loads to the other side.
- Connect the positive sense wire from the SmartShunt/BMV to your battery's positive terminal. This provides voltage sensing.
- For the SmartShunt, connect it to the Cerbo GX using a VE.Direct cable.
- Cerbo GX Installation:
- Mount the Cerbo GX in a central location, usually near your other Victron components.
- Connect all your other Victron devices (MultiPlus/Quattro, SmartSolar MPPTs, SmartShunt) to the Cerbo GX using the appropriate communication cables (VE.Bus for MultiPlus/Quattro, VE.Direct for SmartSolar MPPTs and SmartShunts).
- If you have a GX Touch display, connect it to the Cerbo GX.
- Connect the Cerbo GX to your local network via Ethernet or Wi-Fi (using a USB Wi-Fi dongle if needed) to enable remote monitoring via the VRM portal.
- Power the Cerbo GX from your DC system, usually a 12V or 24V supply, using its dedicated power input.
Configuration and Commissioning Your Victron System
Hardware installed? Awesome! Now it's time to tell your Victron components how to work together. This is where the magic of the Victron ecosystem truly shines, but it also requires careful attention to detail.
Initial Power-Up and Basic Settings
Before you switch everything on, take a deep breath and do one final visual inspection of all your wiring. Are all connections tight? Is polarity correct? Are fuses in place?
- Activate Battery Power: First, turn on your battery disconnect switch to provide power to your MultiPlus/Quattro and SmartSolar MPPT (if not already connected). Your SmartSolar MPPT should power up and display battery voltage. Your MultiPlus/Quattro will likely show error lights until fully configured.
- Connect PV Disconnect: Once the MPPT is powered by the battery, you can turn on your PV disconnect to allow solar power to flow to the charge controller. It should begin to harvest power and charge the batteries if there's enough sunlight.
- Verify Basic Functionality: Check your battery monitor (SmartShunt/BMV) to confirm it's reading voltage and current. You should see charging current from the MPPT if the sun is out.
Using VictronConnect for Bluetooth Devices
Many of Victron's "Smart" devices feature built-in Bluetooth, making initial setup and monitoring incredibly user-friendly.
- Download the App: Get the VictronConnect app on your smartphone or tablet (available for iOS and Android).
- Connect to Devices: Open the app, and it will scan for nearby Victron Bluetooth devices. Connect to your SmartSolar MPPTs and SmartShunt.
- Configure SmartSolar MPPT:
- In the SmartSolar settings, the most crucial step is to select your battery type (e.g., Lithium Iron Phosphate, Gel, AGM, Flooded). This will automatically set appropriate charging voltages.
- If using LiFePO4 batteries, confirm the correct absorption voltage, float voltage, and equalization settings (often disabled for lithium). Many brands, like Battle Born or EG4, have specific recommended charging parameters that you should input.
- Set a maximum charge current if your batteries have a limit or if you want to limit solar charging during certain conditions.
- For 48V systems, ensure the correct voltage is detected.
- Configure SmartShunt:
- Ensure the battery capacity (Ah) is accurately entered. This is critical for the State of Charge (SoC) calculation.
- Set the Peukert exponent and charge efficiency if you know them for your specific battery type (defaults are often fine for lead-acid, but adjust for precision with lithium).
- Ensure the "Synchronize" function is performed when the battery is known to be full, recalibrating the SoC.
Configuring the MultiPlus/Quattro with VE.Configure
This is often the most complex part of a Victron setup, as the MultiPlus/Quattro handles both AC and DC power management. For more advanced configurations, you'll need the VE.Configure software.
- Connection Method:
- Direct via MK3-USB: This is the most common method for initial setup. Connect the MK3-USB adapter to your MultiPlus/Quattro's VE.Bus port and to your Windows computer.
- Via Cerbo GX: If your Cerbo GX is already set up and connected to the MultiPlus/Quattro via VE.Bus, you can access VE.Configure remotely through the Cerbo's interface (via browser or VRM remote console).
- Software: Download and install VE.Configure 3 (or the latest version) from the Victron website.
- Key Settings to Adjust:
- Battery Settings: This is critical. Like with the MPPT, select your battery type. Manually adjust absorption, float, and equalization voltages to precisely match your battery manufacturer's recommendations. For LiFePO4 batteries, pay close attention to the recommended charge parameters for the specific cells or battery system you are using. This is paramount for battery longevity and safety.
- Inverter Settings:
- AC Output Voltage and Frequency: Typically 120V/60Hz for North America.
- Low Battery Cut-Offs: Set appropriate DC voltages for when the inverter should shut down to protect your batteries from over-discharge. For lithium, these are often higher than lead-acid.
- Dynamic Cut-Off: A smart feature that allows the cut-off voltage to adapt based on current draw.
- Charger Settings:
- Max Charge Current: Set this to protect your batteries from overcurrent charging, especially important for smaller battery banks or specific lithium chemistries.
- Storage Mode: If you anticipate long periods of inactivity, this can maintain batteries at a lower, safer voltage.
- AC Input Settings (for generator/shore power): Even in a truly off-grid setup, you might use a generator for backup.
- Input Current Limit: This limits how much current the MultiPlus/Quattro will draw from your generator or shore power, preventing overloading.
- UPS Function: Ensures a seamless transfer to inverter power if AC input is lost.
- Virtual Switch / Assistants: For more advanced control, such as generator auto-start/stop based on battery voltage, or programming specific relays. These are powerful tools for automating your system.
- ESS (Energy Storage System): While typically for grid-tied systems, some off-grid setups can benefit from specific ESS configurations if you're integrating certain types of generators or aiming for specific power flows.
Always save your configuration settings and consider making a backup. A small change can have a big impact, so it's wise to proceed methodically.
Setting Up the Cerbo GX for Monitoring and Control
The Cerbo GX is your window into the entire system.
- Connect Peripherals: Connect your GX Touch display if you have one. If not, you can still access the interface via a web browser on a device connected to the same network as the Cerbo.
- Network Connection: Ensure the Cerbo GX is connected to the internet (Ethernet is most reliable, but Wi-Fi dongles work). This is crucial for enabling the VRM portal.
- Firmware Updates: Always check for and install the latest firmware for all your Victron devices through the Cerbo GX or VictronConnect. This ensures optimal performance and access to new features.
- VRM Portal Setup:
- Create a free account on the Victron VRM portal (vrm.victronenergy.com).
- Add your Cerbo GX to your VRM account using its VRM ID.
- Once connected, you'll see a wealth of data: battery state of charge, solar production, load consumption, inverter status, and more, all in real-time. You can even configure alarms and remotely control certain aspects of your system from anywhere in the world. This is incredibly useful for monitoring your off-grid solar system's health, particularly if you're managing a remote cabin or RV.
Common Pitfalls and Troubleshooting Tips
Even with the best planning, off-grid solar systems can throw a curveball or two. Knowing some common issues and how to approach them can save you a lot of headache.
Connection Errors and Loose Terminals
This is, hands down, the most frequent cause of problems, especially in DIY setups. High current connections, like those from your battery bank to your inverter, generate significant heat if there's resistance.
- Symptoms: Intermittent power, flickering lights, excessive heat at terminals, sudden system shutdowns, or error codes related to high voltage drop.
- Troubleshooting:
- Visual Inspection: Physically check every single connection, especially the high-current ones. Are the terminals securely tightened? Are there any signs of discoloration or melting on the cable insulation or terminal lugs?
- Tug Test: Give each cable a gentle tug at its terminal connection. If it wiggles or comes loose, it's not secure enough.
- Thermal Imaging (if available): A thermal camera can quickly identify hot spots in your wiring, indicating a loose or inadequate connection.
- Retighten: Always use the recommended torque specifications if provided by Victron.
Remember that vibrations, particularly in mobile applications, can loosen connections over time, so periodic checks are a good part of an off-grid solar maintenance guide.
Configuration Mismatches
Victron components are smart, but they're only as smart as the settings you give them. Incorrect configuration can lead to poor performance, battery damage, or even system shutdowns.
- Symptoms: Batteries not charging fully, premature low-voltage cut-offs, inverter unexpectedly shutting off, generator not starting/stopping as expected, or components reporting errors.
- Troubleshooting:
- Battery Settings: Double-check all battery parameters in both VictronConnect (for SmartSolar and SmartShunt) and VE.Configure (for MultiPlus/Quattro). Are the absorption, float, and equalization voltages exactly what your battery manufacturer recommends for your specific battery chemistry (e.g., LiFePO4 vs. AGM)? Mismatched voltages are a leading cause of battery degradation.
- Current Limits: Ensure your charge current limits in the MultiPlus/Quattro and SmartSolar MPPT are set appropriately for your battery bank's maximum charge rate.
- Inverter Cut-Offs: Verify your low DC voltage cut-off settings in the MultiPlus/Quattro. If these are set too high, the inverter will shut down prematurely, even if there's usable power left in the batteries. If set too low for lithium batteries, you risk damaging them.
- Generator Parameters: If using a generator, confirm the auto-start/stop conditions are correct (e.g., based on battery voltage or SoC).
- Firmware: Ensure all your Victron components have the latest firmware. Updates often resolve bugs and improve compatibility. Check our guide on how to troubleshoot off-grid solar for more general issues.
Overcurrent Protection and Fuses
Fuses and circuit breakers are your system's safety nets. If they're improperly sized or omitted, you're inviting trouble.
- Symptoms: Blown fuses, tripped breakers, arcing, or components failing under load.
- Troubleshooting:
- Correct Sizing: Verify that all fuses and circuit breakers are rated correctly for the maximum expected current in that circuit and the wire gauge being protected. For example, the fuse protecting your inverter's DC input should be sized to handle the inverter's maximum continuous current, plus a safety margin, but also be smaller than the current rating of the cable itself.
- Location: Fuses should be installed as close as possible to the power source they are protecting (e.g., battery fuses right at the battery positive terminal, PV fuses right at the solar array).
- Type: Ensure you are using the correct type of fuse (e.g., Class T for high DC currents, PV-rated fuses for solar strings).
- Check for Short Circuits: A repeatedly blowing fuse indicates a short circuit or an overloaded circuit. Disconnect the load, test for continuity across the suspected circuit, and re-check all wiring.
By taking a systematic approach to installation and troubleshooting, you'll find that setting up Victron components, while requiring patience and attention, results in an incredibly robust and reliable off-grid power system.
| Victron Component | Primary Function | Key Connections | Typical Configuration Method |
|---|---|---|---|
| MultiPlus/Quattro | Inverter/Charger | DC Battery, AC In/Out, VE.Bus | VE.Configure (via MK3-USB or Cerbo GX) |
| SmartSolar MPPT | Solar Charge Controller | PV In, DC Battery Out, VE.Direct | VictronConnect App (Bluetooth) |
| Cerbo GX | Communication Hub | VE.Bus, VE.Direct, Ethernet/Wi-Fi, USB | VRM Portal, Remote Console, GX Touch |
| SmartShunt/BMV | Battery Monitor | Main Negative Bus, Positive Sense, VE.Direct | VictronConnect App (Bluetooth) |
| Lynx Distributor | DC Distribution | Battery Cables, DC Loads, VE.Can | Manual (Fuses, Breakers) |
Disclaimer
Please be aware that working with electrical systems, especially high-voltage DC and AC, can be dangerous. This guide provides general information for educational purposes only and is not a substitute for professional electrical advice. Always consult with a certified electrician or solar professional to ensure your system is designed, installed, and maintained safely and in compliance with all local codes and regulations. Incorrect installation can lead to property damage, serious injury, or even death.