How to Size Solar for a 10kWh Day
Figuring out how much solar power you need to comfortably live off-grid can feel like trying to solve a complex puzzle, especially when you're looking at a significant daily energy demand like 10 kilowatt-hours (kWh). It's not just about slapping some panels on a roof; it's a careful dance between understanding your consumption, harnessing the sun, and storing that precious energy. This guide is here to demystify the process, walking you through the steps to accurately size an off-grid solar system capable of powering your 10kWh day, so you can enjoy true energy independence without constantly worrying about running out of juice.
Understanding What a 10kWh Day Really Means for Your Off-Grid Life
When you hear "10 kilowatt-hours per day," it might sound like just a number, but in the world of off-grid living, it's quite a substantial amount of energy. This isn't just for a few lights and charging your phone; a 10kWh daily usage typically means you're powering a small to medium-sized home, a well-equipped cabin, or even a robust RV setup with many creature comforts. It's a fantastic goal, offering a level of convenience and functionality that many off-gridders aspire to, but it definitely requires a thoughtful and robust solar system design.
Breaking Down Your Energy Consumption
The first, and arguably most crucial, step in sizing any off-grid solar system, especially one designed for a 10kWh day, is to perform a detailed load analysis. This is where you meticulously list every single appliance and device you plan to use, how many watts it draws, and for how many hours a day. It's easy to overlook small items, but they add up!
Let's think about what might contribute to that 10kWh target. A modern energy-efficient refrigerator might use around 1-2 kWh per day. A well pump, depending on how often it runs, could easily consume 1-3 kWh daily. Lighting, if you're using LEDs, might only be 0.5 kWh, but if you have a full house with incandescent bulbs, that jumps significantly. Add in a microwave, a washing machine, a TV, computers, charging stations, and perhaps even a small mini-split air conditioner or electric heater for a few hours, and suddenly, 10kWh starts to make sense.
Imagine living in a cozy cabin in the mountains. Your daily usage might look something like this:
- Refrigerator (Energy Star): 1.5 kWh
- LED Lighting (6 hours): 0.5 kWh
- Well Pump (30 minutes total run time): 1.0 kWh
- Laptop (8 hours): 0.4 kWh
- Starlink internet (24 hours): 0.7 kWh
- TV (4 hours): 0.3 kWh
- Microwave (10 minutes daily): 0.2 kWh
- Washing Machine (1 cycle): 0.5 kWh
- Small Electric Heater (intermittent 2 hours in winter): 2.0 kWh
- Hair Dryer (10 minutes): 0.2 kWh
- Coffee Maker (15 minutes): 0.3 kWh
- Various chargers, small electronics: 0.5 kWh
- Total (example): 8.1 kWh
This example is just under 10kWh, showing how quickly appliances add up. To reach a full 10kWh, you might run the mini-split more, have more occupants, or use additional tools and appliances. This exercise of listing everything helps you truly understand your "How to Calculate Daily Energy Usage". You can grab a kill-a-watt meter from places like Amazon to measure the actual draw of your existing appliances, which gives you much more accurate data than relying solely on nameplate ratings.
Seasonal Variations and Usage Patterns
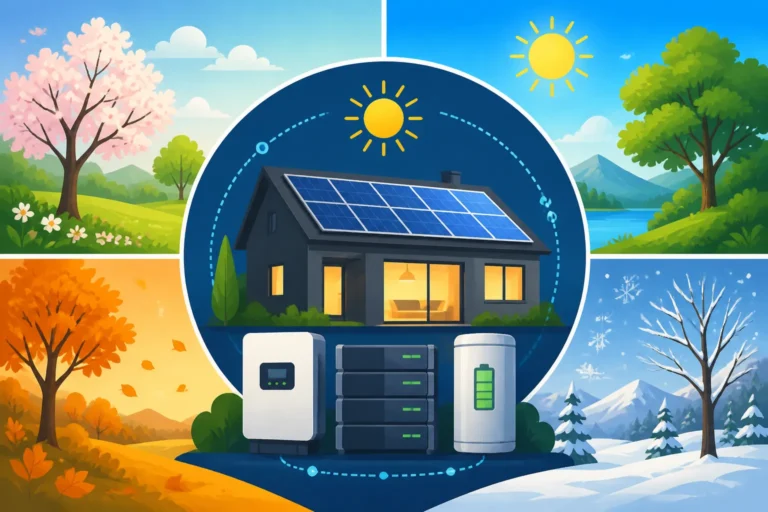
Your 10kWh daily need isn't a static number; it fluctuates significantly throughout the year. Winter brings shorter daylight hours, meaning fewer hours for your solar panels to generate power, but often higher energy demands for heating, indoor lighting, and perhaps more hot water. Summer, with its long sunny days, is fantastic for solar production, but your energy consumption might spike with air conditioning or increased use of outdoor tools.
For instance, in the winter months, when the sun is lower in the sky and days are shorter, your panels will produce less energy. If you're running electric heaters or frequently using power tools in a workshop, your consumption can easily exceed your summer usage. Conversely, a summer day might see you running a small mini-split AC unit for comfort, which is a significant load. Planning for these variations is critical. You don't want to design a system that only meets your needs on a perfect summer day, only to be left in the dark during a cloudy week in December. This is why you need to consider how to account for cloudy days and ensure your system has enough resilience. Many seasoned off-gridders choose to size their system for their winter consumption and winter sun hours, as this provides a buffer for the rest of the year.
Mastering the Math: Sizing Your Solar Panel Array for 10kWh Daily Production
Once you have a solid understanding of your 10kWh daily energy target and how it varies, the next big step is figuring out how many solar panels you'll need to generate all that power. This isn't just about dividing 10kWh by the wattage of a single panel. There are crucial factors like peak sun hours and various system losses that you need to integrate into your calculations for a realistic outcome.
Factoring in Peak Sun Hours
"Peak sun hours" is a concept that often trips up beginners, but it's fundamentally important for accurate solar sizing. It's not the same as the total number of daylight hours. Peak sun hours represent the equivalent number of hours per day when the sun's intensity averages 1,000 watts per square meter (kW/m²). For example, a location might have 10 hours of daylight, but only 5 of those hours are "peak sun hours" where the panels are truly producing near their rated capacity. The other hours are when the sun is lower, less intense, or partially obscured.
The number of peak sun hours varies greatly by your geographical location and the time of year. For instance, sunny Arizona might boast 6-7 peak sun hours daily on average, while a more northern, cloudier region like the Pacific Northwest might only see 3-4 peak sun hours, especially in winter. You absolutely must find the average daily peak sun hours for your specific location, ideally using the lowest average (usually winter) if you plan on year-round, reliable off-grid living. Resources from organizations like the National Renewable Energy Laboratory (NREL) can provide this data for specific zip codes. For this example, let's assume you're in a location with an average of 4.5 peak sun hours per day during your least productive month.
Accounting for System Losses and Efficiency
No solar system is 100% efficient. Energy is lost at various stages due to factors such as:
- Temperature: Solar panels operate less efficiently in very hot conditions.
- Shading: Even partial shading on a single panel can significantly reduce the output of an entire string.
- Dirt and Dust: Accumulated grime on panels reduces light absorption.
- Inverter Efficiency: Inverters convert DC power from batteries to AC power for your appliances, and they always have some efficiency loss (typically 5-15%).
- Wire Losses: Longer or improperly sized wires can lead to voltage drop and energy loss.
- Battery Charging/Discharging Efficiency: Batteries aren't perfectly efficient; some energy is lost during storage and retrieval.
To account for these realities, it's standard practice to apply a "derating factor" or "loss factor" to your calculations. This factor typically ranges from 0.70 to 0.85 (or 70% to 85% efficiency). For a reliable off-grid system, especially one running significant loads like 10kWh daily, it's wise to be conservative and use a lower factor, perhaps 0.75 (75%). This means your system will need to be oversized by about 25% to deliver the desired usable power.
The Panel Sizing Formula in Action
With your daily energy target (10,000 Watt-hours or 10 kWh), your peak sun hours (let's use 4.5), and your system loss factor (0.75), you can now calculate your required solar array size.
The formula is:
Required Solar Array Size (Watts) = (Daily Energy Consumption in Watt-hours) / (Peak Sun Hours x System Loss Factor)
Let's plug in our numbers:
Required Solar Array Size (Watts) = 10,000 Wh / (4.5 peak sun hours x 0.75)
Required Solar Array Size (Watts) = 10,000 Wh / 3.375
Required Solar Array Size (Watts) ≈ 2,963 Watts
So, to reliably generate 10 kWh of usable energy per day, you would need a solar array with a nominal rating of approximately 2,963 watts.
Now, to figure out how many physical panels that translates to, you divide this total wattage by the wattage of the panels you plan to use. If you choose 400-watt solar panels (a common size from manufacturers like Renogy or through online retailers), the calculation would be:
Number of Panels = 2,963 Watts / 400 Watts/panel ≈ 7.4 panels
Since you can't install a fraction of a panel, you'd round up to 8 panels. So, you'd likely need eight 400-watt solar panels to meet your 10 kWh daily energy goal, considering our assumed peak sun hours and system losses. This gives you a total array size of 3,200 watts (8 panels x 400 watts). This is how you begin to answer the question of "How Many Solar Panels for Off-Grid Living" to meet a specific energy demand.
Building Your Energy Bank: Calculating Your Off-Grid Battery Needs
Solar panels generate power when the sun shines, but you need that power at night, on cloudy days, or when the sun is simply not strong enough. This is where your battery bank comes in – it's your essential energy reservoir. For a 10kWh daily usage, you're going to need a substantial battery bank to ensure reliable power, especially if you want to avoid relying on a generator.
Determining Days of Autonomy
"Days of autonomy" refers to how many days your battery bank can power your entire off-grid system without any input from your solar panels (i.e., during prolonged cloudy weather). This is a critical design choice and directly impacts the cost and size of your battery bank.
For a system demanding 10kWh daily, planning for just one day of autonomy can be risky, especially in regions with unpredictable weather. Two to three days of autonomy is a more common and robust starting point for primary residences or critical loads. If you live in a very cloudy area or rely heavily on all your appliances, you might even consider four or five days. Let's aim for three days of autonomy for our 10kWh scenario to ensure a good balance of reliability and cost. This directly relates to the important concept of "How Many Batteries for an Off-Grid System".
Battery Chemistry and Depth of Discharge
The type of battery you choose profoundly affects its usable capacity and lifespan.
- Lead-Acid Batteries (Flooded, AGM, Gel): These are traditionally more affordable upfront but have a lower usable Depth of Discharge (DoD). Typically, you shouldn't discharge lead-acid batteries below 50% DoD to maximize their lifespan. This means if you have a 100 Ah (Amp-hour) lead-acid battery, you can only reliably use 50 Ah of its capacity. They also have shorter lifespans, often 3-7 years.
- Lithium Iron Phosphate (LiFePO4) Batteries: These are a game-changer for off-grid systems. While more expensive upfront, they can be safely discharged to 80-100% DoD without significantly impacting their lifespan, which can be 10-20 years or more. This means a 100 Ah LiFePO4 battery offers almost twice the usable energy of a 100 Ah lead-acid battery. Their superior performance, longer cycle life, and higher efficiency often make them more cost-effective in the long run. Many reputable brands, including Renogy, offer excellent LiFePO4 options. Understanding the LiFePO4 vs Lead-Acid Battery Cost comparison is crucial for long-term planning.
For a 10kWh daily usage, and given their benefits, we'll focus on sizing with LiFePO4 batteries and an 80% DoD.
Battery Sizing Calculation
To calculate your battery bank size, you first need to determine the total energy you need to store.
Total Stored Energy (Watt-hours) = Daily Energy Consumption (Wh) x Days of Autonomy
Total Stored Energy (Watt-hours) = 10,000 Wh/day x 3 days = 30,000 Wh
Now, we need to account for the battery's usable capacity based on its Depth of Discharge (DoD). Since LiFePO4 batteries can safely discharge to 80% DoD, our calculation is:
Required Battery Bank Capacity (Usable Wh) = Total Stored Energy (Wh) / DoD
Required Battery Bank Capacity (Usable Wh) = 30,000 Wh / 0.80 = 37,500 Wh
Next, you need to decide on your system voltage. Higher voltage systems (like 24V or 48V) are generally more efficient for larger loads like 10kWh daily because they draw less current, which means thinner wires and less voltage drop. For a system this size, 48V is highly recommended.
To convert Watt-hours to Amp-hours (Ah) at your chosen system voltage:
Required Battery Bank Capacity (Ah) = Required Battery Bank Capacity (Usable Wh) / System Voltage (V)
Required Battery Bank Capacity (Ah) = 37,500 Wh / 48V ≈ 781.25 Ah
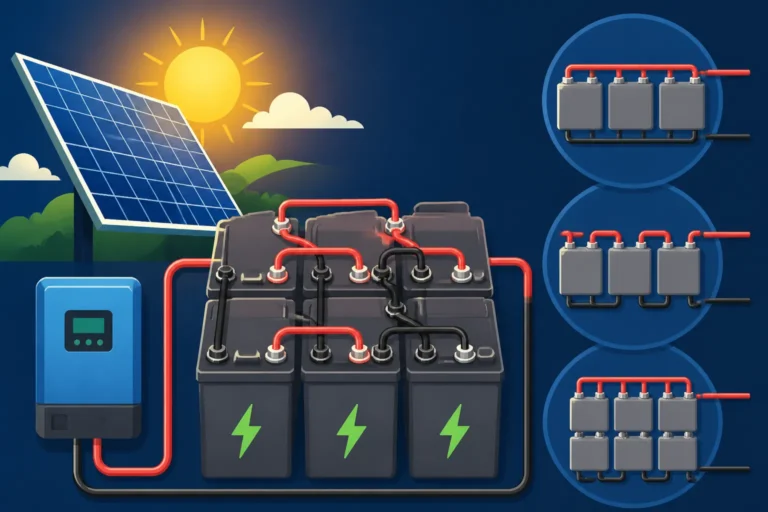
So, you'd need approximately 781.25 Amp-hours of LiFePO4 battery capacity at a 48V system voltage. This is a substantial battery bank, often achieved by connecting multiple 100Ah or 200Ah 12V LiFePO4 batteries in series to achieve 48V, then connecting those 48V strings in parallel to reach the desired total Ah capacity. For example, you might use four 200Ah 12V batteries in series to create one 48V 200Ah string (which would be 9600 Wh usable). You would then need roughly four such strings (38,400 Wh) connected in parallel to get close to your 37,500 Wh requirement, resulting in a bank of sixteen 12V 200Ah batteries. This illustrates how to size an off-grid battery bank and why a higher system voltage is practical for such large energy needs.
The Brains of the Operation: Sizing Your Inverter and Charge Controller
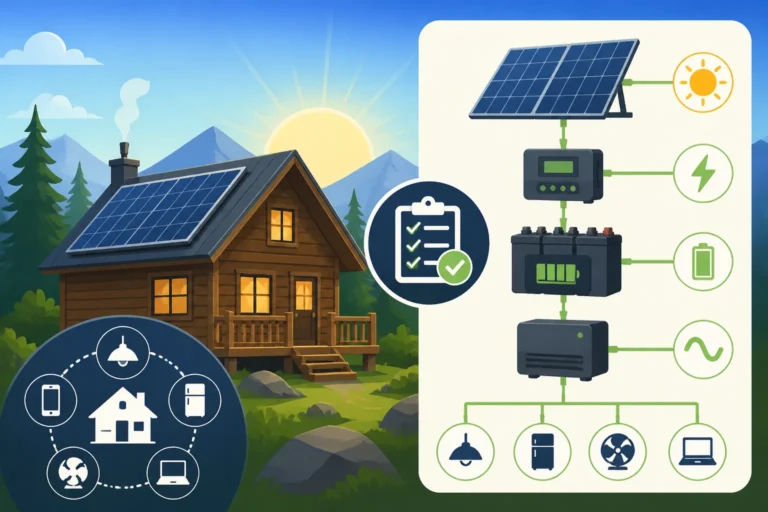
With your solar panels generating power and your batteries storing it, you need the crucial components that manage this energy flow and convert it into usable electricity for your appliances. This is where the charge controller and inverter come into play, acting as the "brains" of your off-grid system.
Inverter Sizing for Peak Loads
The inverter is responsible for converting the direct current (DC) power from your batteries into alternating current (AC) power, which is what most standard household appliances use. Sizing your inverter correctly is critical; an undersized inverter will trip or fail when you try to run too many appliances at once.
There are two main considerations for inverter sizing:
- Continuous Wattage: This is the total wattage of all the AC appliances you anticipate running simultaneously on a regular basis. Add up the running wattage of your refrigerator, lights, TV, laptop, etc., for your busiest expected period.
- Surge Wattage: Many appliances, especially those with motors (refrigerators, well pumps, microwaves, power tools), draw a much higher initial "surge" of power for a brief moment when they start up. This surge can be 2 to 7 times their continuous running wattage. Your inverter must be able to handle this momentary surge without shutting down.
For a 10kWh daily system, you're likely running a variety of appliances, including some that might have significant surge demands. Let's consider a peak simultaneous load scenario:
- Refrigerator: 150W running, 1000W surge
- Well Pump: 1000W running, 3000W surge
- Microwave: 1500W running, 2000W surge
- Laptop, TV, Lights, various chargers: 500W running (no significant surge)
Total Continuous Load: 150 + 1000 + 1500 + 500 = 3150 Watts
Highest Single Surge (Well Pump): 3000 Watts
Scenario: Refrigerator already running, Well Pump starts, Microwave starts. The inverter needs to handle the continuous load of all running items plus the largest single surge that might occur. If the well pump starts while everything else is running, the surge is 3150W (continuous) + 3000W (well pump surge) = 6150 Watts.
Given this, you'd want an inverter with a continuous rating well above 3150W, and a surge rating that can handle at least 6150W. A 6000-watt (6kW) pure sine wave inverter with a good surge capability (often twice its continuous rating for a few seconds) would be a robust choice for a 10kWh daily system. Brands like Victron Energy or Sol-Ark offer excellent inverter-chargers suitable for this level of demand, providing reliable power and advanced features. This helps answer "How to Size an Off-Grid Inverter" for your substantial needs.
Charge Controller for Efficient Charging
The charge controller is the unsung hero of your solar system. It regulates the voltage and current coming from your solar panels to ensure your batteries are charged safely and efficiently, preventing overcharging and prolonging battery life. For a system of this size, you'll almost certainly want an MPPT (Maximum Power Point Tracking) charge controller. MPPT controllers are significantly more efficient than older PWM (Pulse Width Modulation) controllers, especially in varying light conditions and when your panel array voltage differs from your battery bank voltage (which it almost always will in larger systems).
To size your MPPT charge controller, you need two main pieces of information:
- Maximum System Voltage (Voc): The open-circuit voltage of your solar array's coldest operating temperature.
- Maximum System Current (Isc): The short-circuit current of your solar array.
Let's revisit our 3200-watt solar array (eight 400W panels) and assume we're building a 48V battery bank.
Typical 400W panels might have specifications like:
- Voc (Open Circuit Voltage): ~48V
- Imp (Maximum Power Current): ~10A
- Vmp (Maximum Power Voltage): ~40V
- Isc (Short Circuit Current): ~11A
If you wire these 8 panels in two strings of four panels in series, and then connect those two strings in parallel:
- Series Voltage: 4 panels x 48V (Voc) = 192V
- Parallel Current: 2 strings x 11A (Isc) = 22A
Now, we need to apply safety factors. NEC (National Electrical Code) typically requires a 125% safety factor for both voltage and current when sizing charge controllers.
- Max Voltage for Controller: 192V x 1.25 = 240V
- Max Current for Controller: 22A x 1.25 = 27.5A
So, you would need an MPPT charge controller that can handle at least 240V input from the solar array and at least 27.5A output to the battery bank. Many MPPT controllers on the market specify their maximum PV input voltage and maximum battery charging current. A common size for this application might be a 60A or 80A MPPT controller, designed for 48V battery banks and capable of handling 150V or 250V input from the solar array. This process outlines "How to Size a Charge Controller" effectively.
Practical Considerations and Real-World Scenarios for Your 10kWh System
Designing a 10kWh off-grid solar system isn't just about calculations; it's also about anticipating real-world challenges and planning for the long haul. Thinking through practical elements will save you headaches, time, and money down the road.
Expandability and Future-Proofing Your System
It's almost a universal truth in off-grid living: once you have reliable power, you'll find more things you want to power! Maybe it's a new workshop tool, an electric vehicle charger down the line, or simply wanting to upgrade to a larger refrigerator. Designing your system with expandability in mind from the outset can save significant costs and effort later.
Consider using components that allow for easy additions. For example, choose an inverter and charge controller that have some headroom, meaning they can handle a slightly larger array or battery bank than your initial design. You might install conduit that can accommodate additional wiring for future panels. Many homeowners also choose to install a modular battery bank, where individual battery units can be added in parallel as needs grow, rather than replacing the entire bank. This foresight ensures that your initial investment in a 10kWh system doesn't become a limiting factor if your energy needs shift to, say, a 12-15kWh day in the future. Planning for "How to Design an Expandable System" is always a wise move.
Budgeting and Component Sourcing
A 10kWh off-grid solar system is a significant investment. As you've seen, it requires a substantial number of panels, a large battery bank, and robust inverters and charge controllers. The total cost can range anywhere from $15,000 to $40,000+, depending on component quality, installation method (DIY vs. professional), and specific choices like battery chemistry.
When putting together your budget, don't forget the "hidden costs." These can include wiring, fuses, breakers, mounting hardware, specialized tools, and potential permit fees or professional consultation charges. For core components like panels, batteries, and inverters, purchasing from reputable solar suppliers or direct from manufacturers is often recommended. Brands like Renogy, Victron Energy, and Battle Born Batteries are popular choices for their quality and support. For smaller components, tools, or even complete entry-level kits, online retailers like Amazon can be a good starting point, but always prioritize quality for critical parts. Remember to also consider "How to Budget for an Off-Grid Solar System" from the start.
| Component | Typical Cost Range (for 10kWh system) | Notes |
|---|---|---|
| Solar Panels (3-4kW) | $2,000 – $6,000 | 8-10 panels, depending on wattage and efficiency. |
| LiFePO4 Battery Bank | $8,000 – $20,000 | 30-40 kWh usable capacity at 48V, for 3 days autonomy. High-end is often server rack batteries. |
| Inverter (6kW) | $2,000 – $6,000 | Pure sine wave, high surge capacity, possibly an inverter-charger hybrid. |
| Charge Controller | $500 – $1,500 | MPPT, sized for array voltage/current. May be integrated into an inverter-charger. |
| Mounting Hardware | $500 – $2,000 | Roof or ground mounts, depending on location. |
| Wiring, Fuses, Breakers | $500 – $1,500 | Crucial for safety and efficiency. Don't skimp here. |
| Total DIY Estimate | $13,500 – $37,000+ | Excludes installation labor, permits, and other potential costs. |
Note: These are rough estimates and can vary significantly based on brand, specific features, and market conditions.
Professional Consultation Versus DIY Installation
Building an off-grid system for a 10kWh daily load is not a trivial undertaking. While many aspects of off-grid solar can be DIY-friendly, especially for smaller systems like "Off-Grid Solar Cost for an RV", a system of this scale has more complex wiring, higher voltages and currents, and significant safety considerations.
If you have a strong electrical background, are comfortable with reading detailed wiring diagrams, and understand local electrical codes, a DIY approach can save you a significant amount on installation costs. However, if you're new to high-voltage DC and AC wiring, or simply want peace of mind, hiring a qualified electrician or a solar installer is a very smart move. They can ensure your system is safely installed, properly grounded, and compliant with any local regulations (even for off-grid, some jurisdictions have requirements). At the very least, consider having a professional review your design and wiring diagrams before you start, especially for the critical connections and safety elements. When weighing the "DIY vs Professional Off-Grid Solar Cost", remember that safety and long-term reliability are priceless.
Disclaimer
The information provided in this guide is for general informational purposes only and should not be considered professional advice. Off-grid solar system design and installation can be complex and involve significant electrical risks. Always consult with qualified professionals and adhere to all local electrical codes and regulations.