How Much Solar to Charge Your Batteries Daily
It's a common headache for anyone dipping their toes into the off-grid lifestyle: you’ve got your batteries, you’ve got your solar panels, but how do you figure out exactly how much sun-power you need each day to keep those batteries happy and your lights on? It feels like a confusing puzzle with too many variables – cloudy days, power surges, battery types… it can be overwhelming! This comprehensive guide will walk you through the nitty-gritty of calculating your daily solar charging needs, helping you design a system that reliably keeps your battery bank topped up, no matter where your off-grid adventure takes you.
Understanding Your Daily Energy Needs
Before you can even think about how many solar panels you need, you absolutely have to know how much electricity you're actually using. This isn't just a guessing game; it's the bedrock of your entire off-grid solar system. Overestimating can lead to unnecessary costs, while underestimating can leave you in the dark.
Calculating Your Load Profile
Building a solid load profile is essentially creating a detailed inventory of every single electrical device you plan to use, how much power it draws, and for how long each day. Think of it as your household's daily energy diary. This isn't just about the big energy hogs; every little charger, every LED bulb, every time you boil water in an electric kettle adds up.
To start, grab a pen and paper or a spreadsheet. List every appliance. For each one, you'll need its wattage. You can usually find this printed on the appliance itself, in its manual, or with a quick online search. Don't forget to include things like phone chargers, power tools you might use for a few hours, or even a well pump that cycles on and off. Once you have the wattage, estimate how many hours per day you'll realistically use it. Then, multiply the wattage by the hours to get its daily Watt-hour (Wh) consumption. Repeat this for every item, then sum up all the daily Watt-hours. That grand total is your baseline daily energy demand, expressed in Watt-hours. For example, if your trusty laptop uses 60 watts and you use it for 5 hours a day, that's 300 Wh/day just for the laptop. A small off-grid cabin might have a refrigerator, some LED lights, a water pump, and a few charging devices. An RV, on the other hand, might focus more on portable electronics and perhaps a small microwave. This detailed breakdown allows you to see where your energy goes and identify any potential areas for conservation. You can dive deeper into this process by checking out our guide on How to Calculate Daily Energy Usage.
Differentiating Running Watts and Starting Watts
Here’s a crucial detail that many newcomers to off-grid solar overlook, often to their detriment: the difference between running watts and starting watts (also known as surge watts). Running watts are pretty straightforward – it's the power an appliance consistently draws once it's up and running. Your 60-watt laptop uses 60 running watts. Simple.
However, many appliances, especially those with motors or compressors like refrigerators, well pumps, or power tools, require a much larger burst of power for a brief moment when they first switch on. This initial surge can be 2 to 7 times their continuous running wattage. For instance, a small refrigerator might only draw 100-150 running watts, but its compressor could demand 500-1000 starting watts for a second or two. If your inverter isn't sized to handle these starting watts, it will trip or shut down, preventing your appliance from ever turning on. This is critical for sizing your inverter, but it also impacts your battery bank's ability to deliver that instantaneous power. While your daily total energy calculation focuses on running watts over time, knowing your peak starting wattages is vital for selecting the right components that can handle your appliances.
Deciphering Battery Capacity and Depth of Discharge
Your battery bank is the heart of your off-grid system, storing the solar energy collected during the day for use at night or on cloudy days. Understanding its capacity and how to properly utilize it is paramount to designing an effective and long-lasting system.
Amp-Hours, Watt-Hours, and System Voltage
When you start looking at batteries, you’ll quickly encounter terms like Amp-hours (Ah), Watt-hours (Wh), and different system voltages (12V, 24V, 48V). It's easy to get lost in the jargon, but these concepts are fundamental.
- Amp-hours (Ah): This is a common measure of battery capacity, indicating how many amps a battery can deliver for one hour. For example, a 100 Ah battery can theoretically deliver 100 amps for one hour, or 10 amps for 10 hours, or 1 amp for 100 hours.
- Watt-hours (Wh): This is a more universal measure because it directly relates to the power your appliances consume. Watt-hours account for both current (amps) and voltage. To convert Ah to Wh, you multiply Ah by the battery's nominal voltage (Wh = Ah x V). So, a 100 Ah 12V battery has 1200 Wh of capacity. This is often the most useful unit when matching your battery capacity to your daily energy consumption. You can learn more about these measurements in our article on Watts vs Watt-Hours vs Amp-Hours Explained.
- System Voltage: Off-grid systems typically operate at 12V, 24V, or 48V. Choosing the right system voltage is crucial. Higher voltages (like 48V) are generally more efficient for larger systems because they allow for smaller currents to deliver the same amount of power (Power = Voltage x Current). Smaller currents mean you can use thinner, less expensive wiring, and you'll experience less energy loss over longer wire runs. For instance, a 1000W load at 12V draws roughly 83 amps, while at 48V, it only draws about 21 amps. Lower currents are safer and put less strain on components. Most small RV or van setups might stick to 12V, but for a whole house or cabin, 24V or 48V is almost always the way to go. Consider how How Many Batteries for an Off-Grid System might factor into your voltage decision.
The Role of Depth of Discharge DoD
Depth of Discharge (DoD) is perhaps one of the most critical factors for battery longevity. It refers to the percentage of a battery's capacity that has been discharged. For example, if you have a 100 Ah battery and you've used 50 Ah, your DoD is 50%. The lower the DoD, the more charge cycles your battery can typically endure, extending its lifespan significantly.
Different battery chemistries have different recommended DoD limits:
- Lead-Acid Batteries (Flooded, AGM, Gel): These batteries are generally much less tolerant of deep discharges. To maximize their lifespan, it's often recommended to not discharge them beyond 50% DoD, or even 30% for optimal health. Regularly taking them below this threshold will severely shorten their life. If you have a 1200 Wh lead-acid battery and aim for a 50% DoD, you effectively only have 600 Wh of usable power.
- Lithium Iron Phosphate (LiFePO4) Batteries: These are the modern champions of off-grid storage. LiFePO4 batteries can safely be discharged to 80%, 90%, or even 100% DoD without significant impact on their cycle life. This means a 1200 Wh LiFePO4 battery offers nearly 1200 Wh of usable power. This higher usable capacity, combined with their lighter weight and longer lifespan, often makes them a more cost-effective choice in the long run, despite a higher upfront cost. You can read more about this in our comparison of LiFePO4 vs Lead-Acid Battery Cost.
When calculating your battery needs, you must factor in the usable capacity based on your chosen battery chemistry's recommended DoD. So, if your daily energy consumption is 2000 Wh, and you’re using lead-acid batteries with a 50% DoD, you’ll need 4000 Wh of rated battery capacity (2000 Wh / 0.50 = 4000 Wh) to meet that daily demand without damaging your batteries. This makes a huge difference in how large your physical battery bank needs to be.
Solar Panel Output and Environmental Factors
Your solar panels are your energy producers, converting sunlight into electricity. However, their stated wattage on the label isn't what you'll get every single hour of the day. A variety of environmental factors come into play, reducing their real-world output. Ignoring these factors can lead to an undersized array and perpetually undercharged batteries.
Peak Sun Hours and Their Variability
One of the most crucial concepts in solar sizing is "Peak Sun Hours" (PSH). This isn't the total number of hours the sun is visible in the sky. Instead, it's a measurement that represents the average number of hours per day when the intensity of sunlight is equivalent to 1,000 watts per square meter (1 kW/m²). This is the standard test condition under which solar panels are rated.
For example, if you live in an area that gets 5 peak sun hours, it means that even if the sun is out for 12 hours, the equivalent full-power sunshine is only 5 hours. Some regions, like the sunny Southwest U.S., might boast 6-7 PSH daily on average, while a cloudy region in the Pacific Northwest might only get 2-3 PSH in winter. These values fluctuate significantly by geographic location, time of year, and even local weather patterns. You can find average PSH data for your specific location from various sources like the National Renewable Energy Laboratory (NREL) or online solar calculators. Always use the lowest PSH for the time of year you need the most power (often winter for year-round living) to ensure your system can cope during the leanest periods. For a deeper dive, check out our article on Peak Sun Hours Explained.
Efficiency Losses and Derating Factors
Once sunlight hits your panels, it doesn't all magically turn into usable electricity. There are numerous efficiency losses that occur throughout the system, from the panels themselves to the wiring and inverter. To account for these, we use a "derating factor," which is a multiplier (typically between 0.65 and 0.85) that represents the overall efficiency of your system.
Here's a breakdown of common loss factors:
- Temperature Losses: Solar panels operate less efficiently as their temperature increases. On a hot summer day, a panel sitting on a dark roof can easily reach 120-150°F (49-66°C), reducing its power output by 10-20% compared to its standard test condition (STC) rating (which is usually at 77°F or 25°C).
- Shading: Even partial shading from a tree branch, a chimney, or a buildup of snow can dramatically reduce the output of an entire string of panels, not just the shaded one. MPPT charge controllers can help mitigate some of this, but careful placement is key.
- Dust and Dirt: A layer of dust, pollen, bird droppings, or even grime from rain can significantly reduce the amount of sunlight reaching your panels. Regular cleaning is essential for maximizing output.
- Wiring Losses: Resistance in your cables causes a small amount of energy loss as heat. The longer and thinner your wires, the greater the voltage drop and energy loss. Proper wire sizing is critical.
- Charge Controller Efficiency: While modern MPPT (Maximum Power Point Tracking) charge controllers are highly efficient (95-99%), they still incur a small loss. PWM (Pulse Width Modulation) controllers are less efficient (70-85%).
- Inverter Efficiency: Your inverter converts the DC power from your batteries into usable AC power for most household appliances. Inverters also have efficiency ratings, typically ranging from 85% to 95% for quality units.
- Battery Efficiency: Batteries aren't 100% efficient in their charge/discharge cycles. Lead-acid batteries might be 80-90% efficient, while LiFePO4 batteries are typically 95-99% efficient.
When you factor in all these variables, it's clear that your panels will rarely, if ever, produce their nameplate wattage. Using a derating factor of 0.70-0.75 is a reasonable starting point for most well-designed systems, but it can be adjusted based on your specific conditions and component choices.
Calculating Your Solar Array Size
Now that we understand your energy consumption, battery capacity, and the realities of solar output, we can finally put it all together to determine how much solar panel wattage you need. This is where the rubber meets the road!
The Core Sizing Formula
The goal is to generate enough daily Watt-hours from your solar panels to fully recharge your batteries and meet your daily consumption, after accounting for all those pesky losses.
Here’s the fundamental formula:
Required Panel Wattage (in Watts) = (Daily Usable Battery Watt-hours + Daily Load Watt-hours) / (Average Peak Sun Hours x System Efficiency Factor)
Let’s break it down with an example, assuming your daily load Watt-hours are the usable battery Watt-hours you need to put back in:
- Calculate your Total Daily Energy Need (Wh): This is the sum you got from your load profile. Let’s say it’s 2000 Wh/day.
- Determine your Average Peak Sun Hours (PSH): For our example, let’s use 4.5 PSH for your specific location during the lowest production month.
- Choose a System Efficiency Factor (Derating Factor): Let's go with a conservative 0.70 (meaning 70% efficiency after all losses).
Now, let's plug in the numbers:
Required Panel Wattage = 2000 Wh / (4.5 PSH * 0.70)
Required Panel Wattage = 2000 Wh / 3.15
Required Panel Wattage ≈ 635 Watts
So, in this scenario, you would need approximately 635 watts of solar panels. If you're using 100-watt panels, that would mean roughly 7 panels (always round up!). This calculation helps you figure out How Many Watts of Solar You Need. You can find more examples and detailed steps in our comprehensive How to Size an Off-Grid Solar System or Off-Grid Solar System Sizing Guide.
Accounting for Days of Autonomy
Days of autonomy refers to the number of days your battery bank can sustain your energy needs without any input from your solar panels – essentially, how long you can go without sun. This is a critical factor for reliability, especially if you live in an area prone to extended cloudy weather or have critical loads that absolutely cannot lose power.
While days of autonomy primarily influences your battery bank size, it indirectly affects your solar array sizing as well. If you design your system for, say, three days of autonomy, it means you have a much larger battery bank that can weather those cloudy stretches. However, that larger battery bank also needs to be recharged eventually. If you only have the minimum panels for one day's charge, it might take several sunny days to fully replenish a deeply discharged, large battery bank.
To properly account for this, you might choose to slightly oversize your solar array to quickly recharge your larger battery bank after a period of low solar production. Or, you might simply accept that after three days of clouds, it will take a sunny day and a half to get back to full. The key is understanding the trade-off. For year-round living, aiming for 2-3 days of autonomy in your battery bank is a common recommendation. Our guide on How to Calculate Days of Autonomy provides more insight into this.
Practical Considerations and Oversizing
While the formula gives you a good starting point, real-world off-grid living often benefits from a bit of strategic oversizing. Here's why:
- Future Expansion: You might think you have all your energy needs figured out, but as you settle into off-grid life, you might discover new appliances or increased usage. Building in some headroom allows you to add a few more lights or a small tool without completely redesigning your system.
- Seasonal Fluctuations: Even with using the lowest PSH for your calculations, oversizing your panels slightly can make a huge difference during shoulder seasons or particularly gloomy weeks, ensuring consistent charging.
- Battery Longevity: A slightly oversized array means your batteries spend more time at a higher state of charge, reducing deep cycling and prolonging their life, especially for lead-acid types.
- Degradation: Solar panels naturally degrade over time, losing a small percentage of their efficiency each year (typically 0.5-1%). Oversizing by 10-20% upfront can offset this natural aging for years to come.
When choosing panels, consider factors like warranty, temperature coefficient (how much power they lose in heat), and physical dimensions. Brands like Renogy offer a wide range of monocrystalline panels that are popular for their efficiency and durability, often available through retailers like Amazon. Oversizing doesn't mean just adding panels randomly; it's about building resilience and flexibility into your system. To understand the balance, consider reading our article on How to Right-Size vs Oversize a System.
Charge Controllers and System Efficiency
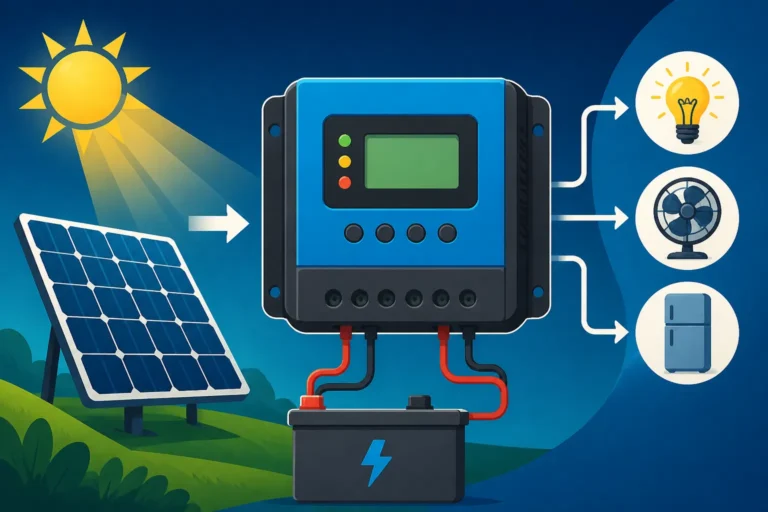
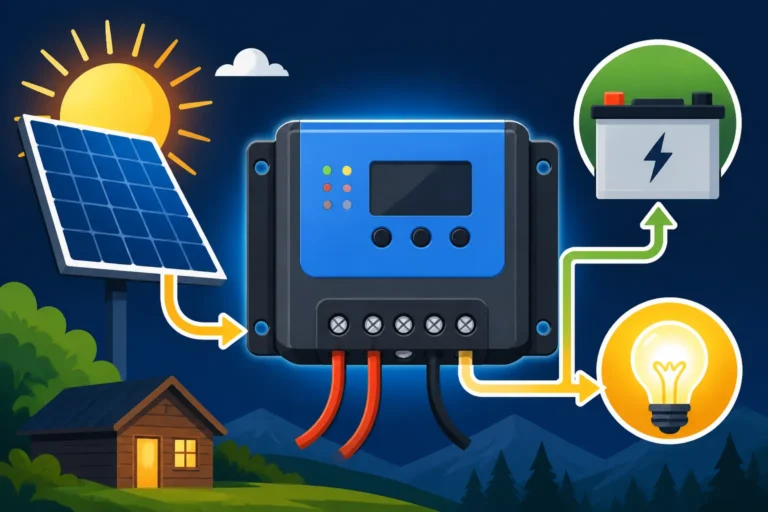
The charge controller is often called the "brain" of your solar charging system. It sits between your solar panels and your battery bank, regulating the voltage and current coming from the panels to ensure your batteries are charged safely and efficiently. Without a charge controller, your panels could overcharge and damage your batteries, or worse, cause a fire.
MPPT vs. PWM Charge Controllers
When choosing a charge controller, you'll primarily encounter two types: Pulse Width Modulation (PWM) and Maximum Power Point Tracking (MPPT). They both do the essential job of protecting your batteries, but they do it very differently, with significant implications for efficiency and cost.
- PWM (Pulse Width Modulation) Charge Controllers: These are the simpler, less expensive option, generally best suited for smaller, less critical systems (e.g., small RVs, basic cabins, or trickle charging setups). PWM controllers work by reducing the voltage from the solar panels to match the battery voltage, essentially "clipping" any excess voltage. This means if your 12V panels are producing 18V (common for 12V nominal panels), the PWM controller will only send 12V to the battery, wasting the extra 6V as heat. Their efficiency typically ranges from 70-85%. While effective for basic charging, they're not ideal for larger systems or situations where every watt counts.
- MPPT (Maximum Power Point Tracking) Charge Controllers: These are the high-tech workhorses of modern off-grid solar. MPPT controllers are much more sophisticated; they actively track the "maximum power point" of the solar array, converting excess voltage into additional current. This allows them to harvest significantly more power from your panels, especially in varying conditions like partial shading, cold weather (when panels produce higher voltage), or during morning and evening hours. For example, an MPPT controller can take the 18V from your "12V" panel and convert it efficiently into 14V for charging, but with more amps than a PWM controller would provide. This can result in a 20-30% (or even higher) increase in charging efficiency compared to PWM, making them essential for larger systems. While more expensive upfront, the increased energy harvest often makes MPPT controllers a worthwhile investment. You can find more detailed information and comparisons in our guide MPPT vs PWM Charge Controllers. Many reputable solar brands, including Renogy and Victron Energy, offer excellent MPPT charge controllers.
Inverter Efficiency and Power Conversion
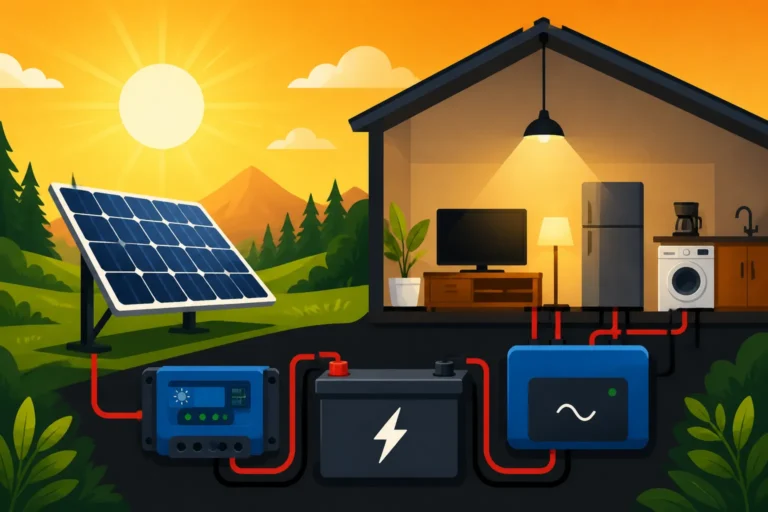
Once your solar panels have charged your batteries, and you want to use AC (alternating current) appliances – which is most of what we use in a modern home or cabin – you need an inverter. The inverter converts the DC (direct current) power stored in your batteries into the AC power that runs your refrigerator, microwave, laptop, and more.
Inverter efficiency is a critical factor in your overall system's performance. It represents how much of the DC power from your batteries is successfully converted into AC power, with the remainder lost as heat. Quality pure sine wave inverters typically boast efficiencies between 85% and 95%. This means if your inverter is 90% efficient and you need to power a 100-watt AC load, your batteries actually need to supply approximately 111 watts of DC power (100W / 0.90 = 111W).
There are two main types of inverters in terms of waveform:
- Pure Sine Wave Inverters: These produce AC power that is virtually identical to what you get from the utility grid. They are essential for sensitive electronics, appliances with motors (like refrigerators, microwaves, and pumps), and anything that would typically be plugged into a wall outlet. They are more efficient and generally more expensive.
- Modified Sine Wave Inverters: These are cheaper and produce a stepped, square-wave approximation of AC power. While they can run basic resistive loads like lights or heating elements, they can cause issues, reduce efficiency, or even damage sensitive electronics, motors, and certain battery chargers. For any serious off-grid setup, a pure sine wave inverter is highly recommended.
Remember to factor this efficiency loss into your calculations. If your daily AC load is 1500 Wh, and your inverter is 90% efficient, your battery bank needs to supply 1667 Wh of DC power to meet that AC demand (1500 / 0.90). This further emphasizes why accurate load calculation and efficient components are so vital.
Putting It All Together: A Real-World Example
Let's tie all these concepts together with a practical example. Imagining a small, year-round off-grid cabin in a moderately sunny region will help illustrate the entire process.
Scenario: A Small Off-Grid Cabin
Our hypothetical cabin hosts one person living full-time, with basic modern conveniences. Here's a breakdown of their daily energy usage:
| Appliance | Wattage (W) | Hours Used/Day | Daily Watt-hours (Wh) | Notes |
|---|---|---|---|---|
| LED Lights (4 bulbs) | 40 (10W each) | 6 | 240 | Evenings, mostly low wattage |
| Laptop | 60 | 4 | 240 | Work and entertainment |
| Phone Charger | 10 | 2 | 20 | Keep devices topped up |
| Water Pump (on demand) | 300 | 0.5 (30 mins) | 150 | Shower, dishes, etc. (high surge) |
| Mini-Fridge (Energy Star) | 80 | 10 (run time) | 800 | Compressor cycles on/off |
| Starlink Internet | 75 | 8 | 600 | Continuous internet access |
| Total Daily AC Load | 2050 Wh | (approx.) |
Load Profile Summary:
- Total Daily AC Load: 2050 Wh
System Assumptions:
- Battery Type: LiFePO4 (allowing 80% usable DoD)
- System Voltage: 24V (more efficient for this size than 12V)
- Inverter Efficiency: 90% (pure sine wave)
- Charge Controller Type: MPPT (98% efficient)
- Lowest Average Peak Sun Hours (Winter): 3.5 PSH (a realistic average for many temperate regions)
- Overall System Efficiency Factor (Derating Factor): 0.70 (accounting for temperature, wiring, dust, etc.)
- Days of Autonomy (desired): 2 days (to get through cloudy stretches)
Step-by-Step Calculation:
-
Adjust Daily AC Load for Inverter Efficiency:
- DC Load required from batteries = Total Daily AC Load / Inverter Efficiency
- DC Load = 2050 Wh / 0.90 = 2278 Wh
-
Calculate Required Usable Battery Capacity:
- Usable Capacity = DC Load required * Days of Autonomy
- Usable Capacity = 2278 Wh/day * 2 days = 4556 Wh
-
Calculate Total Rated Battery Capacity (LiFePO4 at 80% DoD):
- Rated Capacity = Usable Capacity / Usable DoD
- Rated Capacity = 4556 Wh / 0.80 = 5695 Wh
- To find this in Ah for a 24V system: 5695 Wh / 24V = 237.3 Ah
- So, you'd likely need two 100Ah 24V LiFePO4 batteries (200Ah total), plus a bit more, or aim for two 120Ah 24V batteries to give some headroom (240Ah total).
-
Calculate Total Daily Energy Production Needed from Panels (to fully recharge daily):
- This is the energy needed to replace what was used, adjusted for battery and charge controller losses.
- Energy needed = (DC Load from batteries / Battery Efficiency) / Charge Controller Efficiency
- Let's assume LiFePO4 battery efficiency is 98% for charge/discharge.
- Energy needed = (2278 Wh / 0.98) / 0.98 = 2324.5 Wh / 0.98 = 2372 Wh (rounded up)
-
Calculate Required Solar Panel Array Size:
- Required Panel Wattage = Total Daily Energy Production Needed / (Lowest PSH * Overall System Efficiency Factor)
- Required Panel Wattage = 2372 Wh / (3.5 PSH * 0.70)
- Required Panel Wattage = 2372 Wh / 2.45
- Required Panel Wattage ≈ 968 Watts
So, for this cabin, you would need approximately 970 watts of solar panels. If you chose 200-watt panels, you would need 5 panels (970W / 200W = 4.85, round up to 5). If you opt for 300-watt panels, you'd need 4 panels (970W / 300W = 3.23, round up to 4). It’s always better to round up to ensure you have enough power, especially for the winter months. Many companies like Renogy offer kits that can provide a good starting point for these calculations, or individual panels often sold through online marketplaces like Amazon.
Adjusting for Seasonal Variations
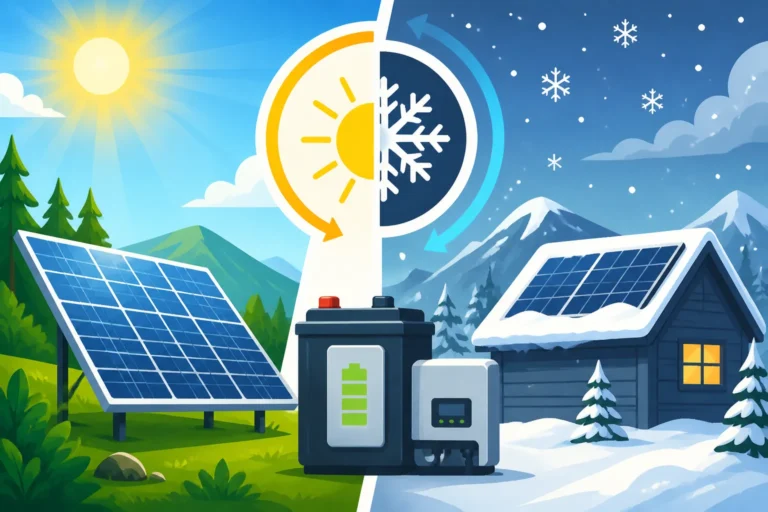
This calculation uses the lowest average peak sun hours for winter. This is a critical design choice for year-round reliability. However, it means in summer, your system will be significantly oversized, producing much more power than you need. This excess power can either keep your batteries perpetually topped off (which is good), or it can simply go unused once the batteries are full.
Here's how to manage seasonal variations:
- Winter Strategy: If your primary goal is year-round living, sizing for winter's lowest PSH is essential. This might mean installing more panels than you would need for summer. During these darker months, consider reducing non-essential loads.
- Summer Production: In summer, with longer days and higher PSH, your panels will produce an abundance of power. This is a great time to tackle power-hungry tasks like running a washing machine, charging power tools, or even running a small air conditioner for a few hours.
- Adding a Backup Generator: For ultimate reliability, especially in regions with very long, dark winters, a backup generator is invaluable. It can quickly top off your battery bank when solar production is insufficient. This is where an inverter charger or a dedicated transfer switch becomes useful. You can learn more about this by exploring the Cost of Adding a Generator to Off-Grid Solar and how How Winter Affects Off-Grid Sizing influences your setup.
- Expandable Systems: Design your system from the outset to be expandable. This means using a charge controller that can handle more panel input than you initially install and an inverter that can manage future load increases. This allows you to start with a smaller system and add more panels as your needs grow or as budget allows.
Planning for seasonal changes ensures you're never caught off guard. While the initial investment might seem higher to accommodate winter, the peace of mind that comes with reliable power throughout the year is invaluable for off-grid living.
Disclaimer
The information provided in this guide is for educational and informational purposes only and should not be considered professional electrical or solar engineering advice. Off-grid solar system design and installation can be complex and involve significant electrical hazards. Always consult with qualified professionals and adhere to all local electrical codes and permitting requirements before installing or modifying any electrical system.