How to Install an Off-Grid Battery Bank
Figuring out how to properly store the precious energy your solar panels collect can feel like a daunting task. You’ve got the panels, maybe even a charge controller, but connecting that vital battery bank seems like a whole different ballgame, fraught with fears of miswiring, short circuits, or simply not having enough power. This guide is here to walk you through the entire process of installing an off-grid battery bank, ensuring you do it safely and effectively.
Planning Your Off-Grid Battery Bank Installation
Before you even think about connecting wires, a solid plan is your best friend. Skipping this step is like trying to build a house without a blueprint – it's a recipe for frustration, wasted time, and potentially dangerous mistakes. We're talking about electricity here, so meticulous planning isn't just a suggestion; it's a necessity.
Understanding Your Battery Type
The type of battery you choose significantly impacts how you'll install and maintain your bank. There are two main contenders in the off-grid world: lead-acid and lithium-ion (specifically LiFePO4). Each has its own quirks and requirements.
Lead-acid batteries, like flooded lead-acid (FLA) or absorbed glass mat (AGM), have been the traditional choice for a long time. They're generally more affordable upfront, but they require more maintenance (especially FLAs, which need regular watering) and have a shorter lifespan compared to lithium. They're also less forgiving when discharged deeply and perform less efficiently in colder temperatures. If you're using FLAs, you absolutely need a well-ventilated space to prevent the buildup of explosive hydrogen gas. AGM batteries are sealed, so they don't off-gas as much, making them a bit safer for indoor installations, but they still have similar temperature sensitivities and depth-of-discharge limitations to other lead-acid types. Understanding the LiFePO4 vs Lead-Acid Battery Cost can help you weigh your options here.
LiFePO4 batteries, or lithium iron phosphate, have become the golden standard for many off-gridders. While their initial cost is higher, their incredible lifespan (often 10-15 years or more), high efficiency, minimal maintenance, and ability to be discharged deeply without damage often make them more cost-effective in the long run. They also perform better in varying temperatures and are generally lighter. Most LiFePO4 batteries come with a built-in Battery Management System (BMS) that protects them from overcharging, over-discharging, and over-current, simplifying the installation process somewhat by handling internal balancing. However, even with a BMS, you still need to ensure your charge controller and inverter are properly configured for lithium batteries. Many popular brands like Battle Born or EG4 offer robust LiFePO4 options that are well-regarded in the off-grid community.
Sizing and Location Considerations
Determining the right size for your battery bank is critical. You don't want to run out of power halfway through the evening, nor do you want to spend a fortune on capacity you'll never use. This involves a careful calculation of your daily energy consumption, desired days of autonomy (how many days you want to run on batteries without solar input, useful for cloudy periods), and the maximum depth of discharge for your chosen battery type. Many people find it helpful to perform a detailed load analysis. You can learn more about this by reading our guide on How to Size an Off-Grid Battery Bank.
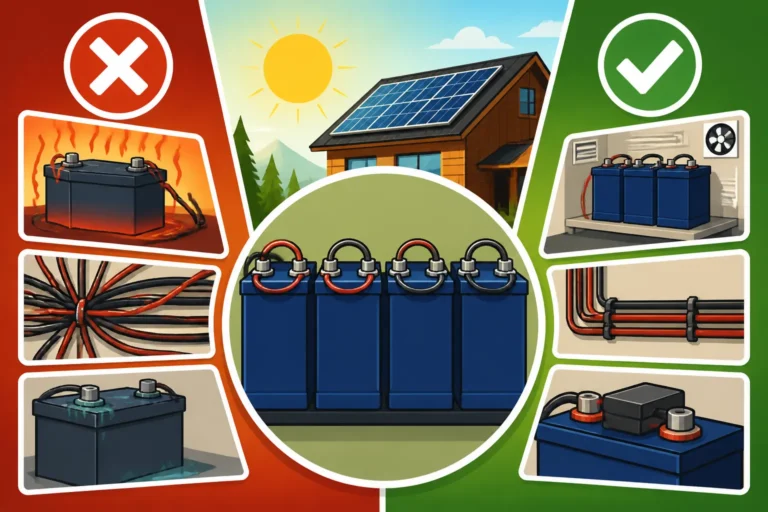
Once you know the size, where will these batteries live? Location is paramount for safety and performance. Batteries should be kept in a cool, dry, and well-ventilated area, away from direct sunlight, extreme heat, or freezing temperatures. For lead-acid batteries, especially flooded ones, a dedicated battery box or enclosure is essential to contain off-gassing and prevent accidental contact. This enclosure should be vented to the outside. Lithium batteries are less sensitive to ventilation but still benefit from stable temperatures. Consider accessibility for maintenance (even lithium batteries might need occasional terminal checks) and ensure the location can support the weight of your battery bank, which can be considerable, especially with lead-acid types. For instance, a small shed near your cabin could be an ideal spot, protecting batteries from the elements while providing ventilation.
Safety First: Essential Precautions and Tools
Working with batteries and high-current electrical systems demands respect. It's not just about getting shocked; a short circuit can cause fires, explosions, or severe burns. Taking safety seriously isn't optional; it's non-negotiable.
Personal Protective Equipment and Emergency Measures
Before you touch anything, don your personal protective equipment (PPE). This includes:
- Safety Glasses or Face Shield: Protects your eyes from sparks, acid splashes (for lead-acid), or flying debris.
- Insulated Gloves: Heavy-duty rubber gloves rated for electrical work will protect your hands from shocks.
- Non-Conductive Clothing: Avoid jewelry, watches, and loose-fitting clothing that could snag or conduct electricity.
- Work Boots: Sturdy, non-slip boots are always a good idea.
Beyond PPE, have emergency measures in place:
- Fire Extinguisher: A Class C or ABC dry chemical extinguisher should be within easy reach.
- First Aid Kit: For minor cuts or burns.
- Baking Soda (for lead-acid): In case of an acid spill, baking soda can neutralize the acid. Keep a large box handy.
- Eyewash Station: If acid gets in your eyes, immediate flushing is crucial.
- Emergency Contact Information: Have your phone ready with emergency numbers.
- Never Work Alone: If possible, have someone nearby who knows what you're doing and can assist in an emergency.
Remember, even a 12V system can deliver enough current to be extremely dangerous. A battery can discharge hundreds or even thousands of amps in a short circuit, creating immense heat and a potential explosion.
Essential Tools for the Job
Having the right tools makes the job safer, easier, and more professional. Don't skimp on quality, especially for electrical tools.
Here’s what you’ll typically need:
- Insulated Wrenches and Pliers: Crucial for making secure connections without accidental short circuits.
- Wire Strippers and Crimpers: Matched to the gauge of your battery cables. Good quality crimpers ensure solid, low-resistance connections, which are vital for efficiency and safety. Don't cheap out on these; poor crimps are a common point of failure.
- Multimeter: Absolutely essential for checking voltage, continuity, and troubleshooting. You'll use this to confirm battery voltage before connecting, check for proper wiring, and diagnose issues.
- Cable Cutters: For cleanly cutting thick battery cables.
- Heat Gun (for heat shrink tubing): To insulate your crimped connections for added protection against corrosion and shorts.
- Terminal Cleaner/Brush: To ensure clean battery terminals for optimal conductivity.
- Battery Hydrometer (for FLA): For checking electrolyte levels and specific gravity in flooded lead-acid batteries.
- Torque Wrench: To ensure battery terminal connections are tightened to the manufacturer's specifications. Over-tightening can damage terminals, while under-tightening leads to resistance and heat.
Having a clear, organized workspace will also contribute to safety. Keep tools tidy, wires managed, and always double-check your connections before powering anything on.
Step-by-Step Battery Bank Installation
Alright, with the planning done and safety gear on, it’s time to get down to business. This is where your off-grid dreams start to really take shape. We'll go through the installation process methodically.
Preparing Your Batteries and Connections
First things first, unpack your batteries and inspect them for any damage. Check the terminals for cleanliness; if they're dirty or corroded, clean them with a wire brush or terminal cleaner. For flooded lead-acid batteries, ensure the electrolyte levels are correct (distilled water if needed, after initial charge).
Next, prepare your battery cables. You'll need cables to connect the batteries to each other (interconnect cables) and cables to connect the entire bank to your charge controller and inverter. The gauge of these cables is critical; it must be thick enough to handle the maximum current your system will draw without excessive voltage drop or overheating. For instance, connecting a small 12V system might use 4 AWG, while a large 48V system with high inverter loads might require 4/0 AWG. Check your component manuals for recommendations or use an online calculator.
Cut your interconnect cables to the appropriate length. Shorter is better to minimize resistance, but make them long enough for comfortable installation and future maintenance. Strip the insulation from the ends of your cables, being careful not to cut any strands. Crimp appropriately sized lug terminals onto the stripped ends. A good crimp is essential for a reliable connection. After crimping, use heat shrink tubing over the crimp connection for insulation and protection against environmental factors. You can find high-quality cables and terminals, sometimes even pre-made, on platforms like Amazon or from specialized off-grid suppliers like Renogy.
Wiring Batteries in Series or Parallel
This is where the magic happens, determining your battery bank's voltage and capacity. You need to decide whether to wire your batteries in series, parallel, or a combination of both. You can read more about How to Wire a Battery Bank in detail.
Series Wiring (Increasing Voltage):
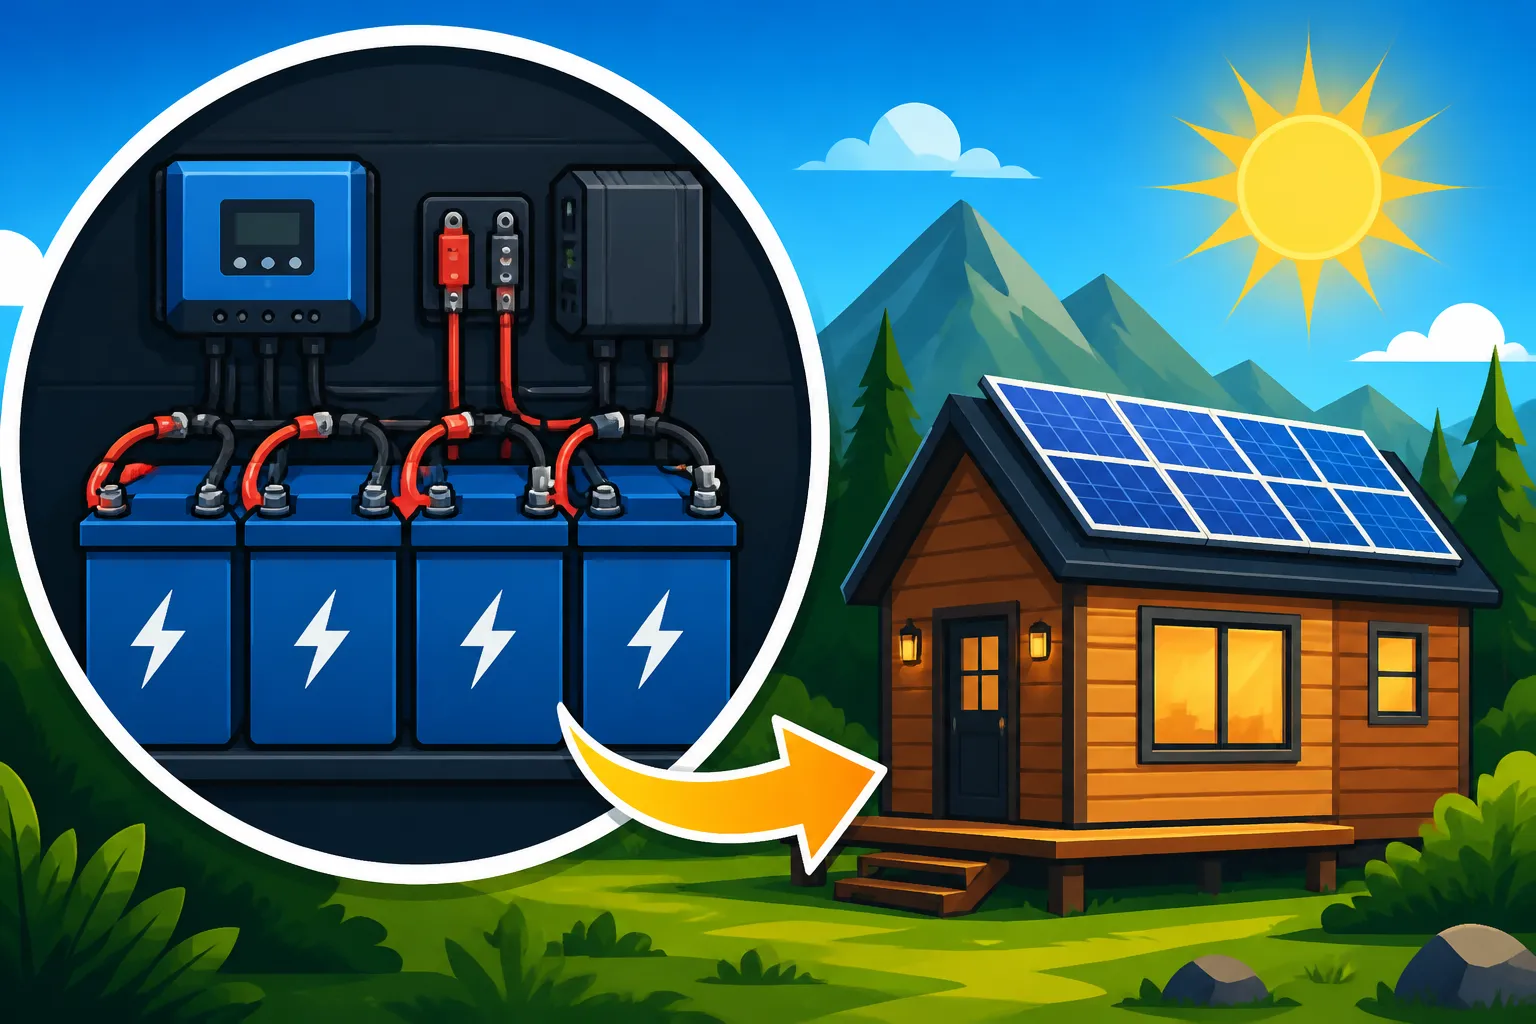
When you wire batteries in series, you connect the positive terminal of one battery to the negative terminal of the next. This adds up the voltage while keeping the amp-hour (Ah) capacity the same. For example, two 12V, 100Ah batteries wired in series create a 24V, 100Ah battery bank. Four 12V, 100Ah batteries in series would create a 48V, 100Ah bank. This is often done for larger systems to reduce current and allow for thinner wiring to the inverter and charge controller.
Parallel Wiring (Increasing Capacity):
When you wire batteries in parallel, you connect all positive terminals together and all negative terminals together. This increases the total amp-hour capacity while keeping the voltage the same. For instance, two 12V, 100Ah batteries wired in parallel create a 12V, 200Ah battery bank. This is common for smaller systems like RVs or sheds where 12V is sufficient, but more storage is needed.
Series-Parallel Wiring (Increasing Both):
For larger systems, you might create "strings" of series-wired batteries and then connect these strings in parallel. For example, you could have two strings of two 12V batteries wired in series (creating two 24V strings), and then connect those two 24V strings in parallel to get a 24V system with double the capacity. This configuration can be a bit more complex, so take your time and double-check every connection.
No matter the configuration, always start by connecting the batteries with your interconnect cables. Double-check your polarity before making the final connection that completes a series string or connects a parallel string. A common practice is to connect your main system cables (to the charge controller and inverter) from diagonally opposite ends of your battery bank to ensure even charging and discharging across all batteries.
Here’s a simple table to illustrate the difference:
| Wiring Type | Connection Method | Effect on Voltage | Effect on Capacity (Ah) | Recommended Use Case |
|---|---|---|---|---|
| Series | (+) to (-) | Increases | Stays the Same | Higher voltage systems (24V, 48V) for efficiency |
| Parallel | (+) to (+), (-) to (-) | Stays the Same | Increases | Lower voltage systems (12V) needing more storage |
Making Secure Connections and Terminal Protection
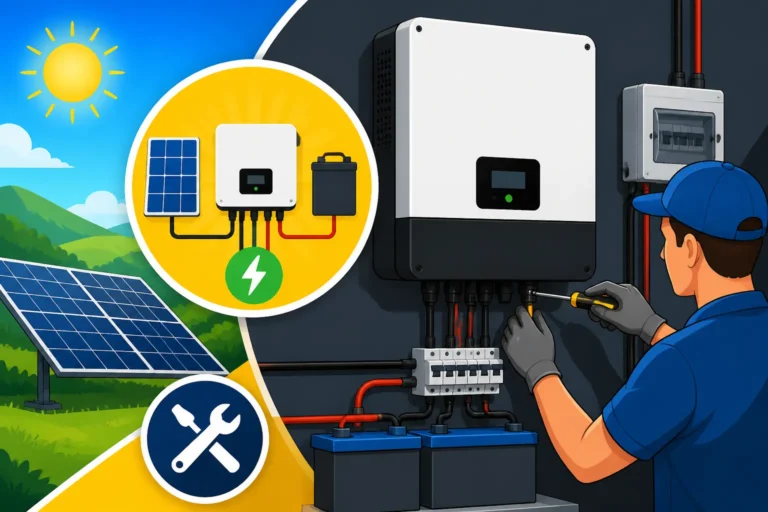
With the batteries interconnected, it's time to make the main connections to your system. This typically involves connecting the positive and negative terminals of your battery bank to a main DC disconnect or circuit breaker, then from there to your charge controller and inverter.
Main DC Disconnect/Breaker: This is a crucial safety component. Install a appropriately sized DC-rated circuit breaker or a fused disconnect switch between your battery bank and your charge controller/inverter. This allows you to safely disconnect the battery bank from the rest of the system for maintenance, troubleshooting, or in an emergency. The size of this breaker will depend on the maximum current draw of your inverter and the continuous charge current from your charge controller. For example, a 3000W 12V inverter might draw 250A, requiring a 300A or higher fuse/breaker.
Connecting to Charge Controller: Connect the main positive and negative battery cables from your DC disconnect to the designated "battery" terminals on your charge controller. Most charge controllers are voltage-sensing, but ensure your controller is compatible with your chosen battery voltage (e.g., 12V, 24V, or 48V). Do not connect solar panels to the charge controller until the battery bank is securely connected and confirmed.
Connecting to Inverter: From your DC disconnect, run heavy-gauge cables to the DC input terminals of your inverter. These cables will often be the thickest in your system, as inverters draw significant current from the battery bank. Again, ensure your inverter is rated for your battery bank's voltage.
Terminal Protection: Once all connections are made and tightened to the manufacturer's specifications (use that torque wrench!), cover any exposed terminals with insulated covers or battery terminal boots. This prevents accidental shorts or contact with live parts. For lead-acid batteries, applying anti-corrosion spray or grease can help prolong terminal life. A properly installed Cost of an Off-Grid Solar Battery Bank can be a significant investment, so protecting your connections is paramount.
Connecting Your Battery Bank to the System
Now that your battery bank is physically wired and secured, the final stage is integrating it into your complete off-grid solar system. This is where all the components come together to create a functional power plant.
Integrating with Charge Controller and Solar Array
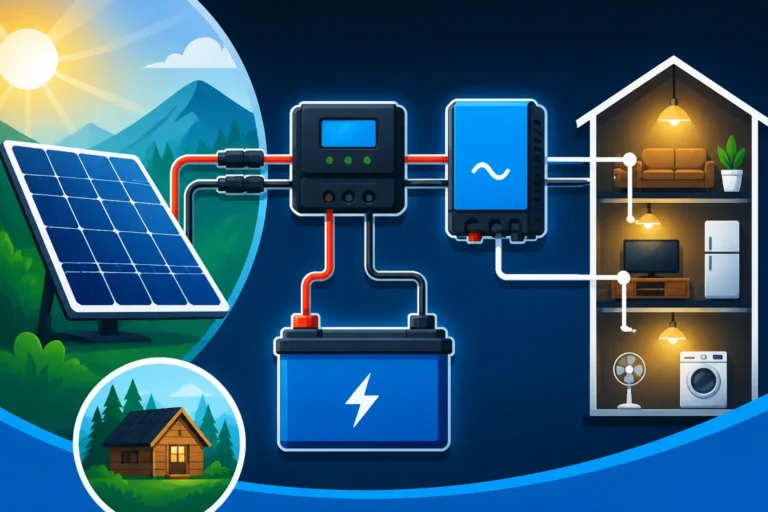
The charge controller is the brain of your charging system. Its job is to regulate the power coming from your solar panels to your battery bank, preventing overcharging and optimizing battery life.
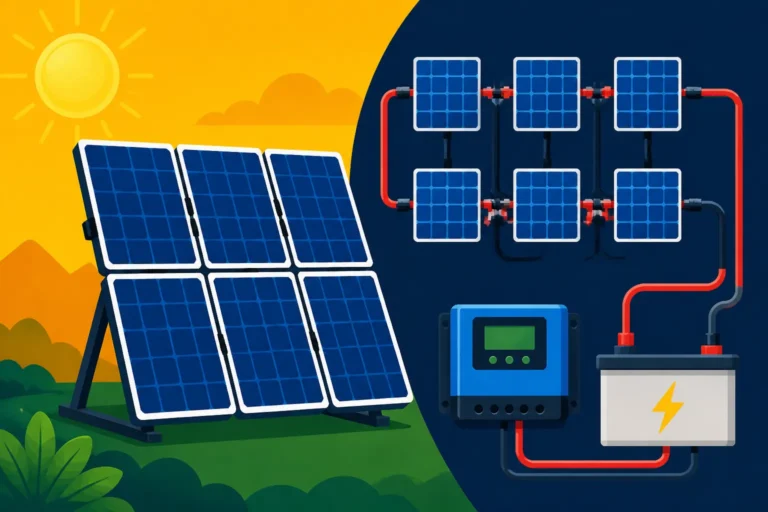
Once your battery bank is connected to the charge controller's battery terminals (and that main DC disconnect is still open!), you can then connect your solar array to the charge controller's PV input terminals. It's crucial to connect the battery first to give the charge controller a voltage reference. If you connect the solar panels first, the controller might get confused or even damaged, especially with MPPT controllers. When connecting your solar panels, ensure they are wired in a series or parallel configuration that matches the voltage requirements of your charge controller. You can find detailed instructions on How to Connect a Charge Controller and for the overall system in an Off-Grid Solar Installation Guide.
After connecting the solar panels, you can close the main DC disconnect to the battery bank. The charge controller should now sense both the battery bank and the solar input and begin the charging process, if there's enough sunlight. Monitor the charge controller's display to confirm it's working as expected, showing battery voltage, charging current, and charge stage. If you're using a system from a manufacturer like Renogy, their charge controllers often have user-friendly displays or apps to help you monitor performance.
Inverter Hookup and Initial Power-Up
Your inverter is what converts the DC power stored in your battery bank into AC power, which is what most of your household appliances use.
The heavy gauge cables from your battery bank (via the main DC disconnect) should already be connected to your inverter's DC input terminals. Before powering up the inverter, ensure that there are no AC loads connected yet. Double-check all DC connections for tightness and correct polarity.
Once you're confident in the DC connections, you can close the DC disconnect to the inverter. Most inverters will have a power button or switch that you'll need to turn on. Listen for any unusual sounds, and check the inverter's display for error codes or normal operation indicators. Many modern inverters, especially those from brands like Victron Energy or Sol-Ark, offer extensive monitoring and configuration options. It's often recommended to start the inverter without any AC loads attached, allowing it to complete its self-test.
After confirming the inverter is operating correctly, you can begin connecting your AC loads. Start with small, non-critical loads and gradually work your way up to larger ones. This helps you verify everything is working as intended and allows you to catch any issues before they affect critical appliances. Remember, an inverter's surge rating is important for appliances with high starting currents, like refrigerators or well pumps. You can read more about How to Size an Off-Grid Inverter to ensure your setup is robust enough for your needs.
Monitoring and Maintenance for Longevity
Installing your battery bank is a big step, but it’s just the beginning of your off-grid journey. Regular monitoring and maintenance are key to ensuring its longevity and maximizing your investment.
Monitoring: Keep an eye on your battery bank's state of charge (SOC), voltage, and current levels. Most charge controllers and inverters will provide this information. A dedicated battery monitor, often including a shunt, can provide a much more accurate picture of your battery's health and remaining capacity. This is especially useful for understanding your actual energy usage and how efficiently your solar array is recharging the bank. Over time, consistent monitoring helps you identify potential issues before they become critical failures. For example, if you notice the battery voltage dropping faster than usual, it might indicate increased load, reduced solar input, or a battery issue.
Maintenance: The type of maintenance largely depends on your battery chemistry:
- Flooded Lead-Acid (FLA): These require the most hands-on maintenance. Regularly check electrolyte levels (typically monthly) and top up with distilled water as needed. Keep the battery tops clean and dry to prevent corrosion and self-discharge. Periodically perform an equalization charge as recommended by the manufacturer to balance cell voltages and prevent sulfation. Also, check specific gravity with a hydrometer.
- AGM Lead-Acid: Less maintenance than FLAs as they are sealed. Still, keep terminals clean and ensure they are housed in a stable temperature environment. Avoid deep discharges to prolong their life.
- LiFePO4 Lithium: These are often called "maintenance-free" because they don't require watering or equalization in the traditional sense. However, it's still good practice to periodically inspect terminals for tightness and corrosion. The built-in BMS handles cell balancing internally. The main "maintenance" here is ensuring your charging parameters (voltage set points, temperature compensation) in your charge controller and inverter are correctly configured for lithium batteries.
Regardless of battery type, always inspect all cables for signs of wear, fraying, or loose connections. Clean any dust or debris from around the batteries and their enclosure. Addressing small issues promptly can prevent larger, more expensive problems down the line, ultimately extending the life of your entire off-grid system.
Disclaimer
Please note that this guide provides general information and recommendations for installing an off-grid battery bank. Electrical work can be dangerous. Always consult with a qualified electrician or solar professional if you are unsure about any steps or require assistance with your specific installation. Improper installation can lead to equipment damage, fire, serious injury, or even death. Always adhere to local electrical codes and safety regulations.