How to Install Off-Grid Solar on a Barn
Getting power to a barn, especially one that's a fair distance from the main homestead or out in a remote area, can be a real headache. Running trenching and extending utility lines often costs a small fortune, leaving many folks feeling stuck between a rock and a hard place: either deal with no power or face an exorbitant bill. This guide is here to walk you through the entire process of installing an off-grid solar system on your barn, helping you achieve reliable, independent power without breaking the bank or wrestling with power companies.
Assessing Your Barn's Needs and Solar Potential
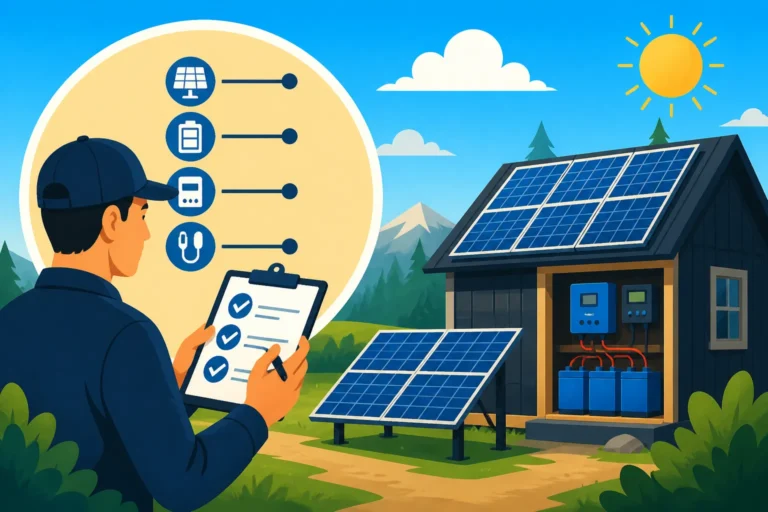
Before you even think about buying a single solar panel, the most crucial first step is to truly understand what you need to power and how much sunshine your barn actually gets. Skipping this part is a common pitfall that leads to undersized systems and endless frustration. Trust me, nobody wants to be left in the dark when they're halfway through a project in the workshop or needing to milk a cow.
Understanding Your Barn's Energy Consumption
This is where you become a detective for your own power habits. Think about every single electrical item you use or plan to use in your barn, no matter how small. From the simple incandescent bulb in the tack room to a powerful air compressor in your workshop, every device draws power. It's not just about how many watts something uses, but how long it uses them for.
Start by making a comprehensive list. Don't forget anything! Common barn appliances might include LED lighting for stalls or work areas, small fans for ventilation, a radio, electric fence chargers, water pumps for livestock, power tools like drills or saws, a small refrigerator for drinks or medicines, or even larger equipment like milking machines or welders. For each item, you'll need to find its wattage (often listed on a sticker on the appliance or in its manual) and estimate how many hours a day or week it will be running. For example, a 10-watt LED light might run for 4 hours a day, while a 1500-watt circular saw might only run for 15 minutes a day.
Once you have your list, calculate the daily watt-hours for each item (watts x hours of use). Sum all these up, and you'll have your total daily energy consumption in watt-hours. This number is the bedrock of your entire solar system design. If you're feeling a bit overwhelmed by this, checking out a detailed guide on Off-Grid Solar Load Calculation Explained can offer a helping hand. Knowing your actual usage prevents you from overspending on an unnecessarily large system or, worse, building a system that can't keep up with demand.
Evaluating Solar Exposure and Mounting Options
Now that you know how much power you need, it's time to figure out how to get it from the sun. The amount of sunlight your barn receives, and at what angle, will dictate how many solar panels for off-grid living you'll ultimately need. This isn't just about sunny days; it's about peak sun hours – the equivalent hours per day when solar irradiance averages 1,000 watts per square meter. These vary significantly by geographic location and time of year.
Take a good look at your barn's roof. Is it largely unshaded throughout the day, particularly during the peak sun hours (usually 9 AM to 3 PM)? Are there tall trees, other buildings, or even seasonal foliage that might cast shadows? Even a small shadow on a single panel can significantly reduce the output of an entire string of panels. Use a sun path app on your phone or observe the sun's movement over a day to get a clear picture. The ideal orientation in the Northern Hemisphere is generally south-facing, with a tilt angle roughly equal to your latitude, possibly adjusted for winter performance if year-round power is critical.
When it comes to mounting, you typically have two main options for a barn: roof mounts or ground mounts. Roof mounts are great because they keep the panels out of the way, often away from snowdrifts, and can leverage existing structures. However, you need to ensure your barn roof is structurally sound enough to support the weight of the panels and the mounting hardware, especially with snow or wind loads. Consider the pitch and material of your roof – asphalt shingles, metal, or wood shakes each have specific mounting requirements. Ground mounts offer more flexibility in terms of orientation and tilt angle, which can be a huge advantage for optimizing winter sun exposure or avoiding specific shading issues. They also make cleaning and maintenance much easier. However, they require a dedicated space and might be more susceptible to theft or damage from livestock, so proper fencing or placement is key.
Gathering Your Off-Grid Solar Components
Once you have a solid understanding of your barn's power demands and how much sun it gets, you can start assembling the right equipment. Think of your off-grid solar system as a finely tuned orchestra, with each component playing a vital role. If one part is weak or mismatched, the whole system suffers.
Key Components for a Barn System
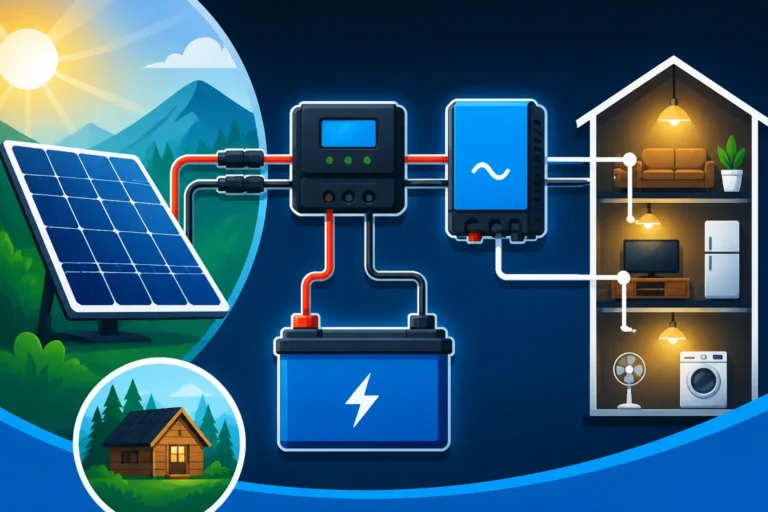
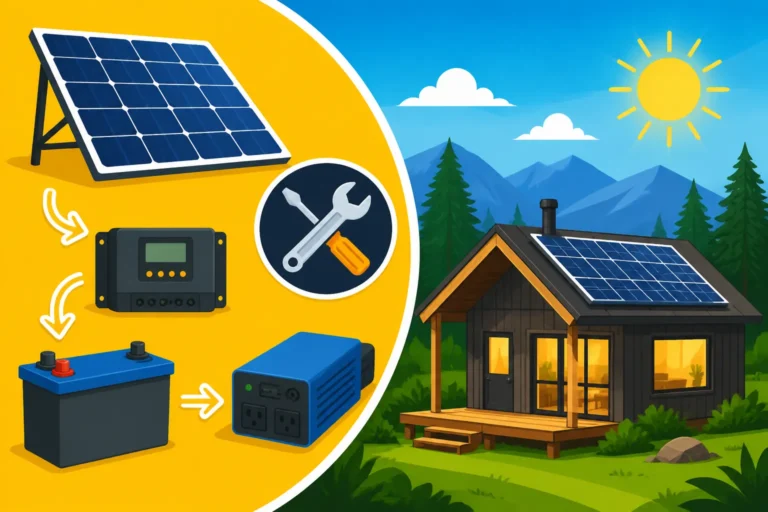
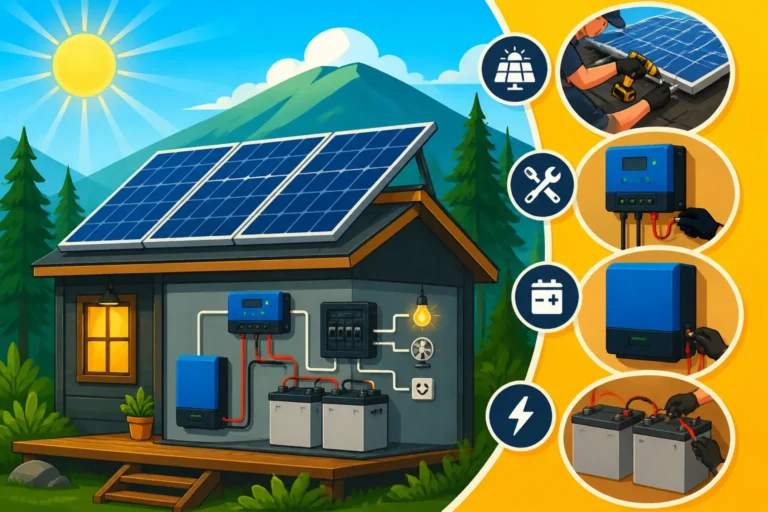
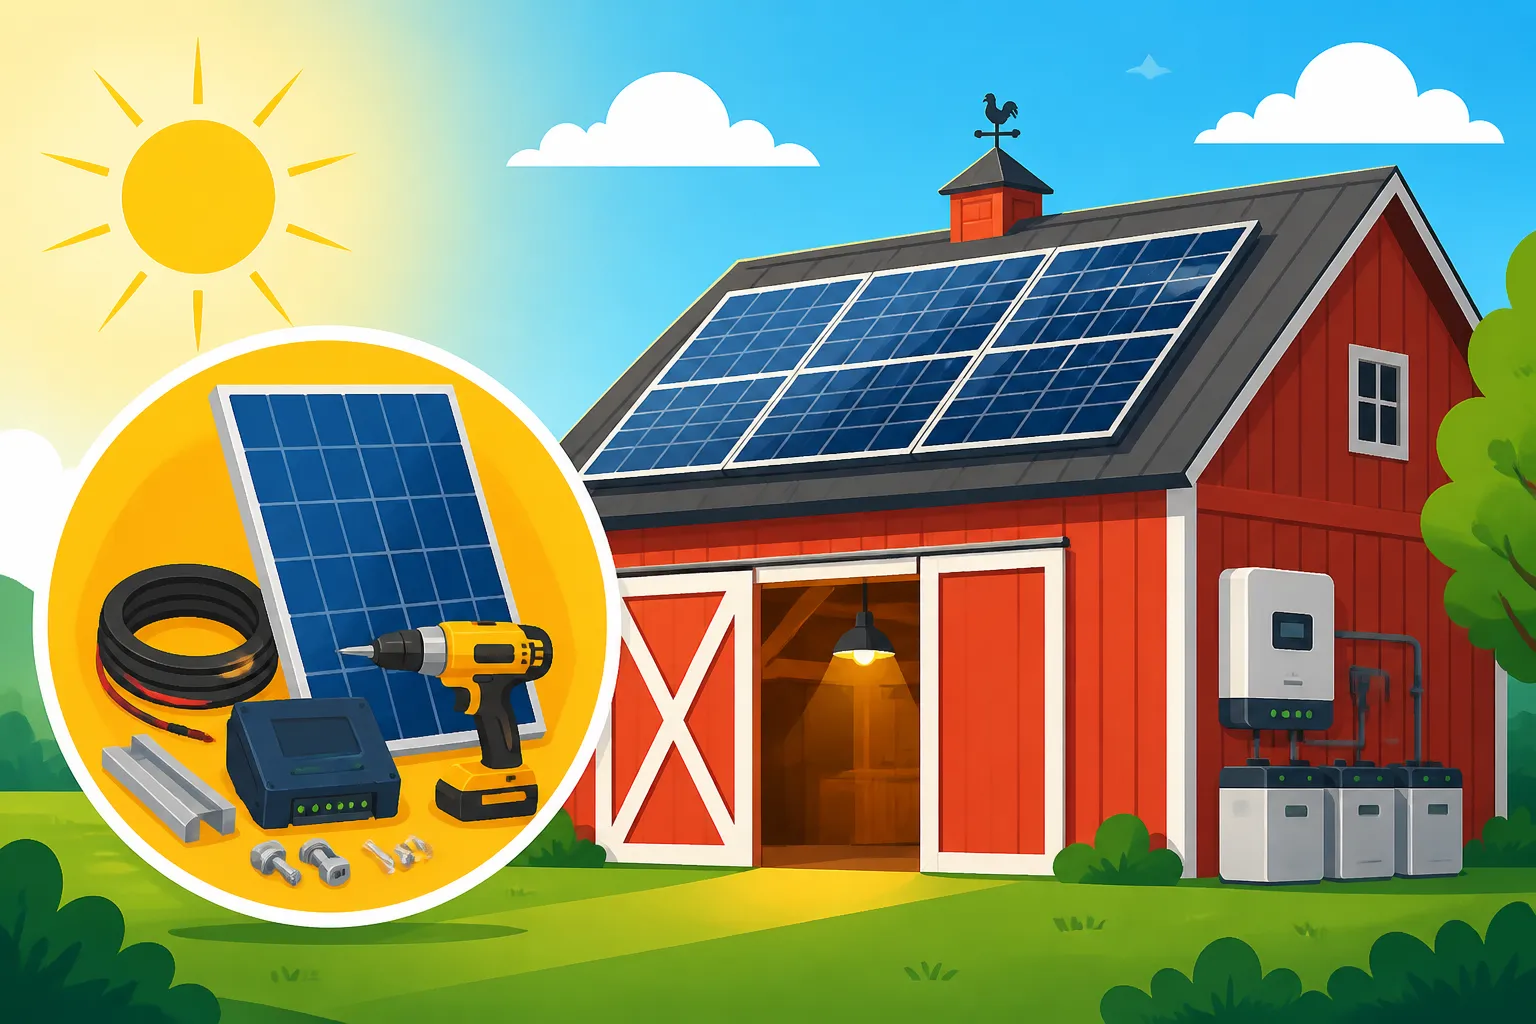
An off-grid solar system for a barn typically consists of four main components:
-
Solar Panels: These are your energy collectors. They convert sunlight directly into DC (direct current) electricity. For a barn, you'll likely want rigid monocrystalline panels known for their efficiency and durability. Brands like Renogy offer a wide range of reliable panels that are well-suited for fixed installations. The number and wattage of panels you choose will depend directly on your calculated daily energy needs and the peak sun hours available at your location. Don't just grab any panels; consider their efficiency, temperature coefficient (how well they perform in heat), and physical size to ensure they fit your mounting plan. For a deeper dive into panel selection, you might want to read about the Best Off-Grid Solar Panels.
-
Charge Controller: This is the brain between your panels and your batteries. Its critical job is to regulate the voltage and current coming from the solar panels to prevent overcharging your batteries, which can severely shorten their lifespan. There are two main types: PWM (Pulse Width Modulation) and MPPT (Maximum Power Point Tracking). For larger, more efficient barn systems, MPPT charge controllers are almost always the better choice. They are more expensive but can harvest significantly more power from your panels, especially in varying light conditions or when the panel voltage is much higher than the battery voltage.
-
Battery Bank: This is your energy storage. Since the sun doesn't shine 24/7, you need batteries to store the excess energy generated during the day for use at night or on cloudy days. For a barn, you'll want deep-cycle batteries, designed for regular, deep discharges. Lithium iron phosphate (LiFePO4) batteries are increasingly popular due to their long lifespan, high efficiency, and minimal maintenance. While they have a higher upfront cost, their overall cost of ownership is often lower than traditional lead-acid batteries. The size of your battery bank (measured in amp-hours or kilowatt-hours) depends on your daily energy usage and how many "days of autonomy" you want – meaning how many days your system can run without any sun. Learn more about How Many Batteries for an Off-Grid System to properly size yours.
-
Inverter: This component converts the DC electricity stored in your batteries into AC (alternating current) electricity, which is what most standard household appliances and tools use. For a barn with sensitive electronics or motor-driven tools, a pure sine wave inverter is essential to prevent damage and ensure smooth operation. Inverters come in various wattages, and you'll need one capable of handling the peak surge of your highest-drawing appliance (like a well pump or a saw starting up), not just its continuous running wattage.
Sourcing Your Equipment
With your component list in hand, it's time to go shopping. You have a few options for sourcing your off-grid solar equipment.
Many reputable online retailers specialize in solar components. Websites like Amazon and various solar-specific distributors offer a vast selection of panels, inverters, charge controllers, and batteries from different manufacturers. This approach allows you to mix and match components, potentially optimizing for price and specific features. For example, you might find a great deal on Renogy panels and pair them with a different brand of inverter. When buying online, always check reviews, warranty information, and shipping costs, especially for heavy items like batteries.
Another option is to look for complete off-grid solar kits. These kits are often pre-engineered and include all the major components (panels, charge controller, inverter, battery bank) designed to work together. This can simplify the purchasing process, especially for beginners. However, ensure the kit is appropriately sized for your barn's specific needs, as a generic kit might not be perfectly optimized for your usage patterns or sun exposure.
Before making any big purchases, it's highly recommended to perform a thorough How to Size an Off-Grid Solar System calculation. This will give you the exact specifications you need for each component, ensuring you buy exactly what's necessary, no more, no less.
Step-by-Step Installation Process for a Barn
Once you've done your homework and gathered all your components, it's time for the exciting part: installation! While DIY is definitely doable for many, especially for smaller barn systems, always remember that electricity can be dangerous. If you're unsure about any step, particularly with wiring, don't hesitate to consult or hire a qualified electrician. Safety first, always!
Mounting Solar Panels on Your Barn
This is where your panels find their permanent home. Whether you opt for a roof mount or a ground mount, secure installation is paramount.
For roof mounts, the process typically involves:
- Locating Rafters: You'll need to securely attach your mounting feet directly into the barn's structural rafters or trusses. Use a stud finder or tap test to locate them accurately.
- Flashing: After drilling pilot holes, install flashing around each mounting foot. This is crucial for preventing water leaks, especially on shingled roofs. Metal roofs often use specialized clamps that don't require roof penetration.
- Rails: Attach mounting rails to the feet. These rails provide the framework onto which your solar panels will be clamped. Ensure they are level and properly spaced according to your panel dimensions.
- Panel Placement: Carefully lift and place your solar panels onto the rails. Most panels have designated clamping points. Use mid-clamps between panels and end-clamps at the array's edges to secure them firmly. Double-check that all clamps are tightened to the manufacturer's specifications.
- Wiring the Array: Once panels are secured, you'll connect them using MC4 connectors. You'll typically wire them in series, parallel, or a combination (series-parallel) to achieve the desired voltage and current for your charge controller. This is a critical step, and understanding your Off-Grid Solar Wiring Diagram Explained will be invaluable. Ensure all connections are tight and waterproof.
For ground mounts, the steps involve:
- Site Preparation: Clear and level the chosen ground area. Dig footings for your support posts, ensuring they go below the frost line in cold climates to prevent heaving.
- Foundation: Pour concrete footings and embed the vertical support posts (often galvanized steel or treated lumber). Allow adequate curing time.
- Frame Assembly: Attach horizontal rails and crossbeams to the vertical supports to create a robust frame. Many prefabricated ground mount kits make this simpler.
- Panel Attachment: Just like with roof mounts, attach your panels to the frame using clamps, ensuring the correct tilt angle and orientation.
- Wiring: Route the panel wiring neatly and securely, often through conduit, to protect it from elements and potential damage.
Regardless of the mounting method, remember that proper grounding is essential for safety. Refer to Off-Grid Solar Safety and Grounding for detailed guidance.
Wiring the System Components
This is where all your components come together to form a cohesive system. Accuracy and attention to detail are paramount to avoid damaging components or creating fire hazards.
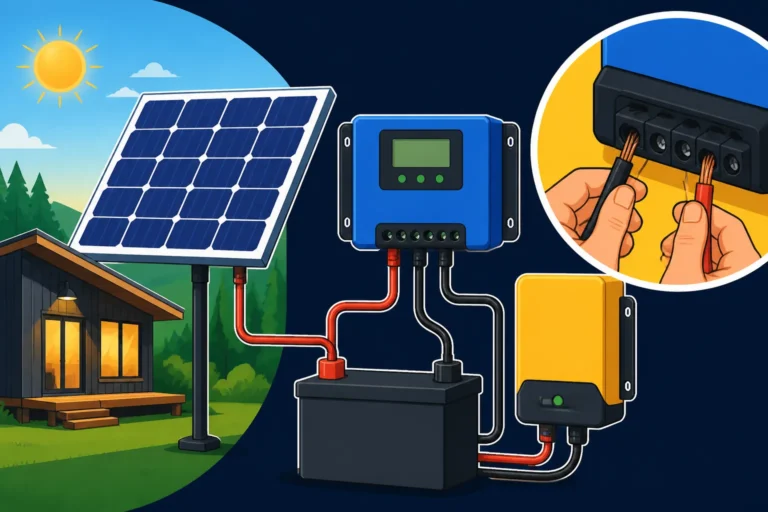
- Panel to Charge Controller: Run your main solar array cables (positive and negative) from your panels to your charge controller. These cables should be appropriately sized for the current and distance to minimize voltage drop and withstand outdoor conditions. Install an in-line fuse or DC breaker on the positive line near the charge controller.
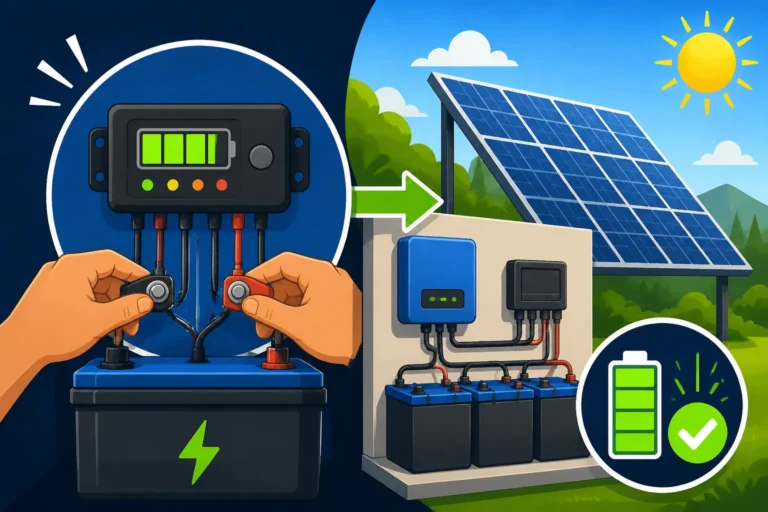
- Charge Controller to Battery Bank: Connect the battery terminals of your charge controller to your battery bank. Again, use properly sized cables and install a fuse or DC breaker on the positive line, as close to the battery bank as possible. It's crucial to connect the charge controller to the batteries before connecting the panels, as the charge controller needs to sense the battery voltage to operate correctly.
- Battery Bank Wiring: If you have multiple batteries, you'll need to wire them together. Depending on your system voltage (12V, 24V, or 48V), you'll wire them in series, parallel, or a combination. Always ensure all battery connections are clean and tight. For a comprehensive understanding, consult a guide on How to Wire an Off-Grid Solar System. Remember to add a main battery disconnect switch between the battery bank and the inverter.
- Inverter Connection: Connect the inverter directly to the battery bank terminals. These cables will typically be very thick due to the high currents involved, so precise sizing is critical. Install a large DC fuse or breaker on the positive line between the battery bank and the inverter. Always make sure the inverter is properly grounded.
Setting Up the Inverter and Distribution
With the DC side of your system connected, it's time to get your barn running on AC power.
- Inverter Mounting: Mount your inverter in a cool, dry, well-ventilated location, close to your battery bank if possible, to minimize voltage drop on the heavy battery cables. Ensure there's adequate clearance for air circulation.
- AC Wiring to a Subpanel: For a barn, you'll likely want to wire your inverter's AC output to a small AC subpanel (breaker box). This allows you to distribute power to different circuits within the barn (e.g., lights, outlets for tools, pumps) and protect them with individual AC breakers. Run appropriate gauge AC wiring from your inverter's AC output to the main breaker in this subpanel.
- Connecting Loads: From the subpanel, run branch circuits to your lights, outlets, and dedicated appliance circuits throughout the barn. Ensure all wiring meets local electrical codes (even off-grid systems often have safety standards to follow) and is properly secured within conduit or protected channels.
- Testing and Commissioning: Once everything is wired, double-check all connections, fuses, and breakers. Then, following your inverter's and charge controller's instructions, power up the system. Monitor your battery voltage, charge current, and inverter output. Test a few small loads first before powering everything up.
- Program Your Components: Many modern charge controllers and inverters have programmable settings. You'll need to program the correct battery type, charging voltages (bulk, absorb, float), and low-voltage disconnect settings to protect your battery bank and optimize performance.
Essential Considerations for Barn Solar Systems
Installing off-grid solar on a barn isn't just a one-time project; it's an ongoing commitment to energy independence. Thinking ahead about safety, maintenance, and future needs will ensure your system serves you well for many years.
Safety and Protection
When dealing with electricity, especially high-voltage solar arrays and powerful battery banks, safety cannot be overstated.
- Grounding: Proper grounding of all major components (solar panels, mounting racks, inverter, charge controller, battery bank, and any metal enclosures) is absolutely critical. This protects against electrical shock and lightning strikes. Consult local electrical codes or the National Electrical Code (NEC) guidelines, even if your barn is off-grid, to ensure your grounding meets industry standards.
- Fuses and Breakers: These are your system's lifelines. Install appropriate DC-rated fuses or breakers on the positive lines between panels and charge controller, and between batteries and charge controller, as well as between batteries and the inverter. On the AC side, use standard AC breakers in your subpanel. These devices protect your equipment and prevent fires in case of a short circuit or overload.
- Disconnect Switches: Include clearly labeled disconnect switches for both the DC (solar array and battery bank) and AC (inverter output) sides of your system. These allow you to safely shut down power for maintenance or emergencies.
- Wiring Protection: All wiring, especially outdoor runs or those in areas accessible to animals, should be protected by conduit to prevent physical damage, weather exposure, and potential chewing by rodents.
- Battery Ventilation and Enclosure: Lead-acid batteries produce hydrogen gas during charging, which is flammable. Ensure your battery bank is in a well-ventilated area or a purpose-built, vented enclosure. Even LiFePO4 batteries, while safer, benefit from stable temperatures and protection from physical damage in a secure battery box.
Maintenance and Longevity
An off-grid solar system is an investment, and like any investment, it requires care to maximize its lifespan and efficiency.
- Panel Cleaning: Dust, dirt, bird droppings, and leaves can significantly reduce panel efficiency. Regularly inspect and clean your panels, especially after dusty periods or heavy rain. A soft brush and water are usually sufficient. In snowy regions, gently remove snow to allow them to produce power.
- Battery Health:
- Lead-Acid: If you have flooded lead-acid batteries, regularly check and top off electrolyte levels with distilled water. Keep the terminals clean and free of corrosion. Ensure they are not consistently discharged below 50% capacity, as this shortens their life.
- Lithium: LiFePO4 batteries are largely maintenance-free, but it's still good practice to periodically check terminal connections for tightness and corrosion. Avoid operating them in extreme temperatures. A guide on Off-Grid Solar Maintenance Guide can provide more detailed information for both battery types.
- Wiring and Connections: Periodically inspect all wiring, connections, fuses, and breakers for signs of wear, corrosion, or loosening. Loose connections can lead to resistance, heat, and inefficient power transfer.
- System Monitoring: If your inverter or charge controller has monitoring capabilities (many modern ones do, sometimes via an app), utilize them. Keeping an eye on voltage, current, and daily energy production can help you catch potential issues early.
Scalability and Future Needs
One of the great things about off-grid solar is its flexibility. It's wise to design your initial system with future expansion in mind.
- Oversize Wiring and Conduit: When running conduit for your initial solar array, consider upsizing it slightly to accommodate additional wiring for more panels down the line. Similarly, ensure your main DC and AC wiring has some headroom.
- Modular Components: Choose components that can be easily added to. For example, some inverters can be stacked in parallel to increase power output, and many battery systems allow for additional battery modules. If you initially install a 24V system, consider if you might eventually want to upgrade to a 48V system for greater efficiency with larger loads, and choose components that can accommodate that transition.
- Space for Expansion: If you have a roof-mounted system, try to leave some space for extra panels. For ground mounts, ensure there's room to expand your array footprint.
- Load Growth: Barns often evolve. You might start with just lights and a radio, but later decide to add a powerful air compressor, a small freezer, or even electric heating. Planning for potential future load growth will save you from having to completely overhaul your system later. For example, if you plan to add a well pump, knowing How to Size an Off-Grid Inverter for its surge current becomes crucial from the outset.
By considering these factors from the start, your barn's off-grid solar system won't just be a temporary fix, but a reliable, long-term power solution that grows with your needs.
Here's a quick reference table for common barn appliance power draws to help you with your initial load calculation:
| Appliance / Device | Typical Wattage (Running) | Estimated Daily Usage (Hours) | Daily Watt-Hours (Example) | Notes |
|---|---|---|---|---|
| LED Light Bulb (10W) | 10 W | 4 | 40 Wh | Great for stalls, general lighting |
| Small Fan | 50 W | 6 | 300 Wh | Ventilation in warmer months |
| Electric Fence Charger | 5-15 W | 24 | 120-360 Wh | Constant draw, critical for livestock |
| Water Pump (e.g., well) | 750-1500 W | 0.5-1 | 375-1500 Wh | High surge demand, short run time |
| Power Drill | 500-800 W | 0.25 | 125-200 Wh | Intermittent use, consider surge |
| Small Refrigerator | 80-150 W | 8 (cycling) | 640-1200 Wh | Cycles on/off, average daily use |
| Workshop Light (Fluorescent) | 40-80 W | 3 | 120-240 Wh | |
| Radio/Bluetooth Speaker | 10-30 W | 2 | 20-60 Wh | Low draw, good for background sound |
| Livestock Water Heater | 100-300 W | 6-12 (cycling) | 600-3600 Wh | Seasonal use, can be a major load |
Note: These are average figures. Always check the specific wattage on your appliance's label for accurate calculations.
Disclaimer
The information provided in this guide is for general informational purposes only and does not constitute professional electrical engineering advice. Off-grid solar system installation involves working with electricity, which can be dangerous. Improper installation can result in property damage, serious injury, or even death. Always consult with a qualified electrician or solar professional before undertaking any electrical work. Adhere to all local, state, and federal codes and regulations. The author and publisher are not liable for any loss, damage, or injury resulting from the use of this information.