How Many Batteries to Run A Mini Split
Powering a mini-split off-grid can feel like trying to solve a complex puzzle, especially when you're staring at battery specifications and wondering how much energy that incredibly comfortable appliance is actually going to draw. Many folks underestimate just how much juice these units need, leading to frustrating brownouts or a battery bank that's constantly depleted. This guide will walk you through the nitty-gritty of calculating exactly how many batteries you'll need to keep your mini-split running smoothly, ensuring you stay cool or warm without constantly worrying about your power supply.
Understanding Mini-Split Power Demands for Off-Grid Living
Let's be real, a mini-split isn't just another lightbulb. It's often the single largest discretionary load in an off-grid home, RV, or cabin. While they are celebrated for their energy efficiency compared to traditional central air conditioners or resistive heaters, they still command a significant chunk of your power budget. Ignoring their true consumption is one of the biggest pitfalls aspiring off-gridders face.
What Exactly is a Mini-Split and Why is it Tricky for Off-Grid?
A mini-split system consists of an outdoor compressor/condenser and one or more indoor air-handling units. Unlike central air, it doesn't use ducts, making installation simpler and reducing energy loss. They are fantastic because they offer both heating and cooling, providing year-round climate control. Many are also heat pumps, which are incredibly efficient at moving heat rather than generating it. This efficiency is a huge plus for off-grid living, but it doesn't make them "free" to run.
The trickiness comes from their variable power draw. A mini-split isn't like a toaster that pulls a constant 1500 watts for two minutes. Modern mini-splits have inverter compressors, which means they can ramp their speed up and down to match the heating or cooling demand. This is what makes them so efficient, but it also makes their power consumption harder to predict. When you first turn it on, or if the room temperature is far from your set point, it will draw a high amount of power – the "starting watts" or "surge." Once the room reaches the desired temperature, it will "modulate" down, drawing much less power, which we call "running watts." This fluctuation is great for energy savings, but it means you need a battery bank and inverter capable of handling both the initial surge and the sustained, albeit lower, running loads over many hours.
Imagine waking up on a chilly morning in your off-grid cabin in the mountains of North Carolina. You want to take the bite out of the air, so you crank up your mini-split. For the first 15-30 minutes, it might pull 1500-2000 watts to quickly get the room comfortable. Then, as it maintains that temperature, it might drop down to 300-600 watts for the rest of the morning. If your battery bank can't handle that initial burst, your inverter might trip, leaving you shivering.
Deconstructing Wattage: Running Watts, Starting Watts, and SEER Ratings
To properly size your battery bank, you need to understand these power terms.
- Running Watts (or Operating Watts): This is the continuous power your mini-split draws once it's operating at a steady state to maintain the desired temperature. For a typical 9,000 BTU (0.75-ton) mini-split, running watts might range from 300 to 800 watts, depending on external conditions and insulation. A 12,000 BTU (1-ton) unit could range from 500 to 1200 watts, and an 18,000 BTU (1.5-ton) unit might be 800-1800 watts. These are approximate, and actual numbers vary greatly by model and environment.
- Starting Watts (or Surge Watts): This is the momentary spike in power demand when the compressor first kicks on. It's often significantly higher than the running watts, sometimes 2 to 3 times the running wattage. While it only lasts for a fraction of a second to a few seconds, your inverter must be able to supply this surge without faulting. For our example 12,000 BTU unit, the starting watts might briefly hit 2000-3000 watts, even if its running watts are closer to 800-1000. It's less of a concern for battery sizing, but absolutely critical for inverter sizing. If you're wondering, "What Size Inverter to Run A Mini Split," you'll need to account for these surge loads.
- SEER/EER Ratings: These are measures of a mini-split's energy efficiency. SEER (Seasonal Energy Efficiency Ratio) is for cooling, and EER (Energy Efficiency Ratio) is for cooling at specific conditions. Higher numbers mean greater efficiency, meaning the unit uses less electricity to provide the same amount of cooling. For heating, you'll look at the HSPF (Heating Seasonal Performance Factor). Always aim for the highest SEER and HSPF ratings your budget allows, as this directly translates to less energy draw from your precious battery bank. For example, a 23 SEER mini-split will consume less power than a 19 SEER model to achieve the same cooling effect over the course of a season.
When planning your off-grid system, it's wise to look at your mini-split's specifications, often found on a label on the outdoor unit or in its manual. This will give you the most accurate running and starting wattage figures for your specific model. Don't forget to consider how many hours per day or night you actually expect to run it. If you're living full-time in an RV in Florida, your summer run-time will be drastically different from someone in a weekend cabin in cooler Oregon.
The Core Calculations for Battery Sizing
Now that we understand what a mini-split demands, let's translate that into actual battery capacity. This is where the rubber meets the road, and getting these calculations right is paramount for a reliable off-grid system. It’s not just about what the mini-split needs, but also how long you expect your batteries to last without sun. This is part of the larger process of How to Size an Off-Grid Solar System.
Calculating Your Mini-Split's Daily Energy Consumption
First, we need to figure out how many Watt-hours (Wh) your mini-split will consume in an average day. This requires an honest assessment of your usage.
Let’s take a common scenario: a 12,000 BTU mini-split with an average running wattage of 800 watts.
-
Estimate Daily Run-Time: How many hours a day will you typically run it?
- Scenario 1 (Moderate Use): You run it for 4 hours in the afternoon to cool down, and 3 hours in the evening. Total: 7 hours.
- Scenario 2 (Heavy Use): You run it intermittently for 10 hours throughout the day and evening. Total: 10 hours.
- Scenario 3 (Seasonal Use, e.g., winter heating): You run it for 5 hours in the morning and 5 hours in the evening. Total: 10 hours.
Let’s go with Scenario 2 for a more robust example: 10 hours per day.
-
Calculate Total Watt-Hours per Day:
- Running Watts x Daily Run-Time (hours) = Total Watt-Hours
- 800 watts x 10 hours = 8,000 Watt-hours (Wh) per day.
For perspective, 8,000 Wh is 8 kWh (kilowatt-hours). This is a significant amount of power, equivalent to running roughly 80 LED lightbulbs (10W each) for 10 hours. This is why getting a comprehensive understanding of How to Calculate Daily Energy Usage for all your appliances, not just the mini-split, is so important.
Remember, this is an average. On scorching hot days in Arizona or frigid nights in Montana, your mini-split might run for more hours or at higher average wattage, drawing more power. It's always a good idea to factor in a buffer or plan for peak demand.
Converting Energy Needs to Battery Capacity (Amp-Hours)
Once you have your daily Watt-hour consumption, you can translate this into the Amp-hour (Ah) capacity needed for your battery bank. This step also involves considering your system voltage and a critical factor called Depth of Discharge (DoD).
Here’s the formula:
Required Battery Capacity (Ah) = (Total Watt-Hours / System Voltage) / Usable Depth of Discharge (DoD) Factor x Days of Autonomy
Let's break it down:
- Total Watt-Hours: From our example, 8,000 Wh per day.
- System Voltage: This is the voltage of your battery bank, usually 12V, 24V, or 48V. For larger loads like a mini-split, a 48V system is almost always recommended because it reduces current (amps) in your wiring, leading to less power loss and allowing for thinner, less expensive cables. It's a key part of your Off-Grid Solar System Design Basics. Let's assume a 48V system for our example.
- Usable Depth of Discharge (DoD) Factor: Batteries shouldn't be fully drained.
- LiFePO4 (Lithium Iron Phosphate): These batteries can typically be discharged to 80-100% without significant harm. We usually use a 0.8 (80%) to 0.9 (90%) DoD factor for calculations to maximize their lifespan. Let's use 0.9 (90%) for LiFePO4.
- Lead-Acid (AGM, Gel, Flooded): These batteries are much more sensitive to deep discharges. To ensure a reasonable lifespan, you should only discharge them to 50% DoD. So, the factor is 0.5.
- Days of Autonomy: This refers to how many days your battery bank can power your essential loads without any solar input (e.g., during extended cloudy weather or heavy snowfall). For most off-grid setups, aiming for 2-3 days is a good balance. For a mini-split, which is a major load, you might want more, or plan for generator backup. Let’s aim for 2 days of autonomy. This helps you How to Account for Cloudy Days.
Let's calculate for a LiFePO4 battery bank (48V, 90% DoD, 2 days autonomy):
- Daily Ah requirement: (8,000 Wh / 48V) = 166.67 Ah per day
- Total Ah for Autonomy: 166.67 Ah/day x 2 days = 333.34 Ah
- Adjust for Usable DoD: 333.34 Ah / 0.90 (90% DoD) = 370.38 Ah
So, for our example 12,000 BTU mini-split running 10 hours a day, you would need a minimum of approximately 370 Ah of LiFePO4 battery capacity at 48V to last for 2 days without sun. This gives you a clear idea of How Many Batteries for an Off-Grid System when a mini-split is involved.
If you were using lead-acid batteries, the calculation would change drastically due to the 50% DoD:
(8,000 Wh / 48V) / 0.50 (50% DoD) x 2 days = 666.68 Ah
You can see why LiFePO4 is often the preferred choice for such demanding loads – you need roughly half the nominal capacity, which saves space, weight, and often, long-term cost.
Choosing the Right Batteries for Your Mini-Split System
The choice of battery chemistry is one of the most impactful decisions you'll make when designing an off-grid system, especially when considering power-hungry appliances like mini-splits. It affects everything from upfront cost to lifespan, maintenance, and the overall reliability of your power. This is where researching your "Cost of an Off-Grid Solar Battery Bank" becomes really important.
Lithium Iron Phosphate (LiFePO4) vs. Lead-Acid Batteries
Let's dive into the specifics of why one might be better for a mini-split than the other.
Lithium Iron Phosphate (LiFePO4) Batteries:
- Pros:
- Deep Depth of Discharge (DoD): As discussed, you can safely use 80-100% of their rated capacity without damaging them. This means a 100 Ah LiFePO4 battery gives you nearly 100 Ah of usable power.
- Long Cycle Life: LiFePO4 batteries typically last for 3,000 to 7,000 cycles or more, depending on usage. This can translate to 10-20 years of daily use, making them a fantastic long-term investment.
- High Efficiency: They have very little internal resistance, meaning they charge faster and more efficiently, wasting less solar energy as heat. This is crucial for maximizing the effectiveness of your solar panels and quickly replenishing batteries after a mini-split run.
- Consistent Voltage: They maintain a more stable voltage throughout their discharge cycle, which is better for sensitive electronics and ensures your mini-split runs optimally without voltage sag.
- Lightweight and Compact: Significantly lighter and smaller than lead-acid batteries of comparable usable capacity, which is a huge benefit for RVs, vans, or spaces with weight/space constraints.
- Low Maintenance: Virtually maintenance-free; no watering or regular equalization needed.
- Built-in BMS: Most come with a Battery Management System (BMS) that protects against overcharging, over-discharging, over-current, and temperature extremes.
- Cons:
- Higher Upfront Cost: This is the main barrier for many. A LiFePO4 battery can cost 2-4 times more than a lead-acid battery of the same nominal capacity. However, when considering usable capacity and lifespan, the "LiFePO4 vs Lead-Acid Battery Cost" often evens out, and LiFePO4 becomes more economical in the long run.
- Cold Weather Performance: Standard LiFePO4 batteries generally cannot be charged below freezing (32°F / 0°C) without internal damage. If you're in a cold climate, you'll need heated batteries (which cost more) or a temperature-controlled battery enclosure.
Lead-Acid Batteries (AGM, Gel, Flooded):
- Pros:
- Lower Upfront Cost: Their primary advantage is a significantly lower initial price point, making them attractive for those on a tight budget.
- Wider Temperature Range (Charging): Flooded and AGM batteries can generally be charged at colder temperatures than standard LiFePO4.
- Readily Available: Can be found at most automotive or marine supply stores.
- Cons:
- Limited Depth of Discharge (DoD): Only safely usable to 50% DoD. This means a 100 Ah lead-acid battery only provides 50 Ah of usable power, essentially doubling the nominal capacity you need.
- Shorter Cycle Life: Typically 300 to 1,200 cycles, depending on the type and depth of discharge. They wear out much faster than LiFePO4, especially with frequent deep discharges.
- Lower Efficiency: Less efficient charging and discharging, leading to more wasted energy.
- Voltage Sag: Voltage drops significantly as they discharge, which can affect appliance performance.
- Heavy and Bulky: Much heavier and larger for the same usable capacity.
- Maintenance: Flooded lead-acid batteries require regular watering and ventilation. AGM/Gel are sealed but still benefit from periodic equalization charges.
- Off-Gassing: Flooded batteries produce hydrogen gas when charging, requiring excellent ventilation.
For powering a mini-split, which is a high-demand appliance you'll likely run for extended periods, LiFePO4 batteries are generally the superior choice despite the higher initial investment. Their deeper discharge, longer life, and greater efficiency make them much more suitable for the rigorous demands of an off-grid climate control system. Brands like Renogy and Battle Born offer popular LiFePO4 options that are widely available on platforms like Amazon, making it easier to source quality components.
Determining the Number of Batteries and System Configuration
Once you've settled on a battery chemistry and calculated your required Ah capacity, it's time to figure out how many actual batteries you'll need. Let's stick with our LiFePO4 example from before, where we need about 370 Ah at 48V.
Most individual LiFePO4 batteries are sold in common capacities like 100 Ah, 200 Ah, or even 300 Ah, and typically at 12V. To build a 48V system with these 12V batteries, you'll need to wire them in series.
Example with 12V 100Ah LiFePO4 Batteries:
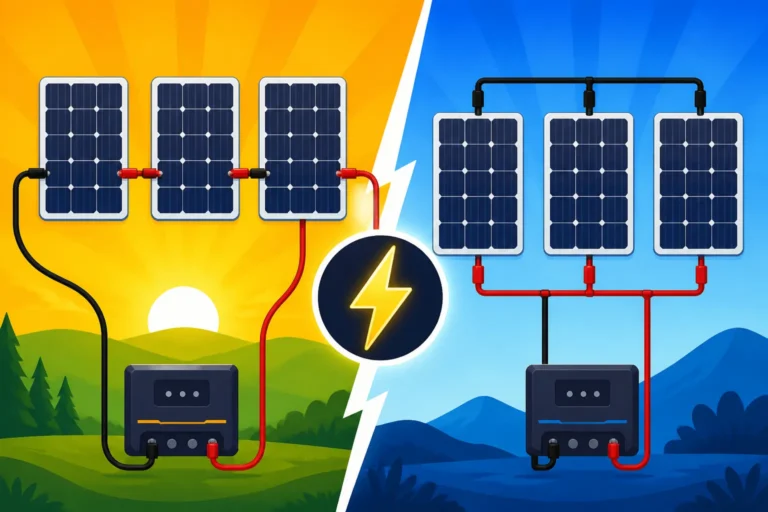
- Series Connection for Voltage: To get to 48V from 12V batteries, you need to connect four 12V batteries in series (12V x 4 = 48V). When batteries are in series, the voltage adds up, but the amp-hour capacity remains the same as a single battery. So, four 12V 100Ah batteries in series give you a 48V 100Ah battery bank.
- Parallel Connection for Capacity: We need about 370 Ah. If one string of four 12V 100Ah batteries in series gives us 100 Ah, we need multiple such strings connected in parallel to reach our target capacity.
- 370 Ah / 100 Ah per string = 3.7 strings.
- Since you can't have a partial string, you'll need 4 strings of 12V 100Ah batteries in parallel.
So, in this scenario, you would need 16 individual 12V 100Ah LiFePO4 batteries (4 batteries in series for voltage, and 4 such series strings in parallel for capacity) to achieve approximately 400 Ah at 48V.
This might sound like a lot of batteries, and it can be, which is why some manufacturers offer higher voltage batteries directly (e.g., 24V or 48V server rack batteries), or even 12V 200Ah or 300Ah batteries to reduce the total number of physical units needed. For instance, if you found 12V 200Ah batteries, you'd only need 2 strings of 4 batteries each (8 batteries total) to get 48V 400Ah (200Ah x 2 strings).
Important Configuration Notes:
- Matching: All batteries in a bank should be of the same type, age, and capacity. Never mix and match different chemistries or capacities within the same bank.
- Balance: When wiring in series, it's crucial to ensure the batteries are balanced for optimal performance and longevity. Many modern LiFePO4 batteries have internal balancing, but for larger banks, external balancers might be beneficial.
- Wiring: Use appropriate gauge wire and fuses/breakers for safety. Higher voltage systems (like 48V) mean lower current, which means thinner wires are often sufficient compared to 12V systems handling the same power.
Here’s a simplified table to give you a rough idea of battery requirements for common mini-split sizes, assuming a 48V LiFePO4 system with 90% DoD and 2 days of autonomy. This assumes an average running wattage and daily usage, so always do your own calculations based on your specific mini-split and usage patterns!
| Mini-Split BTU | Est. Avg Running Watts | Daily Run Time (Hours) | Daily Watt-Hours (Wh) | Estimated Minimum 48V LiFePO4 Ah Needed (2 days autonomy) | Number of 12V 100Ah LiFePO4 Batteries (approx.) |
|---|---|---|---|---|---|
| 9,000 BTU | 600W | 8 | 4,800 Wh | 222 Ah | 8-12 (2-3 parallel strings of 4 in series) |
| 12,000 BTU | 800W | 10 | 8,000 Wh | 370 Ah | 16 (4 parallel strings of 4 in series) |
| 18,000 BTU | 1200W | 12 | 14,400 Wh | 667 Ah | 28-32 (7-8 parallel strings of 4 in series) |
Note: These are estimates. Your actual requirements may vary. Always verify your mini-split's specifications and your expected usage.
This table highlights how substantial the battery bank needs to be for consistent mini-split operation. This is why accurately assessing "How Many Watts of Solar You Need" is equally critical, to ensure your solar array can keep up with charging such a large bank.
Real-World Considerations and Optimization Tips
Beyond the raw numbers, there are practical aspects to consider that can make or break your off-grid mini-split experience. It's not just about the components, but how they all work together in your unique environment. Remember to also consider other loads; a comprehensive "How to Do an Off-Grid Load Analysis" for your entire system is always recommended.
Accounting for Inverter Efficiency and Parasitic Loads
When you calculate your daily Watt-hours, it’s easy to forget that not all the energy stored in your batteries makes it directly to your mini-split. There are always some losses in the system.
- Inverter Efficiency: Your inverter, which converts DC battery power to AC power for your mini-split, isn't 100% efficient. Most quality pure sine wave inverters are 85-95% efficient. This means if your mini-split draws 800W, your inverter might pull closer to 850-900W from your batteries. This isn't a huge factor compared to the mini-split's consumption, but it's important to be aware of. You might need to add an extra 5-15% to your total daily Watt-hour calculation to compensate for this loss. For more details, explore guides on "How to Size an Off-Grid Inverter".
- Parasitic Loads: These are the small, continuous power draws from other components in your system, even when they're not actively powering an appliance. This includes your charge controller, battery monitor, and the inverter itself (even in standby mode). While typically minor (a few watts here and there), these add up over 24 hours, especially if you have several monitoring devices or a large inverter that always draws a little bit of power. Don't forget to include these small, but constant, drains in your overall load analysis.
It’s often a good practice to add a 10-20% buffer to your calculated battery capacity to account for these inefficiencies, unexpected higher usage, or simply to provide a bit of extra cushion for reliability. This small overestimation can save you a lot of headaches down the line.
Maximizing Efficiency and Longevity of Your Mini-Split System
Simply installing a large battery bank isn't the only solution; optimizing your usage and environment can significantly reduce your power needs, thus extending battery life and reducing the overall cost of your off-grid system.
- Insulation is King: This cannot be stressed enough. The better insulated your space (walls, ceiling, floor, windows, and doors), the less work your mini-split has to do, and the less power it will consume. If you're building a new off-grid home or renovating a cabin, prioritize insulation and air sealing above almost everything else. Imagine trying to cool a sieve – that's what a poorly insulated home feels like to a mini-split.
- Proper Mini-Split Sizing: Don't just guess! A mini-split that's too large will cycle on and off frequently, leading to less efficient operation and potentially higher energy use due to repeated surge draws. One that's too small will run constantly and struggle to maintain temperature. Consult an HVAC professional or use online calculators to correctly size the BTU output for your specific space, factoring in climate, insulation, and window exposure.
- Smart Thermostat Usage: Use a smart thermostat, if compatible, to program schedules and set realistic temperature expectations. For instance, in summer, setting the thermostat to 78-80°F might be perfectly comfortable and significantly less energy-intensive than trying to maintain 72°F. In winter, layering up and keeping the thermostat at 65-68°F can save a lot of heat pump energy. Avoiding drastic temperature swings will help keep your mini-split in its efficient "modulation" phase.
- Passive Heating/Cooling Strategies: Integrate passive design elements. Orient your home to take advantage of natural light and warmth in winter, and use overhangs or awnings to shade windows in summer. Plant deciduous trees to provide summer shade and allow winter sun. Cross-ventilation can dramatically reduce the need for AC on mild days.
- Backup Generator: For critical loads like a mini-split, especially if you rely on it for comfort in extreme weather, a backup generator can be a lifesaver. During extended cloudy periods when your solar panels aren't producing much, a generator can charge your batteries and directly power your mini-split. This is an important part of a robust off-grid system and factors into the "Cost of Adding a Generator to Off-Grid Solar." Companies like EcoFlow and Bluetti also offer powerful solar generators that can provide temporary backup.
By combining meticulous calculations with smart design and usage habits, you can effectively run a mini-split off-grid and enjoy consistent comfort without constantly worrying about your battery bank. It's a journey, and with the right planning, it's absolutely achievable.
Disclaimer
The information provided in this guide is for general informational purposes only and does not constitute professional electrical, engineering, or financial advice. Off-grid solar system design and installation can be complex and involve significant risks, including fire and electrical shock. Always consult with qualified professionals, adhere to local codes and regulations, and prioritize safety when designing, installing, or modifying any electrical system.