How to Install Off-Grid Solar Panels
Stepping into the world of off-grid solar can feel incredibly empowering, but let's be honest, the idea of actually installing those big, beautiful solar panels can be downright intimidating. You might be dreaming of energy independence but staring at a rooftop or a piece of land, wondering where to even begin with mounting and wiring without messing something up or, worse, hurting yourself. This comprehensive guide is designed to walk you through the entire process of installing off-grid solar panels, turning that initial overwhelm into a clear, actionable plan so you can confidently bring your solar dreams to life.
Understanding Your Off-Grid Solar Panels Before Installation
Before you even think about lifting a panel onto a roof or assembling a ground mount, it's absolutely crucial to understand the very heart of your solar system: the panels themselves. Getting familiar with their types, specifications, and optimal placement will set the stage for a successful and efficient installation. Trust me, a little homework now saves a lot of headaches later.
Types of Solar Panels and Their Best Uses
When you start looking at solar panels, you'll quickly discover that they aren't all created equal. Each type has its own strengths and weaknesses, making it better suited for certain applications. Knowing the difference will help you confirm if you've got the right panels for your specific off-grid adventure.
First up, we have monocrystalline solar panels. These are often recognized by their uniform, dark black appearance, and they're generally considered the most efficient type on the market. They're made from a single crystal of silicon, which allows electrons to flow more freely, leading to higher power output per square foot. This efficiency makes them an excellent choice if you have limited space, like on a small cabin roof, or if you're aiming for maximum power generation from your array. They tend to be a bit pricier per watt, but their long lifespan and superior performance, especially in lower light conditions, can make them a worthwhile investment for a robust, long-term off-grid setup. Many popular off-grid solar brands, like Renogy, offer high-quality monocrystalline panels that are known for their durability and performance.
Then there are polycrystalline solar panels. These panels have a distinctive speckled blue appearance because they are made from multiple silicon crystals melted together. While slightly less efficient than monocrystalline panels, they are also typically more affordable. If you have plenty of space for your solar array—say, on a large ground mount for a homestead—and you're working with a tighter budget, polycrystalline panels can be a fantastic option. They perform well in warm climates but might see a slightly larger dip in efficiency compared to monocrystalline panels under very hot conditions. However, for many off-grid homeowners, the cost-effectiveness of polycrystalline panels makes them a very attractive choice.
Finally, we have flexible or thin-film solar panels. These are a whole different beast. Instead of rigid frames, they are lightweight and can often conform to curved surfaces. Think RV roofs, boat decks, or even portable setups where you need to roll them up and go. They are generally the least efficient of the three types, meaning you'll need a larger surface area to generate the same amount of power as rigid panels. They also tend to have shorter lifespans. However, their unique flexibility and light weight make them indispensable for mobile applications or situations where traditional rigid panels simply aren't practical. You'll find many flexible panel options available on platforms like Amazon, making them easily accessible for smaller, portable off-grid projects. Choosing the right panel type is a fundamental step in designing your system, and it directly impacts how you'll approach the physical installation. To dive deeper into what makes each type stand out, you might find our guide on Best Off-Grid Solar Panels particularly helpful.
Panel Specifications and What They Mean
Once you've settled on the type of panel, you'll encounter a string of numbers and acronyms on the spec sheet that can look like hieroglyphics if you're not familiar with them. Understanding these specifications isn't just about technical jargon; it's about ensuring compatibility with your other components and maximizing your system's output.
Let's start with Wattage (W). This is the most straightforward number, indicating the panel's maximum power output under ideal testing conditions. A 100W panel, for example, can produce 100 watts of power. Your total system wattage will be the sum of all your panels. This is the first number most people look at, and it's a good starting point to understand your potential power generation.
Next are the Voltage (V) ratings. You'll usually see two key ones:
- Open Circuit Voltage (Voc): This is the maximum voltage the panel can produce when it's not connected to a load (i.e., nothing is drawing power from it). This is an important number for your charge controller, as it needs to be able to handle this maximum voltage. Going above the charge controller's Voc limit can damage it.
- Maximum Power Point Voltage (Vmp): This is the voltage at which the panel produces its maximum power when connected to a load. This is the voltage your charge controller will try to operate at to optimize power harvesting.
Similarly, you'll have Current (A) ratings:
- Short Circuit Current (Isc): This is the maximum current the panel can produce when its positive and negative terminals are directly connected (a "short circuit"). Like Voc, this is a safety rating that your wiring and fuses must be able to handle.
- Maximum Power Point Current (Imp): This is the current at which the panel produces its maximum power.
Finally, pay close attention to Temperature Coefficients. Solar panels don't perform as well in extreme heat, and these coefficients tell you how much their power output, voltage, and current will change for every degree Celsius increase or decrease from the standard test temperature (usually 25°C or 77°F). A negative temperature coefficient for power means that for every degree above 25°C, the panel's power output will decrease by that percentage. For instance, a -0.4%/°C power coefficient means a 10-degree increase in temperature will reduce power by 4%. Understanding these numbers helps you accurately predict real-world performance, especially if you live in a hot climate, and is vital when learning how to size an off-grid solar system.
Optimal Panel Placement and Orientation
Once you understand your panels, the next critical step is figuring out where they'll live and which way they'll face. This isn't just about aesthetics; it profoundly impacts how much electricity your system will generate. Getting this wrong can significantly reduce your system's efficiency, no matter how good your panels are.
The absolute golden rule for solar panel placement is sun access. You need to identify an area that receives the most unobstructed sunlight throughout the day, every day of the year. This means looking at your property for any potential shading culprits: tall trees, neighboring buildings, chimneys, or even utility poles. Even a small amount of shade on just one part of a panel can drastically reduce the output of the entire string of panels, especially with older charge controllers. Walk around your property at different times of the day, and even in different seasons if possible, to observe the sun's path and potential shading patterns. There are also apps and tools that can help map the sun's trajectory throughout the year for your specific location.
When it comes to orientation, in the Northern Hemisphere, your panels should ideally face true south (not magnetic south). In the Southern Hemisphere, they should face true north. This maximizes the amount of direct sunlight they receive throughout the day. However, depending on your energy usage patterns, you might consider adjusting this slightly. For instance, if you use more power in the mornings and evenings, a slightly southeast or southwest orientation might be beneficial, though it will slightly reduce overall daily production.
Finally, the tilt angle is paramount. For fixed arrays, the ideal tilt angle is generally equal to your latitude. For example, if you live at 40 degrees North latitude, a 40-degree tilt angle is often recommended. This angle helps capture maximum sunlight year-round. However, many off-gridders find that adjusting the tilt angle seasonally can significantly boost performance. In winter, when the sun is lower in the sky, a steeper tilt (latitude + 15 degrees) helps catch more direct rays and sheds snow more easily. In summer, a shallower tilt (latitude – 15 degrees) is more effective. For systems on RVs or cabins where adjustability is possible, making these seasonal changes can be a game-changer. For ground mounts, adjustable mounts are highly recommended for this very reason. If you're dealing with persistent shading, even after careful placement, tools like micro-inverters or power optimizers can help individual panels perform independently, minimizing the impact of shade on the rest of your array. Thinking about the overall picture, including how many solar panels for off-grid living you might need, helps to make these placement decisions more informed.
Essential Tools and Safety Gear for Panel Installation
Alright, you've got your head wrapped around your panels, and you've picked out the perfect spot. Now, before you start unboxing anything, let's talk about getting the right gear. Trying to install solar panels with the wrong tools is like trying to chop down a tree with a spoon – frustrating, inefficient, and potentially dangerous. Plus, safety isn't just a suggestion; it's non-negotiable when you're working with electricity and at heights.
Must-Have Tools for a Smooth Install
Having the right tools at hand will not only make your off-grid solar panel installation go a lot smoother but also ensure a more professional and reliable outcome. Don't skimp on these essentials; they're an investment in your energy independence.
First, you'll need a good set of wrenches and sockets. Panel mounting hardware, racking systems, and electrical connections often use various bolt and nut sizes. Having both standard and metric sets, including a torque wrench for specific connections, is crucial. Over-tightening can strip threads, and under-tightening can lead to loose connections and structural instability. A set of screwdrivers—Phillips, flathead, and possibly specialized electrical screwdrivers—will also be invaluable for terminal blocks and enclosures.
For electrical work, a multimeter is your best friend. This device allows you to measure voltage, current, and resistance. Before connecting anything, you'll use it to check the open-circuit voltage (Voc) of your panels and ensure correct polarity. It's also essential for troubleshooting down the line. A reliable pair of wire strippers and crimpers designed for electrical wires, especially MC4 connectors, is non-negotiable. Proper crimping ensures a strong, low-resistance connection that can withstand the elements, preventing power loss and potential fire hazards. Many off-grid solar kits from brands like Renogy or available through Amazon might even include basic crimping tools, but investing in a high-quality, dedicated MC4 crimper is always a good idea.
Finally, a sturdy drill (preferably cordless with extra batteries) with various bits will be necessary for mounting brackets, securing rails, and drilling pilot holes. If you're roof mounting, make sure you have appropriate bits for your roofing material. Other helpful items include a level for ensuring straight panel rows, a tape measure for accurate spacing, and cable ties or clips for neat and secure cable management. For a more exhaustive list of what you'll need, our guide on Off-Grid Solar Installation Tools Needed offers a detailed breakdown.
Prioritizing Safety During Your Solar Project
I can't stress this enough: safety is paramount. You're working with high-voltage electricity and potentially at significant heights. Cutting corners on safety isn't worth the risk. A small mistake can have serious, life-altering consequences.
Let's talk about electrical safety first. Always assume wires are live, even if you think they're not. Wear insulated gloves and use insulated tools when working with electrical connections. Before connecting any panels or wiring, ensure all power sources are disconnected and verify with your multimeter that there's no voltage present. Implementing a lockout/tagout procedure (locking electrical disconnects and tagging them to prevent accidental re-energization) is a best practice, especially for larger systems or if others are working nearby. Never work on wet surfaces or during a thunderstorm. The DC voltage from solar panels can be surprisingly high and dangerous, even from a single panel. Proper grounding of your system is also a critical safety measure, which we'll discuss in more detail later.
If you're installing panels on a roof, fall protection is an absolute must. This means a proper safety harness, a lifeline, and anchor points. Don't rely on ladders alone for extended roof work. Ensure your ladder is stable, properly secured, and extends at least three feet above the edge of the roof. Work with a buddy who can assist and be there in case of an emergency. Wear non-slip footwear and be mindful of your footing, especially when carrying heavy panels. Even on ground mounts, watch out for trip hazards from cables and tools.
Beyond electrical and fall hazards, always wear eye protection to shield your eyes from debris, UV light, or accidental electrical flashes. Work gloves protect your hands from sharp edges, splinters, and chemical exposure (though solar panels themselves are generally safe, other components or sealants might not be). Remember, rushing leads to mistakes, and mistakes can lead to injuries. Take your time, plan your steps, and prioritize your well-being above all else. For a detailed look at safeguarding your system and yourself, read up on Off-Grid Solar Safety and Grounding.
Mounting Your Off-Grid Solar Panels: Options and Best Practices
With your tools ready and safety precautions in place, it's time for the physical act of mounting those solar panels. This is where your pre-planning on placement really pays off. The way you secure your panels isn't just about keeping them from blowing away; it's about optimizing their performance and ensuring their longevity.
Roof Mounting Your Panels for Stationary Systems
Roof mounting is a popular choice for stationary off-grid systems, especially for cabins, tiny homes, or existing structures, as it often uses otherwise unused space. However, it requires careful consideration of your roof's structure and weatherproofing.
The most common method involves a rail system. This typically starts with attaching standoffs or feet directly to your roof's structural members (rafters or trusses). This is crucial; never just attach them to the decking or shingles, as it won't hold up to wind loads and snow. To ensure a watertight seal, especially on asphalt shingle roofs, specialized flashing (like those from EcoFasten or Quick Mount PV) is installed over the penetration point before the standoff is secured with lag bolts. This flashing directs water away, preventing leaks, which is perhaps the biggest concern when penetrating a roof. Once the standoffs are secured and flashed, aluminum rails are attached to them. These rails then provide the framework onto which your solar panels will clamp.
When laying out your panels on the roof, think about several factors. Leave enough space between panels and the roof edge for maintenance and to allow for air circulation, which helps keep panels cooler and more efficient. Consider the weight of the entire array. While solar panels aren't incredibly heavy individually, a large array can add significant load, so ensure your roof can handle it. If you're not sure, a structural engineer can provide peace of mind. Panel orientation and tilt, as discussed earlier, are also critical for maximizing your power output. For cabin owners, our guide on How to Install Solar on a Cabin Roof provides specific tips and tricks for this type of installation. Remember, a well-mounted roof array should be able to withstand local wind and snow loads, ensuring your investment generates power safely for decades.
Ground Mounting for Flexibility and Accessibility
While roof mounting has its advantages, ground mounting offers a fantastic alternative, especially for properties with plenty of open space or challenging roof structures. This method provides greater flexibility in orientation and tilt, and generally makes installation and maintenance much easier.
One of the biggest benefits of ground mounts is the ease of adjustment. You can typically install them with adjustable tilt mechanisms, allowing you to fine-tune the angle to optimize for seasonal sun paths. This means more power generation in winter when the sun is low, and better snow shedding. Maintenance is also a breeze; cleaning panels or inspecting connections doesn't involve climbing onto a potentially slippery roof. Common ground mount structures can range from simple fixed-tilt racks secured to concrete piers or ballasted foundations, to more complex pole mounts that lift the panels higher, clearing vegetation or obstacles and sometimes offering even greater adjustability.
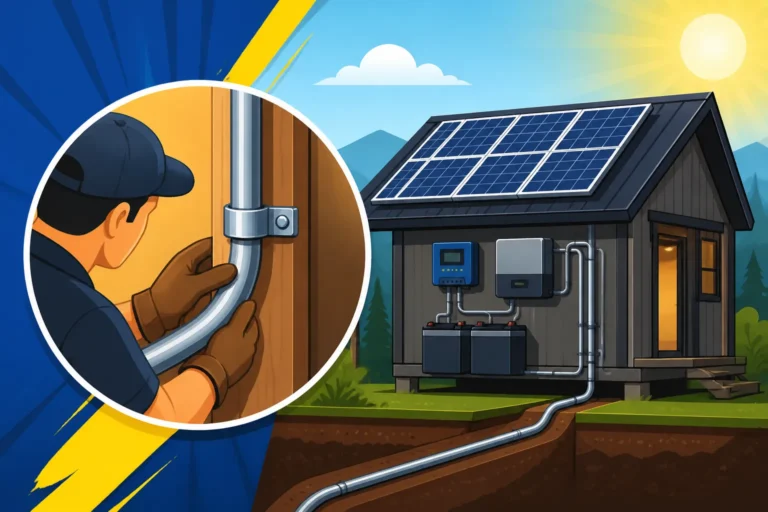
However, ground mounts aren't without their considerations. They require a dedicated footprint on your property, which might not be ideal if space is limited. They can also be more susceptible to theft or vandalism if not properly secured, so consider fencing or other security measures. Trenching for underground wiring from the array to your charge controller and battery bank is often necessary, which adds a layer of complexity and labor. When building a ground mount, ensure the foundation is robust enough for your local wind loads. A slight slope in the terrain can even be advantageous for water drainage and preventing snow buildup. For larger off-grid homesteads, ground mounting often proves to be the most practical and efficient choice for maximizing solar harvest.
Mounting Panels on Mobile Applications
For those living the nomadic life, powering your adventures with solar panels mounted on an RV, van, or boat brings a unique set of challenges and solutions. The key here is balancing power generation with aerodynamics, weight, and the unique movements of a mobile platform.
For RVs and vans, the roof is the most common spot. Here, you'll often see a mix of rigid and flexible panels. Rigid panels, mounted using Z-brackets or specialized RV mounting feet, are durable and efficient. The main concern is securely fastening them to the roof without creating leaks. This involves drilling into the roof, then using copious amounts of sealant (like Dicor Self-Leveling Lap Sealant for rubber roofs or specific marine-grade sealants for boats) around every screw hole and mount point. It's not about just filling the hole; it's about creating a completely waterproof barrier that can withstand vibration and weather. Flexible panels, on the other hand, can be adhered directly to the roof using strong adhesives, eliminating the need for drilling, which is a huge plus for those hesitant to put holes in their vehicle. While less efficient, their low profile and ease of installation make them very popular.
On boats, the considerations expand to include saltwater exposure and constant motion. Panels need marine-grade mounting hardware and wiring. Bimini tops, dodgers, and deck spaces are common locations. Flexible panels often shine here too due to their ability to conform to curves and reduce wind resistance. Whatever the mobile application, ensuring that cables are neatly routed, protected from abrasion, and securely fastened is critical. Vibrations and bumps on the road or waves at sea can easily damage loose wiring over time. Our detailed guide on How to Install Off-Grid Solar on an RV gives a fantastic walkthrough specific to these mobile dwellings, helping you avoid common pitfalls. The goal is a robust, aerodynamic, and completely waterproof installation that stands up to the rigors of travel.
Wiring Your Off-Grid Solar Panels for Efficiency and Safety
Now that your panels are securely mounted, it's time to connect them and bring that glorious sunlight energy to life. This is arguably the most critical part of the installation process. Proper wiring ensures maximum power transfer, protects your system components, and most importantly, keeps you safe from electrical hazards.
Series vs. Parallel Wiring Explained
Understanding series and parallel wiring is fundamental to setting up your solar array correctly. Making the right choice impacts the voltage and current delivered to your charge controller, which in turn affects your system's efficiency and the type of components you need.
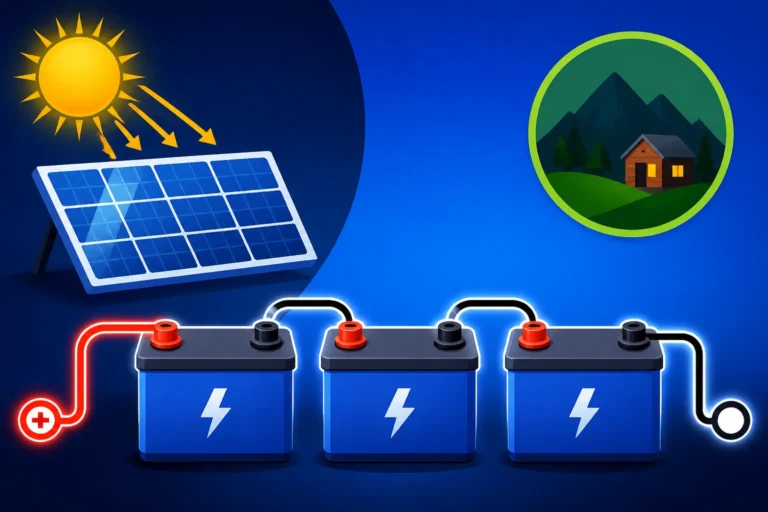
When you wire solar panels in series, you connect the positive terminal of one panel to the negative terminal of the next. Imagine a train: the carriages are connected end-to-end. What happens electrically is that the voltages of the panels add up, while the current remains the same as that of a single panel. So, if you have four 12-volt panels, each producing 8 amps, wiring them in series would give you a total of 48 volts and still 8 amps. Series wiring is often preferred for larger systems because higher voltage reduces current, which means you can use smaller gauge (thinner) wires over longer distances with less power loss due to voltage drop. This is especially beneficial when connecting to an MPPT (Maximum Power Point Tracking) charge controller, which can efficiently convert higher voltage from the panels into the lower voltage needed to charge your battery bank.
On the other hand, when you wire solar panels in parallel, you connect all the positive terminals together and all the negative terminals together. Think of a multi-lane highway: all the cars are moving in the same direction, side-by-side. In this configuration, the currents of the panels add up, while the voltage remains the same as that of a single panel. So, our four 12-volt panels, each producing 8 amps, wired in parallel would give you 12 volts but a whopping 32 amps. Parallel wiring is useful for smaller systems, particularly 12V systems, or when you anticipate partial shading. If one panel in a parallel array is shaded, the others can continue producing power at their full capacity. However, the increased current requires thicker, heavier gauge wiring to prevent overheating and significant voltage drop, especially over longer runs. A combination of series and parallel wiring, known as series-parallel, is common for larger arrays, allowing you to build a system with both higher voltage and higher current. Our guide on How to Wire Solar Panels in Series and How to Wire Solar Panels in Parallel offers detailed visual explanations to help you master these concepts.
Connecting Panels to a Combiner Box
Once you've decided on your series or parallel configuration, or a combination of both, the wires from your individual panels or strings of panels will typically converge at a combiner box. This crucial component serves multiple purposes, primarily safety and consolidation.
A combiner box acts as the central hub for your solar array's wiring. Instead of running multiple long wires directly from each panel string down to your charge controller, you run shorter wires to the combiner box. Inside, all the positive strings are combined, and all the negative strings are combined. This consolidates the output of your entire array into a single positive and negative output cable, simplifying the run to your main power center.
Beyond consolidation, the primary role of a combiner box is protection. Each string of panels entering the box should be protected by its own fuse or circuit breaker. This means if one panel string develops a fault (like a short circuit), its fuse will blow or its breaker will trip, isolating that string without taking down the entire array. This makes troubleshooting much easier and, more importantly, prevents damage to your panels or a fire hazard. Many combiner boxes also include surge protection devices (SPDs). These are designed to protect your system from voltage spikes caused by lightning strikes or other electrical surges. While direct lightning strikes are hard to mitigate entirely, SPDs can significantly reduce the risk of damage from nearby strikes. Ensure your combiner box is rated for outdoor use, waterproof, and appropriately sized for the voltage and current of your array. This component is a non-negotiable step in building a safe and robust off-grid system, and understanding How to Wire Panels to a Combiner Box is key for any serious solar installer.
Selecting the Right Cables and Connectors
The unsung heroes of your solar system are the wires and connectors. Using the wrong type or size can lead to significant power loss, overheating, and even fire. Don't underestimate the importance of proper cable and connector selection.
For connecting your solar panels, MC4 connectors are the industry standard. These are specifically designed for solar applications, offering a robust, waterproof, and UV-resistant connection. They snap together securely and are rated for high voltages and currents. When installing, it's crucial to use a dedicated MC4 crimping tool to ensure a solid electrical connection. A poorly crimped MC4 connector can introduce resistance, leading to heat buildup and power loss. Always ensure the polarity is correct when connecting them; mixing up positive and negative can cause serious damage.
When it comes to cables, you need specific types that can withstand outdoor conditions. PV (photovoltaic) wire is designed for solar applications. It's typically UV-resistant, rated for direct burial (if running underground), and can handle the temperature fluctuations common in outdoor environments. Standard household wiring is not suitable for solar panel connections. The most critical aspect of cable selection is choosing the correct wire gauge. This refers to the thickness of the wire. The thicker the wire (lower gauge number), the more current it can carry and the less voltage drop it will experience over a given distance. You need to calculate the appropriate wire gauge based on the current of your array and the length of the cable run. Too thin a wire will lead to excessive voltage drop, meaning you lose valuable power between your panels and your charge controller. It can also overheat, posing a fire risk. Online wire gauge calculators are readily available, or you can consult the National Electrical Code (NEC) tables. Always err on the side of caution and go with a slightly thicker gauge if you're unsure.
Integrating Panels with Your Charge Controller and Battery Bank
With your solar panels mounted and wired safely to a combiner box, the next major step is getting that harvested energy into your battery bank. This involves the charge controller, the brain of your charging system, and then the crucial connections to your batteries. This part of the installation is all about making sure power flows efficiently and safely.
Connecting Panels to Your Charge Controller
The charge controller is the intermediary between your solar panels and your batteries. Its job is to regulate the voltage and current coming from your panels to safely charge your battery bank without overcharging or damaging them. There are two main types you'll encounter: PWM and MPPT. Our article MPPT vs PWM Charge Controllers offers a deep dive into the differences.
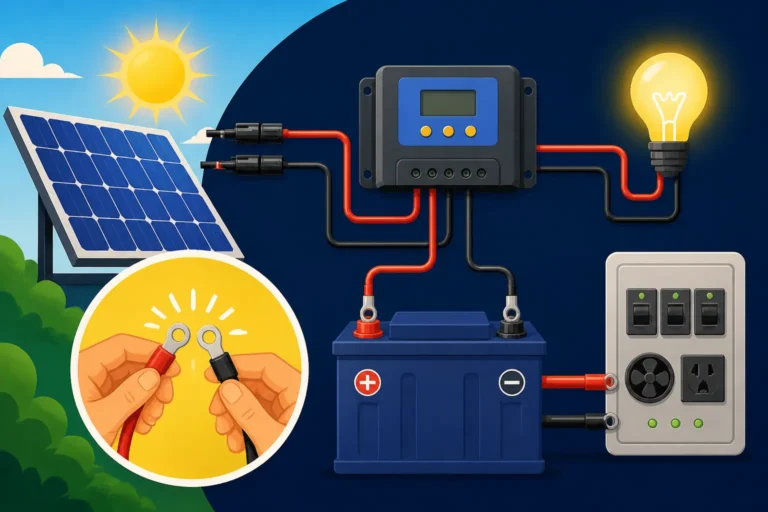
Regardless of whether you have an MPPT or PWM charge controller, the connection sequence is critical. Always connect the battery bank to the charge controller first. This allows the charge controller to sense the battery voltage and configure itself properly. If you connect the solar panels first, the charge controller might not be able to correctly identify the system voltage, which can lead to errors or damage. Once the batteries are connected, and you've confirmed correct voltage readings on your controller, then you connect the positive and negative leads from your solar array (coming from your combiner box) to the designated solar input terminals on the charge controller. Ensure all connections are tight and secure.
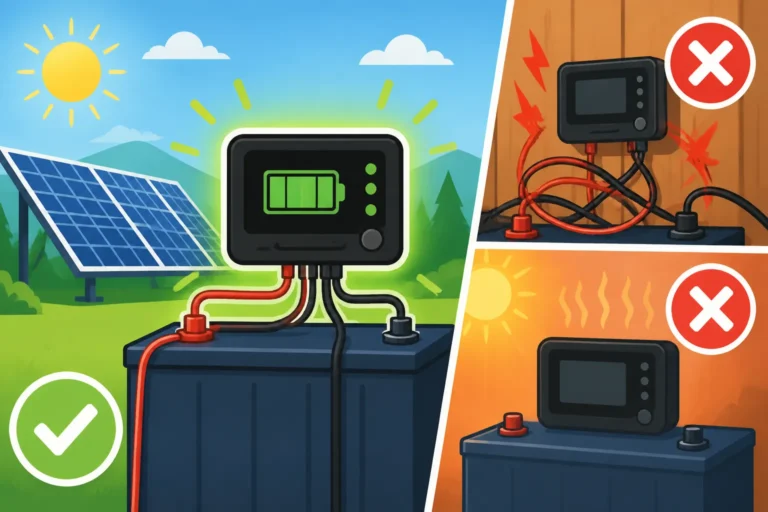
Many modern charge controllers, like those from Victron Energy or Renogy, come with built-in displays or Bluetooth connectivity to monitor performance and adjust settings. Take the time to understand your specific controller's manual. You'll need to configure parameters such as battery type (e.g., lead-acid, LiFePO4), charging voltages (bulk, absorb, float), and temperature compensation settings. Correctly setting these parameters is crucial for the health and longevity of your battery bank. A properly connected and configured charge controller is what allows your panels to convert sunlight into usable energy for your off-grid life. To learn more about this crucial link in your system, check out our guide on How to Connect a Charge Controller.
Essential Safety Disconnects and Overcurrent Protection
Beyond the combiner box, adding disconnects and further overcurrent protection closer to your main power center is a non-negotiable safety measure. These components are your system's emergency brakes, allowing you to quickly and safely shut down power when needed for maintenance, troubleshooting, or in an emergency.
One vital component is the PV (photovoltaic) disconnect switch. This is a manual switch located between your solar array's output (usually after the combiner box) and your charge controller. Its purpose is to completely isolate the solar panels from the rest of your system. This is absolutely critical for safe maintenance of your charge controller or batteries. When this switch is in the "off" position, no power can flow from the panels, even if they are in full sun. It's a quick way to de-energize the solar input. Our article on How to Install a PV Disconnect provides step-by-step instructions.
Similarly, you need DC breakers or fuses installed on the output side of your charge controller, protecting the wiring run to your battery bank. These protect your batteries and charge controller from overcurrent situations that could arise from faults within the system. The sizing of these breakers or fuses depends on the maximum output current of your charge controller and the gauge of your wiring. Again, consult your component manuals and electrical codes for proper sizing. In addition to PV and DC disconnects, a main battery disconnect switch (a large manual switch) is essential right at the battery bank. This allows you to completely isolate the batteries from all loads and charging sources, which is critical for safe maintenance on your inverter or other components, or in the event of an electrical fire. These safety components, while seemingly adding complexity, are investments in the reliability and safety of your entire off-grid solar system.
Ensuring Proper Grounding for Your Solar Array
Grounding your off-grid solar system is not just a regulatory requirement in many places; it's a critical safety measure that protects both your equipment and, more importantly, you from electrical hazards. Neglecting proper grounding can lead to catastrophic consequences.
The primary purpose of grounding, or earthing, is to provide a safe path for fault currents to dissipate into the earth. This prevents dangerous voltage buildups on exposed metal parts of your system, such as panel frames, racking, and inverter chassis. Without grounding, if a live wire accidentally touches a metal frame, that frame could become energized, posing a severe shock hazard to anyone who touches it.
Your grounding system will typically involve several components. All exposed metal parts of your solar array—the frames of the solar panels themselves, the mounting rails, and any metal combiner boxes—must be bonded together with a continuous grounding conductor (usually a bare copper wire). This conductor then connects to a central grounding electrode conductor, which is ultimately connected to a grounding rod driven deep into the earth. In some cases, multiple grounding rods might be required depending on soil resistivity. The National Electrical Code (NEC) provides detailed guidelines for grounding off-grid systems, specifying wire sizes, electrode types, and resistance requirements. Even if you're in a remote location and not subject to inspections, following these guidelines is a wise move for your safety. For mobile applications like RVs, the vehicle's chassis usually acts as the grounding point, which is then connected to the solar system's ground. For a thorough understanding of this vital safety step, our comprehensive guide on How to Ground an Off-Grid Solar System is an invaluable resource.
Testing and Commissioning Your Off-Grid Solar Array
You've put in all the hard work: mounting, wiring, connecting. Now comes the moment of truth – testing your system to ensure everything is working as it should. Commissioning your off-grid solar array isn't just about flipping a switch; it's a systematic process to verify functionality, catch potential issues, and ensure your system is performing optimally from day one.
Initial System Checks and Multimeter Readings
Before you even think about connecting your array to your charge controller permanently, you need to perform a series of crucial checks. This is where your trusty multimeter truly shines. These initial measurements confirm that your panels and wiring are behaving as expected, minimizing surprises and potential damage when everything goes live.
First, with the solar panels disconnected from the charge controller and in full sunlight, measure the Open Circuit Voltage (Voc) of each individual panel. Compare this reading to the manufacturer's specifications. If a panel's Voc is significantly lower than expected, it could indicate damage or a manufacturing defect. Then, if you've wired panels in series, measure the Voc of each series string. This should be the sum of the individual panel Vocs (minus any small losses). If it's not, you might have a loose connection or a faulty panel in the string. Next, carefully measure the Short Circuit Current (Isc). This involves briefly shorting the positive and negative terminals of a single panel or string (using your multimeter in current mode, ensuring it's rated for the expected current). Again, compare to specs.
Crucially, before connecting the main solar leads to your charge controller, use your multimeter to check the polarity of the combined positive and negative wires coming from your array. A positive reading indicates correct polarity; a negative reading means your positive and negative wires are swapped, which could damage your charge controller or other components if connected incorrectly. This is a common mistake and easily preventable with a quick check. Finally, ensure all connections are mechanically sound and secure. Tug gently on wires to confirm they are firmly seated in terminals and connectors. These meticulous checks are the difference between a smooth startup and a frustrating troubleshooting session.
Monitoring Performance and Troubleshooting Common Issues
Once your system is fully connected and energized, the commissioning phase continues with monitoring its performance and being prepared to troubleshoot any issues that arise. An off-grid solar system is a living, breathing entity, and knowing how to read its vital signs is key to its long-term health.
Modern charge controllers and inverters often come with sophisticated monitoring capabilities. This might be a simple LCD screen on the device itself, a dedicated remote display, or even a smartphone app that connects via Bluetooth or Wi-Fi. These monitoring tools provide real-time data on your panel's power output (watts or amps), the voltage of your battery bank, the current flowing into and out of your batteries, and even the power being consumed by your loads. Get familiar with these readings and what healthy performance looks like for your system. For instance, in full sun, you should see consistent power input from your panels. If your battery voltage isn't rising as expected, or if your inverter's output seems low, these monitoring tools are your first line of defense in diagnosing the problem.
Common issues you might encounter include:
- Low power output from panels: This could be due to shading, dirty panels, incorrect tilt/orientation, or a faulty panel. Check for physical obstructions, clean your panels (as detailed in our guide on How to Clean Off-Grid Solar Panels), and verify your tilt settings.
- Batteries not charging or charging slowly: Check all wiring connections, verify charge controller settings (especially battery type and voltage setpoints), and ensure the PV disconnect is ON. A faulty charge controller or dying batteries could also be culprits.
- Inverter not working: Check battery voltage (it might be too low), inverter fuses/breakers, and ensure the inverter is turned on. Some inverters have error codes that can point you to the specific problem.
Don't be afraid to pull out your multimeter again if you suspect an issue. You can test voltages at various points in the system (panel output, charge controller input/output, battery terminals) to pinpoint where the problem lies. Remember to always disconnect power sources before working on connections. Maintaining a log of your system's performance over time can also help you identify gradual declines or intermittent issues. Being proactive with monitoring and knowing how to interpret the data is essential for a reliable off-grid setup. Should you ever face a puzzle, our detailed guide on How to Troubleshoot Off-Grid Solar will walk you through the diagnostic process.
Maintenance and Longevity of Your Off-Grid Solar Panels
Congratulations, your off-grid solar panels are installed and humming along! But the journey doesn't end there. Just like any other valuable asset, your solar array requires ongoing care to ensure it continues to produce clean, reliable power for many years to come. A little regular maintenance goes a long way in maximizing their lifespan and efficiency.
Regular Cleaning and Inspection Routines
One of the simplest yet most effective maintenance tasks for your solar panels is regular cleaning. Accumulations of dirt, dust, pollen, bird droppings, and even leaves can significantly reduce your panels' efficiency by blocking sunlight from reaching the photovoltaic cells.
The frequency of cleaning depends heavily on your environment. If you live in a dusty area, near agricultural fields, or under trees with a lot of pollen or falling debris, you might need to clean your panels monthly or even more often. In cleaner environments, a few times a year might suffice. The best time to clean them is usually early morning or late evening when the panels are cool. Never spray cold water on hot panels, as the sudden temperature change could potentially cause stress or cracking (though this is rare with modern panels). For most situations, a gentle spray with a garden hose and a soft brush or squeegee with a mild, non-abrasive soap solution (like dish soap diluted in water) will do the trick. Avoid harsh chemicals or abrasive scrubbing pads, as these can scratch the tempered glass surface, reducing light transmission. For those looking for detailed instructions, our article on How to Clean Off-Grid Solar Panels provides a step-by-step guide.
Beyond cleaning, make it a habit to regularly inspect your entire solar array. Look for any physical damage to the panels themselves, such as cracks in the glass or delamination. Check the mounting hardware for loose bolts or signs of corrosion. Inspect all visible wiring for fraying, chew marks from rodents, or degradation of the insulation from UV exposure. Ensure all MC4 connectors are still securely snapped together and free of dirt or moisture. Pay attention to your racking system – are there any signs of rust or structural fatigue? Early detection of these issues can prevent minor problems from escalating into costly repairs or system downtime. These routine visual inspections, combined with cleaning, form the backbone of a proactive maintenance schedule for your off-grid solar power system. If you want to dive deeper into all aspects of keeping your system in top shape, consider our comprehensive Off-Grid Solar Maintenance Guide.
Protecting Your Panels in Extreme Weather
Off-grid solar panels are built tough, designed to withstand the elements, but extreme weather events can still pose risks. Taking proactive steps to protect your investment from Mother Nature's fury is a smart move for any off-grid homeowner.
High winds are a major concern, especially if your panels are roof-mounted or on elevated ground mounts. While proper installation with robust mounting hardware (as discussed earlier) is the primary defense, it's worth periodically checking all connections and mounting points for signs of loosening, especially after severe wind storms. If you're in an area prone to hurricanes or tornadoes, consider additional bracing for ground mounts or even the possibility of temporarily stowing portable panels if a major storm is imminent.
Snow and ice can also impact your array. While snow can actually protect panels from hail, it also completely blocks sunlight, halting power generation. If you live in a region with heavy snowfall, considering a steeper tilt angle (as mentioned in the orientation section) can help snow shed more easily. For ground mounts, easily accessible panels can be cleared with a soft broom or specialized snow rake, again, being careful not to scratch the surface. Ensure your racking system is rated for your local snow load, meaning it can safely support the weight of accumulated snow without buckling. Ice buildup can also be problematic; avoid chipping ice directly off panels, which can cause damage.
Finally, hailstorms can be a concern, though most modern solar panels are designed to be quite resilient. They typically use tempered glass, similar to car windshields, which is impact-resistant. However, extremely large hail can still cause damage. If you're in an area with frequent, severe hailstorms, some homeowners consider protective mesh covers, though these can slightly reduce efficiency. The best defense is often a well-built, correctly installed system that uses high-quality panels with durable glass. Regularly checking for hairline cracks after any extreme weather event is a good practice, as even small cracks can allow moisture ingress over time, leading to panel degradation.
| Panel Type | Efficiency Range | Cost Per Watt (Approx.) | Best For | Key Characteristic |
|---|---|---|---|---|
| Monocrystalline | 17-22% | $0.90 – $1.20 | Limited space, high power needs, long-term | High efficiency, sleek black |
| Polycrystalline | 15-17% | $0.70 – $1.00 | Abundant space, budget-conscious | Cost-effective, blue mottled |
| Flexible | 10-14% | $1.50 – $2.50+ | RVs, boats, curved surfaces, portable | Lightweight, bendable, low profile |
Disclaimer
The information provided in this guide is for general informational purposes only and does not constitute professional electrical or structural advice. Off-grid solar installation involves working with high voltages and potentially at heights, which can be dangerous. Always consult with a qualified electrician or solar professional before undertaking any solar installation project. Adhere to all local building codes, electrical codes, and permitting requirements. The author and publisher are not responsible for any injury, damage, or loss resulting from the use or misuse of this information.