How to Choose Off-Grid Solar for a Camper
The dream of hitting the open road with your camper, utterly self-sufficient and powered by the sun, is incredibly appealing. However, the reality of choosing an off-grid solar system can quickly become overwhelming. You're trying to figure out how to keep your perishables cold, your devices charged, and maybe even enjoy some AC, all without being tethered to shore power or constantly refueling a noisy generator. This guide is designed to cut through the confusion, helping you confidently select and plan the perfect off-grid solar setup for your camper adventures.
Understanding Your Camper's Energy Needs
This is the absolute first step in designing any successful off-grid solar system, and frankly, it's where many people either get lost or make assumptions that lead to an underpowered or unnecessarily expensive setup. You simply cannot effectively choose components without a clear understanding of your daily power consumption. Every single electrical item you plan to use, from the smallest phone charger to your refrigerator, draws power, and calculating this consumption accurately is the bedrock of a reliable system.
Performing a Load Analysis
Before you even glance at solar panels or battery specifications, you need to create a meticulous list of every electrical appliance and device you intend to use in your camper. This list should encompass not just your everyday essentials, but also any items you might use occasionally, like a coffee maker for your morning brew or a fan on a warm night. For each item, your mission is to determine its wattage (W) and then estimate precisely how many hours per day you'll operate it. Appliance labels, owner's manuals, or a quick online search are your best friends here for finding wattage ratings.
For instance, consider your 12V refrigerator. Even though it cycles on and off, for sizing, you'll need its average daily consumption. Many efficient 12V fridges might use around 400-800 watt-hours (Wh) per day. Your laptop charger, perhaps 60W, might be used for 3 hours. Don't forget smaller but continuous draws like a carbon monoxide detector, the parasitic load of your stereo's memory, or the standby power of your inverter – these seemingly minor draws add up. This detailed load analysis prevents unpleasant surprises down the road. For a comprehensive walkthrough of this process, our article on How to Calculate Daily Energy Usage can provide more in-depth guidance.
Daily Watt-Hour Calculation
Once you've compiled your list of appliances and their estimated daily usage, the next step is to calculate the daily watt-hours (Wh) for each item. The formula is straightforward: Appliance Wattage (W) x Hours Used Per Day = Daily Watt-Hours (Wh). Summing up these individual watt-hour figures will give you your total daily energy consumption. This critical number forms the basis for sizing your entire off-grid solar system. If your calculations show you need 1,500 Wh per day, then your solar array must be capable of generating at least that much (and usually more, accounting for inefficiencies), and your battery bank must be able to store it.
Let's put this into perspective. If your LED interior lights total 30W and you use them for 5 hours in the evening, that's 150 Wh. Your water pump, perhaps 150W, might only run for 10 minutes (0.17 hours) a day, equating to about 25.5 Wh. Your refrigerator, as mentioned, could be the biggest draw. Being ruthlessly realistic in these estimations is crucial; it's always better to slightly overestimate your needs than to find yourself consistently running out of power. This daily total will directly influence the size of both your battery bank and your solar panel array.
Here’s an example table to help visualize a typical camper’s energy consumption:
| Appliance | Wattage (W) | Est. Hours Used/Day | Daily Watt-Hours (Wh) |
|---|---|---|---|
| LED Interior Lights | 30 | 5 | 150 |
| 12V Refrigerator | 50 | 16 (average runtime) | 800 |
| Laptop Charging | 65 | 2 | 130 |
| Phone Charging (x2) | 10 (each) | 3 (each) | 60 |
| Water Pump | 150 | 0.2 (12 minutes) | 30 |
| Exhaust Fan | 20 | 4 | 80 |
| Total Daily Usage | 1250 Wh |
This example clearly shows how different appliances contribute to your overall energy needs. Items that run for many hours, even at low wattage, can quickly accumulate significant watt-hours.
Key Components of a Camper Solar System
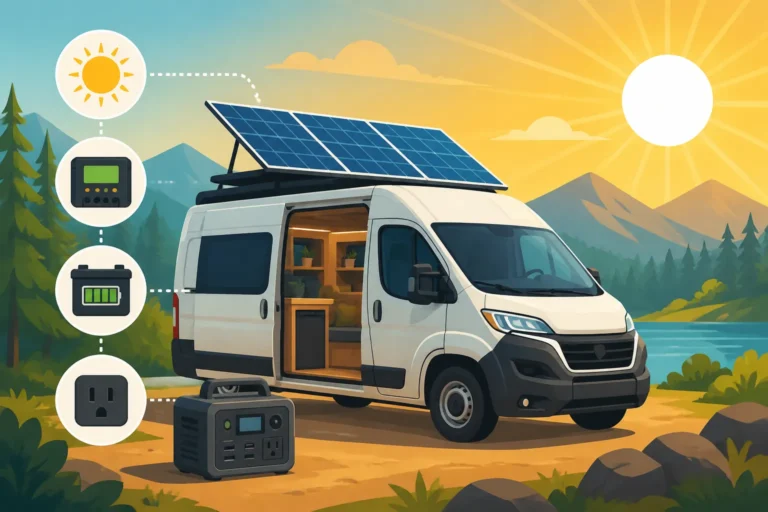
With your energy needs firmly established, it's time to delve into the actual components that will form your off-grid solar system. Each part plays a specific, essential role, and they must all be chosen and sized to function together harmoniously. Think of it like building a reliable engine: every piece needs to be compatible and perform its duty for the whole system to run smoothly.
Solar Panels: Types and Considerations
Solar panels are your primary energy gatherers, converting sunlight into electricity. For campers, where space, weight, and durability are often critical concerns, understanding the different types of panels is paramount.
- Rigid Panels: These are the most common and generally the most efficient type, typically constructed from monocrystalline silicon cells. They offer the best power output per square foot and are highly durable, often backed by a 25-year warranty. Rigid panels are an excellent choice for permanent roof mounts on larger campers or RVs where space permits, or for deployable ground mounts if you have the storage. Reputable brands like Renogy and Rich Solar are well-regarded for their robust rigid panels.
- Flexible Panels: Lighter and much thinner, flexible panels can conform to slightly curved surfaces and offer a low-profile installation. They are often a good fit for smaller campers, pop-top RVs, or situations where minimizing weight and aesthetic impact is a priority. However, they generally have slightly lower efficiency and a shorter lifespan compared to rigid panels, and they can be more susceptible to heat degradation if not properly installed with adequate ventilation.
- Portable Solar Panels and Solar Generators: These offer incredible versatility, especially for smaller power needs or as a supplement to a fixed system. A portable solar panel kit or an all-in-one solar generator, such as those from the Jackery Explorer series, can provide quick, easy power without the complexities of a full, permanent installation. They are perfect for charging phones, laptops, running a portable cooler, or serving as an emergency backup power source. If maximum flexibility and ease of setup appeal to you, exploring our guide on Best Solar Generators for Off-Grid might be incredibly useful.
When selecting panels, consider not only their wattage output but also their physical dimensions, weight, and how they will be mounted to optimize sun exposure and withstand the rigors of travel.
Batteries: The Heart of Your System
Your battery bank is the crucial storage unit for the electricity generated by your solar panels, making that power available to you day and night, rain or shine. This component is often the most significant investment in your off-grid system.
- Lead-Acid Batteries (Flooded, AGM, Gel): These are the traditional workhorses, widely available and generally less expensive upfront. Flooded lead-acid batteries require regular maintenance (checking and refilling water levels), while AGM (Absorbed Glass Mat) and Gel batteries are sealed, maintenance-free, and more resistant to vibration. Their main limitation is a lower usable capacity; to ensure a long lifespan, you should generally not discharge them below 50% of their total capacity. They also have a shorter cycle life compared to lithium options.
- Lithium Iron Phosphate (LiFePO4) Batteries: Often considered the gold standard for off-grid living, LiFePO4 batteries are more expensive initially but offer significant advantages. They boast a much higher usable capacity (safely discharged to 80-100%), a dramatically longer cycle life (often thousands of cycles), are considerably lighter, and require no maintenance. They also perform better across a wider temperature range, though charging in very cold conditions can be an issue for some models unless they feature built-in heating. Many experienced off-gridders find LiFePO4 batteries to be a superior long-term investment due to their durability and efficiency. To explore the best options, our guide on Best Off-Grid Solar Batteries is a great starting point.
The size of your battery bank should ideally be large enough to cover your calculated daily usage for at least one to three "days of autonomy" – meaning, days without any new charge from the solar panels (e.g., during cloudy weather). To truly dial in your battery needs, take a look at our article on How Many Batteries for an Off-Grid System.
Charge Controllers and Inverters
These two essential components act as the brains and muscle of your solar system, managing the flow of electricity to ensure efficiency and safety.
- Charge Controller: This device is positioned between your solar panels and your battery bank. Its primary function is to regulate the voltage and current coming from your panels, ensuring your batteries are charged safely and efficiently without overcharging, which can severely damage them.
- PWM (Pulse Width Modulation) Controllers: These are simpler and more budget-friendly. While they work well for smaller systems where the panel voltage closely matches the battery voltage, they are less efficient, especially in colder temperatures.
- MPPT (Maximum Power Point Tracking) Controllers: These are more sophisticated and significantly more efficient. MPPT controllers actively track and optimize the voltage and current from your solar panels to extract the maximum possible power. This translates to more energy harvested, particularly valuable in fluctuating light conditions or when using higher voltage panels to charge a lower voltage battery bank. For most serious camper solar setups, an MPPT controller is the superior choice due to its efficiency gains.
- Inverter: An inverter's job is to convert the DC (Direct Current) power stored in your batteries into AC (Alternating Current) power. AC is what most standard household appliances and electronics use, so an inverter is essential if you plan to run anything beyond basic 12V DC loads.
- Pure Sine Wave Inverters: These produce clean, stable AC power that is virtually identical to what you get from the grid. They are crucial for sensitive electronics (laptops, medical devices like CPAP machines) and anything with an electric motor (refrigerators, microwaves, blenders).
- Modified Sine Wave Inverters: These are less expensive but produce a "choppier", stepped waveform of AC power. While they might work for simple resistive loads (like incandescent lights or basic heating elements), they can damage sensitive electronics, cause motors to run inefficiently or noisily, or even overheat. For a reliable camper system, always prioritize a pure sine wave inverter. Our Best Off-Grid Solar Inverters guide can assist you in finding the right model for your needs.
When choosing an inverter, ensure its continuous wattage rating is higher than the total combined wattage of all AC appliances you might run simultaneously. Also, pay close attention to its surge rating, as many appliances draw a much higher burst of power when they first start up.
System Sizing for Camper Life
Now that you've diligently performed your load analysis and understand the various components, the next critical step is to correctly size each part of your system to ensure everything works together seamlessly. This isn't just about having "big enough" components; it's about having compatible and appropriately sized components that meet your specific energy demands without breaking the bank. For a complete blueprint, consider reviewing our Off-Grid Solar System Sizing Guide.
Matching Components for Efficiency
Your calculated daily watt-hour usage is the cornerstone of system sizing. Let's revisit our example where you determined a total daily usage of 1,250 Wh.
-
Battery Bank Sizing: Based on your daily usage and desired days of autonomy, you can size your battery bank. If you want two days of autonomy, you need at least 2,500 Wh of usable battery capacity (1,250 Wh/day x 2 days).
- For LiFePO4 batteries, which can be safely discharged to 80-100%, you'd need a battery with a total capacity of roughly 2,500-3,125 Wh (2500 Wh / 0.8 to 1.0). If you're running a 12V system, that translates to approximately 208-260 Amp-hours (Ah) (2500 Wh / 12V = 208 Ah; 3125 Wh / 12V = 260 Ah). So, you might look for two 100Ah LiFePO4 batteries or one 200Ah battery, potentially with some extra capacity for a buffer.
- For lead-acid batteries (AGM, Gel), since you should only use 50% of their capacity, you'd need double the usable capacity. So, for 2,500 Wh usable, you'd need 5,000 Wh total capacity, which at 12V is about 417 Ah. This demonstrates why LiFePO4 is often preferred despite the higher upfront cost – you get more usable power for less weight and space.
The article How Much to Budget for Off-Grid Batteries delves deeper into battery costs and planning.
-
Solar Array Sizing: The goal here is to determine how many watts of solar panels you'll need to fully recharge your battery bank daily, even accounting for system inefficiencies. This calculation relies heavily on "peak sun hours" – the average number of hours per day your panels receive direct, effective sunlight. This figure varies significantly by your location and the season.
- If your camping spot averages 5 peak sun hours per day, and you need to replenish 1,250 Wh, a raw calculation suggests 1250 Wh / 5 hours = 250 Watts. However, you must factor in system losses (typically 15-20% from panels to battery due to wiring, controller efficiency, temperature, etc.). To compensate, you'd want to aim for a panel array closer to 300-400 Watts. This oversizing helps ensure adequate charge during less-than-perfect conditions or shorter sun days.
- Always consider your expected usage during different seasons. If you plan to travel in winter, sun hours will be significantly lower, and you may need to increase your panel array size further or rely more on alternative charging methods. It's almost always better to slightly oversize your solar array to allow for quicker recharges and better performance during cloudy spells.
-
Charge Controller Sizing: Your charge controller must be capable of handling the total current produced by your solar panels. If you have, for example, a 400W panel array and a 12V battery bank, the maximum current would be around 400W / 12V = 33.3 Amps. You should choose a charge controller rated for at least 20-30% more than this maximum current to provide a safety margin, so a 40A or 50A MPPT controller would be appropriate. This ensures it doesn't overheat and can handle peak output from your panels.
-
Inverter Sizing: As discussed earlier, your inverter's continuous wattage rating needs to exceed the highest simultaneous AC load you anticipate. If you might run a 1,000W microwave and a 200W toaster at the same time, you'd need at least a 1,200W inverter. More importantly, consider the surge rating. A refrigerator might continuously draw 50-100W, but its compressor could surge to 800-1,200W for a few seconds when it starts up. Ensure your inverter can handle these temporary, higher demands. If you plan for larger loads, carefully check our guides for specific sizing, such as What Size Inverter to Run An Air Conditioner.
This interconnected sizing process highlights why a holistic approach is best. While buying a complete kit, perhaps from a brand like Renogy, can simplify compatibility, understanding each sizing aspect empowers you to customize and troubleshoot your system effectively.
Planning for Autonomy and Expansion
When living off-grid in a camper, the concept of "days of autonomy" is vitally important. This refers to the number of consecutive days your battery bank can power your camper without any additional charge input from your solar panels (e.g., during prolonged cloudy weather or if you're parked in deep shade). For occasional weekend trips in perpetually sunny locations, 1-2 days of autonomy might be sufficient. However, for full-time living, or if you plan to traverse regions with unpredictable weather, aiming for 3-5 days of autonomy provides a much-needed safety net and peace of mind.
Furthermore, it's wise to design your system with an eye toward future expansion. Your initial power needs might grow over time as you add new appliances or simply become more accustomed to the conveniences of modern living on the road. Designing for expandability could mean choosing an inverter that has a higher wattage capacity than your immediate needs, or selecting a charge controller that can handle additional solar panels down the line. It might also involve opting for a higher system voltage, such as 24V or 48V, right from the start, especially if you foresee larger power demands, as higher voltage systems generally offer greater efficiency for substantial loads. Learning How to Design an Expandable System can save you considerable time and expense later on, as it's far easier to add components to a system built with growth in mind than to completely replace an overloaded setup.
Installation Considerations and Best Practices
Once your components are selected and sized, the next phase involves the careful and safe installation of your off-grid solar system within your camper. This goes beyond simply mounting panels; it involves thoughtful integration to ensure reliability, safety, and seamless operation within your mobile environment.
Mounting Panels on Your Camper
The method you choose for mounting your solar panels will largely depend on your camper type, its available roof space, and how you intend to use your system.
- Roof Mounts: This is the most prevalent approach for permanent installations on RVs and larger campers. Panels are typically secured to the roof using sturdy Z-brackets or specialized mounting feet, maintaining an air gap underneath. This air gap is crucial for cooling the panels, as they perform less efficiently when hot. Roof mounts offer maximum sun exposure and keep the panels out of your way. Key considerations include available roof real estate, potential shading from roof-mounted air conditioners, vents, or antennas, and ensuring all wire entry points into the camper are meticulously sealed against water intrusion. The mounts must be robust enough to endure constant vibrations and high winds encountered during travel.
- Tilt Mounts: Some mounting systems allow you to manually tilt your panels towards the sun, which can significantly enhance power output, especially during winter months or when you're parked for extended periods. While more commonly seen on stationary cabins or ground arrays, tilt mounts can be adapted for camper roofs if you're willing to adjust them frequently to track the sun.
- Portable/Ground Mounts: Solutions like the Jackery SolarSaga panels are exceptionally versatile. They can be deployed in the sunniest spot available, even if your camper is parked comfortably in the shade. They are easy to set up, take down, and store. Although they don't offer the continuous, passive generation of a fixed roof mount, their flexibility is a huge advantage for smaller systems or as supplemental power. If you’re considering a flexible or entirely portable power solution, you might find our guide on How to Install an Off-Grid Solar Generator particularly relevant.
Regardless of the mounting method, always prioritize secure fastening to prevent damage during transit and meticulously seal any cable entry points to prevent water leaks. Utilize UV-resistant cables and appropriate conduit to protect all wiring from environmental exposure and physical damage.
Wiring and Safety Essentials
Wiring an off-grid solar system in a camper is a critical task that demands precision and strict adherence to safety protocols. Errors in wiring can lead to inefficiencies, component damage, or even serious hazards.
- System Voltage: For most smaller camper systems, 12V is the standard, particularly if you predominantly use 12V DC appliances. However, for larger systems with higher power demands (like running multiple AC appliances, a microwave, or a full-size AC unit), transitioning to a 24V or even 48V system is often more efficient. Higher voltage systems carry current with less amperage, which allows for thinner (and often cheaper) wiring over longer runs, reducing voltage drop and heat generation. It's definitely worth weighing the pros and cons; our article 12V vs 24V vs 48V: Which to Choose can help you make an informed decision based on your specific needs.
- Cable Sizing: This is one of the most common pitfalls in DIY solar installations. Undersized wires restrict current flow, leading to significant voltage drop, reduced system efficiency, and excessive heat generation, which poses a fire risk. Always use correctly sized wires (gauges) that are appropriate for the anticipated current flow, the distance the wire runs, and the system voltage. Refer to reliable wire sizing charts, which account for these factors, to select the appropriate gauge.
- Fuses and Breakers: These are non-negotiable safety components. Every major circuit in your solar system – from your solar panels to your charge controller, from the charge controller to your battery bank, and from your battery bank to your inverter – must be protected by appropriately sized fuses or circuit breakers. These devices are designed to interrupt the electrical flow in the event of a short circuit or overcurrent, preventing damage to components and, more importantly, protecting against electrical fires. Never, ever skip this crucial safety step.
- Grounding: Proper grounding of your solar system is paramount for safety, safeguarding both your equipment and anyone using the camper from electrical hazards. This typically involves connecting all metallic non-current-carrying parts of your system to a common ground point, which is often the chassis of the camper. While mobile applications have some different rules than stationary homes, following the spirit of National Electrical Code (NEC) guidelines for grounding is always a wise best practice. Our detailed article on Off-Grid Solar Safety and Grounding provides essential information to ensure a safe installation.
If you have any doubts or uncertainties about the wiring or safety aspects of your installation, it is always prudent to consult with a qualified electrician or an experienced off-grid solar professional. While a DIY installation can be incredibly rewarding, safety must always be the absolute top priority. Many reputable solar kit manufacturers also provide comprehensive wiring diagrams and customer support, which can be an invaluable resource throughout your build. For a complete overview of the installation process, our Off-Grid Solar Installation Guide is an excellent companion.
Making Your Final Choice: Kits, Brands, and Budget
Navigating the vast array of off-grid solar options can be daunting, with countless brands, configurations, and price points. The good news is that there’s a robust solution for nearly every budget and camper lifestyle. The final step is to synthesize all your research and make confident decisions that align perfectly with your energy needs, financial resources, and comfort with DIY projects.
Evaluating Off-Grid Solar Kits versus Custom Builds
Many camper owners, especially those new to off-grid solar, find that starting with a comprehensive off-grid solar kit is an excellent and streamlined approach.
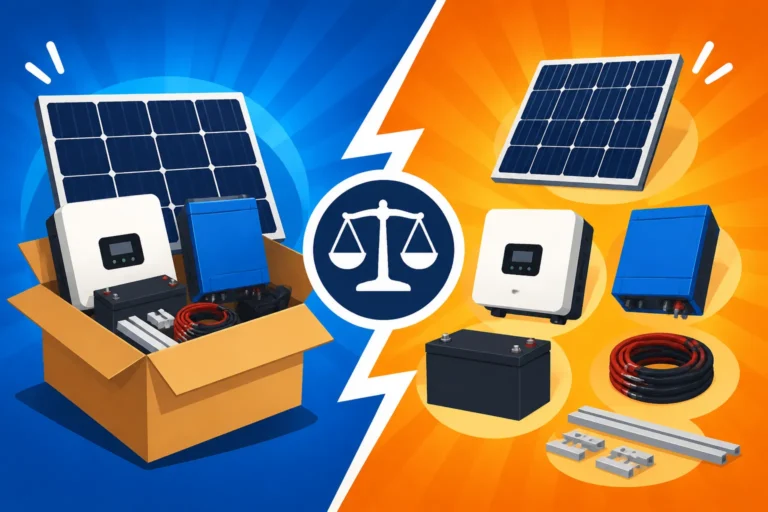
- Off-Grid Solar Kits: These kits typically include a thoughtfully curated selection of compatible components: solar panels, a charge controller, an inverter, and often all the necessary cabling and mounting hardware. They remove a significant amount of guesswork from component matching and can often be a more cost-effective way to get your system up and running quickly. Brands like Renogy and BougeRV offer a wide variety of kits specifically designed for RVs and campers, catering to different power demands. These kits often come with clear, step-by-step instructions, making the installation process much more accessible for the average DIY enthusiast. For instance, a basic 200W kit with a small battery might be ideal for minimal charging needs, while a 1000W kit with a larger LiFePO4 battery bank could handle more substantial loads like a refrigerator and microwave. You can explore various options, from a Best Off-Grid Solar Kit for a Van to a Best Off-Grid Solar Kit for a Tiny Home.
- Custom Builds: For those with very specific or unique power requirements, or for individuals who desire maximum flexibility and control over every component, assembling a custom system might be the preferred route. This approach involves sourcing individual components from different manufacturers, allowing you to hand-pick each part for optimal performance and integration into your precise setup. For example, you might pair high-efficiency panels from a specific brand with a top-tier Victron Energy inverter/charge controller and robust Battle Born LiFePO4 batteries. While a custom build offers unparalleled personalization, it necessitates a deeper understanding of solar electrical systems, component compatibility, and wiring.
Ultimately, the choice between a kit and a custom build often hinges on your personal comfort level with electrical work, your budget, and the complexity of your energy demands. If you're just dipping your toes into off-grid living, a well-designed kit provides an excellent, reliable foundation. If you're an experienced DIYer or have very specialized needs, a custom build offers unmatched freedom and optimization.
Budgeting for Your Off-Grid Solar System
The financial investment required for an off-grid solar system for a camper can fluctuate wildly, ranging from a few hundred dollars for a minimalist portable setup to well over $10,000 for a sophisticated, full-time living system with significant battery capacity and advanced features.
- Entry-Level Systems: For basic power needs, such as charging small electronics, running LED lights, and perhaps a small fan, a portable solar generator like a smaller Jackery Explorer model paired with a foldable solar panel is an excellent, cost-effective solution. These systems typically range from $300 to $1,500.
- Mid-Range Systems: To comfortably power a 12V refrigerator, all your lights, and charge laptops and other devices, you're likely looking at a 200W-600W fixed panel array and a 100-200Ah LiFePO4 battery bank. This type of setup generally falls into the $1,500 to $5,000 range, depending on the quality of components chosen and whether you opt for a DIY installation or a pre-built kit.
- High-End Systems: For those who want to run high-draw appliances like air conditioners, microwaves, and enjoy all the comforts of home, you'll need a more substantial system. This typically involves 800W or more of solar panels, 300-400Ah+ of LiFePO4 batteries, and a powerful pure sine wave inverter (2000W+). Such robust systems can easily exceed $5,000, potentially reaching $10,000 or more, especially if professional installation is involved. For a more detailed breakdown of costs, articles like How Much to Budget for Off-Grid Batteries or Off-Grid Solar Kit Price Ranges can offer valuable insights.
Remember to account for all associated costs, which include not only the primary components but also essential wiring, fuses, breakers, mounting hardware, and any specialized tools you might need. If you plan on professional assistance for certain aspects, factor in installation costs. Being realistic and thorough in your budgeting from the outset will help manage expectations and guide you toward smart purchasing decisions. Our guide on How to Budget for an Off-Grid Solar System can help you with this crucial step.
Understanding Warranties and Support
When making a significant investment in your off-grid camper system, always pay close attention to the manufacturer's warranties and their reputation for customer support. Solar panels typically come with a substantial 25-year performance warranty, while batteries and inverters might offer warranties ranging from 5 to 10 years or even more, particularly for high-quality LiFePO4 batteries.
Prioritize brands known for their reliability, durability, and responsive technical support. In the off-grid lifestyle, having access to knowledgeable assistance when troubleshooting an issue, especially when you're miles from the nearest service center, can be truly invaluable. Reading reviews from other camper and RV enthusiasts can provide honest, real-world insights into product performance and the quality of brand support. When your comfort, safety, and freedom depend on your solar system, choosing reputable manufacturers who stand firmly behind their products is paramount.
Embarking on the journey of powering your camper with off-grid solar is an exciting step towards unparalleled freedom and self-sufficiency. By meticulously assessing your specific power needs, gaining a solid understanding of the various components, accurately sizing your system, and prioritizing safe and thoughtful installation, you'll be well-equipped to enjoy the open road with reliable, sustainable energy.
Disclaimer
Please remember that installing solar electrical systems involves inherent risks, including electrical shock and fire. This guide provides general information and recommendations. Always consult qualified professionals, adhere to local electrical codes, and prioritize safety when designing or installing your off-grid solar system. The author and publisher are not responsible for any harm or damage that may result from following the information provided herein.