Best Off-Grid Solar for a Sailboat
Living the dream on a sailboat often comes with a bit of a headache: keeping your electronics charged and your creature comforts running without constantly firing up the engine or plugging into shore power. It’s a real frustration when you're anchored in a serene cove, and the battery alarm starts beeping, or you have to choose between fresh coffee and your navigation system. This guide is all about helping you navigate the waters of off-grid solar for your sailboat, ensuring you have reliable power for all your adventures.
Understanding the Unique Challenges of Sailboat Solar
Going off-grid with solar on a sailboat isn't quite the same as setting up panels on a cabin or an RV. There are some very specific hurdles you'll face, from the limited space to the relentless marine environment, and understanding these upfront is key to building a robust and reliable system.
Space Constraints and Mounting Considerations
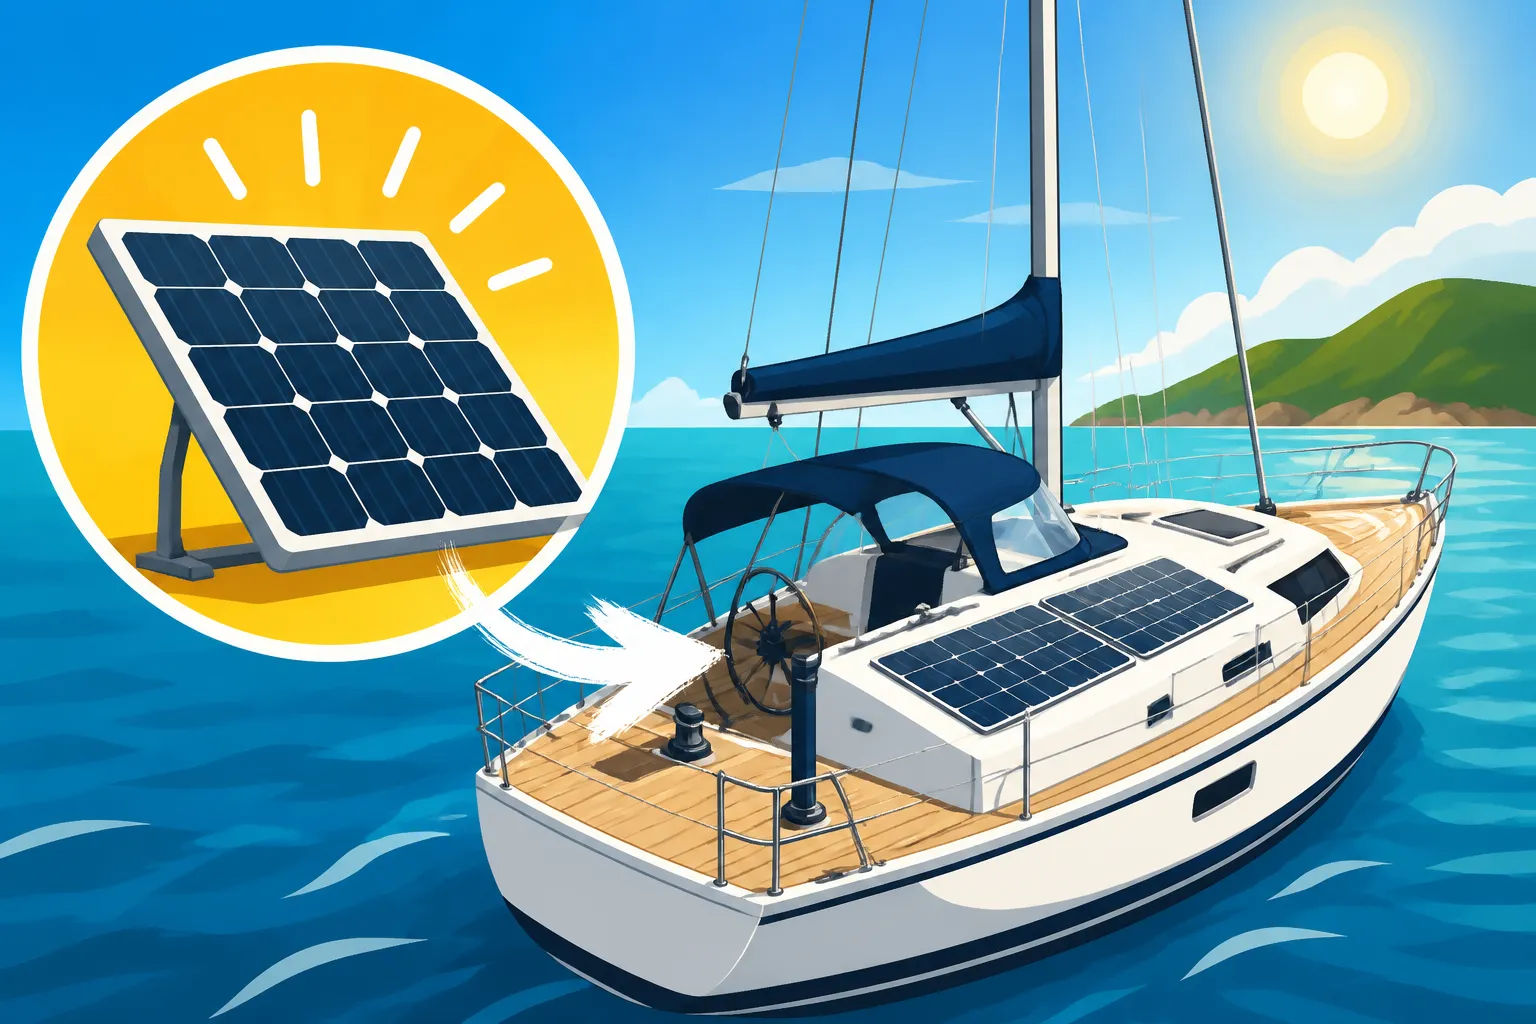
One of the biggest headaches for any sailboat owner eyeing solar is simply where to put the panels. You don't have acres of roof space like a land-based home. Every inch is precious, and often, what space you do have is curved, shaded by masts and booms, or needs to be clear for sail handling and deck movement. You might think about your bimini, dodger, or even the stern arch as prime real estate, but each comes with its own set of compromises. Rigid panels can offer great efficiency, but their size and weight can be prohibitive, potentially blocking views or interfering with lines. Flexible panels, on the other hand, can conform to curved surfaces and be walked on, but they often have lower efficiency and can suffer from heat buildup if not properly ventilated. This trade-off between power output, space utilization, and practicality is a constant balancing act. It's not just about finding a spot; it's about finding the right spot that maximizes sun exposure while minimizing interference with the boat's primary functions.
Harsh Marine Environment
Sailboats operate in one of the most unforgiving environments imaginable for electronics: the open ocean. Saltwater spray, high humidity, constant UV exposure, vibration, and the occasional rogue wave are all serious threats to your solar equipment. These aren't just minor annoyances; they can dramatically shorten the lifespan of components not designed for marine use. When you’re looking at solar panels, inverters, and batteries, you need to prioritize marine-grade equipment that can withstand this relentless assault. Corrosion is a silent killer, creeping into connections and terminals, degrading performance over time. UV radiation can break down plastics and sealants, leading to water ingress. Even the constant motion and vibration from sailing can shake loose poorly secured components. This means extra attention needs to be paid to waterproofing, robust mounting hardware, and materials that are specifically rated for marine applications. Skimping here will only lead to premature failures and headaches out on the water.
Energy Needs of a Sailboat
Before you even start looking at panels, you need a realistic understanding of your sailboat's energy appetite. Unlike a house, where you might have large appliances running constantly, a sailboat’s energy profile is often a mix of essential navigation and communication gear, refrigeration, lighting, and personal electronics. You're likely dealing with 12-volt DC systems predominantly, but you'll also need AC power for things like laptops, blenders, or power tools. The challenge is that usage patterns can vary wildly. Are you a weekend warrior who mostly needs to charge phones and run navigation lights? Or are you a liveaboard cruising extensively, needing to power a fridge, freezer, watermaker, and maybe even a small Starlink setup? How to Calculate Daily Energy Usage on a boat is a critical first step. Undersizing your system will leave you constantly worried about power, while oversizing it can lead to unnecessary expense and space occupation. It's about finding that sweet spot that supports your lifestyle without creating an unwieldy system.
Key Components of a Sailboat Off-Grid Solar System
Building an effective off-grid solar system for your sailboat involves several core components, each playing a crucial role in capturing, storing, and delivering power. Choosing the right ones, especially for the marine environment, is paramount.
Solar Panels: Flexible vs. Rigid
When it comes to solar panels for a sailboat, the choice between flexible and rigid often comes down to available space, mounting options, and budget.
- Flexible Solar Panels: These are incredibly popular for sailboats because of their versatility. They are thin, lightweight, and can often be mounted directly onto curved deck surfaces, dodgers, or biminis without adding significant bulk or windage. Brands like Renogy offer flexible panels that can even be walked on, making them ideal for areas that see foot traffic. They’re fantastic for maximizing available, irregular space. However, they generally have lower power output per square foot compared to rigid panels, and they're susceptible to heat buildup. When flexible panels get hot, their efficiency drops. If they're directly adhered to a dark deck without airflow underneath, this can be a significant issue, shortening their lifespan and reducing their real-world output. They also tend to be less durable in the long run than their rigid counterparts, as constant flexing or prolonged exposure to UV can degrade them faster.
- Rigid Solar Panels: These are the workhorses of solar and offer higher efficiency and better durability. Typically, they're mounted on a dedicated frame, often over a stern arch, on a davit system, or sometimes even on dedicated pole mounts. While they require more robust mounting solutions and introduce more windage, they allow for critical airflow underneath, which helps with cooling and maintains higher efficiency. Their solid construction means they can withstand the elements better and have a longer warranty period. For larger sailboats with sufficient space, rigid panels often provide the most bang for your buck in terms of power production and longevity. You might find yourself debating Best Off-Grid Solar Panels depending on your specific boat's layout.
The best solution might even be a hybrid: flexible panels on the bimini for everyday charging and a few rigid panels on a stern arch for high-demand loads or extended cruising.
Batteries: The Heart of Your System
The battery bank is arguably the most critical component of your sailboat's off-grid solar system. It’s where all that precious solar energy is stored for use when the sun isn't shining. For sailboats, the primary contenders are lead-acid (specifically AGM or gel) and lithium iron phosphate (LiFePO4) batteries.
- Lead-Acid Batteries (AGM/Gel): These have been the traditional choice for decades due to their lower upfront cost and proven reliability. AGM (Absorbed Glass Mat) batteries are sealed, maintenance-free, and can withstand vibration better than flooded lead-acid, making them a good fit for marine environments. Gel batteries are similar but tend to perform better in extreme temperatures and have a slightly longer cycle life, though they have lower charge rates. The main drawbacks are their weight, size, and limited usable capacity (you generally shouldn't discharge them below 50%). This means you need a larger, heavier bank to achieve the same usable power as lithium. For example, if you need 100Ah of usable power, you'd need at least a 200Ah lead-acid bank.
- Lithium Iron Phosphate (LiFePO4) Batteries: These are rapidly becoming the go-to for serious off-grid sailboat owners, despite their higher initial cost. LiFePO4 batteries offer significantly more usable capacity (up to 80-90% discharge), are much lighter, last for thousands more charge cycles, and have faster charging capabilities. This means you can install a smaller, lighter bank that provides more usable energy, which is a huge advantage on a sailboat where weight and space are at a premium. They also maintain a more consistent voltage throughout their discharge cycle, which is great for sensitive electronics. Many marine-specific brands like Battle Born or Victron Energy offer robust LiFePO4 options with integrated Battery Management Systems (BMS) for safety and longevity. How Many Batteries for an Off-Grid System will largely depend on your daily energy use and the type of battery you choose.
Charge Controllers and Inverters
These two components act as the brains and muscle of your power distribution system.
- Charge Controllers: Your charge controller is vital. It sits between your solar panels and your battery bank, regulating the voltage and current coming from the panels to ensure your batteries are charged safely and efficiently. For marine use, you'll almost exclusively want a Maximum Power Point Tracking (MPPT) charge controller. While more expensive than PWM (Pulse Width Modulation) controllers, MPPTs are significantly more efficient, especially in conditions where panel voltage might fluctuate due to partial shading (a common issue with masts and booms) or temperature changes. They can extract up to 30% more power from your panels compared to PWM, which is a huge benefit when every watt counts on a boat. Brands like Victron Energy are very popular in the marine world for their robust, smart MPPT controllers that integrate well with other marine electronics.
- Inverters: An inverter converts the DC (direct current) power from your batteries into AC (alternating current) power, which is what most household appliances use. For a sailboat, you absolutely need a pure sine wave inverter. Modified sine wave inverters are cheaper, but they can damage sensitive electronics, cause motors to run hotter, and lead to annoying buzzing sounds. A pure sine wave inverter provides power that's identical to what you'd get from a grid connection, making it safe for all your devices. When choosing an inverter, consider its continuous wattage rating (how much power it can supply constantly) and its surge rating (how much power it can temporarily supply for starting motors like a refrigerator compressor). For smaller systems or occasional AC needs, a portable power station like a Jackery Explorer 1000 can act as a compact inverter and battery backup, perfect for charging laptops or running small appliances without installing a full dedicated inverter. This can be a great interim solution or for those with more modest AC power needs. For a detailed look into the various components, check out Off-Grid Solar System Components Explained.
Sizing Your Sailboat Solar System for Optimal Performance
Getting the right size for your off-grid solar system on a sailboat is a balancing act between your power needs, available space, and budget. It’s not about guesswork; it’s about careful calculation and realistic expectations.
Calculating Your Daily Energy Consumption
This is the absolute first and most crucial step in designing any off-grid system, especially for a sailboat. You need to know exactly how much energy you use over a 24-hour period. This involves creating a detailed list of every electrical appliance and device on your boat, from your navigation lights and autopilot to your refrigeration, cabin lights, phone chargers, and even your occasional microwave use.
For each item, you need to determine:
- Its wattage (W): This is often listed on the appliance itself or in its manual. If it only lists amps (A), multiply amps by voltage (V) to get watts (W = A x V).
- How many hours per day it runs: Be realistic. Your fridge might run 50% of the time, while your laptop might be charged for 3 hours.
- Its daily watt-hours (Wh): Multiply the wattage by the hours it runs (W x h = Wh).
Once you have the daily watt-hours for each item, sum them all up to get your total daily energy consumption in watt-hours. Don't forget to account for phantom loads (devices that draw power even when "off" but still plugged in) and efficiency losses in your inverter (typically 10-15%). For example, if your total comes to 1000 Wh, you might want to budget for 1100-1150 Wh to cover inefficiencies. This load analysis is the foundation of How to Size an Off-Grid Solar System.
Determining Panel and Battery Capacity
With your daily energy consumption in hand, you can now size your solar array and battery bank.
-
Sizing Your Solar Panels: The goal here is to generate enough power each day to replace what you consume and recharge your batteries. You need to consider your boat's location and the average "peak sun hours" for that region. Peak sun hours represent the equivalent number of hours per day when solar irradiance averages 1,000 watts per square meter. For example, if you're cruising in the Caribbean, you might get 5-6 peak sun hours, but off the coast of Maine in winter, it might be only 2-3.
- Calculation: Divide your total daily watt-hour consumption by your average peak sun hours. This gives you the minimum watt-peak (Wp) rating your solar array needs to have.
- Example: If you use 1000 Wh/day and get 4 peak sun hours, you'd need 1000 Wh / 4 h = 250 Wp of panels.
- Real-world factors: You'll want to add a buffer for cloudy days, shading from sails/masts, and panel degradation. Many recommend oversizing by 20-30% for marine applications. So, for our 250 Wp example, you might aim for 300-325 Wp. This might involve multiple panels, and figuring out How Many Solar Panels for Off-Grid Living on a boat specifically can be tricky due to space limitations.
-
Sizing Your Battery Bank: Your battery bank needs to be large enough to store the energy produced by your panels and provide power during periods of low sunlight or at night. It's often recommended to have enough battery capacity for at least 2-3 days of "autonomy" – meaning you can run your boat without any solar input for that duration.
- Calculation: Multiply your daily watt-hour consumption by the desired days of autonomy. Then, if using lead-acid, double that number to account for the 50% depth of discharge rule. For LiFePO4, you can use closer to 80-90% of the calculated value.
- Example (LiFePO4): 1000 Wh/day * 2 days = 2000 Wh. If you have a 12V system, that's 2000 Wh / 12V = 167 Ah. So, you'd look for a LiFePO4 bank around 170-200 Ah.
- Example (Lead-Acid): 1000 Wh/day * 2 days * 2 (for 50% DoD) = 4000 Wh. For a 12V system, that's 4000 Wh / 12V = 333 Ah. So, you'd need around a 350-400 Ah lead-acid bank. You can see why LiFePO4 batteries are often preferred for their capacity-to-weight ratio in a sailboat environment, making them one of the Best Off-Grid Solar Batteries.
Considerations for System Voltage (12V vs. 24V vs. 48V)
Most sailboats natively operate on a 12V DC system, so sticking with 12V for your solar setup often simplifies things, especially for smaller systems. However, as your power needs grow, moving to a higher voltage system like 24V or even 48V can offer significant advantages.
- 12V Systems: Common for smaller boats, RVs, and vans. Easier to integrate with existing boat wiring and appliances. The downside is that for higher power draws (e.g., running a powerful inverter for AC appliances), you'll have higher currents, which requires thicker, more expensive wiring to prevent voltage drop and heat buildup.
- 24V Systems: Becoming more common on medium to larger sailboats, especially those with substantial battery banks and higher power demands. By doubling the voltage, you halve the current for the same amount of power (P = V * I), meaning you can use thinner wiring, reduce voltage drop, and often improve efficiency. Many modern marine appliances and inverters are available in 24V.
- 48V Systems: Typically reserved for large yachts or land-based off-grid homes with very high energy requirements. While offering the greatest efficiency in terms of wiring, converting all your boat's 12V loads to 48V can be a complex and expensive undertaking, often requiring DC-DC converters for specific appliances.
For most sailboats, a 12V or 24V system will be the most practical. Consider your total power consumption and the cost/complexity of upgrading your existing DC loads. If you're starting from scratch or doing a major refit, a 24V system might offer better long-term scalability and efficiency.
Best Practices for Sailboat Solar Installation and Maintenance
Installing and maintaining an off-grid solar system on a sailboat requires careful planning and execution. The unique marine environment demands specific attention to detail to ensure safety, reliability, and longevity.
Mounting Strategies and Weatherproofing
Mounting solar panels on a sailboat is probably one of the biggest design challenges. It's not just about finding a flat surface; it's about finding one that maximizes sun exposure throughout the day, avoids shading from masts, booms, and rigging, and doesn't interfere with the boat's operation or safety.
- Stern Arch/Davits: This is often the ideal solution for rigid panels. A custom or pre-fabricated stainless steel arch over the stern provides a strong, elevated platform that minimizes shading, allows for good airflow (preventing overheating), and keeps panels out of the way of deck activities. It can also double as a davit system for a dinghy. This setup offers the best performance and durability for rigid panels.
- Bimini/Dodger Mounts: Flexible panels are excellent candidates for mounting on fabric surfaces like biminis or dodgers. They can be sewn in or attached with zippers, making them easily removable or foldable. However, ensure there's a way for heat to dissipate, perhaps by having a small gap or using standoffs if possible. If directly adhered to dark fabric, they will get very hot and lose efficiency.
- Deck Mounts: Flexible panels can also be directly adhered to deck surfaces. While offering a sleek, low-profile look, they are most prone to overheating here, as there's no airflow underneath. Ensure the panels are rated for foot traffic if in a high-traffic area.
- Rail Mounts: Smaller panels can be mounted on railings using adjustable brackets. These are great for supplementary power or for situations where space is extremely limited. They often allow for manual tilting to follow the sun, which can significantly boost output.
Regardless of the mounting method, weatherproofing is non-negotiable. All electrical connections must be marine-grade, sealed, and protected from salt spray and moisture. Use high-quality UV-resistant cables and connectors. Consider junction boxes or combiner boxes that are IP67 rated or better to protect wiring. Properly sealing any deck penetrations for wiring is absolutely critical to prevent leaks into the boat. For a complete understanding of the mounting process, refer to How to Mount Off-Grid Solar Panels.
Wiring for Safety and Efficiency
Poor wiring is not only inefficient but can also be a serious fire hazard on a boat. The marine environment means you need to go above and beyond standard land-based wiring practices.
- Marine-Grade Wire: Always use tinned marine-grade copper wire. Tinned wire resists corrosion far better than untinned wire, which is crucial in a saltwater environment. The insulation should also be UV and abrasion resistant.
- Proper Sizing: Voltage drop is a big deal, especially on 12V systems over longer runs. Undersized wires lead to power loss (heat) and reduced performance. Use a voltage drop calculator to determine the appropriate wire gauge based on current draw and length of the run. How to Wire an Off-Grid Solar System for a boat often involves shorter runs than a house, but thicker gauges are still important.
- Fuses and Breakers: Every circuit must be properly fused or have a circuit breaker to protect against overcurrents and short circuits. This includes the main fuse from the solar array to the charge controller, from the charge controller to the battery bank, and from the battery bank to the inverter and other DC loads.
- Secure Connections: All connections should be crimped properly with high-quality crimpers, preferably using heat-shrinkable butt connectors or terminals for an extra layer of moisture protection. Avoid twist-on wire nuts, which are not suitable for marine environments.
- Grounding: A robust grounding system is essential for safety. All metal components, including panel frames and inverter casings, should be properly grounded to the boat's common ground point. This helps protect against electrical shocks and lightning strikes. Off-Grid Solar Safety and Grounding practices are vital for your peace of mind and the safety of your crew.
Remember, if you're not confident in your electrical skills, it's always wise to consult with or hire a certified marine electrician for the wiring phase.
Routine Maintenance for Longevity
Once your system is installed, regular maintenance will ensure it operates efficiently and lasts for many years. Neglecting maintenance in the marine environment will quickly lead to problems.
- Panel Cleaning: Salt spray, bird droppings, and dust can accumulate on your panels, significantly reducing their output. Regularly clean your panels with fresh water and a soft brush or cloth. Avoid harsh chemicals or abrasive materials.
- Connection Checks: Periodically inspect all electrical connections for corrosion, looseness, or damage. Pay close attention to terminals on batteries, charge controllers, and inverters. A small amount of dielectric grease can help protect exposed terminals.
- Battery Health:
- Lead-Acid: If you have flooded lead-acid batteries, check electrolyte levels regularly and top up with distilled water as needed. Keep terminals clean.
- LiFePO4: While generally maintenance-free, monitor your battery management system (BMS) readings if available. Ensure no cells are drifting out of balance. Keep the battery compartment well-ventilated.
- Wiring Inspection: Look for any signs of chafing, cracking insulation, or discoloration on wires, especially in areas of high vibration or movement. Address any issues promptly.
- Inverter/Controller Vents: Ensure any cooling vents on your inverter or charge controller are clear of dust, salt, or debris to prevent overheating.
- System Monitoring: Utilize a battery monitor to keep track of your battery's state of charge, voltage, current in/out, and overall health. This helps you understand your power consumption and generation patterns and troubleshoot issues early. Some charge controllers and inverters, like those from Victron Energy, offer excellent remote monitoring capabilities via Bluetooth or Wi-Fi, allowing you to check your system from your phone or tablet. Even a smaller portable power station like a Jackery has a clear display that lets you track input and output, helping you understand your system's performance.
Regular checks, even simple visual ones, can catch small problems before they become big, expensive headaches. Investing a little time in Off-Grid Solar Maintenance Costs can save you a lot in the long run.
Disclaimer
The information provided in this guide is for general informational purposes only and does not constitute professional advice. Off-grid solar system design and installation, especially in a marine environment, can be complex and potentially dangerous. Always consult with qualified professionals, adhere to local electrical codes and marine regulations, and prioritize safety when working with electricity.