Off-Grid Inverter Charger Installation Mistakes to Avoid
Embarking on the journey of off-grid living is incredibly rewarding, but let's be honest, installing an inverter charger can feel like trying to solve a complex puzzle with missing pieces. Many folks jump in with good intentions, only to find themselves troubleshooting frustrating power issues, risking equipment damage, or even facing safety hazards, all because of common, yet avoidable, installation mistakes. This comprehensive guide is here to walk you through those pitfalls, helping you sidestep the headaches and ensure your off-grid power system runs smoothly and safely.
Skipping the Foundation: Pre-Installation Planning Mistakes
Before you even think about connecting a single wire, there's a crucial phase of preparation that many eager DIYers accidentally overlook. Rushing this stage is a surefire way to introduce problems that are much harder and more costly to fix down the line. It's like building a house without a proper blueprint – you might get a roof over your head, but it's probably not going to be stable or efficient.
Not Reading the Manual: The Cardinal Sin
Oh, the dreaded manual! We all tend to skim or ignore them, don't we? But when it comes to a sophisticated piece of equipment like an inverter charger, this isn't just a suggestion, it's a lifeline. Every manufacturer, whether it's a high-end Victron Energy unit or a more budget-friendly Renogy option, designs their product with specific operating parameters, safety warnings, and installation instructions. These documents contain critical information about voltage compatibility, wiring specifications, fault codes, and even troubleshooting steps unique to that particular model.
Ignoring the manual can lead to immediate and costly failures. For instance, connecting an inverter charger to a battery bank with the wrong voltage could instantly fry the unit. Or, perhaps you miss a crucial step about tightening terminals to a specific torque, leading to loose connections that overheat and cause efficiency losses or, worse, a fire. The manual is also your primary defense if you ever need to make a warranty claim; if you haven't followed their guidelines, your warranty could be instantly voided. Take the time, grab a cup of coffee, and really digest that manual cover to cover. It's the cheapest insurance policy you'll ever get for your off-grid system.
Misjudging System Voltage and Capacity Needs
One of the most fundamental mistakes is failing to correctly assess your overall system's voltage and power requirements. Off-grid systems typically operate at 12V, 24V, or 48V, and your inverter charger needs to be perfectly matched to this system voltage. Trying to force a 12V inverter charger into a 24V system, or vice-versa, is a recipe for disaster. The moment you flip that switch, you're looking at potential component damage or at the very least, a system that simply won't work.
Beyond voltage, capacity is king. Many people underestimate their peak power draw (surge wattage) and continuous power needs (running wattage). An inverter charger has two ratings: continuous output (what it can supply consistently) and surge output (what it can handle for a few seconds to start motors or compressors). If you're hoping to run a power-hungry appliance like an air conditioner or a well pump, you need to account for its substantial starting surge. A common scenario we see is someone installing a 2000W inverter only to find it trips every time they try to start their refrigerator, which might have a 1500W running draw but a 4000W starting surge. This miscalculation means constant frustration, tripped breakers, and potentially premature wear on your equipment. Taking the time to properly calculate your off-grid solar load calculation is non-negotiable.
Wiring Woes: Common Electrical Connection Errors
Wiring is where the rubber meets the road, and unfortunately, it's also where many easily preventable mistakes happen. Incorrect wiring isn't just about things not working; it’s a serious safety concern that can lead to fires, electrocution, and permanent damage to your expensive off-grid components.
Incorrect DC Wiring and Fusing
Connecting your inverter charger to your battery bank requires meticulous attention to detail. One of the most critical aspects is using the correct gauge wiring. Undersized DC cables for the current flowing from your batteries to your inverter charger will act like a heating element, creating dangerous resistance, voltage drop, and potentially melting insulation or starting a fire. Imagine trying to push a garden hose's worth of water through a straw – it just won't work efficiently, and the straw will burst. The same principle applies here. Always consult your manual and a reliable wire gauge chart to ensure your cables can handle the maximum current your inverter charger will draw.
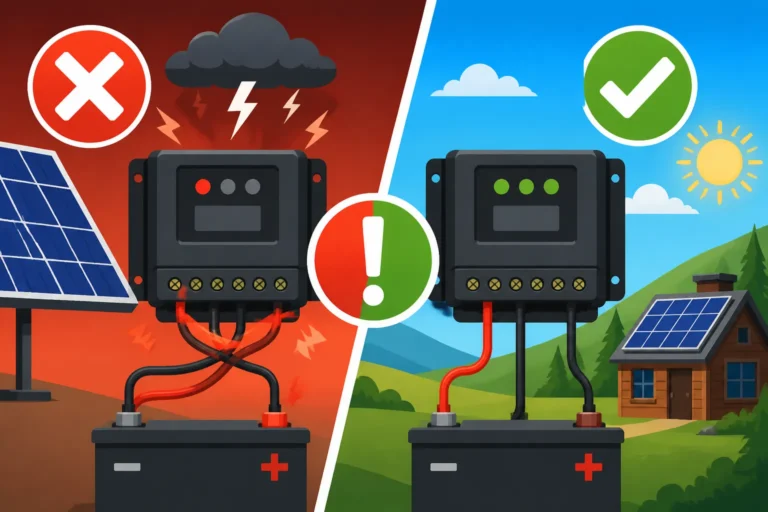
Polarity is another huge one. Connecting the positive battery terminal to the negative inverter input, or vice versa, will almost certainly cause immediate and irreparable damage to the inverter charger. These devices are designed to protect against minor mishaps, but a direct reverse polarity connection is usually fatal. Double-checking your positive (red) and negative (black) connections multiple times before making the final connection is not paranoia; it's smart practice.
Finally, fuses and circuit breakers are your system's guardians. Placing an appropriately sized fuse or DC breaker as close as possible to the positive terminal of your battery bank is absolutely critical. This protects your entire system, especially your expensive inverter charger, from catastrophic short circuits. Without proper fusing, a short circuit could cause battery meltdown, explosions, or a raging electrical fire. Many folks skip this or use fuses that are too small or too large, defeating their purpose entirely. Remember, the fuse is there to protect the wire, not the appliance.
AC Wiring Mistakes and Grounding Issues
Once the DC side is sorted, you move to the AC output of your inverter charger. Here, common errors involve incorrect neutral-ground bonding and insufficient grounding. Many off-grid inverter chargers are designed to be standalone power sources, meaning they need to establish their own neutral-ground bond, similar to how your main service panel does when connected to the utility grid. Incorrectly bonding the neutral and ground (or failing to bond them when necessary) can create hazardous voltage potentials and interfere with the safe operation of your AC appliances. It can also lead to issues with ground fault circuit interrupter (GFCI) outlets or breakers tripping unnecessarily, or, more dangerously, not tripping when they should.
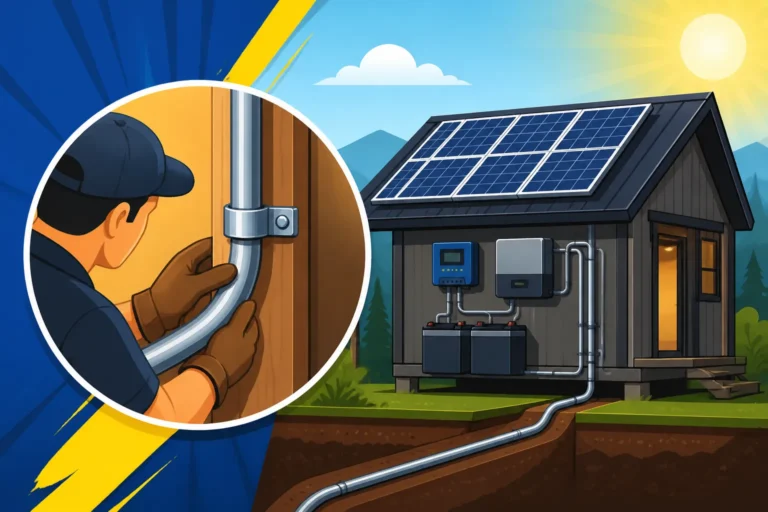
Proper grounding of your entire off-grid system is absolutely non-negotiable for safety. This means connecting the inverter charger's chassis, the solar panel frames, and any other metal enclosures to a dedicated earth ground. Without a proper grounding electrode system, stray currents can create dangerous shock hazards. Imagine a fault inside your inverter charger casing; if it's not properly grounded, touching the casing could mean becoming the path to ground yourself. This is a life-threatening mistake. For detailed guidance, you might want to look into how to ground an off-grid solar system.
Overlooking Proper Ventilation and Placement
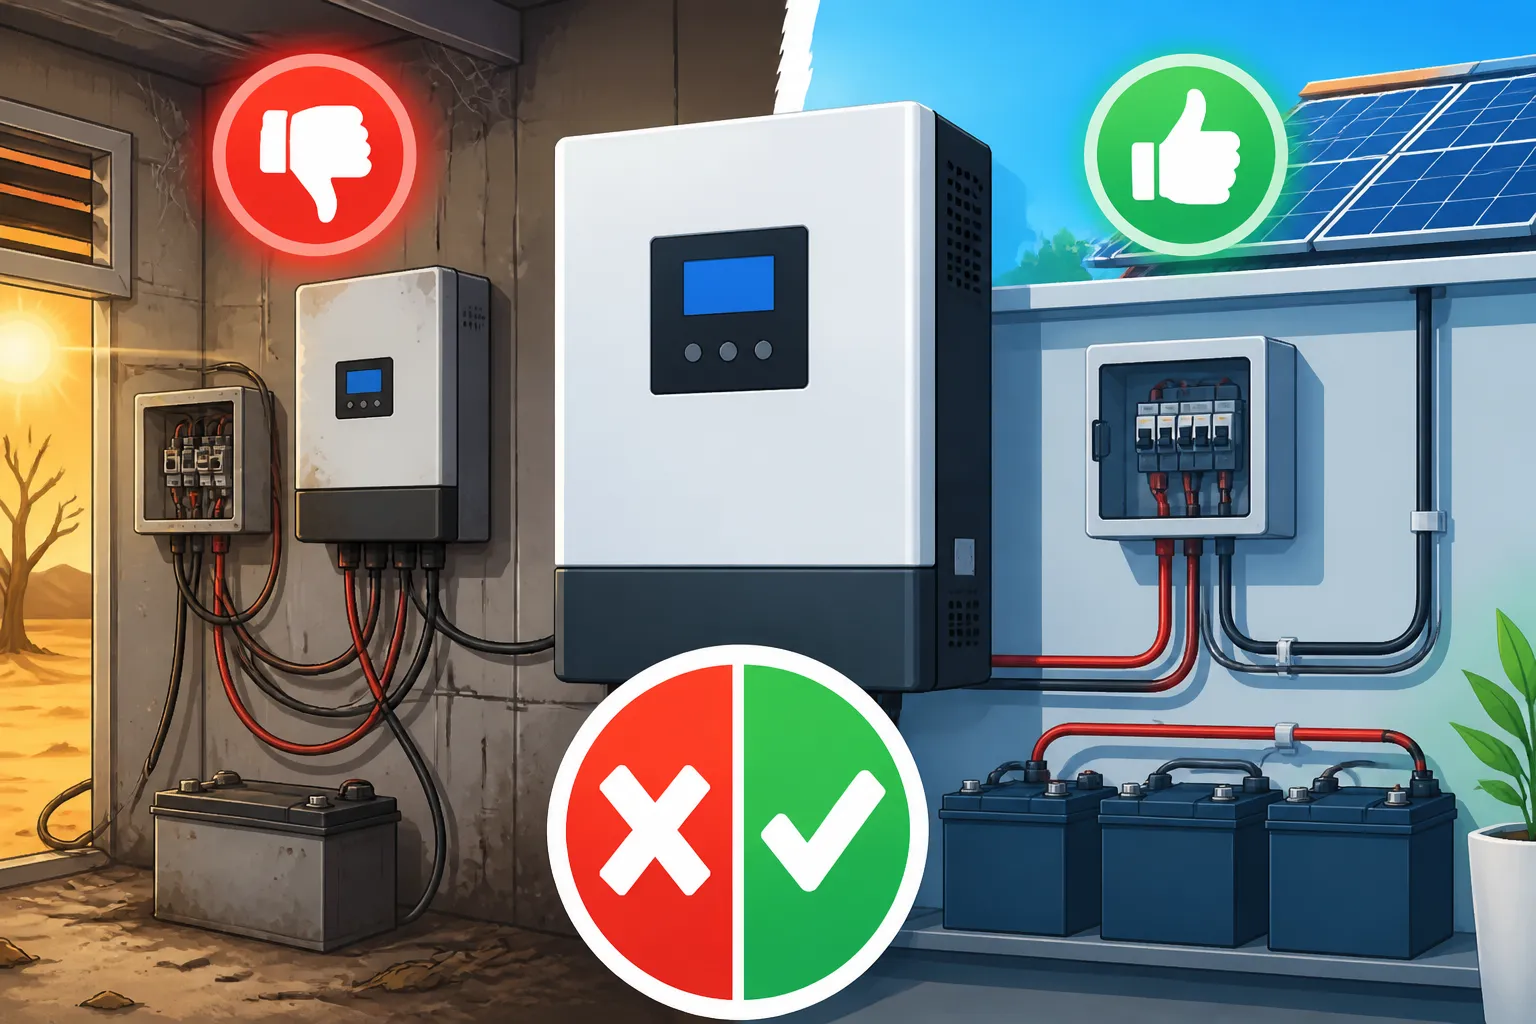
Inverter chargers generate heat as they convert DC power from your batteries into usable AC power. If this heat isn't dissipated effectively, the unit will overheat, leading to reduced performance, premature failure, or even damage to internal components. A common mistake is installing an inverter charger in a cramped, unventilated space, like a small cabinet or utility closet, without accounting for adequate airflow. Manufacturers specify minimum clearances around the unit for a reason – these spaces allow cool air to enter and hot air to escape. Blocking these vents or placing the unit in a sealed box will inevitably lead to overheating issues.
Environmental factors are just as important as airflow. Installing an inverter charger in a dusty workshop, a damp shed, or an area exposed to direct sunlight can severely impact its lifespan and performance. Dust can accumulate on internal components, acting as an insulator and causing overheating, or even short circuits. Moisture, obviously, is an electrician's worst nightmare and can lead to immediate electrical faults and corrosion. Direct sunlight will not only exacerbate heat issues but can also degrade the plastic components over time. Carefully consider a cool, dry, clean, and easily accessible location for your inverter charger.
Battery Bank Integration Pitfalls
Your battery bank is the heart of your off-grid system, and how you integrate it with your inverter charger is paramount. Mistakes here can drastically reduce the life of your batteries, which are often the most expensive single component to replace.
Mismatched Battery Types or Capacities
This is a mistake that causes endless frustration and expense. Never, ever mix different battery chemistries (like connecting a LiFePO4 battery in parallel with a lead-acid battery). Each battery type has vastly different charging characteristics, discharge curves, and voltage ranges. A lithium battery, for instance, prefers a deep discharge and fast charging, while a lead-acid battery needs careful floating and can be damaged by deep discharges. When mixed, one type will always be overcharged or undercharged, leading to rapid degradation of the weaker battery and inefficient power delivery from the stronger one.
Similarly, avoid mixing batteries of different ages, brands, or capacities (Ah ratings) within the same battery bank. When you combine them, the older, weaker, or smaller capacity battery will act as a bottleneck, limiting the performance of the entire bank. It's like having a team of Olympic sprinters and then adding someone who prefers a leisurely stroll – the overall pace of the team will be significantly slower. Over time, this imbalance will lead to cell damage, reduced overall capacity, and significantly shortened battery lifespan. If you're looking to expand your system, it's generally recommended to add a completely new, separate bank of identical batteries, or replace the entire existing bank with new, matched ones. For a deeper dive into battery considerations, explore topics like how to wire a battery bank or the cost comparison of LiFePO4 vs Lead-Acid Battery Cost.
Inadequate Battery Cable Connections
Connecting your battery cables properly is a deceptively simple task that many get wrong. Loose or poorly crimped connections are silent killers in an off-grid system. A loose connection at the battery terminal or on the inverter charger can create significant resistance. This resistance generates heat, which can be enough to melt cable insulation, cause arcing, or even start a fire. Visually, a loose connection might look fine, but under load, it's a ticking time bomb.
Always use proper lugs that match your cable gauge, and crimp them securely with a heavy-duty crimping tool. A cheap crimper will often result in a poor connection that fails under load. Once crimped, use heat shrink tubing to seal the connection from moisture and corrosion, which can also increase resistance over time. Finally, ensure all terminals are tightened to the manufacturer's specified torque settings. Don't just eyeball it; use a torque wrench. A small oversight here can lead to a cascading failure of your entire power system.
Ignoring Battery Temperature Management
Batteries are sensitive to temperature extremes, and failing to manage this can drastically shorten their lives. Lead-acid batteries, for example, lose capacity in cold weather and can be permanently damaged if deeply discharged when frozen. Lithium Iron Phosphate (LiFePO4) batteries are robust but have a critical weakness: they should never be charged below freezing temperatures (typically 32°F or 0°C). Charging them when too cold can cause lithium plating, which permanently reduces capacity and can lead to internal short circuits.
Many off-grid setups are in remote locations, cabins, or RVs where temperature control is challenging. Installing batteries in uninsulated outdoor boxes without heating elements in cold climates, or in direct scorching sunlight in hot climates, is a common mistake. For cold climates, consider insulated battery boxes, internal heating pads (especially for LiFePO4), or bringing batteries inside a conditioned space during winter. For hot climates, ensure adequate ventilation and shade to prevent overheating. Some advanced LiFePO4 batteries, like those from Battle Born or EG4, come with internal low-temperature cutoff protection, which is a fantastic feature but still doesn't negate the need for overall temperature awareness. Your battery bank's health is directly tied to its thermal environment.
The Devil's in the Details: Configuration and Testing Mishaps
Even with perfect hardware installation, an inverter charger can fail to perform optimally if its software settings aren't dialed in. This stage requires patience and a methodical approach.
Incorrect Settings for Battery Charging
One of the most critical configuration errors is setting the wrong battery charging parameters in your inverter charger. Most modern inverter chargers are also smart chargers, managing the multi-stage charging process (bulk, absorption, float, equalization) for your batteries. However, these settings need to be precisely matched to your specific battery chemistry and manufacturer recommendations. For instance, charging voltages and absorption times for a sealed AGM battery are different from those for a flooded lead-acid battery, and vastly different from LiFePO4.
If these settings are too high, you risk overcharging, which can boil off electrolyte in lead-acid batteries, cause gassing, swelling, and permanent damage. If they're too low, you'll perpetually undercharge your batteries, leading to sulfation in lead-acid or simply never reaching full capacity with lithium. Both scenarios lead to significantly reduced battery lifespan and performance. Many DIYers leave these settings at their default values, which might be okay for a generic battery type but rarely optimal for yours. Take the time to understand how to set charge controller parameters correctly in your inverter charger, referring to both your inverter charger manual and your battery manufacturer's specifications. This step alone can add years to your battery bank's life.
Skipping Initial System Testing and Monitoring
After installation, the temptation is to just flip the switch and enjoy the power. But skipping thorough testing and setting up proper monitoring is a huge mistake. Initial testing involves verifying all connections, checking voltages at various points (battery terminals, inverter input/output), and slowly introducing loads to ensure the inverter charger handles them as expected. A phased approach to testing – starting with small loads and gradually increasing to larger ones, including surge loads – can help identify weaknesses before they become critical failures.
Furthermore, integrating a reliable battery monitor into your system is non-negotiable for long-term health. A battery monitor, often a shunt-based system, gives you accurate real-time information on your battery's state of charge (SoC), voltage, current draw, and even historical data. Without it, you're essentially flying blind, guessing at how much power you have left. This often leads to unknowingly over-discharging your batteries, which severely damages their lifespan, especially for lead-acid types. Many inverter chargers integrate well with popular battery monitors from brands like Victron. Understanding how to test an off-grid solar system thoroughly after installation will save you countless headaches down the line.
The Hefty Price of Errors: Consequences and Avoiding Future Headaches
Making installation mistakes with your inverter charger isn't just an inconvenience; it can have significant and lasting repercussions for your off-grid lifestyle and your wallet.
Reduced System Performance and Lifespan
Every mistake we've discussed, from undersized wiring to incorrect charging settings, ultimately leads to a less efficient and shorter-lived off-grid system. An inefficient system means you're wasting valuable solar energy, either by not converting it properly or by prematurely degrading your batteries. For example, voltage drop from inadequate wiring means your appliances aren't getting the full power they need, and your inverter charger has to work harder, generating more heat and consuming more power itself. This translates directly to less usable energy for you and more stress on your components.
Over time, these seemingly small errors compound. Batteries that are consistently overcharged or undercharged will lose capacity much faster than their rated lifespan, forcing expensive replacements sooner than anticipated. An inverter charger that's constantly overheating because of poor ventilation will eventually fail, leaving you without power until you can source a replacement. The goal of off-grid living is self-sufficiency and reliability, and cutting corners during installation directly undermines both of these objectives. You'll spend more time and money on maintenance and replacements than you would have spent doing it right the first time.
Safety Hazards and Warranty Voidance
Beyond performance and lifespan, the most critical consequence of installation mistakes is the creation of serious safety hazards. Electrical fires, property damage, and the risk of severe injury or electrocution are very real possibilities with improperly installed high-voltage DC and AC electrical systems. Loose connections can arc and spark, igniting nearby flammable materials. Incorrect grounding or neutral bonding can turn your system into a shock hazard. Overloaded or unfused circuits can cause wires to melt and ignite. These aren't theoretical risks; they are real-world dangers that every off-grid system owner must take seriously.
Moreover, manufacturers have strict guidelines for installation. If your inverter charger fails due to improper installation, such as reverse polarity, overheating from lack of ventilation, or incorrect wiring, your warranty will almost certainly be voided. This means you'll be solely responsible for the cost of replacement, which for a quality inverter charger could be thousands of dollars. Companies like Renogy, for example, provide detailed instructions for a reason, and deviating from them negates their responsibility when things go wrong. Taking the time to ensure a safe and correct installation protects not only your equipment but, more importantly, yourself and your loved ones.
Avoiding DIY Disaster: When to Seek Help
While the spirit of DIY is strong in the off-grid community, there's no shame in knowing your limits and recognizing when it's time to call in a professional.
Recognizing Your Limits
The allure of building your own off-grid solar system is powerful, and for many, it's a deeply satisfying endeavor. However, inverter chargers and battery banks involve high voltages and currents that can be incredibly dangerous if mishandled. If you find yourself scratching your head at wiring diagrams, feeling uncertain about fuse sizing, or just generally uneasy about making high-voltage connections, that's your cue to pause. It's far better to admit that a particular aspect is beyond your current skill set than to push through and make a dangerous error.
Think about complex installations, like integrating an inverter charger into an existing home electrical panel, or designing a large 48V system with multiple battery strings. These scenarios often require a deeper understanding of electrical codes, load balancing, and fault protection. A licensed electrician who specializes in off-grid or renewable energy systems can provide invaluable expertise, ensuring your system is not only functional but also safe and compliant. Investing in professional help for critical stages, even if you do most of the work yourself, can save you from catastrophic errors and provide peace of mind. For a realistic perspective on costs, consider looking at DIY vs Professional Off-Grid Solar Cost.
Resources for Learning and Troubleshooting
Even if you're tackling most of the installation yourself, you're not alone. The off-grid community is rich with resources. Online forums and dedicated groups are fantastic places to ask questions and learn from the experiences (and mistakes) of others. Many reputable manufacturers, such as Victron Energy and Sol-Ark, offer extensive documentation, video tutorials, and even customer support lines to guide you through their product installations and troubleshooting. Don't hesitate to leverage these resources.
Furthermore, a wealth of educational materials exists. There are numerous books, online courses, and YouTube channels dedicated to off-grid solar installation. Sometimes, simply purchasing a well-regarded off-grid solar installation guide from platforms like Amazon can provide the step-by-step instructions and visual aids you need to confidently complete your project. Always remember to cross-reference information and prioritize safety above all else. Learning is an ongoing process in off-grid living, and the more knowledgeable you are, the more resilient and enjoyable your experience will be.
Disclaimer
The information provided in this guide is for educational and informational purposes only and does not constitute professional electrical advice. Working with electricity can be dangerous and may lead to serious injury or death. Always consult with a qualified and licensed electrician or solar professional before installing or modifying any electrical system. Follow all local codes, regulations, and manufacturer instructions. The author and publisher are not liable for any loss, damage, or injury that may arise from reliance on the information contained herein.