How to Install an Off-Grid Charge Controller
Embarking on the journey to power your life with off-grid solar is incredibly exciting, but let's be honest, the thought of wiring it all up can feel like staring at a complex puzzle with missing pieces. One component that often causes a bit of head-scratching for newcomers is the charge controller. It's the unsung hero of your solar setup, quietly working behind the scenes to protect your expensive batteries and ensure your system runs smoothly. This guide will walk you through everything you need to know about installing an off-grid charge controller, making it feel less like a daunting task and more like a satisfying step towards energy independence.
Understanding the Off-Grid Charge Controller's Role
Before we even think about screwdrivers and wires, it's vital to understand what an off-grid charge controller actually does. Think of it as the brain of your solar charging system. Its primary job is to regulate the voltage and current coming from your solar panels before it reaches your battery bank. Without it, you’d be risking serious damage, possibly even a fire, and certainly shortening the life of your batteries significantly.
Why a Charge Controller is Essential
Imagine connecting a powerful fire hose directly to a delicate balloon. That's a bit like what happens if you connect solar panels straight to your batteries. Solar panels can produce varying amounts of voltage and current depending on sunlight intensity, temperature, and even the angle they're mounted at. Batteries, on the other hand, need to be charged within a very specific voltage and current range to operate safely and last for years.
The charge controller steps in to bridge this gap. It prevents overcharging by reducing or stopping the flow of power once the batteries reach their full capacity. This is crucial because overcharged batteries can overheat, vent, and degrade rapidly, leading to premature failure and potentially dangerous situations. Conversely, it also helps prevent reverse current flow at night, where batteries could discharge back into the panels, draining your precious stored energy. Beyond just protection, a good charge controller also helps optimize the charging process, ensuring your batteries get the most efficient charge possible, which is a big deal, especially on cloudy days or when sun exposure isn't perfect. It's truly a critical piece of equipment for any robust off-grid system, from a small setup for a remote cabin to a larger one for a full-time RV.
Types of Charge Controllers
When you start looking at charge controllers, you'll primarily encounter two main types: Pulse Width Modulation (PWM) and Maximum Power Point Tracking (MPPT). They both do the essential job of regulating charge, but they go about it in very different ways, impacting efficiency and cost.
Pulse Width Modulation PWM Controllers
PWM controllers are the simpler, generally more affordable option. They work by making a direct connection from the solar array to the battery, but they rapidly switch this connection on and off. When the battery is low, the connection is mostly "on" to allow maximum current. As the battery charges up, the controller pulses the power more frequently, effectively slowing down the charge rate. It's like gently tapping the brakes as you approach a stop sign, maintaining a steady, safe approach.
- Pros: They are robust, reliable, and typically less expensive. They're also quite efficient if your solar panel voltage closely matches your battery bank voltage (e.g., a 12V panel charging a 12V battery). For smaller systems, like those for a shed, a small camper, or simple lighting setups, a PWM controller from brands like Renogy can be a perfectly viable and cost-effective choice.
- Cons: Their main drawback is efficiency. They can't convert excess voltage into amperage, meaning if your panels produce more voltage than your battery bank needs, that extra power is essentially wasted. This becomes more pronounced in larger systems or when there's a significant voltage mismatch. For instance, a "12V" solar panel often puts out around 18-20V at its peak. A PWM controller will essentially "clip" that voltage down to match the battery voltage (e.g., 14.4V for a charging 12V battery), losing the difference.
Maximum Power Point Tracking MPPT Controllers
MPPT controllers are the more advanced, sophisticated, and generally more expensive option. These controllers use a complex algorithm to continuously find the "maximum power point" of the solar array – the optimal combination of voltage and current at which the panels can produce the most power. They can then convert any excess voltage into amperage, boosting the charging current to your batteries.
- Pros: Their biggest advantage is significantly higher efficiency, often 10-30% more efficient than PWM controllers, especially in cooler conditions, during low light, or when there's a significant voltage difference between your solar array and battery bank (e.g., using 24V or 48V panels to charge a 12V battery bank). This means more power gets into your batteries from the same number of panels. If you're looking into How Many Solar Panels for Off-Grid Living or a comprehensive guide on How to Size an Off-Grid Solar System, you'll often find MPPT controllers recommended for their superior performance.
- Cons: They are more complex, which translates to a higher upfront cost. They also tend to be larger and can generate more heat, requiring good ventilation. However, for most medium to large off-grid systems, or any setup where maximizing power harvest is critical, the investment in an MPPT controller usually pays off in the long run.
Ultimately, the best choice depends on your specific system size, budget, and power needs. For smaller, less critical applications where cost is paramount, PWM might suffice. For larger, more complex, or year-round systems where every watt counts, an MPPT controller is almost always the superior choice.
Pre-Installation Preparations and Safety First
Alright, before you unbox that shiny new charge controller, let’s talk about preparation. Proper planning and safety aren't just good ideas; they're absolutely critical for a successful and safe off-grid solar installation. Skipping these steps can lead to damaged equipment, electrical hazards, or frustration down the line.
Sizing Your Charge Controller Correctly
This is perhaps the most important pre-installation step. You must ensure your charge controller can handle the power coming from your solar array and properly charge your battery bank. If it's too small, it could overheat and fail, potentially damaging other components or causing a fire.
Here’s the basic breakdown for sizing:
- Determine Your System Voltage: Is your battery bank 12V, 24V, or 48V? This is your system voltage.
- Calculate Maximum Solar Array Current (Amps):
- Find the short-circuit current (Isc) of one of your solar panels (usually listed on the panel's sticker in Amps).
- Determine how many strings of panels you have connected in parallel. If you have panels wired in series, the Isc of the string is the same as a single panel. If you have multiple strings in parallel, you multiply the Isc of one string by the number of parallel strings.
- Add a safety factor. Electrical codes often require you to multiply this total Isc by 1.25 (125%). This accounts for unusual conditions where panels might overperform slightly, like on a very cold, sunny day.
- Example: You have two 200W panels in parallel. Each panel has an Isc of 10A. Total Isc = 10A + 10A = 20A. With the safety factor: 20A * 1.25 = 25A. Your charge controller should be rated for at least 25 Amps for the solar input.
- Calculate Maximum Solar Array Voltage (Volts):
- Find the open-circuit voltage (Voc) of one of your solar panels (also on the panel's sticker, in Volts).
- Determine how many panels you have connected in series. Multiply the Voc of one panel by the number of panels in series. If you have parallel strings, the voltage of each string is the same.
- Again, add a safety factor, especially for MPPT controllers in cold climates. Cold temperatures can temporarily increase panel voltage. A common rule of thumb is to multiply by 1.25, or check your panel's datasheet for temperature coefficients to be more precise.
- Example: You have two panels in series. Each panel has a Voc of 22V. Total Voc = 22V + 22V = 44V. With a safety factor: 44V * 1.25 = 55V. Your charge controller should be able to handle at least 55V DC from the solar input.
So, for this example, you would need a charge controller rated for at least 25 Amps and 55 Volts for the solar input, compatible with your battery bank voltage (e.g., 12V, 24V, or 48V). Always round up to the next available size if your calculation falls between standard controller sizes. You can find more detailed guidance on How to Size a Charge Controller to ensure you're making the right choice for your specific needs.
Gathering Your Tools and Materials
Having everything you need on hand before you start will save you a lot of headaches and trips to the hardware store.
Here's a checklist of essential tools and materials:
- The Charge Controller: Obviously! Make sure it’s the correct size and type (PWM or MPPT) for your system.
- Battery Cables: Properly sized (gauge) for the current your system will carry. These connect the charge controller to your battery bank. Refer to wiring charts or online calculators for appropriate sizing to prevent voltage drop and overheating.
- Solar Panel Cables (PV Cables): UV-resistant and rated for outdoor use. These connect your solar panels to the charge controller.
- MC4 Connectors: If your panels and controller don't come with pre-attached connectors, you'll need these to make secure, waterproof connections for your solar wiring.
- Fuses or Breakers: Crucial for safety! You'll need fuses or DC-rated circuit breakers on both the battery side (between the charge controller and batteries) and the solar array side (between the panels and charge controller). The battery side fuse should be sized to protect the battery wiring and the charge controller's output. The solar side fuse should be sized to protect the solar wiring and the charge controller's input, typically matching your controller's max input current rating or slightly below it.
- Battery Disconnect Switch: An absolute must-have for safely isolating your battery bank from the rest of the system for maintenance or emergencies.
- PV Disconnect Switch (Optional but Recommended): A switch between your solar panels and the charge controller to easily cut off power from the array.
- Wire Strippers/Cutters: For preparing your cables.
- Crimping Tool: For attaching lug terminals to your battery cables. Ensure it's the right type for the lugs you're using.
- Screwdrivers/Wrenches: To secure connections and mount the controller.
- Multimeter: Absolutely essential for checking voltage, current, and continuity at various stages of the installation. Don't skip this!
- Safety Glasses and Gloves: Always protect your eyes and hands when working with electrical systems.
- Mounting Hardware: Screws, anchors, etc., appropriate for the surface you're mounting the controller to.
- Conduit (Optional but Recommended): To protect wiring, especially outdoors or in high-traffic areas.
- Cable Ties/Clips: For neat and secure cable management.
You can often find high-quality components and tools from reputable brands or on large online marketplaces like Amazon, where you can compare different options and read reviews. Just remember to always prioritize safety and quality, especially for critical electrical components.
Step-by-Step Installation of Your Off-Grid Charge Controller
Now for the hands-on part! This sequence is crucial for safety and proper function. Always remember: connect batteries first, then solar panels, and always disconnect power sources before wiring anything.
Mounting the Charge Controller
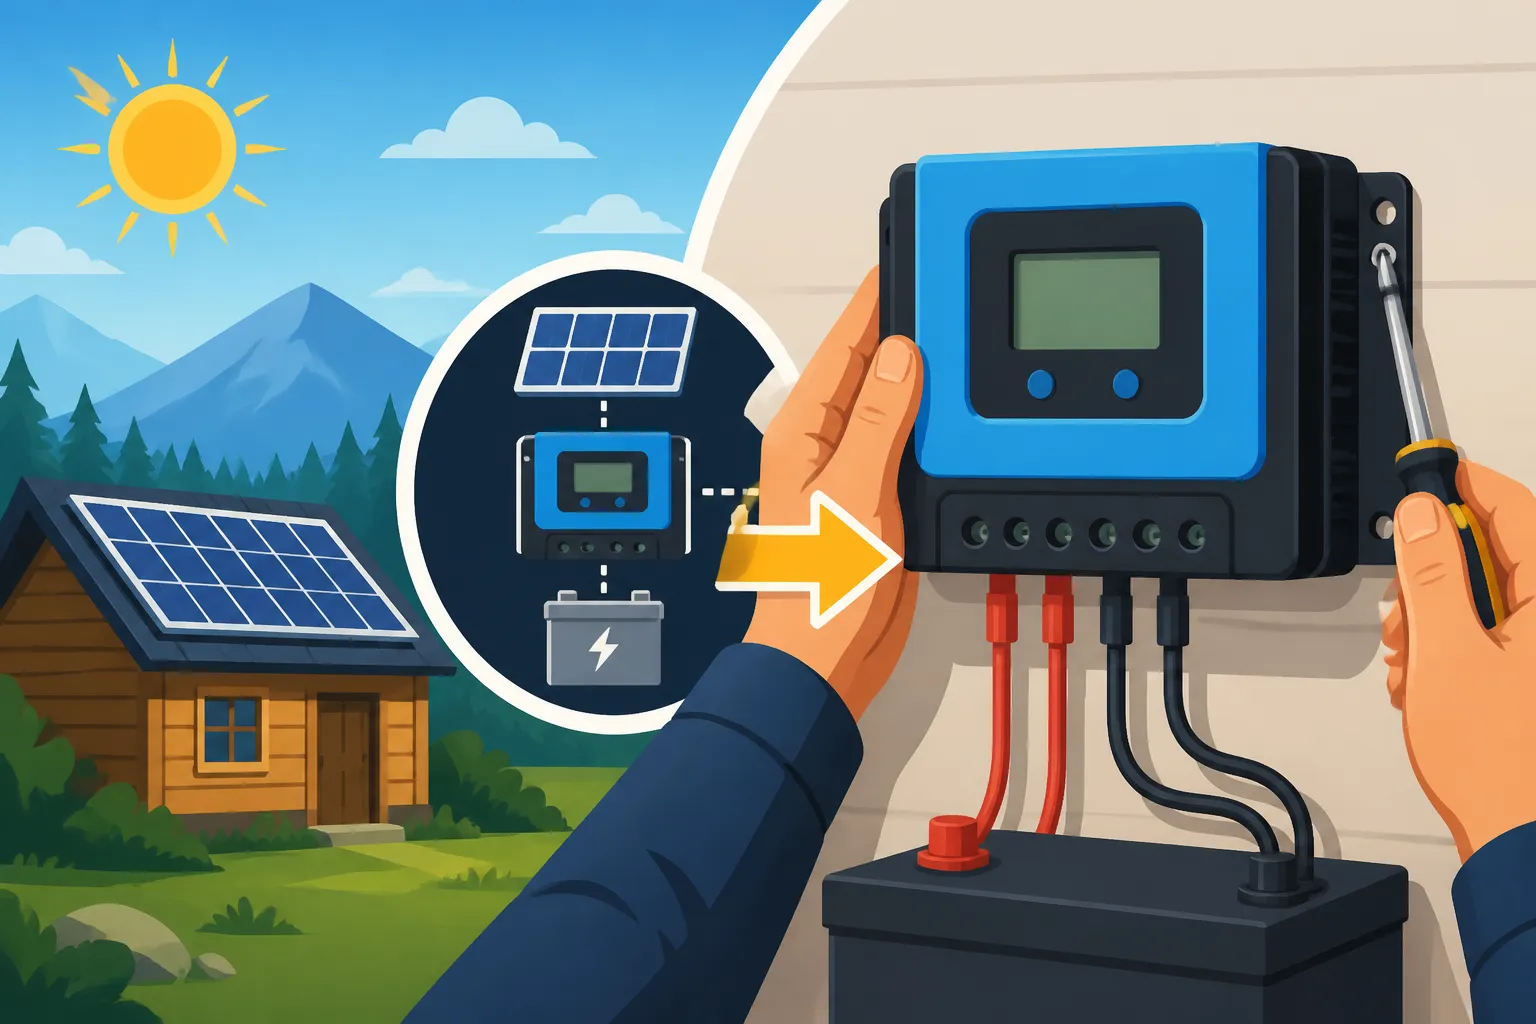
Before you make any electrical connections, get your charge controller securely mounted.
- Choose a Location:
- Proximity to Batteries: Ideally, your charge controller should be mounted as close to your battery bank as safely possible. Shorter cable runs mean less voltage drop and more efficient charging.
- Ventilation: Charge controllers, especially MPPT models, can generate heat. Ensure the location has good airflow. Avoid enclosed spaces without ventilation. Don't mount it in a hot, cramped compartment if you can help it.
- Protection: It needs to be in a dry, protected environment, away from direct sunlight, moisture, dust, and corrosive fumes (especially if you're using flooded lead-acid batteries that vent gases – never mount electronics directly above them).
- Accessibility: Choose a spot where you can easily see the display, access the wiring terminals, and perform any necessary adjustments or maintenance.
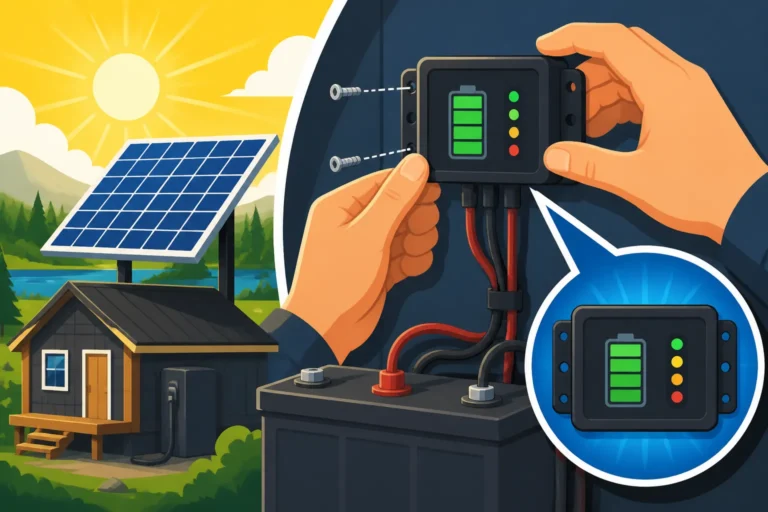
- Mark and Drill: Hold the charge controller against the chosen surface and mark the mounting holes. Use appropriate drill bits for your surface (wood, metal, drywall with anchors).
- Secure the Controller: Fasten the charge controller firmly to the wall or panel using the recommended screws or bolts. Ensure it's level and stable.
Proper mounting not only makes your system look professional but also ensures the longevity and safe operation of your controller. A little extra thought here goes a long way.
Wiring to the Battery Bank
This is the first and most critical electrical connection you'll make. It establishes the system voltage for the controller and provides power for its internal operation.
- Ensure All Power is Off: Absolutely paramount! Double-check that your solar panels are covered or disconnected (if you haven't already installed a PV disconnect) and any other power sources are isolated.
- Install the Battery Disconnect and Fuse:
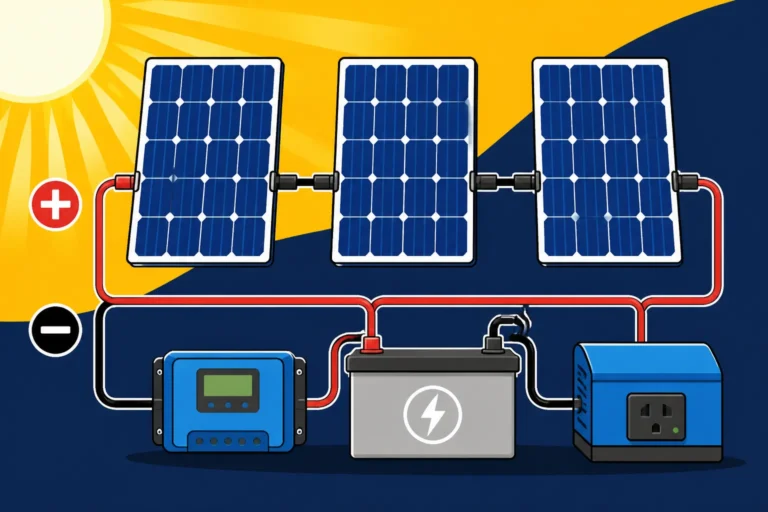
- Before connecting to the charge controller, install your DC-rated fuse and battery disconnect switch in the positive (+) line very close to the battery bank. This is your primary safety measure.
- Wire a positive (+) cable from the battery's positive terminal to one side of the battery disconnect, then from the other side of the disconnect to one side of the fuse holder, and finally from the other side of the fuse holder to the positive (+) input terminal on your charge controller.
- Connect to the Battery Terminals:
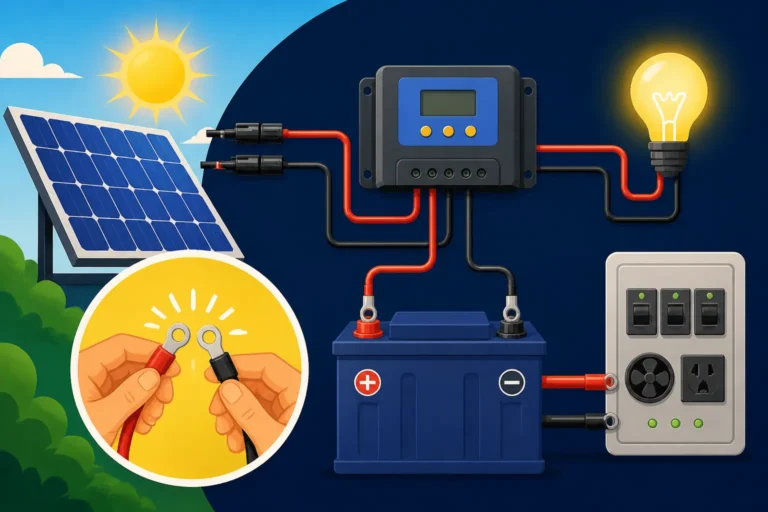
- Connect the positive (+) battery cable (which should be running through your fuse and disconnect) to the positive (+) battery terminal on your charge controller.
- Connect the negative (-) battery cable directly from your battery's negative terminal to the negative (-) battery terminal on your charge controller.
- Double-check Polarity: This cannot be stressed enough. Reverse polarity can instantly destroy your charge controller and potentially your batteries. Use your multimeter to verify voltage and polarity before making the final connection.
- Tighten Connections: Ensure all terminal screws are tight. Loose connections can cause resistance, heat buildup, and power loss.
Once these connections are made, you can usually switch on the battery disconnect. Your charge controller should power up, displaying the battery voltage. This confirms the battery wiring is correct. If it doesn't power on, immediately disconnect and recheck all connections and fuse continuity. For larger setups, knowing How to Wire a Battery Bank correctly is a whole topic in itself, so make sure you're confident in your battery connections.
Connecting the Solar Panels
With the battery connections secure and verified, it's time to bring in the sun's power.
- Ensure Solar Panels are Disconnected/Covered: Before you touch any solar wiring, make absolutely sure your panels are not producing power. Cover them with a blanket or tarp, or use a PV disconnect switch if you've installed one. Working with live solar panels can be extremely dangerous.
- Install the PV Disconnect and Fuse (Optional but Recommended):
- If you're using a PV disconnect switch and fuse, install them in the positive (+) line between your solar array and the charge controller. This allows you to safely cut off solar input for maintenance.
- Wire the positive (+) cable from your solar array to the PV disconnect, then from the disconnect to the PV fuse, and finally to the positive (+) solar input terminal on the charge controller.
- Connect to the Solar Terminals on the Controller:
- Connect the positive (+) solar cable from your panels (running through any fuses/disconnects) to the positive (+) solar input terminal on your charge controller.
- Connect the negative (-) solar cable from your panels to the negative (-) solar input terminal on your charge controller.
- Double-check Polarity Again: Just like with the batteries, reverse polarity on the solar input can damage the controller. Use your multimeter to confirm the voltage and polarity coming from your panels before connecting them to the controller.
- Tighten Connections: Secure all terminal screws firmly.
- Uncover Panels / Close PV Disconnect: Once all connections are tight and double-checked, you can safely uncover your solar panels or close the PV disconnect. The charge controller should now begin regulating the power and sending it to your batteries. You should see indicators or a display showing solar input and charging status.
Properly connecting the panels ensures efficient power harvesting. If you're wondering How to Wire Solar Panels in Series or parallel, there are specific techniques to maximize output and ensure safety.
Wiring to the Load Terminals (if applicable)
Some smaller charge controllers have dedicated "load" terminals. These are typically for connecting low-power DC loads directly, like LED lights or small fans.
- Evaluate Your Needs: For most larger off-grid systems that use an inverter to power AC appliances, you typically won't use the load terminals on the charge controller. Instead, your DC loads (if any) and your inverter will connect directly to your battery bank (with appropriate fusing and disconnects).
- For Smaller Systems: If you have a small system and are only powering a few minor DC devices, you can connect them to the charge controller's load terminals.
- Always Fuse: Install an appropriately sized fuse in the positive (+) line between the load terminal and your DC appliance.
- Connect Positive and Negative: Wire the positive (+) wire from your appliance to the positive (+) load terminal on the controller, and the negative (-) wire to the negative (-) load terminal.
- Load Management: The advantage of using these terminals is that the controller can manage the load, often cutting power to protect the battery from over-discharge, which is a neat feature for simpler setups. However, be mindful of the maximum current rating for these terminals – they're not designed for heavy loads.
If you have an inverter in your system, your inverter will connect directly to your battery bank, ensuring your charge controller focuses solely on battery management. Understanding How to Connect an Inverter to Batteries is a separate but equally important step for most off-grid setups.
Configuration, Testing, and Troubleshooting
You’ve wired everything up – fantastic! But the job isn't quite done. The final steps involve telling your charge controller what kind of batteries it's working with, making sure everything is operating as expected, and knowing what to do if things go sideways.
Initial Configuration and Settings
Your charge controller isn't "plug-and-play" in the sense that it knows everything about your system from the get-go. You usually need to input some critical information, especially about your batteries.
- Select Battery Type: This is paramount! Most modern charge controllers offer settings for different battery chemistries:
- Flooded Lead-Acid: Requires higher "absorption" voltages and a "float" charge.
- Sealed Lead-Acid (AGM/Gel): Have specific voltage requirements, often a bit lower than flooded, and generally don't tolerate overcharging well.
- Lithium Iron Phosphate (LiFePO4): These are increasingly popular and have very different charging profiles. They need precise voltage settings and often benefit from specific charging stages.
Your charge controller manual will provide instructions on how to select your battery type. If your controller doesn't have a specific setting for your battery, especially LiFePO4, make sure it has customizable settings where you can manually input the required voltages.
- Set System Voltage: While many controllers auto-detect 12V, 24V, or 48V, it's good practice to verify this setting, especially on larger systems.
- Adjust Charging Parameters (Advanced):
- Bulk Charge: This is the first stage, where the controller delivers maximum current to rapidly bring the battery voltage up.
- Absorption Charge: Once the battery reaches a certain voltage, the controller holds it at a constant, higher voltage to fully saturate the battery. This stage is crucial for complete charging.
- Float Charge: After absorption, the voltage is reduced to a lower level to maintain the battery at full charge without overcharging, compensating for self-discharge.
- Equalization (for some lead-acid batteries): A controlled overcharge to balance cell voltages and remove sulfation. Never equalize LiFePO4 batteries or sealed lead-acid batteries unless specifically instructed by the battery manufacturer and controller manual.
Your battery manufacturer will provide recommended charging voltages and durations for these stages. Take the time to match these as closely as possible in your charge controller's settings. Incorrect settings can severely shorten battery lifespan, regardless of how good your off-grid solar batteries are.
Consult your charge controller's user manual thoroughly for specific programming steps. Brands like Renogy and Victron Energy provide detailed manuals and even mobile apps for easier configuration of their more advanced MPPT controllers.
Post-Installation Checks and Testing
Once configured, it’s time to verify everything is working as it should.
- Visual Inspection: Give your entire setup a final once-over. Are all wires neatly run and secured? Are connections tight? Is there any visible damage?
- Confirm Voltage Readings: Use your multimeter to check the voltage at the charge controller's battery terminals. It should match your battery bank's voltage.
- Verify Solar Input: Ensure your panels are uncovered. Check the voltage coming into the charge controller from the solar array. This should be higher than your battery voltage, especially with an MPPT controller. Your controller's display should also show incoming solar voltage and current.
- Monitor Charging Activity: Observe the charge controller for a period. Does it cycle through its charging stages (bulk, absorption, float)? Does the current flow decrease as the battery gets fuller? Most controllers have indicator lights or a digital display showing current flow, battery state of charge, and charging status.
- Check for Heat: Carefully feel the charge controller and connections for excessive heat. Some warmth is normal, but anything uncomfortably hot to the touch could indicate a problem like an overloaded controller or a loose connection.
- Load Test (Optional): If you have loads connected, turn them on and monitor how the system reacts. Does the battery voltage drop significantly? Does the charge controller continue to provide power as expected? This is where your load analysis during the sizing stage really pays off.
Regular monitoring of your system, especially in the first few days, will help you catch any minor issues before they become major problems.
Common Installation Mistakes and Solutions
Even seasoned DIYers can make mistakes. Here are some of the most common ones with off-grid charge controller installations:
- Reverse Polarity:
- Mistake: Connecting positive to negative or vice versa, either with the battery or solar inputs.
- Solution: Immediately disconnect all power sources. Use a multimeter to carefully identify positive and negative terminals on your battery and solar array. Rewire correctly. Many modern controllers have reverse polarity protection, but it's not foolproof and can still damage the unit.
- Incorrect Wiring Sequence:
- Mistake: Connecting solar panels to the controller before the batteries.
- Solution: Always connect batteries first (to establish system voltage), then solar panels, then loads. Disconnect everything and re-sequence.
- Loose Connections:
- Mistake: Terminal screws not tightened enough.
- Solution: Visually inspect and gently tug on each wire. Tighten all screws firmly. Loose connections cause resistance, heat, and poor performance.
- Improper Wire Sizing:
- Mistake: Using too thin of a wire gauge for the current.
- Solution: This leads to voltage drop and overheating. Refer back to wire sizing charts and replace undersized wires. Always err on the side of slightly thicker wire if in doubt. For long cable runs, thicker wire is even more critical.
- Missing or Incorrectly Sized Fuses/Breakers:
- Mistake: No overcurrent protection, or fuses that are too large/small for the wire and component ratings.
- Solution: Install appropriate DC-rated fuses or breakers on both the battery and solar panel lines. Size them correctly based on the maximum current and wire gauge. A fuse protects the wire from overheating and causing a fire if a short circuit occurs.
- Incorrect Battery Type Settings:
- Mistake: Selecting "lead-acid" when you have LiFePO4, or vice versa.
- Solution: Access the charge controller's menu and adjust the battery type or custom voltage settings to match your battery manufacturer's recommendations. This is critical for battery health and longevity.
- Poor Ventilation:
- Mistake: Mounting the controller in a confined space without airflow.
- Solution: Relocate the controller to a better-ventilated area or install a small fan to improve airflow around it. Overheating can lead to reduced efficiency and premature failure.
- Inadequate Grounding:
- Mistake: Not properly grounding the system components.
- Solution: Ensure all metal enclosures and frames are properly grounded to a common ground point. Consult Off-Grid Solar Safety and Grounding for detailed information.
By being meticulous and patient during installation, and diligently following these guidelines, you'll greatly reduce the chances of encountering these common pitfalls, ensuring your off-grid charge controller provides reliable service for years to come.
PWM vs. MPPT Charge Controller Comparison
To help you visualize the key differences and make an informed decision for your system, here's a table comparing PWM and MPPT charge controllers:
| Feature | PWM (Pulse Width Modulation) | MPPT (Maximum Power Point Tracking) |
|---|---|---|
| Efficiency | 75-80% | 90-99% (can be 10-30% more efficient than PWM) |
| Cost | Lower upfront cost | Higher upfront cost |
| Complexity | Simpler design, fewer electronic components | More complex, uses advanced algorithms and circuitry |
| Voltage Matching | Best when panel Vmp is very close to battery voltage | Can convert excess panel voltage into current; ideal for voltage mismatch |
| Ideal For | Small systems (e.g., 100-200W), trickle charging, warmer climates | Medium to large systems, year-round use, cold climates, cloudy conditions |
| Max Panel Voltage Input | Generally limited to battery voltage + a few volts (e.g., 12V batt, max 25V input) | Can handle significantly higher panel voltages (e.g., 48V batt, 150V+ input) |
| Heat Generation | Minimal | Can generate more heat, requires good ventilation |
| Power Loss | Wastes excess voltage as heat/unused energy | Minimizes power loss by optimizing voltage and current |
| Scalability | Less ideal for expanding large systems | Excellent for larger, more complex, and expandable systems |
This comparison should give you a clear picture of when to choose one over the other. For many off-grid homeowners and serious RVers, the efficiency gains of an MPPT controller often justify the higher initial expense, especially when considering the long-term performance and battery health.
Disclaimer
Please be aware that working with electricity can be dangerous. This guide provides general information and recommendations for installing an off-grid charge controller. Always consult a qualified electrician or solar professional if you are unsure about any steps or aspects of your installation. Adhere to all local electrical codes and safety regulations. The author and publisher are not responsible for any injury, damage, or loss resulting from the use or misuse of this information.