How to Connect a Charge Controller
Wiring up an off-grid solar system can feel like deciphering a cryptic puzzle, especially when it comes to crucial components like the charge controller. Many folks find themselves scratching their heads, worried about frying expensive equipment or simply not getting any power at all because they're unsure of the correct connection sequence and safety protocols. This comprehensive guide is here to walk you through the process of connecting a charge controller, ensuring your system runs smoothly, efficiently, and most importantly, safely.
Understanding the Heart of Your Off-Grid System: The Charge Controller
When you embark on the journey of setting up an off-grid solar system, it's easy to get caught up in the allure of shiny solar panels and robust battery banks. But there’s a quiet hero in the mix, a component that often gets overlooked until something goes wrong: the charge controller. This device is absolutely vital for the health and longevity of your battery bank and the overall stability of your system. Without it, you're essentially leaving your expensive batteries vulnerable to irreversible damage, which is a headache no one wants.
Why Your Charge Controller is a Solar System's Best Friend
Imagine trying to fill a bucket with a firehose without a way to turn it off. That's essentially what happens if you connect solar panels directly to batteries without a charge controller. Solar panels produce varying amounts of voltage and current depending on sunlight intensity. Batteries, on the other hand, have specific voltage limits they can handle before they begin to degrade, overheat, or even become dangerous. The charge controller acts as the intelligent gatekeeper, regulating the flow of electricity from your solar panels to your batteries.
Its primary role is to prevent overcharging. When batteries are overcharged, their lifespan significantly diminishes, and in extreme cases, they can vent dangerous gases or even explode. A good charge controller monitors the battery's state of charge and reduces or stops the current when the battery is full. Beyond preventing overcharging, many controllers also protect against deep discharge, which can be equally damaging to batteries, especially lead-acid types. By cutting off power to loads when the battery voltage drops too low, it ensures there’s always a minimum reserve, extending the battery's life dramatically. This protective function is why the charge controller isn't just a component; it's the guardian of your entire energy storage system.
MPPT vs PWM: Choosing the Right Brain for Your System
Not all charge controllers are created equal, and understanding the two main types—PWM (Pulse Width Modulation) and MPPT (Maximum Power Point Tracking)—is crucial for making an informed decision for your setup. Each has its own strengths, ideal applications, and price points. The choice you make here can significantly impact your system's efficiency and overall cost. If you're pondering How to Choose an Off-Grid Charge Controller, this distinction is a fundamental starting point.
PWM controllers are the simpler, more affordable option. They work by connecting the solar array to the battery, allowing the voltage to "pull down" to match the battery's voltage. Once the battery reaches a certain charge, the PWM controller rapidly switches the current on and off (pulse width modulation) to maintain a steady charge and prevent overcharging. While effective for smaller systems, especially those where the solar panel's voltage is close to the battery's voltage (e.g., a 12V panel charging a 12V battery), they aren't the most efficient. They essentially waste a portion of the solar panel's potential output, particularly if the panel's voltage is much higher than the battery's.
MPPT controllers, on the other hand, are the more advanced and efficient choice. They constantly track the maximum power point of the solar array, converting any excess voltage into amperage. This means that if you have high-voltage solar panels (say, a 20V-40V panel designed for grid-tied systems) and a lower-voltage battery bank (like a 12V or 24V system), an MPPT controller can efficiently step down that voltage and convert the surplus into usable charging current. This results in significantly higher charging efficiency, often 10-30% more power harvested compared to PWM, especially in cooler weather or when panels are oversized. Brands like Renogy offer excellent MPPT controllers that are widely popular for their reliability and performance. While they come with a higher upfront cost, the increased energy harvest often makes them worthwhile for larger or more critical off-grid setups, directly impacting how many batteries you can effectively charge and maintain. Delving deeper into MPPT vs PWM Charge Controllers will give you a clearer picture of which fits your specific needs.
Gathering Your Tools and Components
Before you start stripping wires and making connections, a bit of preparation goes a long way. Trying to find a missing tool or realizing you don't have the right size fuse in the middle of an installation can be incredibly frustrating and even lead to safety shortcuts. Taking the time to gather everything you need ensures a smooth, safe, and efficient connection process for your charge controller. This methodical approach will prevent headaches and potential damage to your valuable solar equipment.
Essential Tools for a Smooth Installation
Having the right tools at your fingertips is paramount for any electrical project, and off-grid solar installation is no exception. You don't need a professional workshop, but a few key items will make a world of difference. First and foremost, a good quality multimeter is indispensable. This device will allow you to check voltage, current, and continuity, helping you verify connections and troubleshoot issues before they escalate. Always keep it handy to confirm polarities before making final connections.
Next up, you'll need wire strippers and crimpers. Don't underestimate the importance of these; poorly stripped wires can lead to loose connections and potential fire hazards, while weak crimps can cause resistance and power loss. Invest in a tool that can handle the various wire gauges you'll be using, from smaller wires for system monitoring to thicker battery cables. A pair of sturdy wire cutters will also be essential for neat cuts. For connecting battery cables to busbars or the inverter, you'll likely need a battery lug crimper, which can be manual or hydraulic, depending on the cable thickness. Finally, safety gear such as insulated gloves, safety glasses, and appropriate footwear should be non-negotiable. Electricity is unforgiving, and a momentary lapse in safety can have serious consequences. Many of these tools are readily available on platforms like Amazon, making it easy to stock your toolbox.
The Components You'll Need to Connect
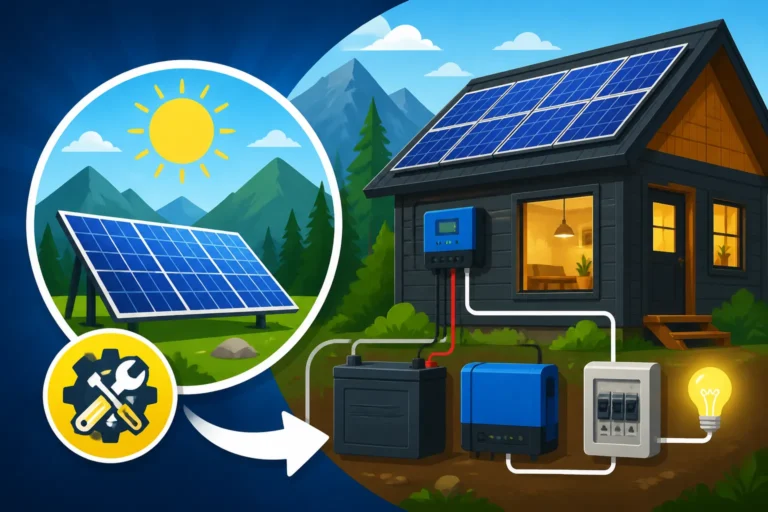
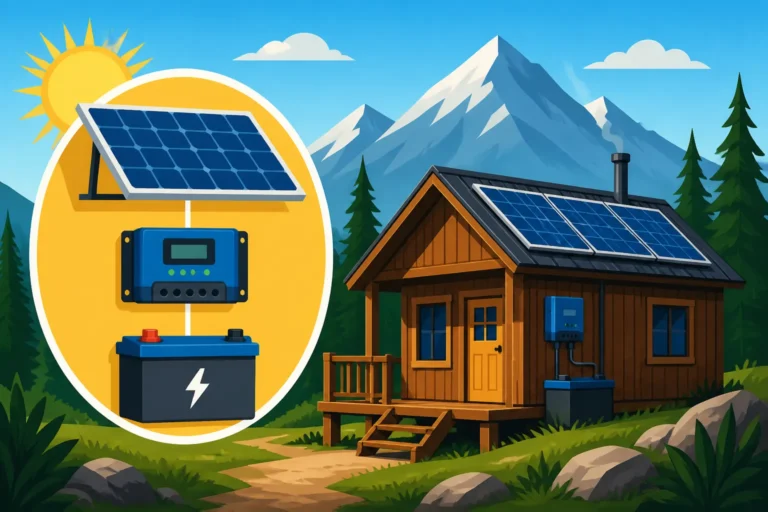
Beyond the tools, understanding and having all the necessary components on hand is crucial. You’ll be dealing with three main categories of components that funnel into and out of your charge controller: the solar panels, the charge controller itself, and the battery bank. Each plays a specific role, and their individual characteristics will influence your wiring choices.
Of course, you'll need your solar panels, also known as the photovoltaic (PV) array. These convert sunlight into DC electricity. Know their voltage and current ratings – this is vital for sizing your charge controller and wiring. Then there's the charge controller, the star of this guide, which you've already carefully selected (either MPPT or PWM). Next up is your battery bank, the heart of your off-grid storage. Whether you're using lead-acid, AGM, Gel, or the increasingly popular LiFePO4 batteries, understanding their nominal voltage (12V, 24V, 48V) and capacity (Amp-hours or Watt-hours) is fundamental. This knowledge helps you ensure the charge controller is compatible and can properly charge and protect them. You can learn more about How to Size an Off-Grid Battery Bank if you haven't already.
Finally, you'll need all the cabling and protective devices. This includes appropriately sized solar PV wire (rated for outdoor use and UV resistance) to connect your panels to the charge controller, and robust battery cables (thicker gauge) to connect the controller to your battery bank. Don't forget lugs for terminating the cables, as well as fuses or circuit breakers for both the solar input and the battery output circuits. These fuses are critical safety devices that protect your components from overcurrents or short circuits. Without them, a fault in one part of your system could take down everything, or worse, cause a fire. The correct sizing of these protective devices is critical, and they must be installed correctly in line with the positive terminals of both the PV input and the battery bank connections.
Step-by-Step Guide to Connecting Your Charge Controller
Now that you have all your tools and components ready, it’s time to get down to business. Connecting a charge controller isn't complicated, but the order of operations is absolutely critical. Skipping steps or doing them out of sequence can lead to damaged equipment or even personal injury. We're talking about direct current (DC) electricity here, which can be quite powerful, so pay close attention to polarity and secure connections.
The Golden Rule: Batteries First, Then Panels
This is perhaps the single most important rule in off-grid solar wiring, and it's where many beginners make a costly mistake. Always, always connect the battery bank to the charge controller first, and then connect the solar panels. Why? Because the charge controller needs to "sense" the battery voltage to properly regulate the incoming power from the solar panels. If you connect the panels first, the controller can be hit with an unregulated surge of voltage that it isn't prepared for, potentially damaging its internal circuitry beyond repair.
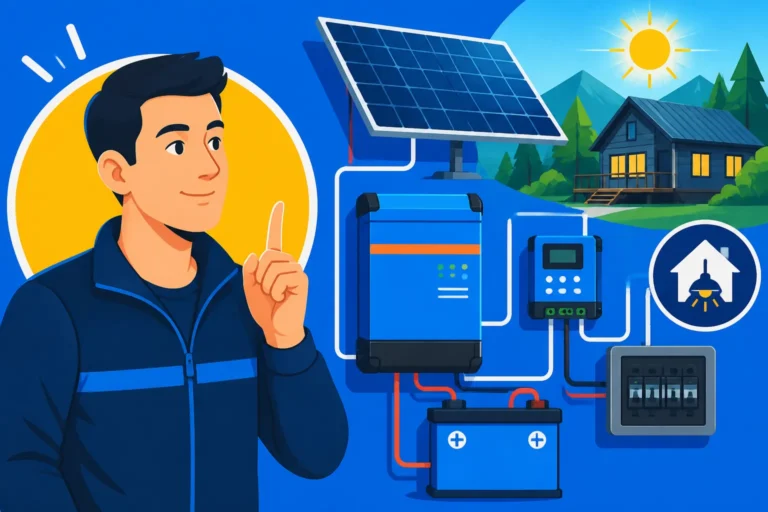
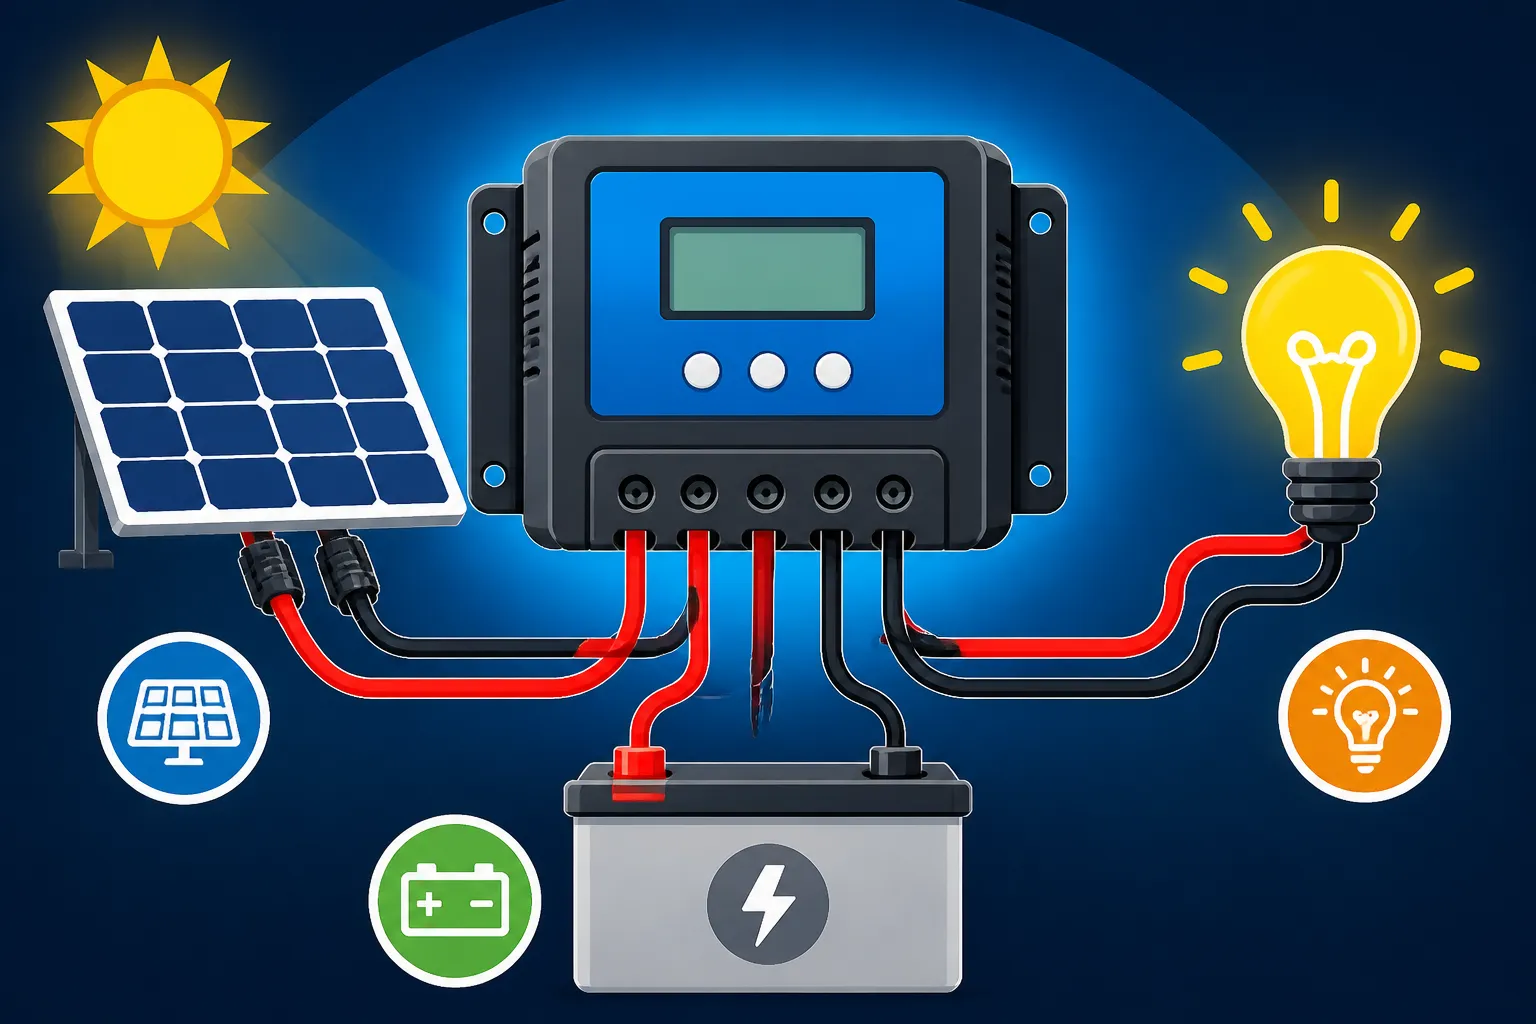
So, the very first step is to connect your battery bank to the battery terminals on the charge controller. Locate the clearly marked "Battery" or "Batt" terminals on your charge controller. Using appropriately sized battery cables (which you've already terminated with lugs), connect the positive (+) terminal of your battery bank to the positive (+) terminal on the charge controller. Immediately follow this by connecting the negative (-) terminal of your battery bank to the negative (-) terminal on the charge controller. Before making these connections, ensure any battery disconnect switches are in the "off" position. Crucially, install a properly sized DC fuse or circuit breaker on the positive battery cable, as close to the battery terminal as possible. This is your primary protection for the charge controller and the cables leading to it. Once these connections are secure, you can flip your battery disconnect switch to "on" if you have one, and you should see the charge controller light up, indicating it has power and has successfully recognized your battery voltage. This is a crucial step in How to Wire a Battery Bank.
Wiring Your Solar Panels to the Charge Controller
With your battery safely connected and the charge controller powered up, the next step is to connect your solar panels. This is where the energy harvesting truly begins! Again, polarity is critical, and understanding your panel configuration (series, parallel, or series-parallel) will dictate how you wire them before they reach the controller. If you're unsure about this, reviewing guides like How to Wire Solar Panels in Series or How to Wire Solar Panels in Parallel can be incredibly helpful.
Locate the "PV" or "Solar" input terminals on your charge controller. These will also be marked with positive (+) and negative (-) signs. Using your solar PV wire (which is specifically designed to withstand outdoor conditions and UV exposure), run your wires from your solar array to these terminals. Connect the positive output from your solar array to the positive (+) PV input terminal on the charge controller. Then, connect the negative output from your solar array to the negative (-) PV input terminal on the charge controller. Just like with the battery connection, it's highly recommended to install a DC-rated fuse or circuit breaker on the positive solar input line, typically between the solar array and the charge controller. This protects the controller from any overcurrents originating from the panels, which can happen in fault conditions. Many professionals also recommend a PV disconnect switch for added safety, allowing you to completely isolate the panels from the controller for maintenance or emergencies. Once all connections are secure, you can engage any PV disconnect switches, and your charge controller should begin to display charging activity, indicating that it's now regulating power from your panels to your battery bank.
Connecting Your Loads
Some charge controllers, particularly those designed for smaller systems, come equipped with a "Load" output. This output provides regulated DC power directly from the charge controller to your DC appliances (like LED lights, 12V fans, or phone chargers) without needing to draw power directly from the battery terminals. While not all systems utilize this feature, understanding it can simplify your wiring for certain applications.
If your charge controller has a load output, you'll find terminals clearly marked "Load" or with a lightbulb icon, typically with positive (+) and negative (-) indicators. You would connect your DC loads directly to these terminals, ensuring correct polarity. The significant advantage of using the load output is that the charge controller can protect your batteries from deep discharge by automatically disconnecting the loads when the battery voltage drops below a safe threshold. This extends battery life by preventing it from being fully drained. However, it's crucial to remember that the load output has a maximum current rating, so you can only connect appliances that collectively draw less than this maximum. Overloading it can damage the charge controller. Just like the other connections, consider installing a small inline fuse on the positive wire running from the load output to your DC distribution panel or individual appliances. For larger systems, or those with significant AC loads, you'll typically connect an inverter directly to your battery bank (with proper fusing), and your loads will draw power from there. This distinction is key for understanding how to build out your system beyond the charge controller, and a guide like How to Connect an Inverter to Batteries can provide further details.
Critical Safety Measures and Best Practices
Safety isn't just a suggestion when working with electricity; it's an absolute necessity. An off-grid solar system, while empowering, involves managing significant electrical currents and voltages that can be dangerous if not handled properly. Taking shortcuts during installation can lead to equipment damage, electrical fires, or serious injury. Prioritizing safety through proper fusing, grounding, and meticulous wire management will not only protect your investment but, more importantly, ensure your well-being.
Protecting Your System with Fuses and Breakers
Fuses and circuit breakers are the silent guardians of your solar power system. Their job is simple: to break the circuit and stop the flow of electricity if an overcurrent condition occurs, thereby preventing damage to components and mitigating fire hazards. Without them, a short circuit or an overloaded component could cause wires to overheat, melt insulation, or even ignite surrounding materials. It’s not just about protecting your expensive equipment; it’s about protecting your property and yourself.
You should always install appropriately sized DC-rated fuses or circuit breakers on the positive line of every major circuit. This means one between your solar array and the charge controller, and another between your charge controller and your battery bank. For example, if your solar panels can produce a maximum of 30 amps, you'd choose a fuse rated slightly above that, perhaps a 40-amp fuse. Similarly, for your battery bank, if your charge controller has a maximum output of 60 amps to the battery, you'd select a fuse like a 80-amp fuse, again placed as close to the battery terminal as possible. Remember, fuses are designed to protect the wire and the component from overcurrent, so their rating should correspond to the lowest current rating of the wire or component in that circuit. Using fuse blocks or breaker panels simplifies organization and replacement. For example, a quality fuse holder available on Amazon will ensure your fuses are properly housed and protected.
Grounding and Wire Management for Longevity
Proper grounding is another critical safety measure that protects against electrical shock and helps dissipate stray currents. In an off-grid system, the equipment chassis (e.g., the metal casing of your charge controller, inverter, and solar panel frames) should be bonded together and connected to a common ground point. This ground point, often a dedicated grounding busbar, should then be connected to a robust earth ground, such as a ground rod driven deep into the soil. This creates a safe path for fault currents to travel, tripping a breaker or blowing a fuse rather than traveling through you or damaging sensitive electronics. This is a fundamental aspect of How to Ground an Off-Grid Solar System and shouldn't be overlooked.
Beyond safety, meticulous wire management is a hallmark of a professional and reliable installation. Wires should be run neatly, secured with cable ties or clamps, and protected from abrasion, sharp edges, and excessive heat. Use conduit where wires pass through walls or are exposed to potential physical damage. For outdoor runs, ensure your solar PV wire is UV-resistant to prevent degradation over time. Proper wire management also makes troubleshooting and future maintenance much easier. Imagine trying to diagnose an issue in a spaghetti-like tangle of wires versus a clearly labeled, organized system. By investing a little extra time in neatness and protection during installation, you significantly enhance the longevity, reliability, and safety of your entire off-grid solar setup.
Troubleshooting Common Connection Issues
Even with the best intentions and careful installation, sometimes things don't go exactly as planned. It's a common experience for anyone setting up an off-grid solar system to encounter a hiccup or two. The good news is that many common issues related to charge controller connections can be diagnosed and resolved with a systematic approach. Don't panic if your system isn't powering up or charging as expected; often, the solution is simpler than you might think.
When Your System Doesn't Power Up
One of the most disheartening things is connecting everything, flipping the switch, and… nothing. No lights on the charge controller, no charging indication. When your system stubbornly refuses to show any signs of life, start with the most basic checks. First, revisit the "batteries first" rule. Is your battery bank actually connected to the charge controller, and are the polarities correct? Double-check that the positive terminal on the battery goes to the positive terminal on the controller, and the same for the negative. Reverse polarity is a common mistake and can damage the controller if not protected.
Next, check your fuses and circuit breakers. Did you install them on the positive battery cable leading to the controller? Is that fuse intact, or has it blown? A blown fuse indicates an overcurrent event, which could mean a short circuit or a surge. Replace any blown fuses with one of the exact same rating. Don't use a higher-rated fuse, as this eliminates the protection. Use your multimeter to check the voltage directly at the battery terminals to ensure your batteries are charged enough to power the controller. Most controllers require a minimum battery voltage (e.g., 9-10V for a 12V system) to even turn on. If the battery voltage is too low, the controller won't activate. If all these seem fine, physically inspect all cable connections for looseness or corrosion. A loose lug can prevent current flow as effectively as a broken wire.
Understanding Controller Error Codes and Displays
Modern charge controllers are often equipped with digital displays and indicator lights that can provide valuable feedback about the system's status or, more importantly, signal specific problems. When your controller displays an error code, it's not trying to confuse you; it's trying to help you diagnose. The key is to know what these codes mean for your specific model and brand.
The first and most crucial step when an error code appears is to consult your charge controller's user manual. Every manufacturer, from Renogy to Victron, has specific codes that relate to different issues. Common error codes might indicate:
- Over-voltage: This usually means the solar panel input voltage is too high for the controller. This could happen if you've incorrectly wired your panels in series, resulting in a combined voltage that exceeds the controller's maximum input rating.
- Low Battery Voltage: The controller detects that the battery bank is critically discharged and might shut off to protect the batteries.
- Over-current: An excessive current flow has been detected, often due to an overloaded circuit or a short.
- Reverse Polarity: You've connected the positive and negative terminals incorrectly, either for the battery or the solar panels. Many modern controllers have built-in protection against reverse polarity, but it's still best to avoid.
- Over-temperature: The controller is overheating, possibly due to poor ventilation or an overloaded condition.
Understanding these codes, as detailed in your manual, will guide you directly to the source of the problem. For instance, if you get a "PV Over-voltage" error, you'll know to check your panel wiring and the voltage output from your array. If it's a "Low Battery" warning, you'll focus on your battery's state of charge or potential issues with the charging process. Always resolve the underlying issue before simply clearing the error, as ignoring it could lead to more serious damage. A systematic review, coupled with your multimeter and the manual, will empower you to troubleshoot effectively. For a deeper dive into the overall wiring, you might find a resource like Off-Grid Solar Wiring Diagram Explained useful.
| Feature / Type | PWM Charge Controller | MPPT Charge Controller |
|---|---|---|
| Efficiency | 70-80% (lower in high voltage differential) | 90-99% (optimal in all conditions) |
| Cost | Lower | Higher |
| Ideal Application | Small systems, trickle charging, panels match battery V | Medium to large systems, diverse panel/battery V, high efficiency needs |
| Panel Voltage | Panels must match battery voltage (e.g., 12V panel for 12V battery) | Can use higher voltage panels to charge lower voltage batteries |
| Heat Generation | Lower | Higher (due to conversion process, but often passively cooled) |
| Battery Life | Good (prevents overcharging) | Excellent (optimized charging profiles) |
| Size/Complexity | Smaller, simpler circuitry | Larger, more complex circuitry |
| Typical Brands | Renogy, Rich Solar, HQST | Victron, Outback, Renogy, EG4 |
Disclaimer
The information provided in this guide is for general informational and educational purposes only. While we strive to offer accurate and up-to-date advice, off-grid solar system installation involves electrical work that can be dangerous if not performed correctly. Always exercise extreme caution when working with electricity. If you are unsure about any part of the installation process, or if local regulations require it, please consult with a qualified and licensed electrician or solar professional. Adherence to all applicable electrical codes and safety standards in your specific location is your responsibility. We are not liable for any injuries, damages, or losses resulting from the use or misuse of this information.