How to Wire Solar Panels in Series
Stepping into the world of off-grid solar can feel like learning a whole new language, especially when you start diving into the nitty-gritty of wiring. One of the most common stumbling blocks people face is understanding how to properly wire solar panels in series. This guide is here to demystify series wiring, walking you through the why and how, so you can build a robust and efficient solar power system for your cabin, RV, or remote homestead without feeling overwhelmed.
Understanding the Basics of Series Wiring
When you first look at a solar panel, it generates a certain voltage and current. But what if that voltage isn't enough for your system? Or what if you want to optimize for thinner, longer cable runs? That's where series wiring comes into play, and it's a fundamental concept for anyone serious about off-grid living.
What is Series Wiring and Why Use It?
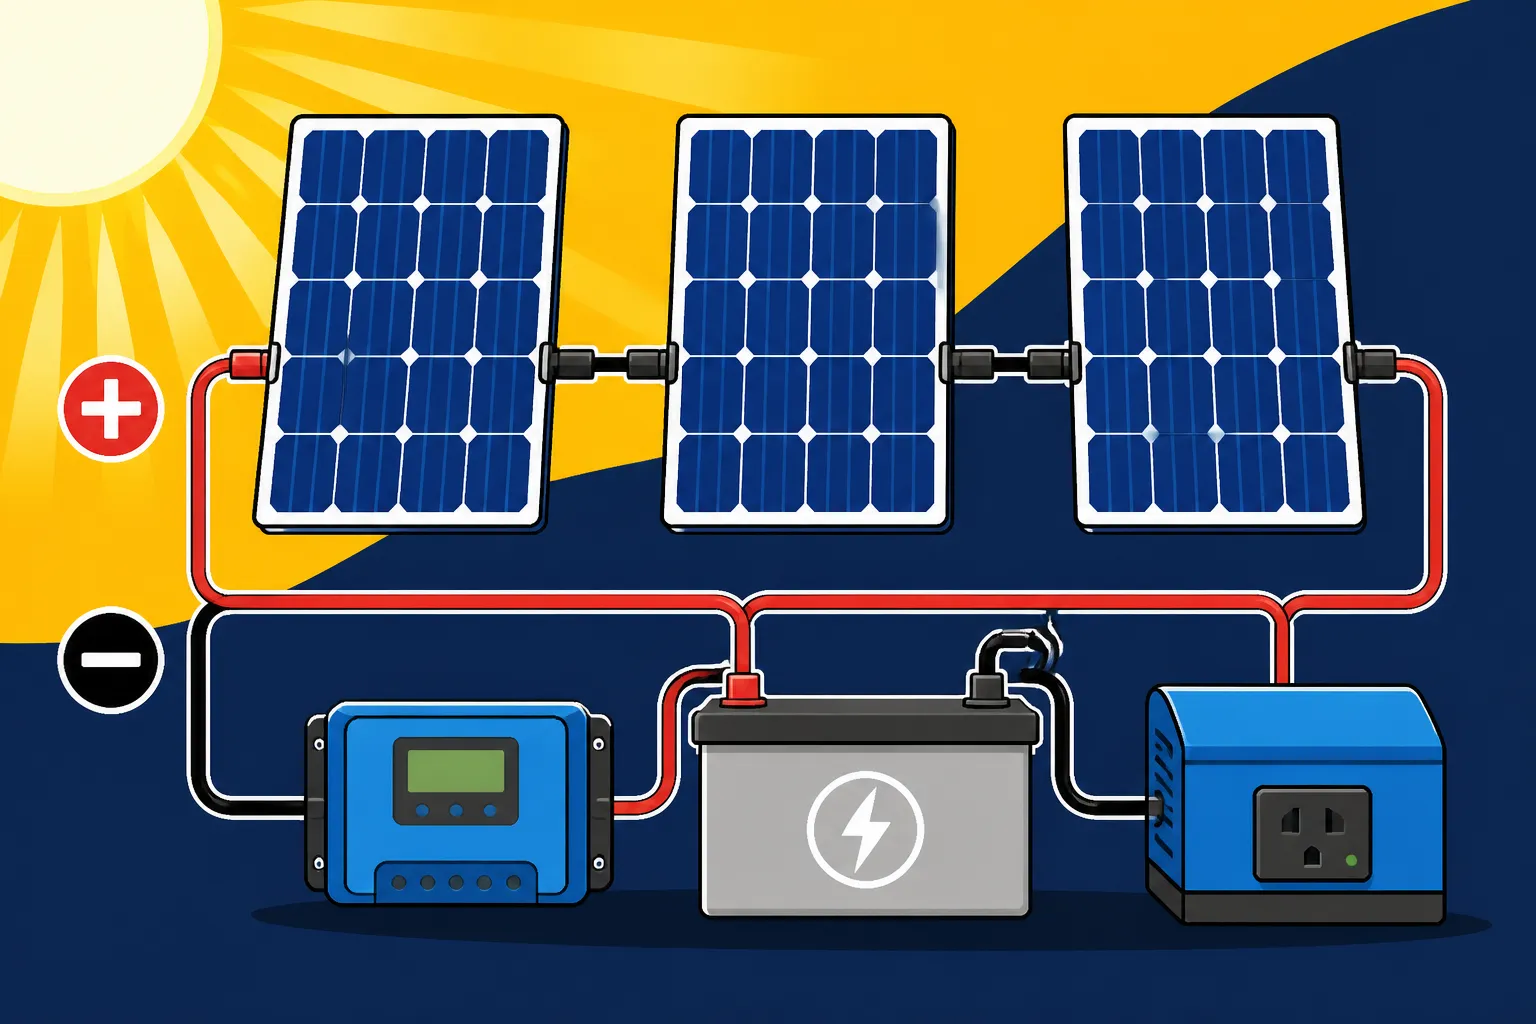
Simply put, wiring solar panels in series means connecting the positive terminal of one panel to the negative terminal of the next, much like how batteries are arranged in a flashlight. When you do this, the voltages of the individual panels add up, while the current (amperage) remains the same. Imagine you have two 12-volt solar panels, each producing 8 amps. If you wire them in series, your output will be 24 volts at 8 amps. If you had three of these panels, you'd get 36 volts at 8 amps, and so on.
The primary reason we lean towards series wiring in many off-grid solar setups is to increase the overall voltage of the solar array. Why is higher voltage desirable? Well, for starters, higher voltage allows you to transmit the same amount of power (watts) with less current. Lower current means you can use thinner, and therefore less expensive, wiring to cover longer distances from your panels to your charge controller and battery bank. This is a huge benefit, especially if your ideal panel placement is a good distance from where your equipment is housed. Furthermore, many modern MPPT (Maximum Power Point Tracking) charge controllers operate far more efficiently with higher input voltages, making series wiring a crucial part of maximizing your system's energy harvest, particularly during colder weather or lower light conditions. It's all about getting the most out of every ray of sunshine.
Key Components for a Series System
Before you start connecting anything, it's vital to know the pieces of the puzzle that make up a series-wired solar system. Each component plays a specific role in ensuring the efficient and safe operation of your power source.
First and foremost, you'll need the solar panels themselves. For series wiring, it's generally best practice to use identical panels – meaning they have the same wattage, voltage, and current ratings. While you can sometimes mix and match, it's significantly more complex and can lead to inefficiencies, as your entire string will be limited by the weakest link. Next, you'll need MC4 connectors, which are the industry standard for solar panel connections. These waterproof connectors make for secure, easy-to-use connections between panels and with your wiring. Most solar panels come with MC4 leads already attached, but you might need additional connectors or extension cables. You can often find reliable MC4 connectors and tools on platforms like Amazon.
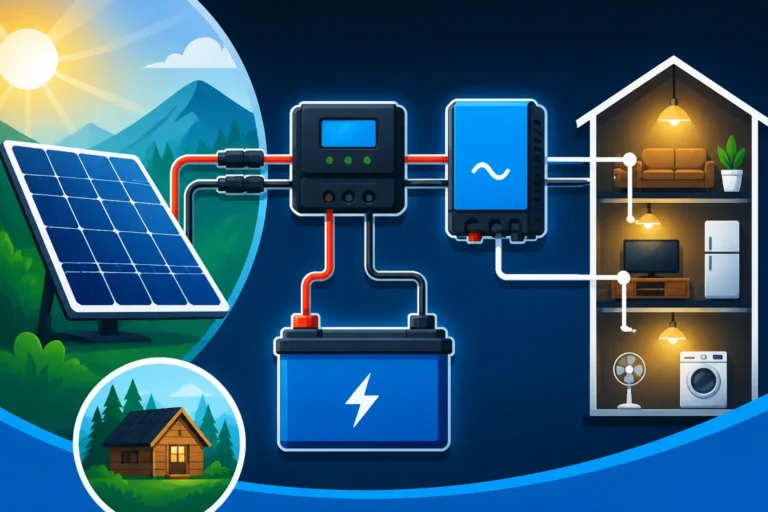
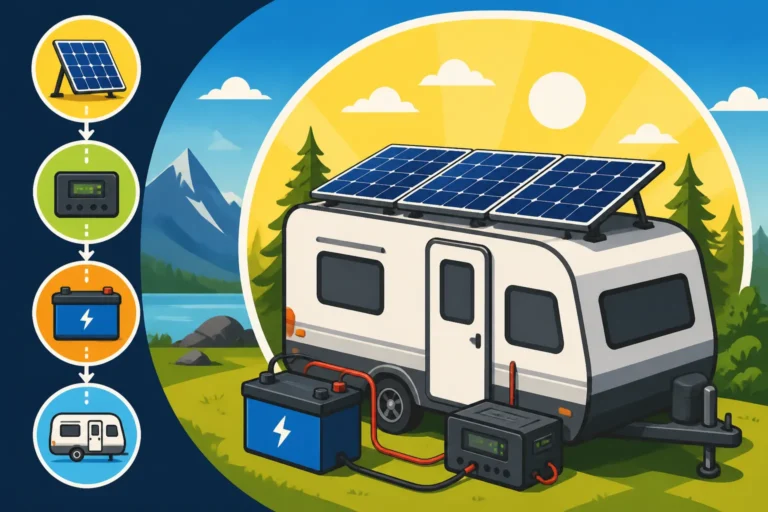
Crucially, a charge controller is required to regulate the power coming from your solar panels to prevent overcharging your batteries. For series systems, an MPPT charge controller is almost always the best choice. As discussed, these controllers excel at taking a higher voltage input from your series-wired panels and efficiently converting it into the appropriate voltage to charge your battery bank, whether that's 12V, 24V, or 48V. Finally, the inverter converts the DC power stored in your batteries into usable AC power for your household appliances. While not directly part of the series wiring of the panels themselves, the inverter's voltage input needs to match your battery bank's voltage, which in turn influences how many panels you wire in series. Proper wire sizing and fusing are also non-negotiable for safety and performance, making sure your system can handle the current without overheating.
The Advantages and Disadvantages of Series Wiring
Like any technical decision in an off-grid setup, opting for series wiring comes with its own set of pros and cons. Understanding these will help you decide if it's the right choice for your specific needs and environmental conditions.
Benefits for System Performance
One of the most compelling reasons to use series wiring is the improved efficiency, especially when paired with an MPPT charge controller. These controllers can take a high voltage input from your panels – often much higher than your battery bank voltage – and convert it down to the appropriate charging voltage with minimal power loss. This is particularly advantageous in cooler climates, where solar panels tend to produce higher voltages. An MPPT controller can capture this excess voltage and convert it into usable current, essentially extracting more power from your array than a simpler PWM controller could. This leads to a more robust and reliable system, giving you more watt-hours at the end of the day.
Another significant benefit is the ability to use thinner, less expensive wiring. Ohm's Law tells us that for a given amount of power, as voltage increases, current decreases. Since power loss in wires is proportional to the square of the current (I²R), reducing the current significantly reduces power loss over long distances. For example, if you're installing your solar array 50 feet away from your cabin, running a high-voltage series string means you can likely use a smaller gauge wire, saving you money on copper and reducing voltage drop. This also simplifies cable management, as thinner cables are easier to run through conduit or around structures. Manufacturers like Renogy offer a wide range of wiring and connectors that are perfect for these types of installations, ensuring you have quality components to minimize any voltage loss.
Potential Drawbacks and Considerations
While series wiring offers numerous advantages, it's not without its challenges. The most significant drawback is its vulnerability to shading. When panels are wired in series, the entire string's current is limited by the panel that is producing the least current. This means if even a small portion of one panel is shaded by a tree branch, a chimney, or even bird droppings, it can drastically reduce the output of all the panels in that series string. Imagine a hose: if you kink it at any point, the water flow for the entire hose is restricted. Solar panels in series behave similarly. This makes careful site selection and regular maintenance, like cleaning your panels, absolutely crucial for series-wired systems.
Another consideration is the "single point of failure" aspect. If one panel in a series string completely fails – perhaps due to a faulty bypass diode or a physical defect – it can break the entire circuit, causing the entire string to stop producing power. While individual panels are generally very reliable, this is a risk to be aware of. High voltage, while beneficial for wiring, also comes with increased safety concerns. Working with higher DC voltages (often 100V or more in series strings) requires greater caution and adherence to safety protocols to prevent electrical shock. It's critical to understand Off-Grid Solar Safety and Grounding before you begin any wiring work. You'll need properly rated fuses, breakers, and disconnects to protect yourself and your equipment.
Step-by-Step Guide to Wiring Solar Panels in Series
Ready to roll up your sleeves? Wiring solar panels in series is a straightforward process once you understand the logic. Let's break it down into manageable steps.
Planning Your Series Configuration
Before you connect a single wire, meticulous planning is paramount. This isn't a step to rush through; getting it right here saves a lot of headaches later. Your first task is to determine the optimal system voltage for your needs. Are you building a small 12V system for an RV, a 24V setup for a small cabin, or a 48V system for a full-sized off-grid home? This decision will dictate how many panels you need to string together in series. Remember, your charge controller and inverter typically have specific voltage input requirements, and your battery bank will also operate at a certain voltage. For instance, if you have a 48V battery bank and an MPPT charge controller, you'll want your panel array's voltage to be significantly higher, perhaps 100V to 150V, to allow the MPPT controller to operate at peak efficiency.
Next, you need to examine the specifications of your individual solar panels. Look for the "Voc" (Open Circuit Voltage) and "Imp" (Maximum Power Current) on the label. When wiring in series, the Voc of each panel adds up. So, if you have four panels with a Voc of 25V each, your total string voltage will be 100V. It's crucial that this total voltage falls within the acceptable input range of your MPPT charge controller. Going above the controller's maximum voltage can damage it, while going too low might prevent it from operating efficiently or even from charging your batteries at all. You'll also need to consider your climate; panels produce slightly higher voltage in colder temperatures, so factor this into your maximum voltage calculation to prevent overvoltage in winter. Understanding How to Size an Off-Grid Solar System and especially How to Size a Charge Controller will be incredibly helpful in this planning phase.
Connecting the Panels
With your plan in hand, it's time to make the physical connections. Always start by ensuring all panels are covered or disconnected from any load to prevent accidental shocking. Solar panels generate power the moment they're exposed to light, so treating them as "live" circuits at all times is a good practice.
Most solar panels come with MC4 connectors pre-installed: a positive connector on one cable and a negative connector on another. To wire panels in series, you'll connect the positive MC4 cable from one panel to the negative MC4 cable of the next panel in your string. Continue this pattern down the line. For example, if you have four panels (P1, P2, P3, P4), you would connect P1 Positive to P2 Negative, P2 Positive to P3 Negative, and P3 Positive to P4 Negative. At the end of this string, you'll be left with one free negative connector from P1 and one free positive connector from P4. These two connectors represent the total output of your series string. They are what you will connect to your charge controller. Ensure all MC4 connections are fully seated and clicked into place; a loose connection can lead to resistance, power loss, and even fire hazards. Many solar kit providers, such as Renogy, include all the necessary MC4 extension cables and connectors to get your system wired up efficiently and safely.
Integrating with the Charge Controller and Inverter
Once your solar panels are wired in series, the next critical step is to connect them to your charge controller and then the charge controller to your battery bank and inverter.
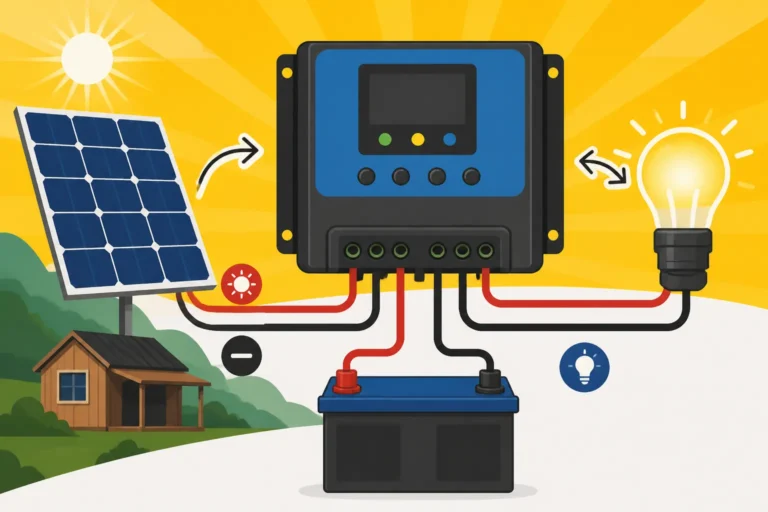
First, identify the solar input terminals on your MPPT charge controller. These are usually clearly marked with a sun symbol or "PV Input." Using appropriately sized solar cable – sized to handle the voltage and current of your series string with minimal voltage drop – connect the positive lead from your series string to the positive PV input terminal on the charge controller, and the negative lead from your string to the negative PV input terminal. Double-check your polarity here! Reversing the polarity can instantly damage your charge controller. It's always best practice to connect the negative wire first, then the positive wire, after verifying all connections.
After the panels are connected to the charge controller, you'll then connect the charge controller to your battery bank. Again, observe polarity strictly: positive output from the charge controller to the positive terminal of your battery bank, and negative to negative. Make sure you use a dedicated battery cable of the correct gauge for this connection, as it will carry the full charging current. Many users find it helpful to install a battery monitor at this stage to keep an eye on their energy usage and charge status. Finally, your inverter will connect directly to your battery bank, not to the charge controller or panels. This is where the stored energy from your batteries gets converted to AC power for your appliances. Just like with the other connections, ensure the inverter's DC input matches your battery bank's voltage and that you adhere to the correct polarity. You can learn more about these connections in depth by reading our guides on How to Connect a Charge Controller and How to Connect an Inverter to Batteries.
Safety Measures and Best Practices for Series Wiring
Safety should always be your number one priority when working with electricity, especially with potentially high-voltage solar arrays. Taking the right precautions can prevent serious injury or damage to your equipment.
Essential Safety Precautions
Working with solar panels that are producing electricity can be hazardous if proper safety measures aren't followed. Always assume that your solar panels are live and producing voltage whenever they are exposed to light, even on cloudy days. Before making any connections or modifications to your wiring, it is absolutely crucial to cover your panels with an opaque material (like a tarp or blanket) or disconnect them from any circuits. This stops the flow of electricity and makes the system safe to work on.
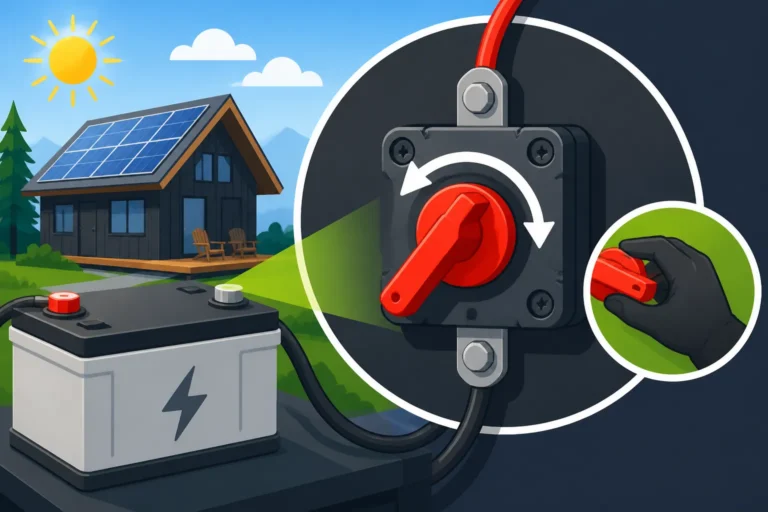
Wear appropriate Personal Protective Equipment (PPE). This includes insulated gloves, safety glasses, and sturdy, non-conductive footwear. Keep a multimeter handy to test voltages at various points in your system before and after making connections. This allows you to verify polarity and ensure expected voltage levels. Never work alone, especially when dealing with higher voltages; always have someone nearby who can assist in case of an emergency. Install easily accessible DC disconnects between your solar array and your charge controller, and between your charge controller and your battery bank. These are critical for safely isolating different parts of your system for maintenance or in an emergency. Remember, an ounce of prevention is worth a pound of cure, and being cautious will ensure your installation goes smoothly and safely.
Protecting Your System
Beyond personal safety, protecting your valuable off-grid solar equipment is equally important. Fuses and circuit breakers are your system's frontline defense against overcurrents and short circuits, which can cause severe damage or even fires.
For series-wired solar panels, you will need to install a properly rated fuse or circuit breaker on the positive line coming from your solar array before it reaches your charge controller. This fuse should be rated slightly higher than the maximum current your entire series string can produce, but lower than the maximum input current rating of your charge controller. This protects the wiring and the charge controller from excessive current. Additionally, you should install another set of fuses or breakers between your charge controller and your battery bank, and yet another between your battery bank and your inverter. These need to be sized according to the expected loads and the specifications of your components. For larger systems, a dedicated combiner box with individual string fuses is often used for multiple series strings, providing an organized and safe way to combine power from several arrays.
Proper grounding is also non-negotiable for system protection. All metallic components of your solar array, including panel frames and mounting racks, should be properly grounded according to electrical codes. This prevents dangerous voltage buildups in case of a fault or lightning strike. Ensure you use the correct gauge grounding wire and connect it to a reliable earth ground. For more detailed instructions on grounding and wiring best practices, our comprehensive guide on Off-Grid Solar Safety and Grounding offers invaluable insights. Taking these steps ensures that your off-grid system is not only functional but also built to last safely through years of reliable service.
Common Mistakes and Troubleshooting Series Wiring
Even seasoned off-gridders can make mistakes, and with series wiring, a small error can lead to a big headache. Knowing what to look for and how to diagnose issues will save you time and frustration.
Identifying and Avoiding Wiring Errors
One of the most common and damaging errors in solar wiring is reverse polarity. This happens when you accidentally connect a positive wire to a negative terminal, or vice-versa, at the charge controller or battery bank. While some newer charge controllers have reverse polarity protection, many older or cheaper models do not, and a reverse connection can instantly fry the internal electronics. Always double-check, and then triple-check, your positive and negative connections before making the final contact. A digital multimeter is your best friend here, allowing you to confirm voltage and polarity at each stage of your wiring.
Another frequent issue is loose connections. MC4 connectors are designed to be robust, but if they aren't fully seated and clicked into place, or if wires within terminals are not tightened securely, they can create high resistance points. These points can heat up, leading to power loss, reduced efficiency, and potentially a fire hazard. After making each connection, give the wires a gentle tug to ensure they are firm. When you're dealing with multiple panels, ensuring all your MC4 connectors are crimped properly is key; if you’re making your own cables, invest in a good quality MC4 crimping tool. Finally, mismatched panels in a series string can lead to inefficiencies. While technically possible, putting panels of different wattages or current ratings in the same series string will cause the entire string's performance to be limited by the panel with the lowest current output. It's generally best to stick with identical panels for any series string to ensure optimal performance. Our article on Common Off-Grid Wiring Mistakes dives deeper into these and other pitfalls to avoid.
Basic Troubleshooting for Series Systems
So, you've wired everything up, but your system isn't producing power, or the output is much lower than expected. Don't panic! Most issues can be traced back to a few common culprits.
Your first tool in troubleshooting should be a multimeter. Start by testing the voltage directly at the output leads of your series string, before it connects to the charge controller. Ensure the panels are in full sunlight (uncovered) and measure the DC voltage. Does it match the sum of the Voc ratings of your individual panels? If it's zero or significantly lower, you likely have an open circuit somewhere in your series string. This could be a loose MC4 connector, a faulty bypass diode within a panel, or a broken wire. Work your way back, testing the voltage of each individual panel in the string. If a single panel shows a dramatically lower voltage than its counterparts, or no voltage at all, that's your problem panel.
Next, check the current. While more challenging without specialized equipment, a DC clamp meter can measure the current flowing from your array. If the voltage is correct but the current is low, consider shading issues. Even partial shading on one panel can significantly reduce the current for the entire series string. Visually inspect all panels for obstructions. Also, check for continuity in your wiring using the multimeter's continuity setting. This can help identify breaks in wires that aren't obvious to the eye. Finally, ensure your charge controller settings are correct for your battery type and voltage. Sometimes, a system won't charge simply because the controller isn't configured properly. Taking the time to understand How to Test an Off-Grid Solar System will empower you to diagnose issues effectively and keep your power flowing.
Series Wiring vs. Parallel Wiring: A Quick Comparison
When designing your off-grid solar system, you'll inevitably encounter two primary wiring strategies: series and parallel. While this guide focuses on series, it's crucial to understand the differences and when each method is most appropriate. Often, larger systems employ a combination of both.
When to Choose Series
Series wiring shines when you need to increase your system's overall voltage. As we've discussed, this is particularly beneficial for efficiency with MPPT charge controllers, which can take a high-voltage input and convert it efficiently for battery charging. If you have a 24V or 48V battery bank, wiring panels in series is often the most straightforward way to achieve the necessary input voltage for your charge controller. For instance, if you have 12V nominal panels, you'd typically wire two in series for a 24V system, or four in series for a 48V system (aiming for even higher voltage to leverage MPPT efficiency).
Another strong case for series wiring is when your solar array needs to be located a significant distance from your charge controller and battery bank. Because series wiring results in higher voltage and lower current for the same power output, it reduces voltage drop over long cable runs. This allows you to use thinner and less expensive wires, saving on material costs and making installation easier. Imagine running power from a ground-mounted array 100 feet away to your remote cabin; series wiring would be the clear choice to minimize power loss and wiring expense. This approach also simplifies the wiring itself for smaller arrays, as you're primarily connecting positive to negative in a chain. For those looking to power more demanding applications, understanding How to Design an AC Off-Grid System often involves higher voltage inputs achieved through series panel configurations.
When to Choose Parallel
Parallel wiring, on the other hand, involves connecting all positive terminals of your panels together and all negative terminals together. When wired in parallel, the current (amperage) of the individual panels adds up, while the voltage remains the same as that of a single panel. So, two 12-volt panels producing 8 amps each, wired in parallel, would give you 12 volts at 16 amps.
Parallel wiring is typically preferred in systems where shading is a significant concern. Unlike series wiring, where a shaded panel reduces the current for the entire string, a shaded panel in a parallel array only impacts its own current contribution, with the other panels continuing to produce at their full potential. This makes parallel systems more resilient to partial shading. It's also often chosen for smaller, simpler 12V systems, like those found in smaller RVs or sheds, where higher voltage isn't necessary, and a PWM charge controller (which is simpler and less expensive than an MPPT) might be used. For systems with diverse panel types or if you frequently add or remove panels, parallel wiring offers more modularity, as adding another panel simply increases the current without altering the system voltage. You can delve into the specifics of this alternative approach by exploring our guide on How to Wire Solar Panels in Parallel.
| Feature | Series Wiring | Parallel Wiring |
|---|---|---|
| Voltage | Adds up (e.g., 12V + 12V = 24V) | Stays the same (e.g., 12V + 12V = 12V) |
| Current | Stays the same (e.g., 8A + 8A = 8A) | Adds up (e.g., 8A + 8A = 16A) |
| Best for | High voltage systems (24V, 48V+), MPPT | Low voltage systems (12V), partial shading |
| Wiring Size | Can use thinner wires for long runs | Requires thicker wires for high current |
| Shading Impact | High impact on entire string | Low impact on other panels |
| Charge Controller | MPPT highly recommended for efficiency | PWM or MPPT (less critical for MPPT efficiency) |
| Failure Point | One panel failure can impact entire string | One panel failure typically only impacts itself |
| Common Use Case | Whole-house systems, large cabins, remote power | Small RVs, boats, basic shed power |
Disclaimer
The information provided in this article is for general educational purposes only and is not intended as professional electrical advice. Working with electricity, especially high-voltage DC systems, can be dangerous and lead to serious injury or property damage if not handled correctly. Always consult with a qualified electrician or solar professional before installing or modifying an off-grid solar system. Ensure all installations comply with local electrical codes and regulations. The author and publisher are not liable for any losses, injuries, or damages resulting from the use of this information.